
Grow Celery Backyard Year Round? Absolutely! Imagine stepping into your garden any time of year and snipping fresh, crisp celery stalks for your salads, soups, or even a healthy snack. No more wilted, expensive celery from the grocery store! This isn’t just a dream; it’s an achievable reality with a few clever DIY tricks and hacks that I’m excited to share with you.
Celery, with its origins tracing back to the Mediterranean, has been enjoyed for centuries, not only for its culinary uses but also for its medicinal properties. Ancient Greeks even used celery leaves to crown victors in athletic games! While traditionally a cool-season crop, growing celery year-round requires a bit of ingenuity, especially if you live in a region with harsh winters or scorching summers.
Why bother with the effort, you might ask? Well, beyond the satisfaction of growing your own food, cultivating celery in your backyard offers numerous benefits. You’ll have access to fresher, more flavorful celery, free from harmful pesticides and herbicides. Plus, you’ll save money and reduce your environmental footprint by avoiding those plastic-wrapped grocery store bundles. In this article, I’ll guide you through simple, effective DIY methods to grow celery backyard year round, regardless of your climate. Get ready to transform your garden into a celery haven!
Growing Celery in Your Backyard Year-Round: A DIY Guide
Hey there, fellow gardening enthusiasts! Ever dreamt of snipping fresh celery stalks right from your backyard whenever you need them? Well, dream no more! Growing celery at home, even year-round, is totally achievable with a little know-how and some dedication. I’m going to walk you through everything you need to know to have a thriving celery patch, no matter the season.
Understanding Celery’s Needs
Before we dive into the nitty-gritty, let’s talk about what celery needs to thrive. Celery can be a bit finicky, but understanding its preferences is half the battle.
* Sunlight: Celery loves sunshine, but not scorching heat. Aim for at least 6 hours of sunlight per day, but provide some afternoon shade in hotter climates.
* Water: This is crucial! Celery is a thirsty plant. Consistent moisture is key to preventing tough, bitter stalks.
* Soil: Rich, well-draining soil is a must. Celery needs plenty of nutrients to grow those crisp, juicy stalks.
* Temperature: Celery prefers cooler temperatures, ideally between 60-70°F (15-21°C). This is where year-round growing gets interesting!
Starting Celery from Seed (or Seedlings)
You have two main options: starting from seed or buying seedlings. Starting from seed takes longer, but it’s more economical. Seedlings give you a head start.
Starting from Seed:
1. Timing is Everything: Celery seeds need a long growing season, so start them indoors about 10-12 weeks before the last expected frost. For year-round growing, you’ll need to stagger your planting schedule. I usually start a new batch of seeds every few months to ensure a continuous harvest.
2. Sowing the Seeds: Celery seeds are tiny and need light to germinate. Sprinkle them on top of a seed-starting mix in a tray or small pots. Gently press them down, but don’t bury them.
3. Creating a Humid Environment: Cover the tray with a plastic dome or plastic wrap to create a humid environment. This helps with germination.
4. Light and Warmth: Place the tray under grow lights or in a bright, indirect sunlight location. Maintain a temperature of around 70-75°F (21-24°C).
5. Keep it Moist: Mist the soil regularly to keep it moist, but not soggy.
6. Patience is Key: Germination can take up to 2-3 weeks, so be patient!
7. Thinning the Seedlings: Once the seedlings have a few true leaves, thin them out, leaving the strongest one in each pot or cell.
8. Hardening Off: Before transplanting the seedlings outdoors, you need to harden them off. This means gradually exposing them to outdoor conditions over a week or two. Start by placing them outside for an hour or two each day, gradually increasing the time.
Using Seedlings:
1. Choose Healthy Seedlings: Look for seedlings that are about 4-6 inches tall, with healthy green leaves and a strong root system. Avoid seedlings that are yellowed, wilted, or have signs of pests or diseases.
2. Acclimate the Seedlings: Even if you buy seedlings, it’s a good idea to acclimate them to your garden for a few days before planting. Place them in a sheltered location with partial shade.
Preparing the Garden Bed
Whether you’re starting from seed or using seedlings, preparing the garden bed is essential.
1. Choose the Right Location: Select a spot that gets at least 6 hours of sunlight per day, but has some protection from the intense afternoon sun, especially during the summer months.
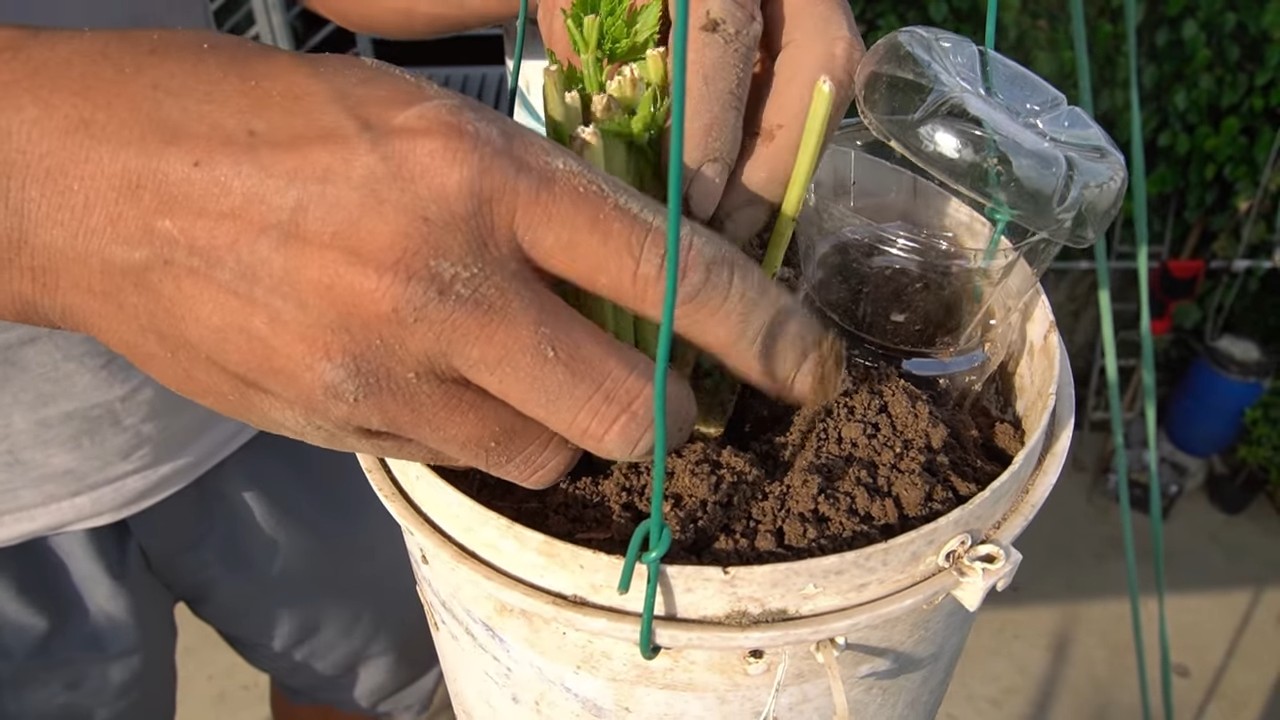
2. Soil Preparation: Celery needs rich, well-draining soil. Amend the soil with plenty of compost or well-rotted manure. This will improve drainage, add nutrients, and help retain moisture. I like to add a slow-release organic fertilizer as well.
3. Soil pH: Celery prefers a slightly acidic to neutral soil pH, around 6.0-6.8. You can test your soil pH with a soil testing kit and amend it accordingly.
4. Creating Raised Beds (Optional): Raised beds can improve drainage and make it easier to manage the soil. This is especially helpful if you have heavy clay soil.
Transplanting Celery
Now for the exciting part – getting those celery plants into the ground!
1. Spacing: Space the celery plants about 6-8 inches apart in rows that are 12-18 inches apart. This gives them enough room to grow without overcrowding.
2. Planting Depth: Dig a hole that is slightly larger than the root ball of the seedling. Gently remove the seedling from its pot and loosen the roots. Place the seedling in the hole and backfill with soil, making sure the top of the root ball is level with the soil surface.
3. Water Thoroughly: After planting, water the celery plants thoroughly. This will help settle the soil and encourage root growth.
4. Mulching: Apply a layer of mulch around the celery plants. This will help retain moisture, suppress weeds, and regulate soil temperature. I like to use straw or shredded leaves.
Caring for Your Celery Plants
Consistent care is key to a successful celery harvest.
1. Watering: Celery needs consistent moisture. Water deeply and regularly, especially during dry spells. Aim for at least 1 inch of water per week. I check the soil moisture daily and water when the top inch feels dry.
2. Fertilizing: Celery is a heavy feeder. Fertilize every 2-3 weeks with a balanced organic fertilizer. You can also side-dress with compost or well-rotted manure.
3. Weeding: Keep the garden bed free of weeds. Weeds compete with celery for nutrients and water. Hand-pull weeds regularly or use a hoe to cultivate the soil.
4. Blanching (Optional): Blanching celery stalks makes them more tender and less bitter. About 2-3 weeks before harvest, you can blanch the stalks by wrapping them with newspaper, cardboard, or soil. Leave the tops of the leaves exposed. This blocks sunlight and prevents chlorophyll production, resulting in paler, milder stalks.
5. Pest and Disease Control: Keep an eye out for pests and diseases. Common celery pests include aphids, celery leaf tiers, and slugs. Common diseases include celery blight and pink rot. Use organic pest control methods, such as insecticidal soap or neem oil, to control pests. Ensure good air circulation to prevent diseases.
Extending the Growing Season for Year-Round Harvest
This is where the real magic happens! To grow celery year-round, you need to protect your plants from extreme temperatures.
For Hot Weather:
* Shade Cloth: Use shade cloth to provide afternoon shade during the hottest months. This will help prevent the celery from bolting (going to seed) and becoming bitter.
* Watering: Water more frequently during hot weather to keep the soil consistently moist.
* Mulching: A thick layer of mulch will help keep the soil cool.
* Planting Location: Choose a location that gets morning sun and afternoon shade.
For Cold Weather:
* Cold Frames: Cold frames are simple structures that protect plants from frost and cold temperatures. You can build your own cold frame or purchase one.
* Row Covers: Row covers are lightweight fabrics that you can drape over plants to provide insulation.
* Greenhouses: A greenhouse provides the best protection from cold weather. You can grow celery in a greenhouse year-round.
* Mulching: A thick layer of mulch will help insulate the soil and protect the roots from freezing.
* Choosing Cold-Hardy Varieties: Some celery varieties are more cold-hardy than others. Look for varieties that are specifically bred for cold climates.
Harvesting Your Celery
The moment you’ve been waiting for!
1. Timing: Celery is typically ready to harvest about 80-100 days after transplanting. The stalks should be at least 8 inches long and thick enough to snap easily.
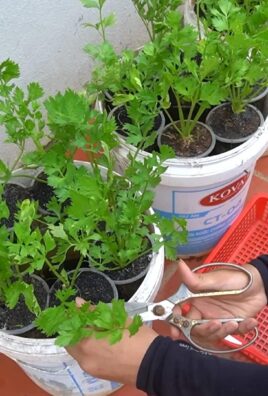
2. Harvesting Method: You can harvest the entire plant at once or harvest individual stalks as needed. To harvest the entire plant, cut it off at the base with a sharp knife. To harvest individual stalks, snap them off at the base.
3. Storage: Celery can be stored in the refrigerator for up to 2 weeks. Wrap it in a damp paper towel and place it in a plastic bag.
Troubleshooting Common Celery Problems
Even with the best care, you might encounter some problems. Here are a few common issues and how to address them:
* Bitter Celery:
Conclusion
So, there you have it! Mastering the art of growing celery in your backyard year-round is not just a pipe dream; it’s an achievable reality with a little planning and dedication. We’ve walked through the essential steps, from selecting the right variety and preparing your soil to providing consistent care and protecting your precious crop from the elements.
Why is this DIY trick a must-try? Because fresh, crisp, and flavorful celery, grown right outside your door, is simply unbeatable. Store-bought celery often lacks the vibrant taste and satisfying crunch of homegrown varieties. Plus, you’ll have the satisfaction of knowing exactly where your food comes from and that it’s free from harmful pesticides. Imagine the delicious celery sticks you can enjoy with your favorite dips, the flavorful additions to your soups and stews, and the refreshing crunch it brings to your salads – all thanks to your own green thumb.
But the benefits extend beyond just taste and convenience. Growing your own celery is a sustainable practice that reduces your carbon footprint and promotes a healthier lifestyle. It’s also a rewarding hobby that connects you with nature and provides a sense of accomplishment.
Don’t be afraid to experiment with different celery varieties to find your personal favorite. Some popular choices include ‘Utah Tall,’ known for its crisp stalks, and ‘Golden Self-Blanching,’ which offers a milder flavor. You can also try succession planting, sowing seeds every few weeks, to ensure a continuous harvest throughout the year. Consider companion planting too! Celery thrives alongside onions, garlic, and tomatoes, creating a mutually beneficial ecosystem in your garden.
And if you’re feeling adventurous, why not try growing celery from the base of a store-bought stalk? Simply cut off the base, place it in a shallow dish of water, and watch it sprout new roots and leaves. It’s a fun and easy way to recycle and propagate your own celery plants.
We understand that growing celery year-round can seem daunting at first, but with the right knowledge and a little patience, you can overcome any challenges. Remember to pay close attention to your plants’ needs, adjust your watering and feeding schedule as needed, and protect them from extreme temperatures.
We are confident that you can successfully grow celery in your backyard year-round. So, grab your gardening gloves, prepare your soil, and get ready to enjoy the delicious rewards of your labor. We encourage you to try this DIY trick and share your experiences with us. Let us know what varieties you’re growing, what challenges you’ve faced, and what tips you’ve discovered along the way. Together, we can create a community of passionate celery growers and inspire others to embrace the joys of homegrown produce. Happy gardening!
Frequently Asked Questions (FAQ)
What is the best time of year to start growing celery?
The best time to start growing celery depends on your climate. In regions with mild winters, you can start seeds indoors in late winter or early spring for transplanting outdoors after the last frost. In colder climates, it’s best to start seeds indoors 8-10 weeks before the last expected frost. For a fall or winter harvest, start seeds indoors in mid-summer. Remember that celery requires a long growing season, so starting indoors is generally recommended.
How much sunlight does celery need?
Celery thrives in full sun, which means at least 6-8 hours of direct sunlight per day. However, in hotter climates, some afternoon shade can be beneficial to prevent the plants from bolting (going to seed prematurely). If you’re growing celery indoors, use grow lights to supplement natural sunlight.
What kind of soil is best for growing celery?
Celery prefers rich, well-drained soil that is high in organic matter. Amend your soil with compost, aged manure, or other organic materials before planting. The ideal soil pH for celery is between 6.0 and 6.8. You can test your soil pH with a home testing kit or by sending a sample to your local agricultural extension office.
How often should I water celery?
Celery needs consistent moisture to thrive. Water deeply and regularly, especially during hot, dry weather. Aim to keep the soil consistently moist but not waterlogged. Mulching around the plants can help retain moisture and suppress weeds. Check the soil moisture regularly by sticking your finger about an inch into the soil. If it feels dry, it’s time to water.
How do I fertilize celery?
Celery is a heavy feeder and requires regular fertilization. Use a balanced fertilizer (e.g., 10-10-10) at planting time and then side-dress with a nitrogen-rich fertilizer every few weeks during the growing season. You can also use organic fertilizers such as compost tea or fish emulsion. Follow the instructions on the fertilizer package carefully to avoid over-fertilizing.
What are some common pests and diseases that affect celery?
Celery can be susceptible to several pests and diseases, including aphids, celery leaf tiers, carrot weevils, early blight, and pink rot. Monitor your plants regularly for signs of infestation or disease. Use organic pest control methods such as insecticidal soap or neem oil to control pests. To prevent diseases, ensure good air circulation around the plants and avoid overhead watering. Remove any infected leaves or plants promptly to prevent the spread of disease.
How do I blanch celery?
Blanching celery is a technique used to reduce bitterness and improve the flavor and tenderness of the stalks. To blanch celery, you can either mound soil around the stalks or wrap them with paper or cardboard a few weeks before harvest. This blocks sunlight from reaching the stalks, which reduces chlorophyll production and results in a paler, milder flavor. Self-blanching varieties are also available, which naturally blanch themselves as they grow.
When is celery ready to harvest?
Celery is typically ready to harvest 80-120 days after planting, depending on the variety. The stalks should be at least 6-8 inches long and firm to the touch. You can harvest the entire plant at once or harvest individual stalks as needed. To harvest, simply cut the stalks at the base of the plant with a sharp knife.
Can I grow celery in containers?
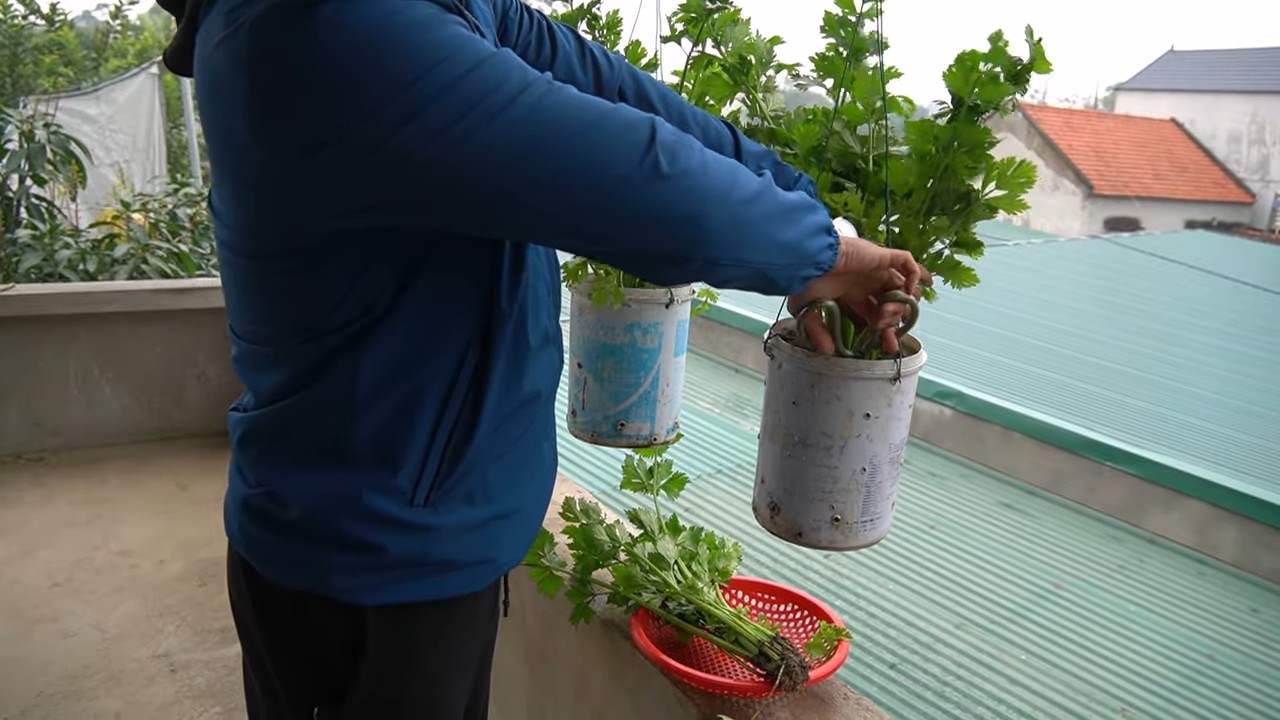
Yes, celery can be grown in containers, but you’ll need to choose a large container that is at least 12 inches deep and wide. Use a well-draining potting mix and provide regular watering and fertilization. Container-grown celery may require more frequent watering than celery grown in the ground.
How do I store celery after harvesting?
To store celery after harvesting, wrap the stalks in a damp paper towel and place them in a plastic bag in the refrigerator. Celery can be stored for up to 2-3 weeks using this method. You can also freeze celery, but it will lose some of its crispness. To freeze celery, blanch it for 2-3 minutes, then cool it in ice water before freezing.


Leave a Comment