
Grow Chili Peppers like a pro, even if you think you have a brown thumb! Have you ever dreamed of adding a fiery kick to your meals with homegrown chilies, bursting with flavor and spice? I know I have! For centuries, chili peppers have been more than just a culinary ingredient; they’ve been woven into the fabric of cultures worldwide, from ancient Mesoamerica, where they were first cultivated, to the vibrant cuisines of Asia and beyond.
But let’s be honest, the thought of successfully cultivating these spicy gems can be daunting. That’s where this DIY guide comes in! I’m going to share some simple yet effective tricks and hacks that will empower you to grow chili peppers successfully, regardless of your gardening experience.
Imagine the satisfaction of harvesting your own vibrant chilies, knowing exactly where they came from and how they were grown. No more bland, store-bought peppers! With these easy-to-follow tips, you’ll be well on your way to adding a touch of homegrown heat to your dishes and impressing your friends and family with your gardening prowess. Let’s get started!
DIY Concrete Countertops: A Step-by-Step Guide
Hey there, fellow DIY enthusiasts! I’m so excited to share one of my favorite home improvement projects with you: creating your own concrete countertops. It might seem intimidating, but trust me, with a little patience and these detailed instructions, you can achieve a stunning, modern look for your kitchen or bathroom without breaking the bank. Let’s get started!
Materials You’ll Need
Before we dive in, let’s gather all the necessary materials. This will save you time and frustration later on.
* Concrete Mix: I recommend a high-strength concrete mix specifically designed for countertops. Look for one with added polymers for increased durability and reduced cracking. Quikrete 5000 or similar is a good choice. Calculate the amount you need based on the dimensions of your countertop and the concrete mix’s yield information. Always buy a little extra – it’s better to have too much than not enough!
* Melamine Boards: These will form the mold for your countertop. Choose a thickness of at least ¾ inch for stability.
* Screws: Use wood screws to assemble the melamine mold.
* Silicone Caulk: This is crucial for sealing the seams of the mold and preventing concrete from leaking out. Choose a paintable, 100% silicone caulk.
* Reinforcement: You can use wire mesh, rebar, or fiberglass reinforcement to strengthen the concrete and prevent cracking. I prefer wire mesh for its ease of use.
* Concrete Sealer: This protects the concrete from stains and water damage. Choose a food-safe sealer if you’re using the countertop in your kitchen.
* Concrete Pigment (Optional): If you want to add color to your countertop, use a concrete pigment designed for this purpose.
* Mixing Tools: You’ll need a concrete mixer (rent one if you don’t have one), a wheelbarrow or large mixing tub, a shovel, and a mixing paddle.
* Finishing Tools: These include a trowel, a float, a grinder with diamond polishing pads (various grits), and a concrete polishing compound.
* Safety Gear: Always wear safety glasses, gloves, and a dust mask when working with concrete.
* Release Agent: A concrete release agent will help you remove the countertop from the mold. You can use a commercial release agent or a mixture of mineral oil and dish soap.
* Measuring Tape, Pencil, and Square: For accurate measurements and marking.
* Level: Essential for ensuring a level countertop.
* Clamps: To hold the mold pieces together while the silicone caulk dries.
Building the Mold
This is arguably the most important step, as the mold determines the shape and size of your countertop. Take your time and be precise!
1. Measure and Cut the Melamine Boards: Carefully measure the dimensions of your desired countertop. Add an extra inch or two to each side to allow for trimming later. Cut the melamine boards to size using a circular saw or table saw. Remember to cut the bottom piece of the mold to the exact size you want your countertop to be. The side pieces will sit on top of this base.
2. Assemble the Mold: Screw the melamine boards together to form a rectangular box. The side pieces should be flush with the edges of the bottom piece. Use plenty of screws to ensure a strong and stable mold.
3. Reinforce the Mold: For larger countertops, consider adding extra support to the mold to prevent it from bowing outwards under the weight of the concrete. You can use wood braces or clamps for this purpose.
4. Seal the Seams: This is where the silicone caulk comes in. Apply a generous bead of caulk along all the seams of the mold, both inside and outside. Smooth the caulk with your finger or a caulk smoothing tool to create a watertight seal. Let the caulk dry completely according to the manufacturer’s instructions. This is crucial to prevent concrete from seeping out and ruining your countertop.
5. Create Cutouts (Optional): If you need cutouts for a sink or cooktop, now’s the time to create them. Build smaller melamine boxes to the exact dimensions of the cutouts and attach them to the inside of the mold using screws and silicone caulk. Remember to account for the thickness of the sink or cooktop flange.
6. Apply Release Agent: Liberally apply the release agent to the inside of the mold. This will prevent the concrete from sticking to the melamine and make it easier to remove the countertop later.
Mixing and Pouring the Concrete
Now for the fun part! Mixing and pouring the concrete can be a bit messy, so be prepared.
1. Prepare the Concrete Mix: Follow the manufacturer’s instructions for mixing the concrete. Add water gradually until you achieve a thick, but pourable consistency. The concrete should be wet enough to flow easily into the mold, but not so wet that it separates. If you’re using concrete pigment, add it to the water before mixing it with the concrete.
2. Pour the First Layer: Pour a layer of concrete into the mold, about halfway up. Use a trowel or float to spread the concrete evenly and eliminate any air pockets.
3. Add Reinforcement: Place the wire mesh or rebar into the concrete, ensuring that it’s fully embedded. This will add strength and prevent cracking.
4. Pour the Second Layer: Pour the remaining concrete into the mold, filling it to the top. Again, use a trowel or float to spread the concrete evenly and eliminate any air pockets.
5. Vibrate the Concrete: This is an important step to remove any remaining air pockets and consolidate the concrete. You can use a rubber mallet to tap the sides of the mold, or rent a concrete vibrator for larger countertops.
6. Screed the Surface: Use a straightedge (like a piece of wood or metal) to screed the surface of the concrete, removing any excess and creating a level surface.
7. Trowel the Surface: After screeding, use a trowel to smooth the surface of the concrete. This will help to create a smooth, even finish.
Curing the Concrete
Curing is essential for achieving strong and durable concrete.
1. Cover the Concrete: Cover the concrete with plastic sheeting to prevent it from drying out too quickly. This will help to ensure proper hydration and prevent cracking.
2. Keep the Concrete Moist: Mist the concrete with water several times a day for the first few days of curing. This will help to keep it moist and prevent it from drying out too quickly.
3. Cure for at Least 7 Days: Allow the concrete to cure for at least 7 days, or longer if possible. The longer it cures, the stronger it will be.
Removing the Mold and Grinding/Polishing
This is where your countertop starts to take shape!
1. Remove the Mold: After the concrete has cured, carefully remove the mold. You may need to use a hammer and chisel to gently pry the melamine boards apart. Be careful not to damage the concrete.
2. Grind the Surface: Use a concrete grinder with diamond polishing pads to grind the surface of the concrete. Start with a coarse grit (like 50 or 100) and gradually work your way up to finer grits (like 400, 800, and 1500). This will remove any imperfections and create a smooth, even surface.
3. Fill Voids (Optional): If you have any small voids or air pockets in the concrete, you can fill them with a concrete patching compound. Allow the patching compound to dry completely before continuing with the grinding process.
4. Polish the Surface: After grinding, use a concrete polishing compound to polish the surface of the concrete. This will give it a glossy, professional finish.
5. Clean the Surface: Thoroughly clean the surface of the concrete to remove any dust or debris.
Sealing the Concrete
Sealing is crucial to protect your countertop from stains and water damage.
1. Apply the Sealer: Apply the concrete sealer according to the manufacturer’s instructions. Use a brush, roller, or sprayer to apply a thin, even coat of sealer.
2. Allow the Sealer to Dry: Allow the sealer to dry completely according to the manufacturer’s instructions.
3. Apply Additional Coats (Optional): For added protection, you can apply additional coats of sealer. Allow each coat to dry completely before applying the next.
Installation
Almost there! Now it’s time to install your beautiful new concrete countertop.
1. Prepare the Cabinets: Ensure that your cabinets are level and sturdy. You may need to add shims to level them.
2. Apply Adhesive: Apply a bead of construction adhesive to the top of the cabinets.
3. Position the Countertop: Carefully position the countertop on top of the cabinets.
4
Conclusion
So, there you have it! Growing chili peppers at home, even without a sprawling garden, is not only achievable but incredibly rewarding. This DIY trick, focusing on optimizing sunlight and soil conditions, is a game-changer for anyone looking to add a fiery kick to their culinary creations. We’ve walked you through the steps, from selecting the right seeds to nurturing your seedlings and finally, harvesting those vibrant, flavorful peppers.
But why is this DIY approach a must-try? Beyond the satisfaction of growing your own food, it offers several key advantages. Firstly, you have complete control over the growing process, ensuring your chili peppers are free from harmful pesticides and chemicals. Secondly, you can cultivate varieties that might be difficult or impossible to find in your local grocery store. Imagine the possibilities – ghost peppers, habaneros, Scotch bonnets, all thriving in your own backyard or even on your windowsill! Thirdly, it’s a cost-effective way to enjoy a constant supply of fresh chili peppers, saving you money in the long run.
Don’t be afraid to experiment with variations to suit your specific needs and preferences. Consider using different types of containers, such as fabric pots or self-watering planters, to optimize drainage and moisture retention. You can also explore companion planting, pairing your chili peppers with herbs like basil or oregano to deter pests and enhance flavor. For those living in colder climates, consider using grow lights to supplement natural sunlight during the winter months. Another great variation is to experiment with different types of fertilizer. Some chili pepper growers swear by bone meal to encourage flowering, while others prefer a balanced liquid fertilizer. The key is to observe your plants closely and adjust your approach as needed.
Growing chili peppers is not an exact science, and there’s always room for learning and improvement. The most important thing is to get started and have fun! We encourage you to embrace the challenge, get your hands dirty, and experience the joy of harvesting your own homegrown chili peppers.
We’re confident that this DIY trick will transform your chili pepper growing experience. But don’t just take our word for it – try it out for yourself! We’re eager to hear about your successes, challenges, and any unique variations you discover along the way. Share your experiences in the comments below, and let’s create a community of passionate chili pepper growers. Your insights could inspire others to embark on their own chili pepper adventures! Let us know what varieties you are growing and what tips you have learned. We are all here to learn from each other.
Now, let’s address some frequently asked questions to ensure you have all the information you need to get started.
Frequently Asked Questions (FAQ)
What is the best time of year to start growing chili peppers?
The ideal time to start growing chili peppers depends on your climate. In warmer regions with long growing seasons, you can start seeds directly outdoors after the last frost. However, in cooler climates, it’s best to start seeds indoors 6-8 weeks before the last expected frost. This gives your seedlings a head start and ensures they have enough time to mature and produce fruit before the weather turns cold. You can use a heat mat to help with germination.
What type of soil is best for growing chili peppers?
Chili peppers thrive in well-draining, fertile soil with a slightly acidic pH (around 6.0-6.8). A good potting mix for chili peppers should contain a blend of peat moss, perlite, and vermiculite. You can also amend your garden soil with compost or aged manure to improve its drainage and fertility. Avoid using heavy clay soil, as it can retain too much moisture and lead to root rot.
How much sunlight do chili peppers need?
Chili peppers are sun-loving plants and require at least 6-8 hours of direct sunlight per day to thrive. If you’re growing chili peppers indoors, place them near a sunny window or use grow lights to supplement natural sunlight. Insufficient sunlight can result in leggy plants with poor fruit production. Rotate your plants regularly to ensure even light exposure.
How often should I water my chili peppers?
Water your chili peppers regularly, especially during hot and dry weather. The soil should be kept consistently moist but not waterlogged. Overwatering can lead to root rot, while underwatering can cause the plants to wilt and stunt their growth. Check the soil moisture level regularly by sticking your finger into the soil. If the top inch feels dry, it’s time to water.
What kind of fertilizer should I use for chili peppers?
Chili peppers benefit from regular fertilization, especially during the flowering and fruiting stages. Use a balanced fertilizer with equal amounts of nitrogen, phosphorus, and potassium (e.g., 10-10-10) early in the growing season to promote healthy growth. Once the plants start to flower, switch to a fertilizer with a higher phosphorus content (e.g., 5-10-5) to encourage fruit production. Avoid over-fertilizing, as it can lead to excessive foliage growth and reduced fruit yield.
How do I protect my chili peppers from pests and diseases?
Chili peppers can be susceptible to various pests and diseases, including aphids, spider mites, whiteflies, and fungal infections. To prevent pest and disease problems, inspect your plants regularly and take action at the first sign of trouble. You can use insecticidal soap or neem oil to control aphids, spider mites, and whiteflies. To prevent fungal infections, ensure good air circulation around your plants and avoid overwatering. You can also use a fungicide if necessary.
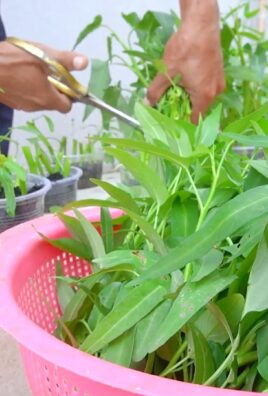
When should I harvest my chili peppers?
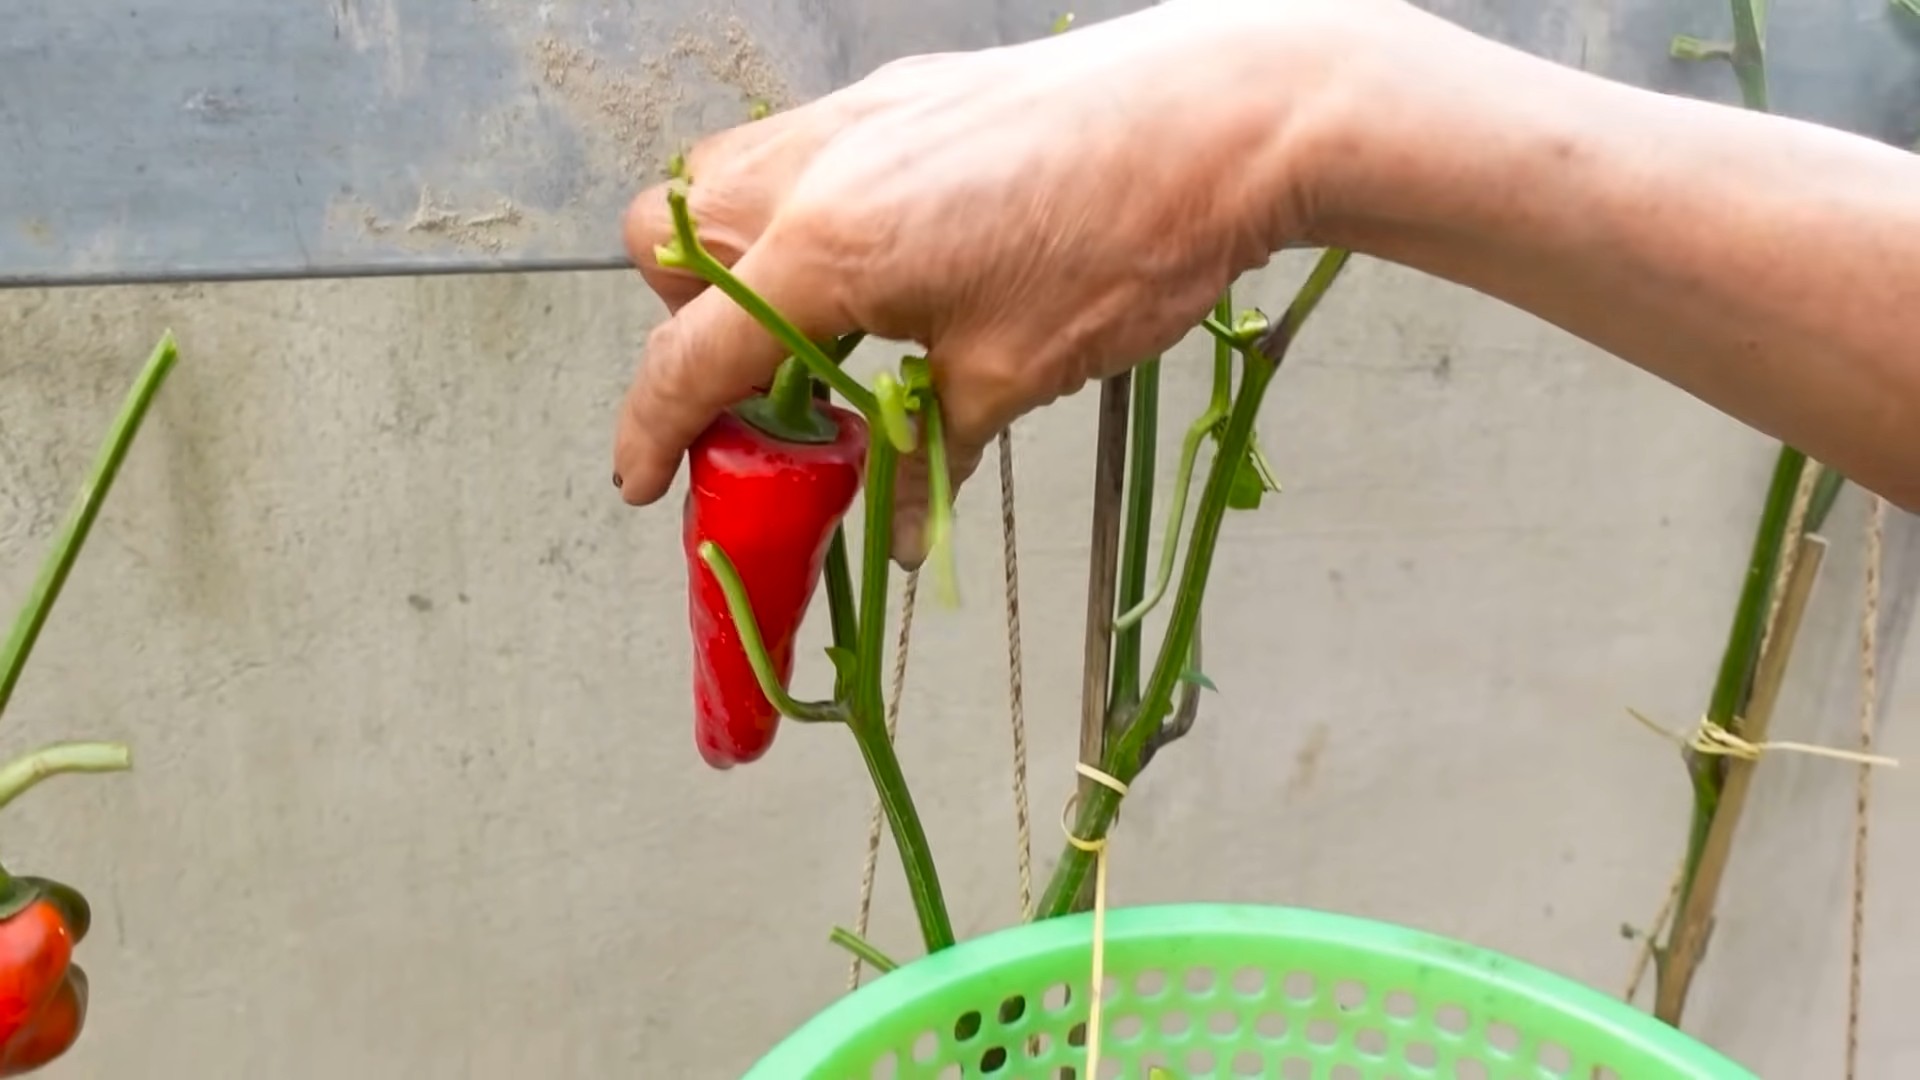
The best time to harvest chili peppers depends on the variety and your personal preference. Most chili peppers are ready to harvest when they have reached their mature color and size. The color will vary depending on the variety, but generally, they will turn from green to red, yellow, orange, or brown. You can also harvest chili peppers when they are still green, but they will be less flavorful and less spicy. Use scissors or pruning shears to cut the peppers from the plant, leaving a small stem attached.
Can I grow chili peppers in containers?
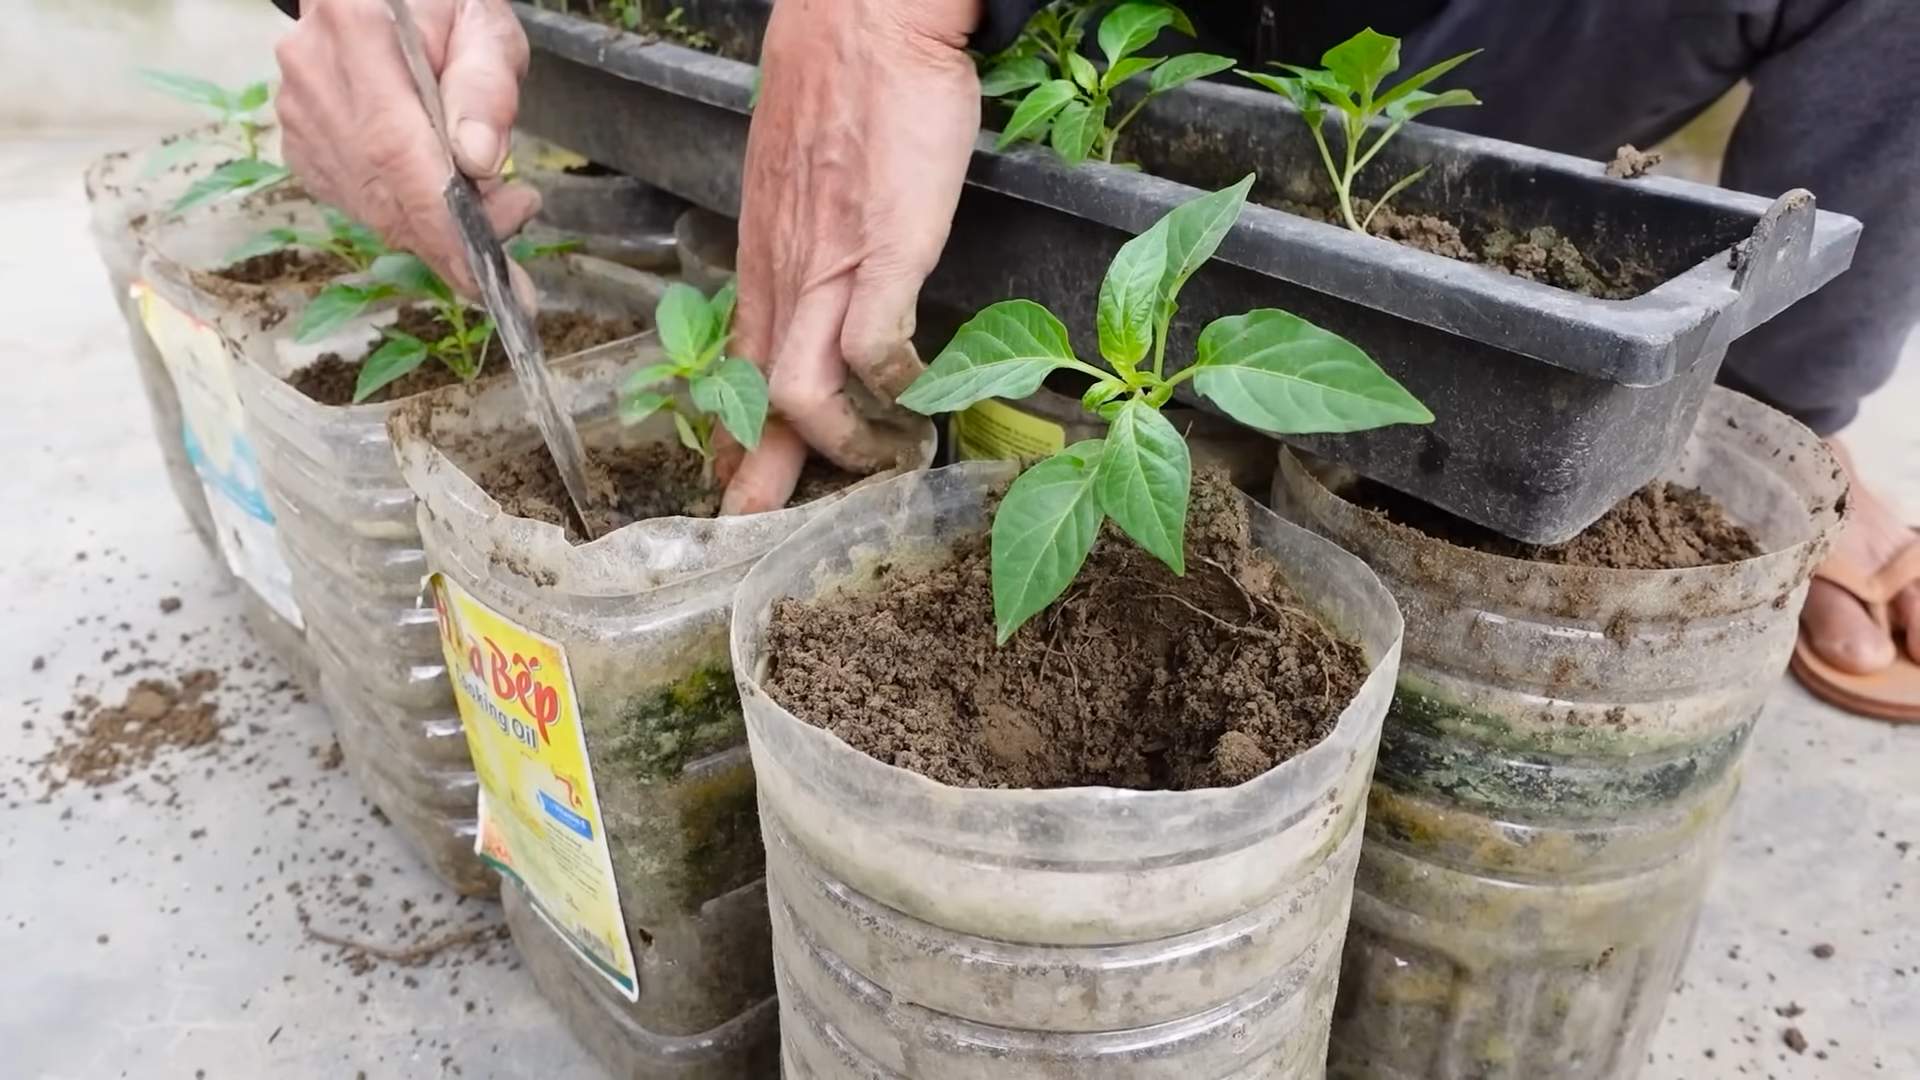
Yes, chili peppers can be successfully grown in containers. Choose a container that is at least 12 inches in diameter and has drainage holes. Use a well-draining potting mix and provide your plants with plenty of sunlight and water. Container-grown chili peppers may require more frequent watering and fertilization than those grown in the ground.
How do I overwinter my chili pepper plants?
If you live in a climate with cold winters, you can overwinter your chili pepper plants indoors. Before the first frost, prune the plants back to about 6 inches and transplant them into smaller pots. Place the plants in a sunny location and water them sparingly. They may lose some of their leaves during the winter, but they should start to regrow in the spring.
What are some good chili pepper varieties to grow for beginners?
Some good chili pepper varieties to grow for beginners include jalapeños, bell peppers, banana peppers, and poblano peppers. These varieties are relatively easy to grow and produce a good yield. They also have a mild to moderate heat level, making them a good choice for those who are new to chili peppers.
Leave a Comment