
Grow Eggplants Quick Harvest – that’s the dream, isn’t it? Imagine biting into a perfectly ripe, homegrown eggplant, bursting with flavor, and knowing you nurtured it from seedling to table in record time. Forget those long waits and disappointing yields! I’m here to share some insider secrets that will have you harvesting plump, juicy eggplants faster than you ever thought possible.
Eggplants, with their glossy purple skin, have a rich history, tracing back to ancient Asia where they were cultivated for centuries. They weren’t always the culinary stars we know today; initially, some varieties were grown more for their ornamental value! But over time, their deliciousness won out, and they’ve become a staple in cuisines worldwide, from Italian parmigiana to Indian bharta.
But let’s be honest, growing eggplants can be a bit of a challenge. They’re heat-loving divas that demand attention. That’s where these DIY tricks and hacks come in. We all lead busy lives, and sometimes, waiting for a bountiful harvest feels like an eternity. These tips will help you optimize your growing conditions, boost your plant’s health, and ultimately, grow eggplants quick harvest. Get ready to unlock the secrets to a faster, more abundant eggplant harvest – your taste buds (and your garden) will thank you!
Grow Eggplants: A Speedy Harvest Guide
Hey there, fellow gardeners! Are you dreaming of delicious eggplant parmesan, smoky baba ghanoush, or just perfectly grilled eggplant slices? But are you also impatient like me and want to harvest those beauties as quickly as possible? Well, you’ve come to the right place! I’m going to share my tried-and-true methods for getting a jumpstart on your eggplant harvest. Let’s get started!
Choosing the Right Variety
The first step to a quick harvest is selecting the right eggplant variety. Some varieties naturally mature faster than others. Here are a few of my favorites for a speedy harvest:
- ‘Black Beauty’: A classic for a reason! ‘Black Beauty’ eggplants are reliable and mature in about 70-80 days.
- ‘Ichiban’: These long, slender Japanese eggplants are known for their early maturity, often ready in just 60-70 days. Plus, they’re super tasty!
- ‘Fairy Tale’: These adorable, striped eggplants are not only beautiful but also mature quickly, usually within 50-60 days.
- ‘Little Fingers’: As the name suggests, these are small and slender, maturing in around 65 days. They’re perfect for grilling or stir-fries.
Starting Seeds Indoors (The Early Bird Gets the Eggplant!)
Eggplants need a long growing season, so starting them indoors is crucial, especially if you live in a cooler climate. I usually start my seeds about 8-10 weeks before the last expected frost.
Materials You’ll Need:
- Eggplant seeds (of course!)
- Seed starting trays or small pots
- Seed starting mix (a light, well-draining mix is essential)
- Heat mat (optional, but highly recommended)
- Grow lights (also optional, but they make a huge difference)
- Spray bottle with water
Step-by-Step Instructions:
- Prepare Your Seed Starting Trays: Fill your seed starting trays or pots with seed starting mix. Gently tap the trays to settle the mix.
- Sow the Seeds: Make a small indentation (about ¼ inch deep) in the center of each cell or pot. Place 2-3 seeds in each indentation. This increases your chances of at least one seed germinating.
- Cover the Seeds: Gently cover the seeds with more seed starting mix. Lightly pat the surface.
- Water Gently: Use a spray bottle to mist the soil thoroughly. You want the soil to be moist but not soggy.
- Provide Warmth: Place the trays on a heat mat. Eggplant seeds germinate best in warm temperatures (around 80-85°F).
- Provide Light: If you’re using grow lights, position them a few inches above the trays. If not, place the trays in a sunny window. However, direct sunlight can sometimes be too intense for seedlings, so keep an eye on them.
- Maintain Moisture: Keep the soil consistently moist by misting it regularly. Don’t let it dry out!
- Wait Patiently (But Not Too Patiently!): Eggplant seeds usually germinate in 7-14 days. Once the seedlings emerge, remove the heat mat and adjust the grow lights as needed.
- Thin the Seedlings: Once the seedlings have their first true leaves (the second set of leaves), thin them to one seedling per cell or pot. Choose the strongest, healthiest-looking seedling and snip off the others at the soil line.
Hardening Off Your Seedlings
Before transplanting your eggplant seedlings outdoors, you need to “harden them off.” This process gradually acclimates them to the outdoor environment, preventing shock.
Step-by-Step Instructions:
- Day 1-3: Place the seedlings outdoors in a sheltered location (like a porch or patio) for just 1-2 hours each day. Make sure they’re protected from direct sunlight and strong winds.
- Day 4-6: Gradually increase the amount of time the seedlings spend outdoors, adding an hour or two each day.
- Day 7-10: Expose the seedlings to more direct sunlight and wind. By the end of this period, they should be able to tolerate a full day outdoors.
Preparing the Garden Bed
Eggplants are heavy feeders, so preparing the garden bed properly is essential for a quick and abundant harvest.
What Eggplants Need:
- Full Sun: Eggplants need at least 6-8 hours of direct sunlight per day.
- Well-Drained Soil: Eggplants don’t like soggy roots. Make sure your soil drains well.
- Rich Soil: Eggplants thrive in soil that’s rich in organic matter.
- Slightly Acidic Soil: The ideal soil pH for eggplants is between 6.0 and 6.8.
Step-by-Step Instructions:
- Choose a Sunny Location: Select a spot in your garden that receives at least 6-8 hours of direct sunlight per day.
- Amend the Soil: Dig in plenty of compost, well-rotted manure, or other organic matter to improve soil drainage and fertility. I like to add a generous amount of compost – it really makes a difference!
- Check the Soil pH: Use a soil testing kit to check the pH. If the soil is too alkaline, amend it with sulfur. If it’s too acidic, add lime.
- Create Raised Beds (Optional): If your soil is poorly drained, consider creating raised beds. This will improve drainage and warm the soil faster in the spring.
Transplanting Your Seedlings
Once your seedlings are hardened off and the danger of frost has passed, it’s time to transplant them into the garden.
Step-by-Step Instructions:
- Choose a Cloudy Day: Transplanting on a cloudy day will reduce stress on the seedlings.
- Dig Holes: Dig holes that are slightly larger than the root balls of your seedlings. Space the holes about 18-24 inches apart.
- Gently Remove Seedlings: Carefully remove the seedlings from their trays or pots. Gently loosen the roots if they’re tightly bound.
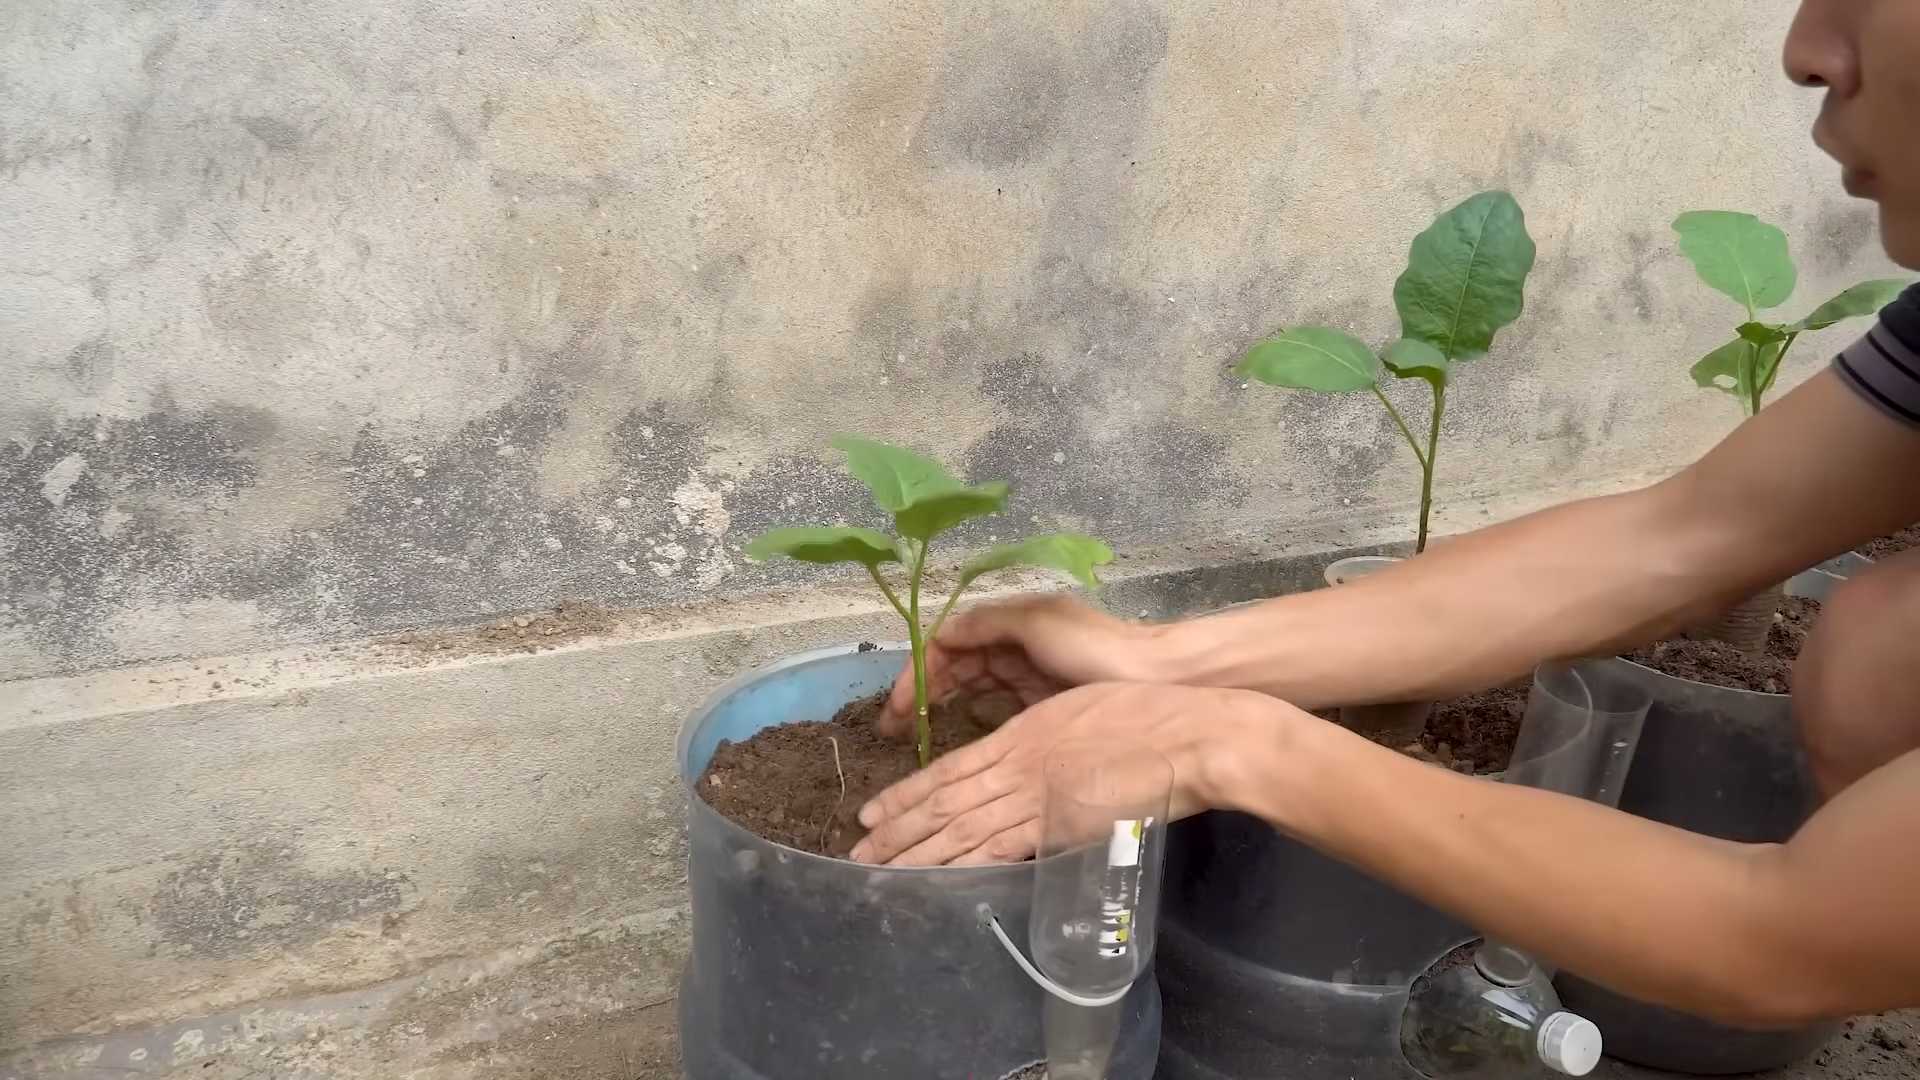
- Plant the Seedlings: Place the seedlings in the holes and backfill with soil. Make sure the top of the root ball is level with the surrounding soil.
- Water Thoroughly: Water the seedlings thoroughly after planting.
- Mulch: Apply a layer of mulch around the plants to help retain moisture, suppress weeds, and regulate soil temperature. I like to use straw or shredded leaves.
Providing Optimal Growing Conditions
To ensure a quick and abundant harvest, you need to provide your eggplants with optimal growing conditions throughout the season.
Watering:
Eggplants need consistent moisture, especially during hot, dry weather. Water deeply and regularly, aiming for about 1-2 inches of water per week. Avoid overhead watering, as this can promote fungal diseases. Drip irrigation or soaker hoses are ideal.
Fertilizing:
Eggplants are heavy feeders and benefit from regular fertilization. I like to use a balanced organic fertilizer every 2-3 weeks. You can also side-dress the plants with compost or well-rotted manure.
Pruning:
Pruning can help improve air circulation and encourage fruit production. Remove any suckers (small shoots that grow from the base of the plant) and any yellowing or diseased leaves. You can also pinch off the tips of the branches to encourage bushier growth.
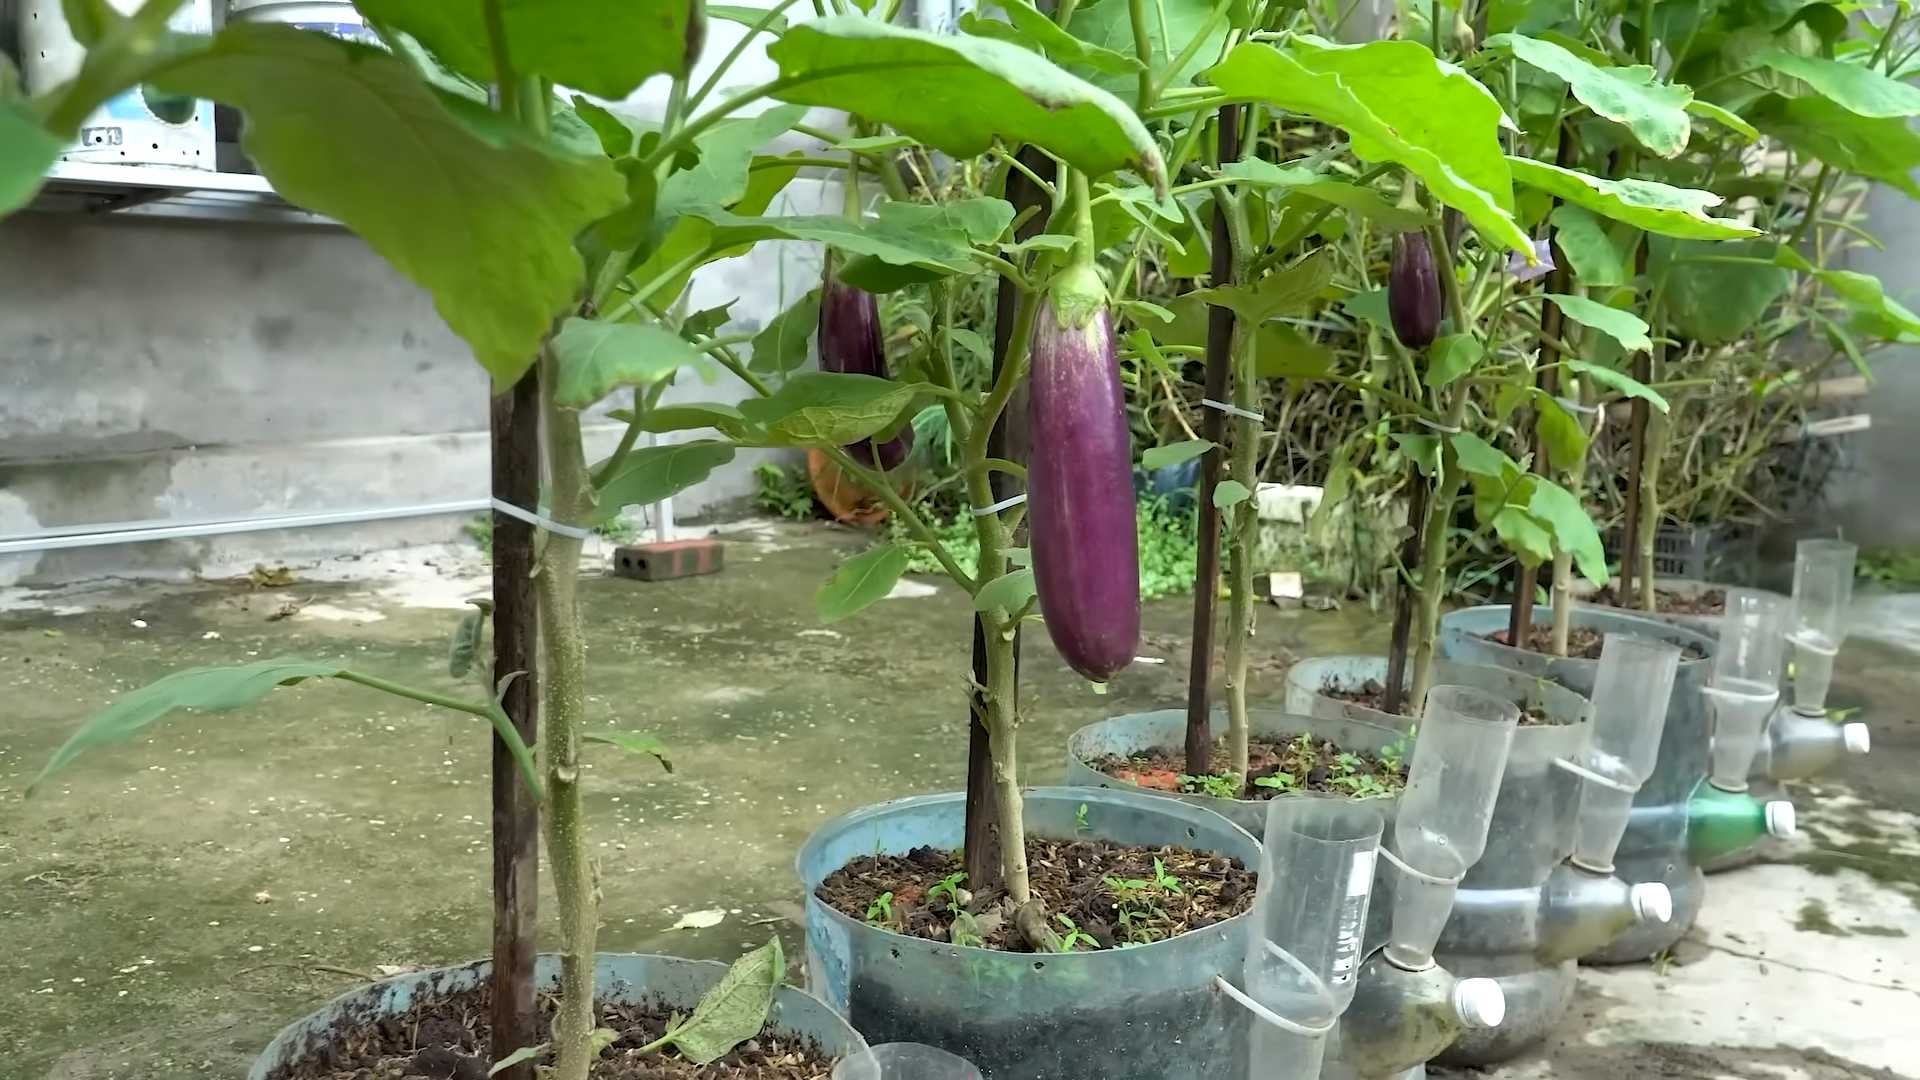
Supporting:
Eggplant fruits can be quite heavy, so it’s a good idea to provide support for the plants. You can use stakes, cages, or trellises. This will prevent the branches from breaking under the weight of the fruit.
Pest and Disease Control:
Eggplants are susceptible to a few pests and diseases, including aphids, flea beetles, and blossom-end rot. Inspect your plants regularly and take action promptly if you notice any problems. I prefer to use organic pest control methods whenever possible, such as insecticidal soap or neem oil. For blossom-end rot, make sure your plants are getting consistent moisture and calcium.
Tricks for Speeding Up the Harvest
Here are a few extra tricks I’ve learned over the years to speed up the eggplant harvest:
- Use Black Plastic Mulch: Black plastic mulch warms the soil faster in the spring, which can give your eggplants a head start.
- Row Covers: Row covers can protect your plants from
Conclusion
So, there you have it! This simple, yet incredibly effective DIY trick for encouraging a quick eggplant harvest is a game-changer for any gardener, regardless of experience level. We’ve walked you through the process, highlighting the key steps to ensure success. But why is this method a must-try?
Firstly, it addresses a common frustration: the often slow and unpredictable growth of eggplants. By implementing this technique, you’re essentially giving your plants a targeted boost, encouraging them to focus their energy on fruit production rather than vegetative growth. This translates to a significantly faster harvest, meaning you can enjoy delicious, homegrown eggplants weeks, even months, earlier than you might otherwise.
Secondly, it’s incredibly cost-effective. You likely already have most, if not all, of the materials needed right in your garden shed or kitchen. No expensive fertilizers or specialized equipment are required. This makes it an accessible and sustainable solution for gardeners on any budget.
Thirdly, it’s adaptable. While we’ve outlined a specific method, feel free to experiment and tailor it to your specific needs and growing conditions. For example, if you live in a particularly hot climate, you might want to adjust the timing of the trick to avoid stressing your plants during the hottest part of the day. Or, if you’re growing a particularly large variety of eggplant, you might consider increasing the amount of the solution you use.
Variations and Suggestions:
* Companion Planting Boost: Combine this trick with companion planting. Basil, thyme, and marigolds are excellent companions for eggplants, helping to deter pests and improve overall plant health.
* Foliar Feeding: Supplement this method with occasional foliar feeding using a diluted seaweed extract. This provides your plants with an extra boost of nutrients, further encouraging fruit production.
* Pruning for Success: Regular pruning is crucial for maximizing your eggplant harvest. Remove any suckers (small shoots that grow from the base of the plant) to direct the plant’s energy towards fruit development.
* Soil Health Matters: Remember that this trick is most effective when combined with healthy soil. Ensure your soil is well-draining and rich in organic matter. Amend with compost or aged manure before planting.
* Watering Wisely: Consistent watering is essential, especially during fruit development. Water deeply and regularly, but avoid overwatering, which can lead to root rot.We are confident that this DIY trick will revolutionize your eggplant growing experience. Imagine the satisfaction of harvesting plump, juicy eggplants from your own garden, knowing that you played a direct role in their success. The taste of homegrown produce is simply unmatched, and this method makes it even easier to achieve a bountiful harvest.
Don’t just take our word for it – give it a try! We encourage you to implement this technique in your garden and share your results with us. We’d love to hear about your successes, challenges, and any variations you’ve discovered. Share your photos and stories on social media using #QuickEggplantHarvest and let’s learn from each other. Let’s all enjoy a quick eggplant harvest this season. Happy gardening!
Frequently Asked Questions (FAQ)
What exactly does this DIY trick do to help eggplants grow faster?
This trick primarily works by gently stressing the eggplant plant in a controlled manner. This controlled stress triggers a survival mechanism within the plant, prompting it to prioritize reproduction (fruit production) over vegetative growth (leaf and stem development). By temporarily limiting resources or manipulating the plant’s environment, we encourage it to focus its energy on producing fruit, leading to a quicker and more abundant harvest. It’s similar to how some animals will reproduce more rapidly when they sense a threat to their survival. The plant “thinks” it needs to produce seeds (inside the eggplants) quickly to ensure its offspring survive.
How often should I repeat this DIY trick on my eggplant plants?
Generally, repeating the trick once every 2-3 weeks is sufficient. However, the frequency may need to be adjusted based on your specific growing conditions and the variety of eggplant you’re growing. Observe your plants closely. If you notice signs of stress, such as wilting or yellowing leaves, reduce the frequency. If your plants seem to be responding well and are growing vigorously, you can maintain the 2-3 week interval. The key is to find a balance that encourages fruit production without overly stressing the plant.
Is this DIY trick safe for organic gardening?
Yes, absolutely! The materials used in this trick are typically natural and readily available, making it perfectly compatible with organic gardening practices. There are no harsh chemicals or synthetic fertilizers involved. This aligns with the principles of organic gardening, which prioritize sustainable and environmentally friendly methods. Always ensure that any amendments or solutions you use are certified organic if you are strictly adhering to organic gardening standards.
What if I don’t see results immediately after trying this trick?
Patience is key! It may take a few weeks to see noticeable results. Factors such as weather conditions, soil health, and the overall health of your plants can influence the speed at which they respond. Continue to monitor your plants closely and provide them with proper care, including adequate watering, sunlight, and nutrients. If you still don’t see any improvement after several weeks, consider adjusting the frequency of the trick or exploring other potential issues, such as pest infestations or nutrient deficiencies.
Can this trick be used on other vegetable plants besides eggplants?
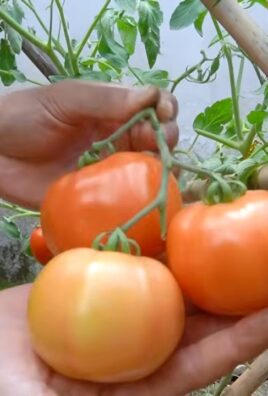
While this trick is specifically designed for eggplants, the underlying principle of controlled stress can potentially be applied to other fruiting vegetables, such as tomatoes, peppers, and cucumbers. However, it’s important to proceed with caution and research the specific needs of each plant before attempting this technique. The optimal timing, frequency, and intensity of the stress may vary depending on the plant species. Start with a small test group of plants and carefully observe their response before applying the trick to your entire garden.
My eggplant leaves are turning yellow after applying the trick. What should I do?
Yellowing leaves can be a sign of over-stressing the plant. Immediately stop applying the trick and ensure your plants are receiving adequate water and nutrients. Consider providing them with a diluted foliar feed of seaweed extract to help them recover. If the yellowing persists, investigate other potential causes, such as nutrient deficiencies, pest infestations, or fungal diseases. Adjust your watering schedule and soil amendments as needed.
What are some common mistakes to avoid when trying this DIY trick?
* Over-stressing the plants: Applying the trick too frequently or using too strong of a solution can damage your plants.
* Neglecting other essential care: This trick is not a substitute for proper watering, sunlight, and nutrient management.
* Ignoring signs of stress: Pay close attention to your plants and adjust your approach if you notice any negative effects.
* Using contaminated water: Ensure the water you use is clean and free from harmful chemicals or pathogens.
* Applying the trick during extreme weather: Avoid applying the trick during periods of intense heat, drought, or heavy rain.How do I know when my eggplants are ready to harvest?
Eggplants are typically ready to harvest when they are firm, glossy, and have reached their mature size and color. The skin should be smooth and unblemished. Gently press the skin with your thumb; if it springs back slightly, the eggplant is ripe. Overripe eggplants will become dull, soft, and may have a bitter taste. Use a sharp knife or pruning shears to cut the eggplant from the plant, leaving a short stem attached.

Leave a Comment