
Grow Ginger at Home with these simple, yet effective DIY tricks! Have you ever dreamt of snipping fresh ginger straight from your own garden for your favorite stir-fry or soothing cup of tea? Well, dream no more! This article is your ultimate guide to cultivating this flavorful rhizome right in the comfort of your own home.
Ginger, with its pungent aroma and zesty flavor, has been cherished for centuries, not only for its culinary uses but also for its medicinal properties. Originating in South Asia, ginger has played a significant role in traditional medicine systems like Ayurveda for thousands of years. Its warming properties are believed to aid digestion, reduce inflammation, and even boost immunity.
But why should you bother learning how to grow ginger at home? Simple! Store-bought ginger can sometimes be expensive and lack the vibrant freshness of homegrown. Plus, there’s nothing quite like the satisfaction of nurturing a plant from rhizome to harvest. Imagine the convenience of having a readily available supply of organic ginger whenever you need it. I’m going to show you some easy-to-follow DIY hacks that will have you harvesting your own ginger in no time, regardless of your gardening experience. Let’s get started!
Ingwer zu Hause anbauen: Ein umfassender DIY-Leitfaden
Hallo liebe Gartenfreunde! Habt ihr euch jemals gefragt, wie ihr diesen würzigen, gesunden Ingwer, den ihr so gerne in eurem Tee oder Curry verwendet, einfach selbst anbauen könnt? Ich zeige euch, wie es geht! Es ist einfacher als ihr denkt und macht unglaublich viel Spaß. Lasst uns gemeinsam in die Welt des Ingweranbaus eintauchen!
Was ihr braucht: Die Zutaten für euren Ingwer-Erfolg
Bevor wir loslegen, hier eine Liste der Dinge, die ihr für dieses DIY-Projekt benötigt:
* Ein Stück Ingwerwurzel (Rhizom): Achtet darauf, dass es gesund aussieht, prall ist und idealerweise bereits kleine “Augen” oder grüne Knospen hat. Bio-Ingwer ist oft die bessere Wahl, da er weniger wahrscheinlich mit Wachstumsinhibitoren behandelt wurde.
* Ein Pflanzgefäß: Wählt einen Topf, der mindestens 30 cm breit und tief ist. Ingwerwurzeln breiten sich horizontal aus, also ist Breite wichtiger als Tiefe.
* Hochwertige Blumenerde: Eine gut durchlässige, nährstoffreiche Erde ist entscheidend. Ich empfehle eine Mischung aus Blumenerde, Kompost und etwas Perlit oder Vermiculit für eine bessere Drainage.
* Wasser: Klares, sauberes Wasser zum Gießen.
* Ein sonniger Standort: Ingwer liebt Wärme und Licht, aber direkte, pralle Mittagssonne kann schädlich sein. Ein Standort mit Morgen- oder Nachmittagssonne ist ideal.
* Eine Sprühflasche (optional): Um die Luftfeuchtigkeit zu erhöhen, besonders in trockenen Umgebungen.
* Geduld: Ingwer braucht Zeit zum Wachsen, also seid nicht entmutigt, wenn ihr nicht sofort Ergebnisse seht.
Schritt-für-Schritt-Anleitung: So pflanzt ihr euren Ingwer
Jetzt, wo wir alles haben, was wir brauchen, können wir mit dem Pflanzen beginnen!
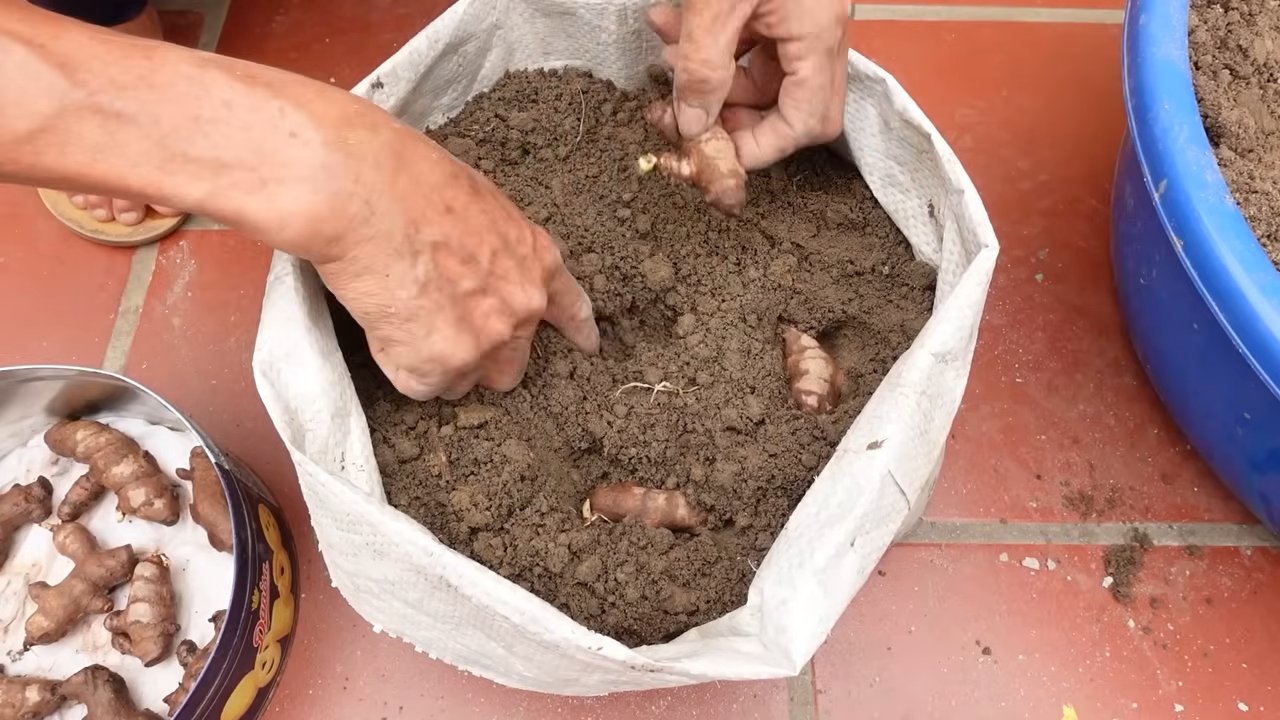
1. Die Ingwerwurzel vorbereiten: Wenn eure Ingwerwurzel sehr groß ist, könnt ihr sie in mehrere Stücke schneiden. Achtet darauf, dass jedes Stück mindestens ein oder zwei “Augen” hat. Lasst die Schnittflächen ein paar Tage an der Luft trocknen, um Fäulnis zu verhindern. Das ist ein wichtiger Schritt!
2. Den Topf vorbereiten: Füllt den Topf mit eurer Blumenerde-Mischung, lasst aber etwa 5 cm Platz bis zum Rand.
3. Den Ingwer pflanzen: Legt die Ingwerstücke horizontal auf die Erde, mit den “Augen” nach oben. Bedeckt sie dann mit etwa 2-5 cm Erde. Drückt die Erde leicht an.
4. Gießen: Gießt die Erde gründlich, bis das Wasser aus den Abzugslöchern des Topfes läuft.
5. Der richtige Standort: Stellt den Topf an einen warmen, hellen Ort, aber vermeidet direkte Mittagssonne. Ein Fensterbrett mit Morgen- oder Nachmittagssonne ist perfekt.
6. Feuchtigkeit und Temperatur: Ingwer liebt Feuchtigkeit. Besprüht die Erde regelmäßig mit Wasser, besonders wenn die Luft trocken ist. Die ideale Temperatur für das Wachstum liegt zwischen 20 und 30 Grad Celsius.
7. Geduld haben: Es kann einige Wochen dauern, bis ihr die ersten grünen Triebe seht. Habt Geduld und gießt die Erde regelmäßig, aber vermeidet Staunässe.
Pflege eures Ingwers: So bleibt er glücklich und gesund
Sobald euer Ingwer zu wachsen beginnt, ist es wichtig, ihn richtig zu pflegen, damit er gesund und produktiv bleibt.
* Gießen: Gießt euren Ingwer regelmäßig, aber lasst die Erde zwischen den Wassergaben leicht antrocknen. Staunässe kann zu Wurzelfäule führen.
* Düngen: Düngt euren Ingwer alle paar Wochen mit einem organischen Flüssigdünger. Ich verwende gerne einen Dünger auf Algenbasis oder Komposttee.
* Schädlinge und Krankheiten: Ingwer ist relativ resistent gegen Schädlinge und Krankheiten, aber achtet auf Anzeichen von Blattläusen oder Spinnmilben. Wenn ihr Schädlinge entdeckt, könnt ihr sie mit einer milden Seifenlösung bekämpfen.
* Umtopfen: Wenn euer Ingwer zu groß für seinen Topf wird, könnt ihr ihn in einen größeren Topf umtopfen. Achtet darauf, die Wurzeln nicht zu beschädigen.
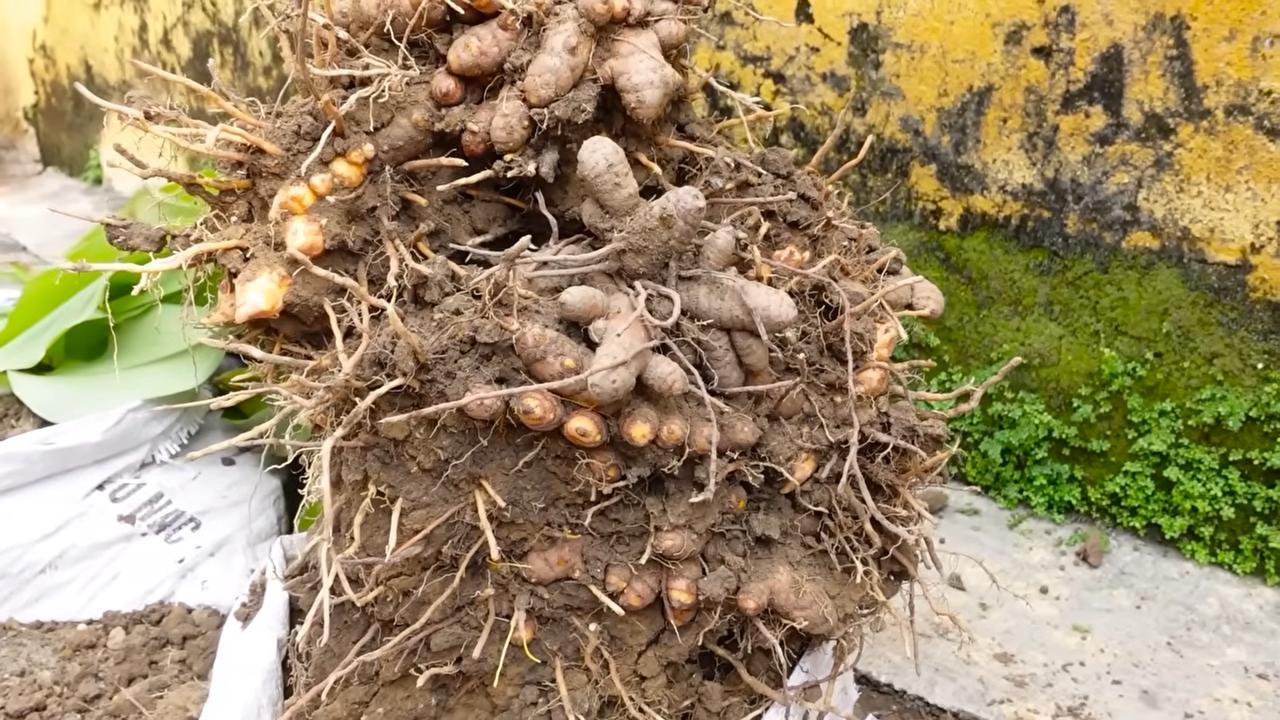
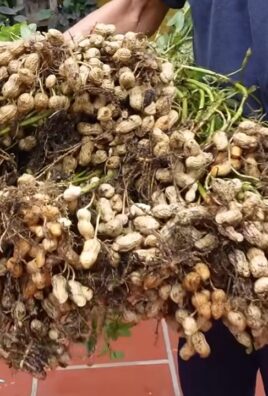
Die Ernte: Wann und wie ihr euren Ingwer erntet
Das Wichtigste zuerst: Wann ist der richtige Zeitpunkt für die Ernte?
* Wann ernten: Ihr könnt euren Ingwer etwa 8-10 Monate nach dem Pflanzen ernten. Die Blätter werden dann gelb und beginnen zu welken.
* Wie ernten: Grabt vorsichtig um die Pflanze herum und hebt die Ingwerwurzeln aus der Erde. Ihr könnt entweder die ganze Pflanze ernten oder nur einen Teil der Wurzeln abschneiden und den Rest im Topf lassen, damit er weiterwächst.
* Lagerung: Frischer Ingwer kann im Kühlschrank in einem Plastikbeutel oder Behälter bis zu einigen Wochen aufbewahrt werden. Ihr könnt ihn auch einfrieren oder trocknen.
Zusätzliche Tipps und Tricks für den Ingweranbau
Hier sind noch ein paar zusätzliche Tipps, die euch helfen können, euren Ingweranbau zu optimieren:
* Die richtige Erde: Eine gut durchlässige Erde ist entscheidend, um Wurzelfäule zu vermeiden. Fügt eurer Blumenerde etwas Perlit oder Vermiculit hinzu, um die Drainage zu verbessern.
* Die richtige Temperatur: Ingwer liebt Wärme. Wenn ihr in einer kälteren Region lebt, könnt ihr euren Ingwer in einem Gewächshaus oder in einem beheizten Raum anbauen.
* Die richtige Luftfeuchtigkeit: Ingwer liebt Feuchtigkeit. Besprüht die Blätter regelmäßig mit Wasser, besonders wenn die Luft trocken ist. Ihr könnt auch einen Luftbefeuchter verwenden.
* Die richtige Sorte: Es gibt verschiedene Ingwersorten. Einige Sorten sind besser für den Anbau im Topf geeignet als andere. Informiert euch vor dem Pflanzen über die verschiedenen Sorten.
* Vermehrung: Ihr könnt euren Ingwer vermehren, indem ihr die Wurzeln teilt. Achtet darauf, dass jedes Stück mindestens ein oder zwei “Augen” hat.
* Ingwertee: Aus den Blättern könnt ihr auch einen leckeren Ingwertee zubereiten. Einfach ein paar Blätter abzupfen und mit heißem Wasser übergießen.
Häufige Probleme und Lösungen
Auch beim Ingweranbau können Probleme auftreten. Hier sind einige der häufigsten Probleme und wie ihr sie lösen könnt:
* Gelbe Blätter: Gelbe Blätter können ein Zeichen für Überwässerung, Unterwässerung, Nährstoffmangel oder Schädlinge sein. Überprüft die Erde, düngt die Pflanze und sucht nach Schädlingen.
* Wurzelfäule: Wurzelfäule wird durch Staunässe verursacht. Achtet darauf, dass die Erde gut durchlässig ist und gießt die Pflanze nicht zu oft.
* Schädlinge: Blattläuse und Spinnmilben können Ingwerpflanzen befallen. Bekämpft sie mit einer milden Seifenlösung oder einem Insektizid.
* Langsames Wachstum: Langsames Wachstum kann durch zu wenig Licht, zu wenig Wärme oder Nährstoffmangel verursacht werden. Stellt die Pflanze an einen helleren, wärmeren Ort und düngt sie regelmäßig.
Ich hoffe, dieser Leitfaden hat euch geholfen, euren eigenen Ingwer zu Hause anzubauen. Es ist ein lohnendes Projekt, das euch mit frischem, aromatischem Ingwer versorgt. Viel Spaß beim Gärtnern!
Conclusion
So, there you have it! Growing ginger at home is not only achievable, but it’s also incredibly rewarding. Forget those expensive, often lackluster ginger roots from the supermarket. Imagine the satisfaction of harvesting your own fresh, vibrant ginger, bursting with flavor and ready to elevate your culinary creations. This DIY project transforms a simple kitchen staple into a thriving plant, adding a touch of green to your home and a burst of flavor to your meals.
This isn’t just about saving money; it’s about connecting with your food, understanding its origins, and enjoying the unparalleled taste of homegrown produce. The ginger you grow yourself will be noticeably more aromatic and flavorful than anything you can buy in a store. Think of the possibilities: freshly grated ginger in your stir-fries, soothing ginger tea brewed with your own harvest, or even candied ginger made from scratch.
Beyond the culinary benefits, growing ginger is a surprisingly therapeutic activity. Nurturing a plant from a simple rhizome to a flourishing specimen is a deeply satisfying experience. It’s a chance to slow down, connect with nature, and witness the magic of growth firsthand. Plus, the lush green foliage of the ginger plant adds a touch of tropical beauty to any indoor space.
Ready to take your ginger game to the next level? Consider experimenting with different varieties of ginger. While common ginger (Zingiber officinale) is the most readily available, you might be able to find other varieties like galangal or turmeric, which can be grown using similar methods. Each variety offers a unique flavor profile, allowing you to expand your culinary horizons even further.
Another variation to consider is the growing medium. While potting mix works well, you can also experiment with coco coir or a blend of perlite and vermiculite for improved drainage. Just be sure to provide adequate nutrients, regardless of the medium you choose.
Don’t be intimidated if you’ve never grown anything before. Growing ginger at home is a beginner-friendly project that requires minimal effort and yields impressive results. With a little patience and the right conditions, you’ll be harvesting your own fresh ginger in no time.
We wholeheartedly encourage you to give this DIY trick a try. It’s a fun, educational, and ultimately delicious way to enhance your cooking and connect with nature. And most importantly, we want to hear about your experience! Share your photos, tips, and stories in the comments below. Let’s create a community of home ginger growers and inspire others to embark on this rewarding journey. What are you waiting for? Get your ginger rhizome and start growing today!
Frequently Asked Questions (FAQ)
What kind of ginger should I use to start growing?
The best ginger to use for growing is a fresh, plump rhizome from an organic source. Organic ginger is less likely to have been treated with growth inhibitors, which can prevent sprouting. Look for rhizomes that are firm, with visible “eyes” or buds. Avoid ginger that is shriveled, soft, or moldy. You can typically find suitable ginger at your local grocery store or farmers market. If possible, soak the ginger in water overnight before planting to rehydrate it and encourage sprouting.
How long does it take for ginger to sprout?
Sprouting time can vary depending on factors such as temperature, humidity, and the freshness of the ginger rhizome. Generally, you can expect to see sprouts emerge within 2 to 3 weeks. However, it can sometimes take longer, up to a month or more. Be patient and keep the soil consistently moist but not waterlogged. Providing warmth and humidity can help speed up the sprouting process. You can create a humid environment by covering the pot with plastic wrap or placing it in a greenhouse.
What is the best soil for growing ginger?
Ginger thrives in well-draining, nutrient-rich soil. A good potting mix specifically formulated for vegetables or herbs is ideal. You can also create your own mix by combining equal parts of potting soil, compost, and perlite or vermiculite. The compost provides essential nutrients, while the perlite or vermiculite improves drainage and aeration. Avoid using heavy clay soil, as it can retain too much moisture and lead to root rot.
How much sunlight does ginger need?
Ginger prefers bright, indirect sunlight. Avoid placing it in direct sunlight, especially during the hottest part of the day, as this can scorch the leaves. A spot near an east-facing or north-facing window is usually ideal. If you’re growing ginger outdoors, choose a location that receives partial shade. You can also use shade cloth to protect the plants from intense sunlight.
How often should I water ginger?
Water ginger regularly, keeping the soil consistently moist but not waterlogged. Allow the top inch of soil to dry out slightly between waterings. Overwatering can lead to root rot, so it’s important to ensure good drainage. During the growing season (spring and summer), you may need to water more frequently than during the dormant season (fall and winter). Check the soil moisture regularly and adjust your watering schedule accordingly.
When is the best time to harvest ginger?
You can start harvesting ginger about 8 to 10 months after planting. The leaves will start to turn yellow and die back when the ginger is ready to harvest. You can harvest the entire plant or just dig up a portion of the rhizome, leaving the rest to continue growing. To harvest, gently loosen the soil around the plant and lift the rhizome out of the ground. Wash off any excess soil and enjoy your fresh ginger!
Can I grow ginger indoors year-round?
Yes, you can grow ginger indoors year-round, provided you provide the right conditions. Ginger needs warmth, humidity, and bright, indirect sunlight to thrive. During the winter months, you may need to supplement with artificial light to ensure adequate growth. Keep the plant away from drafts and cold temperatures. With proper care, you can enjoy a continuous supply of fresh ginger throughout the year.
What are some common problems when growing ginger?
Some common problems when growing ginger include root rot, pests, and nutrient deficiencies. Root rot is caused by overwatering and poor drainage. To prevent root rot, ensure that your soil is well-draining and avoid overwatering. Pests such as aphids and spider mites can also attack ginger plants. Inspect your plants regularly and treat any infestations promptly with insecticidal soap or neem oil. Nutrient deficiencies can manifest as yellowing leaves or stunted growth. Fertilize your ginger plants regularly with a balanced fertilizer to provide them with the nutrients they need.
Leave a Comment