
Grow Kailan Faster and enjoy fresh, homegrown greens on your table sooner than you ever thought possible! Have you ever planted kailan, eagerly anticipating that delicious, slightly sweet, and nutritious harvest, only to find yourself waiting… and waiting… and waiting? I know I have! It can be frustrating, especially when you’re craving that stir-fry or steamed kailan dish.
For centuries, kailan, also known as Chinese kale, has been a staple in Asian cuisine, prized not only for its flavor but also for its impressive health benefits. From bustling city markets to tranquil rural gardens, kailan has nourished generations. But let’s be honest, in today’s fast-paced world, we want things done efficiently, and that includes our gardening!
That’s why I’m so excited to share these simple yet effective DIY tricks and hacks that will help you grow kailan faster and more abundantly. Imagine harvesting your own vibrant, leafy greens just weeks after planting! These tips are perfect for both beginner gardeners and seasoned pros looking to boost their kailan game. We’ll cover everything from soil preparation to watering techniques, ensuring you get the most out of your kailan crop. Get ready to unlock the secrets to a faster, more bountiful kailan harvest!
Grow Kailan Faster: My Foolproof DIY Guide
Hey there, fellow gardening enthusiasts! I’m thrilled to share my tried-and-true method for speeding up kailan growth. Kailan, also known as Chinese kale, is a delicious and nutritious leafy green that I absolutely love adding to stir-fries and soups. But let’s be honest, sometimes it feels like it takes forever to mature! That’s why I’ve developed this DIY hack to get you harvesting those tasty leaves much sooner.
Understanding Kailan’s Needs
Before we dive into the nitty-gritty, let’s quickly cover what kailan needs to thrive. Understanding these basics is crucial for maximizing growth.
* Sunlight: Kailan loves sunshine! Aim for at least 6 hours of direct sunlight per day.
* Soil: Well-draining soil that’s rich in organic matter is key.
* Water: Consistent moisture is important, but avoid waterlogging.
* Nutrients: Kailan is a heavy feeder, so regular fertilization is a must.
* Temperature: Kailan prefers cooler temperatures, ideally between 60-70°F (15-21°C).
The Secret Weapon: Seed Starting Indoors
The biggest time-saver in this process is starting your kailan seeds indoors. This gives them a head start and protects them from harsh weather conditions and pests when they’re most vulnerable.
Materials You’ll Need:
* Kailan seeds (choose a variety you love!)
* Seed starting trays or small pots
* Seed starting mix (a light, sterile mix is best)
* Spray bottle with water
* Grow lights (optional, but highly recommended)
* Heat mat (optional, but helpful for germination)
* Small fan (for air circulation)
Step-by-Step Instructions:
1. Prepare Your Seed Starting Trays: Fill your seed starting trays or pots with the seed starting mix. Gently tap the trays to settle the mix.
2. Sow the Seeds: Make a small indentation (about ¼ inch deep) in the center of each cell or pot. Place 2-3 kailan seeds in each indentation. This increases your chances of at least one seed germinating.
3. Cover the Seeds: Gently cover the seeds with the seed starting mix. Lightly pat the surface.
4. Water Thoroughly: Use a spray bottle to thoroughly moisten the seed starting mix. Avoid overwatering, which can lead to damping off (a fungal disease that kills seedlings).
5. Provide Warmth: Place the seed starting trays on a heat mat (if using) to maintain a soil temperature of around 70-75°F (21-24°C). This will speed up germination.
6. Provide Light: Place the trays under grow lights or in a sunny window. If using grow lights, position them a few inches above the trays and keep them on for 14-16 hours per day.
7. Maintain Moisture: Keep the seed starting mix consistently moist, but not soggy. Check the moisture level daily and mist with water as needed.
8. Provide Air Circulation: Use a small fan to provide gentle air circulation around the seedlings. This helps prevent fungal diseases.
9. Thin the Seedlings: Once the seedlings have developed their first true leaves (the second set of leaves that appear after the initial seed leaves), thin them to one seedling per cell or pot. Choose the strongest, healthiest-looking seedling and gently snip off the others at the soil line.
10. Harden Off the Seedlings: About a week before you plan to transplant the seedlings outdoors, start hardening them off. This process gradually acclimates them to outdoor conditions. Start by placing the trays outdoors in a sheltered location for a few hours each day, gradually increasing the amount of time they spend outdoors. Also, gradually expose them to more sunlight and wind.
Preparing the Garden Bed
While your seedlings are growing indoors, it’s time to prepare the garden bed. This is just as important as starting the seeds indoors!
Materials You’ll Need:
* Garden fork or tiller
* Compost or well-rotted manure
* All-purpose organic fertilizer
* Garden rake
Step-by-Step Instructions:
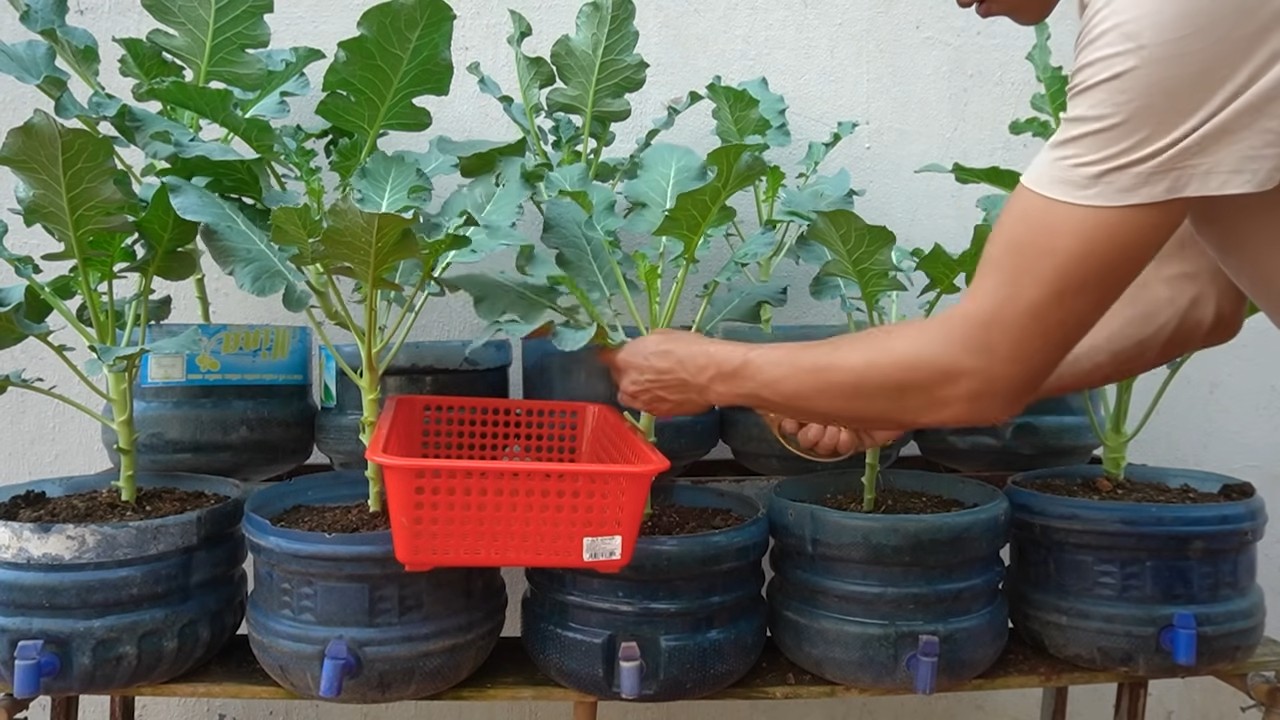
1. Choose a Sunny Location: Select a location in your garden that receives at least 6 hours of direct sunlight per day.
2. Prepare the Soil: Use a garden fork or tiller to loosen the soil to a depth of at least 12 inches. Remove any rocks, weeds, or debris.
3. Amend the Soil: Incorporate a generous amount of compost or well-rotted manure into the soil. This will improve drainage, fertility, and water retention. I usually add about 2-3 inches of compost.
4. Fertilize the Soil: Apply an all-purpose organic fertilizer according to the package directions. This will provide the kailan plants with the nutrients they need to thrive.
5. Rake the Soil: Use a garden rake to smooth the soil surface and create a level planting area.
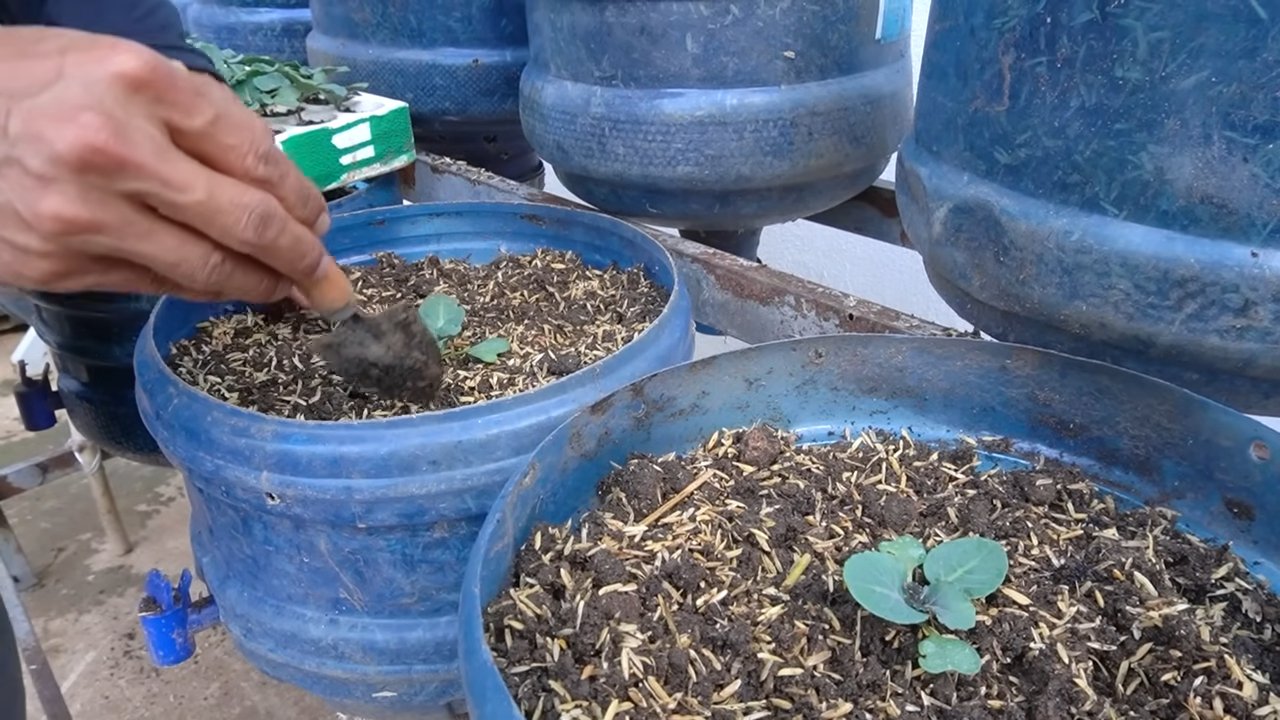
Transplanting the Seedlings
Once your seedlings have been hardened off and the garden bed is prepared, it’s time to transplant them outdoors.
Materials You’ll Need:
* Hardened-off kailan seedlings
* Trowel or small shovel
* Watering can or hose
* Mulch (optional, but recommended)
Step-by-Step Instructions:
1. Choose a Cloudy Day: Transplant the seedlings on a cloudy day or in the late afternoon to minimize stress.
2. Dig Holes: Dig holes in the prepared garden bed that are slightly larger than the root balls of the seedlings. Space the holes about 12-18 inches apart.
3. Remove Seedlings from Trays: Gently remove the seedlings from their seed starting trays or pots. Be careful not to damage the roots. If the roots are tightly bound, gently loosen them before planting.
4. Plant the Seedlings: Place the seedlings in the holes and backfill with soil. Gently firm the soil around the base of the plants.
5. Water Thoroughly: Water the seedlings thoroughly after planting.
6. Apply Mulch (Optional): Apply a layer of mulch around the plants to help retain moisture, suppress weeds, and regulate soil temperature. I like to use straw or wood chips.
Ongoing Care: The Key to Rapid Growth
Transplanting is just the beginning! Consistent care is essential for maximizing kailan growth.
Watering:
* Water the kailan plants regularly, especially during dry periods. Aim to keep the soil consistently moist, but not soggy.
* Water deeply and less frequently, rather than shallowly and more often. This encourages deep root growth.
* Water in the morning to allow the foliage to dry before nightfall, which helps prevent fungal diseases.
Fertilizing:
* Kailan is a heavy feeder, so regular fertilization is important.
* Side-dress the plants with an all-purpose organic fertilizer every 2-3 weeks.
* You can also use a liquid fertilizer, such as fish emulsion or seaweed extract, to give the plants a boost.
Weeding:
* Keep the garden bed free of weeds, which compete with the kailan plants for nutrients and water.
* Hand-pull weeds regularly or use a hoe to cultivate the soil.
* Mulching can also help suppress weed growth.
Pest Control:
* Keep an eye out for pests, such as aphids, cabbage worms, and flea beetles.
* Inspect the plants regularly and take action promptly if you see any signs of infestation.
* Use organic pest control methods, such as insecticidal soap, neem oil, or Bacillus thuringiensis (Bt).
* Consider using row covers to protect the plants from pests.
Harvesting:
* You can start harvesting kailan leaves as soon as they are large enough to eat, typically about 6-8 weeks after transplanting.
* Harvest the outer leaves first, leaving the inner leaves to continue growing.
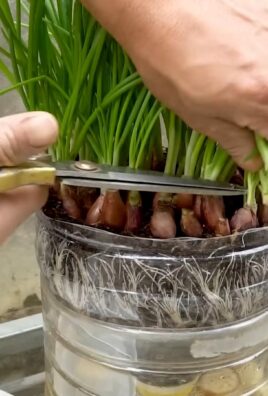
* Cut the leaves with a sharp knife or scissors.
* Regular harvesting encourages the plants to produce more leaves.
Boosting Growth with Epsom Salts
Here’s a little secret weapon I use to give my kailan an extra boost: Epsom salts! Epsom salts are magnesium sulfate, and magnesium is an essential nutrient for plant growth.
How to Use Epsom Salts:
* Soil Application: Dissolve 1 tablespoon of Epsom salts in 1 gallon of water and water the kailan plants every 2-3 weeks.
* Foliar Spray: Dissolve 1 tablespoon of Epsom salts in 1 gallon of water and spray the foliage of the kailan plants every 2-3 weeks.
Why Epsom Salts Work
Conclusion
So, there you have it! This simple yet effective DIY trick to grow Kailan faster is a game-changer for any gardener, whether you’re a seasoned pro or just starting out. We’ve walked you through the process, highlighting the benefits of this method, from accelerated growth and increased yields to healthier, more robust plants.
But why is this a must-try? Because it’s more than just a gardening hack; it’s about taking control of your food source, connecting with nature, and experiencing the satisfaction of nurturing life from seed to table. Imagine harvesting your own fresh, vibrant Kailan, knowing you played a direct role in its growth and development. The taste is simply unmatched, far surpassing anything you can find in a store.
Beyond the basic method, there’s plenty of room for experimentation. Consider using different types of organic fertilizers to further boost growth. Compost tea, worm castings, and fish emulsion are all excellent options. You could also try varying the type of container you use, experimenting with different sizes and materials to see what works best for your specific environment.
Another variation to explore is companion planting. Certain plants, like marigolds and basil, can help deter pests and attract beneficial insects, creating a healthier environment for your Kailan to thrive. Research which plants are known to be good companions for Kailan and incorporate them into your garden.
This DIY trick isn’t just about speed; it’s about creating a sustainable and rewarding gardening experience. It’s about learning, adapting, and connecting with the natural world. It’s about enjoying the fruits (or in this case, the vegetables) of your labor.
We wholeheartedly encourage you to give this DIY trick a try. Don’t be afraid to experiment, adapt, and make it your own. Gardening is a journey of discovery, and there’s no one-size-fits-all approach. The most important thing is to get your hands dirty, have fun, and learn along the way.
And once you’ve harvested your first batch of homegrown Kailan, we’d love to hear about your experience! Share your photos, tips, and variations in the comments below. Let’s create a community of gardeners who are passionate about growing their own food and sharing their knowledge with others. Together, we can make the world a greener, healthier, and more delicious place, one Kailan plant at a time. So go ahead, get planting, and let us know how you grow Kailan faster! We are excited to see your results.
Frequently Asked Questions (FAQ)
What exactly makes this DIY trick help Kailan grow faster?
This DIY trick focuses on optimizing the growing environment for Kailan. By providing the right nutrients, adequate sunlight, and consistent moisture, we create conditions that encourage rapid growth. The specific techniques, such as using nutrient-rich soil amendments and ensuring proper drainage, all contribute to a healthier and more vigorous plant, leading to faster development. Furthermore, protecting the young seedlings from harsh weather conditions or pests allows them to establish themselves quickly and efficiently, accelerating their overall growth rate.
How long does it typically take to see results using this method?
While the exact timeframe can vary depending on factors like climate, soil quality, and the specific Kailan variety, you should generally start to see noticeable results within a few weeks. Expect to see faster leaf development and overall plant growth compared to traditional methods. Keep in mind that consistent care and attention are crucial for achieving optimal results. Regularly monitor your plants, adjust your watering schedule as needed, and provide additional nutrients if necessary.
What if I don’t have access to all the recommended materials? Can I substitute anything?
Absolutely! Gardening is all about resourcefulness. If you don’t have access to specific soil amendments, you can substitute them with readily available alternatives. For example, if you don’t have compost, you can use well-rotted manure or leaf mold. If you can’t find a specific type of fertilizer, you can use a balanced organic fertilizer that is suitable for leafy greens. The key is to provide your Kailan plants with the essential nutrients they need to thrive. Don’t be afraid to experiment and see what works best for you.
Is this method suitable for growing Kailan indoors?
Yes, this method can be adapted for indoor growing, but you’ll need to make some adjustments. First, ensure that your Kailan plants receive adequate light. If you don’t have a sunny windowsill, you’ll need to use grow lights. Second, pay close attention to watering, as indoor plants tend to dry out more quickly. Third, provide good ventilation to prevent fungal diseases. With a little bit of care and attention, you can successfully grow Kailan indoors using this DIY trick.
What are some common problems I might encounter, and how can I fix them?
Some common problems you might encounter include pests, diseases, and nutrient deficiencies. Pests like aphids and cabbage worms can be controlled with organic insecticides or by handpicking them off the plants. Diseases like powdery mildew can be prevented by providing good ventilation and avoiding overwatering. Nutrient deficiencies can be addressed by adding appropriate fertilizers to the soil. Regularly inspect your plants for any signs of problems and take action promptly to prevent them from escalating.
Can I use this trick to grow other leafy green vegetables as well?
Yes, this DIY trick can be adapted for growing other leafy green vegetables, such as spinach, kale, and lettuce. The basic principles of providing the right nutrients, adequate sunlight, and consistent moisture apply to all leafy greens. However, you may need to make some adjustments based on the specific needs of each vegetable. For example, some leafy greens prefer slightly different soil pH levels or have different watering requirements. Research the specific needs of the vegetables you want to grow and adjust your approach accordingly.
How often should I water my Kailan plants when using this method?
The frequency of watering will depend on factors like climate, soil type, and the size of your containers. As a general rule, water your Kailan plants when the top inch of soil feels dry to the touch. Avoid overwatering, as this can lead to root rot. During hot and dry weather, you may need to water more frequently. During cooler and wetter weather, you may need to water less frequently. Monitor your plants closely and adjust your watering schedule as needed.
What type of fertilizer is best for growing Kailan using this method?
A balanced organic fertilizer that is specifically formulated for leafy greens is generally the best choice. Look for a fertilizer that contains a good balance of nitrogen, phosphorus, and potassium, as well as micronutrients like iron, magnesium, and calcium. You can also use compost tea, worm castings, or fish emulsion as natural sources of nutrients. Avoid using synthetic fertilizers, as they can harm the soil and the environment.
How do I know when my Kailan is ready to harvest?
Kailan is typically ready to harvest when the leaves are about 6-8 inches long. You can harvest the entire plant at once or harvest individual leaves as needed. To harvest individual leaves, simply cut them off at the base of the plant. Avoid harvesting more than one-third of the plant at a time, as this can stress the plant and reduce its yield.
What’s the best way to store harvested Kailan?
To store harvested Kailan, wash the leaves thoroughly and pat them dry. Then, wrap them in a damp paper towel and store them in a plastic bag in the refrigerator. Kailan can typically be stored for up to a week using this method.
Leave a Comment