
Grow Mushrooms at Home: A Beginner’s Guide to Fun and Flavor
Have you ever dreamed of harvesting your own gourmet mushrooms, right from your backyard or kitchen? Learning to grow mushrooms at home is easier than you think! This isn’t just about saving money on grocery bills; it’s about connecting with nature in a deeply satisfying way, experiencing the magic of cultivation firsthand, and enjoying the unparalleled taste of freshly picked fungi. For centuries, cultivating mushrooms has been a vital part of many cultures, providing sustenance and a connection to the earth. From ancient Chinese techniques to modern-day mycologists, the art of mushroom cultivation has evolved, making it accessible to even the most novice gardener.
I’ve always been fascinated by the mysterious world of mushrooms, and after years of experimenting, I’ve developed some simple yet effective grow mushrooms at home techniques that I’m excited to share with you. This article will guide you through everything you need to know, from choosing the right mushroom species to setting up your own home-growing system. Whether you’re a seasoned gardener or a complete beginner, you’ll find practical tips and tricks to help you achieve a bountiful harvest. Why bother? Because there’s nothing quite like the taste of a mushroom you’ve grown yourself – the texture, the aroma, the sheer satisfaction of knowing exactly where your food comes from.
Why Grow Your Own Mushrooms?
Beyond the delicious rewards, growing your own mushrooms offers a unique opportunity to learn about sustainable food production and connect with the natural world. It’s a rewarding hobby that can be enjoyed by people of all ages and skill levels. So, let’s get started on this exciting journey and discover the simple joy of growing your own delicious mushrooms!

Growing Your Own Mushrooms at Home: A Step-by-Step Guide
Growing your own mushrooms is a rewarding experience, connecting you with nature and providing delicious, fresh fungi for your meals. This guide will walk you through the process, from preparing your substrate to harvesting your bounty. Let’s get started!
Phase 1: Choosing Your Mushroom and Gathering Supplies
- Select your mushroom type: Oyster mushrooms are a popular choice for beginners due to their ease of cultivation and fast growth. Other options include shiitake, lion’s mane, or even more challenging varieties like morels (though those require more advanced techniques).
- Acquire a mushroom growing kit or create your own substrate: Kits provide everything you need, simplifying the process. If you’re feeling adventurous, you can create your own substrate using straw, coffee grounds, or hardwood sawdust. Research the specific substrate requirements for your chosen mushroom type.
- Gather your supplies: You’ll need a clean, spray bottle, a large plastic container with drainage holes (or a grow bag), a misting bottle, and a location with indirect light and consistent temperature.
Phase 2: Preparing the Substrate
- Sterilize your chosen substrate: This is crucial to prevent mold and bacterial contamination. If using a kit, this step is usually already done. For homemade substrates, you can pasteurize it by soaking it in hot water (around 160°F/71°C) for several hours, then draining it well. Alternatively, you can pressure cook it for a longer period to achieve complete sterilization. Safety first: Always use caution when handling hot water and pressure cookers.
- Inoculate the substrate: This involves introducing the mushroom spawn (mushroom mycelium) to your prepared substrate. If using a kit, this is typically already done. For homemade substrates, carefully mix the spawn into the substrate, ensuring even distribution. Work in a clean environment to minimize contamination. I recommend wearing a mask to avoid inhaling any spores.
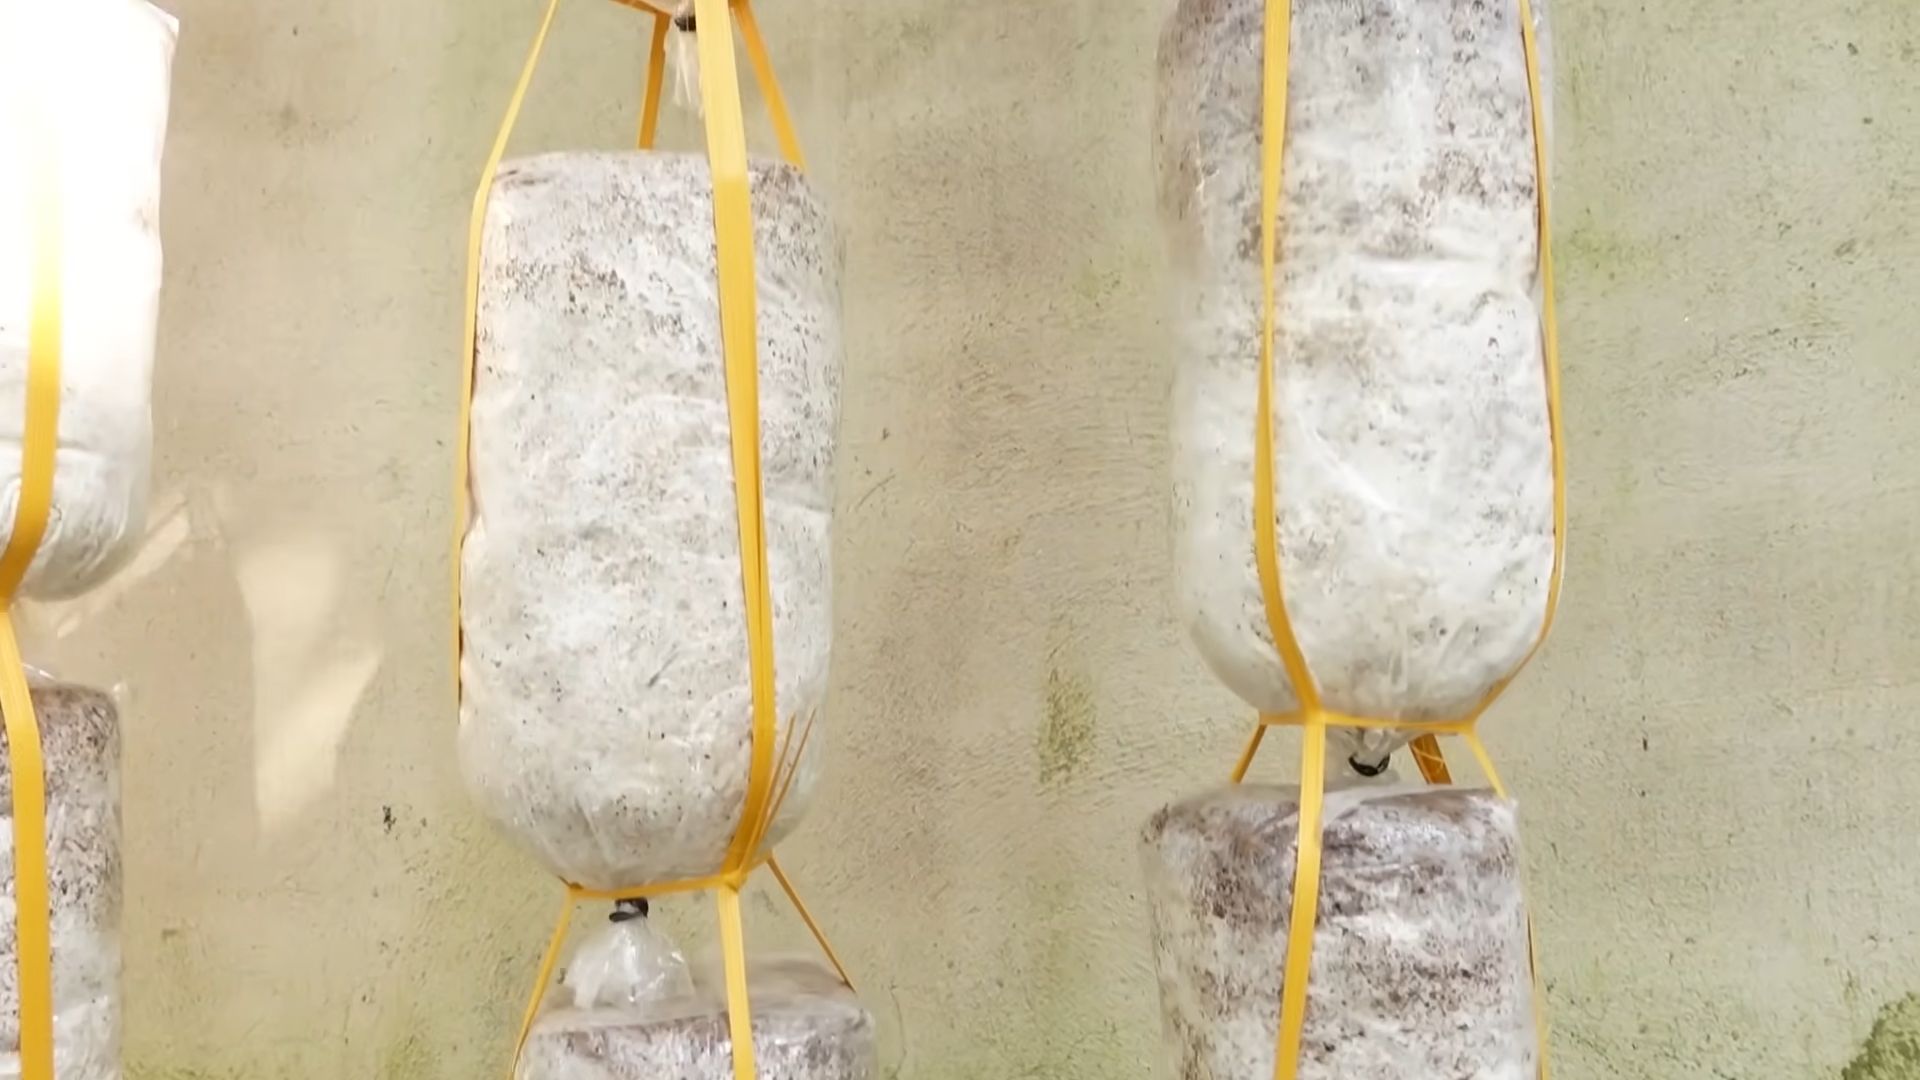
- Incubation: Place your inoculated substrate in your chosen container. Seal it loosely to allow for gas exchange but prevent contamination. Keep it in a dark, humid environment with a temperature suitable for your chosen mushroom type (check the instructions for your specific mushroom or kit). This incubation period can last several weeks, during which the mycelium will colonize the substrate. You’ll notice the substrate changing color and texture as the mycelium grows.
Phase 3: Fruiting and Harvesting
- Initiate fruiting: Once the substrate is fully colonized (usually indicated by a dense white mycelium network), it’s time to initiate fruiting. This involves introducing fresh air and slightly lower temperatures. Remove the lid of your container or create small openings for ventilation. Increase the humidity by regularly misting the substrate with water. You can also place the container in a humid environment, like a bathroom or a plastic bag with high humidity.
- Monitor growth: Keep a close eye on your substrate. You should start seeing small mushroom pins (primordia) emerging from the substrate. These are the beginnings of your mushrooms. Maintain consistent humidity and ventilation during this stage.
- Harvesting: Once your mushrooms reach maturity (size and appearance vary depending on the type), it’s time to harvest them. Gently twist or cut the mushrooms at the base, being careful not to damage the substrate. Harvesting mushrooms when they are mature ensures optimal flavor and texture. Don’t wait too long, as overripe mushrooms can become less palatable.
- Second flush: After your first harvest, you might get a second, or even third, flush of mushrooms. The substrate will need some time to recover, so continue misting and maintaining humidity. You may need to add more water to the substrate to keep it moist.
Phase 4: Troubleshooting and Maintenance
- Contamination: Keep a close eye out for signs of mold or bacterial contamination (unusual colors, foul odors). If you notice contamination, it’s best to discard the contaminated substrate to prevent it from spreading. Proper sterilization and hygiene are key to preventing contamination.
- Humidity levels: Maintaining the correct humidity is crucial. Too little humidity will result in stunted growth, while too much can lead to bacterial growth. Regular misting and monitoring are essential.
- Temperature control: Mushrooms are sensitive to temperature fluctuations. Ensure your growing environment maintains a consistent temperature suitable for your chosen mushroom type. Avoid placing your substrate in direct sunlight or near heat sources.
- Ventilation: Adequate ventilation is necessary for gas exchange and to prevent the build-up of moisture, which can lead to bacterial growth. However, excessive ventilation can dry out the substrate.
Phase 5: Enjoying Your Homegrown Mushrooms
Once you’ve harvested your mushrooms, you can enjoy them in a variety of dishes. Their unique flavors and textures add a delightful touch to soups, stir-fries, pasta dishes, and more. Remember to always cook mushrooms thoroughly before consumption.
Important Note: Always thoroughly research the specific requirements for your chosen mushroom species before starting. Different mushrooms have different needs regarding substrate, temperature, humidity, and light. This guide provides general information, but specific instructions may vary.
Conclusion
So there you have it! Growing your own mushrooms at home isn’t just a fun hobby; it’s a rewarding experience that connects you to the natural world and provides you with delicious, fresh fungi. This DIY trick offers a surprisingly simple and accessible way to cultivate your own gourmet mushrooms, transforming your kitchen or a spare corner into a thriving fungal farm. The ease of the process, combined with the incredible satisfaction of harvesting your own homegrown mushrooms, makes this a must-try for anyone with even a passing interest in gardening or cooking. You’ll be amazed at the quality and flavor compared to store-bought mushrooms. The unique earthy aroma that permeates your space as your mushrooms grow is a bonus too!
Beyond the basic techniques outlined, the possibilities for experimentation are endless. Consider trying different mushroom varieties. Oyster mushrooms are known for their ease of cultivation and delicious, slightly sweet flavor. Shiitake mushrooms offer a more robust, umami-rich taste and are prized in many cuisines. Lion’s mane mushrooms, with their unique appearance and purported health benefits, are another exciting option to explore. Remember to research the specific needs of each variety, as growing conditions can vary.
You can also experiment with different substrates. While straw is a readily available and effective option, you can also explore using coffee grounds (a wonderfully sustainable choice!), wood chips, or even sawdust, depending on the mushroom species you choose. Remember to properly sterilize your chosen substrate to prevent unwanted mold or bacterial growth. This is crucial for successful mushroom cultivation. The more you experiment, the more you’ll learn about the fascinating world of mycology and the nuances of growing your own mushrooms.
Don’t be intimidated by the prospect of growing mushrooms at home. With a little patience and attention to detail, you’ll be harvesting your own delicious, homegrown crop in no time. This DIY project is a fantastic way to connect with nature, enhance your culinary skills, and impress your friends and family with your newfound expertise. We strongly encourage you to give it a try! Share your experiences, successes, and even your failures – learning from mistakes is all part of the process. Post pictures of your thriving mushroom gardens on social media and tag us! Let’s build a community of home mushroom growers and share our collective knowledge and passion for this rewarding endeavor. The world of homegrown mushrooms awaits! Start your own mushroom growing adventure today and experience the joy of harvesting your own delicious, organic produce.
Frequently Asked Questions
What type of mushrooms are easiest to grow at home?
Oyster mushrooms are generally considered the easiest mushrooms for beginners to grow at home. They are relatively low-maintenance and tolerate a wider range of growing conditions compared to other varieties. Shiitake mushrooms are also a good choice for beginners, offering a rewarding experience with their distinct flavor and aroma.
How long does it take to grow mushrooms at home?
The time it takes to grow mushrooms varies depending on the species and growing conditions. However, you can generally expect to see your first harvest anywhere from 4 to 12 weeks after inoculation, with some varieties taking longer. Patience is key!
What equipment do I need to grow mushrooms at home?
The equipment needed is surprisingly minimal. You’ll primarily need a suitable substrate (such as straw or coffee grounds), mushroom spawn (the “seeds” of the mushrooms), a container for growing (a plastic bin or similar works well), and a spray bottle for misting. Sterilization equipment, such as a pressure cooker or a large pot for boiling, is also recommended to prevent contamination.
What are the best growing conditions for mushrooms?
Mushrooms thrive in a dark, humid environment with consistent temperatures. The ideal temperature range varies depending on the mushroom species, but generally falls between 65-75°F (18-24°C). Adequate ventilation is also important to prevent the build-up of moisture and CO2.
What if my mushrooms don’t grow?
Several factors can affect mushroom growth. Contamination from bacteria or mold is a common problem, often caused by improper sterilization of the substrate or equipment. Insufficient moisture, incorrect temperature, or lack of proper ventilation can also hinder growth. Review the instructions carefully and troubleshoot potential issues. Don’t be discouraged – even experienced growers encounter setbacks sometimes. Learning from mistakes is part of the process.
Can I grow mushrooms year-round?
Yes, you can grow mushrooms year-round indoors, provided you maintain the appropriate temperature and humidity levels. This makes it a great hobby for any season.
Where can I buy mushroom spawn?
Mushroom spawn can be purchased online from various suppliers specializing in mushroom cultivation. Many online retailers offer a wide variety of mushroom species and spawn types.
Are homegrown mushrooms safe to eat?
Yes, homegrown mushrooms are safe to eat, provided you use clean, sterilized equipment and follow proper growing techniques. Always ensure you are growing a known edible species and avoid consuming any mushrooms that you are unsure about. If you have any doubts, consult a mycology expert.
Is growing mushrooms difficult?
While it requires some attention to detail and patience, growing mushrooms at home is not as difficult as many people think. With clear instructions and a little practice, anyone can successfully cultivate their own delicious mushrooms. The rewarding experience makes the effort worthwhile!
What are the benefits of growing my own mushrooms?
Growing your own mushrooms offers numerous benefits, including access to fresh, high-quality mushrooms, the satisfaction of cultivating your own food, a fun and engaging hobby, and the opportunity to experiment with different varieties and techniques. It’s also a sustainable way to enjoy delicious fungi!
Leave a Comment