
Grow Napa Cabbage Backyard: Imagine stepping into your backyard and harvesting crisp, delicious Napa cabbage, ready to be transformed into kimchi, stir-fries, or fresh salads. Sounds dreamy, right? Well, it doesn’t have to be just a dream! This DIY guide is packed with simple, effective tricks to help you successfully grow Napa cabbage right in your own backyard, even if you’re a beginner gardener.
Napa cabbage, also known as Chinese cabbage, has a rich history, deeply rooted in Asian cuisine and culture. For centuries, it’s been a staple ingredient, prized for its versatility and nutritional value. But you don’t have to travel to Asia to enjoy its goodness. With a little know-how, you can cultivate this amazing vegetable yourself.
Why should you bother with this DIY project? Because fresh, homegrown produce tastes infinitely better than anything you can buy at the store! Plus, you’ll know exactly what’s gone into growing your Napa cabbage – no harmful pesticides or mystery ingredients. More importantly, growing your own food is incredibly rewarding and therapeutic. I’m excited to share these simple tricks to help you grow Napa Cabbage Backyard and enjoy the satisfaction of harvesting your own delicious, healthy vegetables. Let’s get started!
Napa-Kohl im eigenen Garten anbauen: Eine Schritt-für-Schritt-Anleitung
Ich liebe es, frisches Gemüse direkt aus meinem Garten zu ernten, und Napa-Kohl ist da keine Ausnahme! Er ist vielseitig, lecker und überraschend einfach anzubauen, selbst wenn du kein erfahrener Gärtner bist. In diesem Artikel zeige ich dir, wie du Napa-Kohl erfolgreich in deinem eigenen Garten anbauen kannst. Keine Sorge, ich führe dich Schritt für Schritt durch den Prozess.
Was du brauchst:
Bevor wir loslegen, stelle sicher, dass du alles Notwendige zur Hand hast:
* Napa-Kohl-Samen (am besten von einer vertrauenswürdigen Quelle)
* Anzuchtschalen oder kleine Töpfe (optional, für die Voranzucht)
* Anzuchterde (optional, für die Voranzucht)
* Gartenboden (gut durchlässig und reich an organischen Stoffen)
* Kompost oder gut verrotteter Mist
* Gartengeräte: Spaten, Harke, Gießkanne oder Gartenschlauch
* Mulch (Stroh, Holzhackschnitzel oder Grasschnitt)
* Pflanzenschutzmittel (optional, je nach Bedarf)
* Schneckenkorn (optional, wenn du Probleme mit Schnecken hast)
Die Vorbereitung: Der Schlüssel zum Erfolg
Die richtige Vorbereitung ist das A und O für eine erfolgreiche Napa-Kohl-Ernte. Hier sind die Schritte, die du beachten solltest:
1. Den richtigen Zeitpunkt wählen: Napa-Kohl ist eine Kühlwetterpflanze. Das bedeutet, dass er am besten im Frühjahr oder Herbst angebaut wird. Die ideale Pflanzzeit ist etwa 4-6 Wochen vor dem letzten Frost im Frühjahr oder 6-8 Wochen vor dem ersten Frost im Herbst. Ich persönlich bevorzuge die Herbstpflanzung, da der Kohl dann in Ruhe wachsen kann und weniger anfällig für Schädlinge ist.
2. Den Standort vorbereiten: Napa-Kohl braucht viel Sonne, mindestens 6 Stunden pro Tag. Wähle also einen sonnigen Platz in deinem Garten. Der Boden sollte gut durchlässig sein und reich an organischen Stoffen. Wenn dein Boden schwer und lehmig ist, kannst du ihn mit Kompost oder gut verrottetem Mist verbessern. Grabe den Boden um und entferne Steine und Unkraut.
3. Den Boden verbessern: Napa-Kohl ist ein Starkzehrer, das heißt, er braucht viele Nährstoffe. Arbeite vor dem Pflanzen reichlich Kompost oder gut verrotteten Mist in den Boden ein. Das sorgt für eine gute Grundlage und versorgt die Pflanzen mit den notwendigen Nährstoffen. Ich verwende gerne eine Mischung aus Kompost und Hornspänen, um den Boden optimal vorzubereiten.
Die Aussaat: Zwei Wege zum Napa-Kohl
Es gibt zwei Möglichkeiten, Napa-Kohl anzubauen: durch Direktsaat oder durch Voranzucht. Beide Methoden haben ihre Vor- und Nachteile.
Direktsaat
Die Direktsaat ist die einfachste Methode, aber sie ist nicht immer die erfolgreichste.
1. Samen aussäen: Säe die Samen etwa 1 cm tief und 2-3 cm auseinander in Reihen. Der Abstand zwischen den Reihen sollte etwa 45-60 cm betragen.
2. Gießen: Halte den Boden feucht, aber nicht nass.
3. Ausdünnen: Sobald die Sämlinge etwa 5-7 cm groß sind, dünne sie auf einen Abstand von 30-45 cm aus. Das gibt den Pflanzen genügend Platz zum Wachsen.
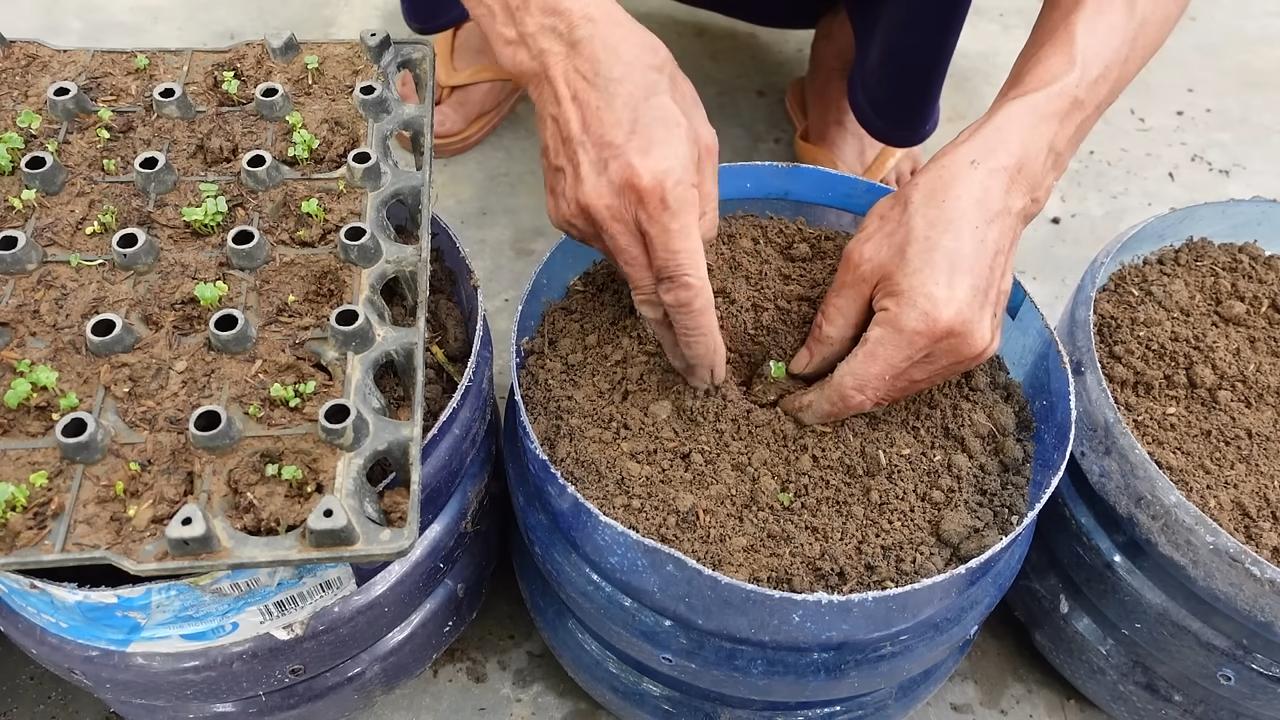
Voranzucht
Die Voranzucht ist etwas aufwendiger, aber sie bietet einige Vorteile. Du kannst die Pflanzen früher ins Freie setzen und sie sind weniger anfällig für Schädlinge.
1. Samen aussäen: Säe die Samen etwa 1 cm tief in Anzuchtschalen oder kleine Töpfe mit Anzuchterde.
2. Gießen: Halte die Erde feucht, aber nicht nass.
3. Standort: Stelle die Anzuchtschalen an einen hellen und warmen Ort.
4. Pikieren: Sobald die Sämlinge groß genug sind, pikiere sie in größere Töpfe.
5. Abhärten: Bevor du die Pflanzen ins Freie setzt, härte sie ab, indem du sie tagsüber für einige Stunden nach draußen stellst.
Das Pflanzen: Der Umzug ins Freie
Sobald die Sämlinge etwa 10-15 cm groß sind oder die Gefahr von Frost vorüber ist (bei Direktsaat), ist es Zeit, sie ins Freie zu pflanzen.
1. Pflanzlöcher graben: Grabe Pflanzlöcher im Abstand von 30-45 cm.
2. Pflanzen einsetzen: Setze die Pflanzen vorsichtig in die Pflanzlöcher und fülle sie mit Erde auf.
3. Gießen: Gieße die Pflanzen gründlich an.
4. Mulchen: Mulche den Boden um die Pflanzen herum mit Stroh, Holzhackschnitzeln oder Grasschnitt. Das hilft, die Feuchtigkeit im Boden zu halten und Unkraut zu unterdrücken.
Die Pflege: Damit dein Napa-Kohl prächtig gedeiht
Die richtige Pflege ist entscheidend für eine reiche Ernte. Hier sind die wichtigsten Punkte:
1. Gießen: Napa-Kohl braucht regelmäßig Wasser, besonders während trockener Perioden. Gieße die Pflanzen am besten morgens, damit die Blätter tagsüber abtrocknen können. Vermeide es, die Blätter zu benetzen, da dies Pilzkrankheiten fördern kann.
2. Düngen: Dünge die Pflanzen alle 2-3 Wochen mit einem organischen Dünger. Ich verwende gerne Brennnesseljauche oder Komposttee.
3. Unkraut entfernen: Halte den Boden um die Pflanzen herum unkrautfrei. Unkraut konkurriert mit dem Napa-Kohl um Nährstoffe und Wasser.
4. Schädlinge und Krankheiten bekämpfen: Napa-Kohl kann von verschiedenen Schädlingen und Krankheiten befallen werden. Achte auf Anzeichen von Befall und bekämpfe sie rechtzeitig.
* Kohlweißlinge: Die Raupen des Kohlweißlings fressen gerne an den Blättern des Napa-Kohls. Du kannst sie absammeln oder mit einem biologischen Insektizid bekämpfen.
* Erdflöhe: Erdflöhe sind kleine Käfer, die Löcher in die Blätter fressen. Du kannst sie mit einem Insektizid bekämpfen oder den Boden mit einem Netz abdecken.
* Schnecken: Schnecken können großen Schaden anrichten, besonders an jungen Pflanzen. Du kannst Schneckenkorn verwenden oder die Pflanzen mit Kupferband schützen.
* Falscher Mehltau: Falscher Mehltau ist eine Pilzkrankheit, die sich durch gelbe Flecken auf den Blättern äußert. Du kannst sie mit einem Fungizid bekämpfen oder für eine gute Belüftung sorgen.
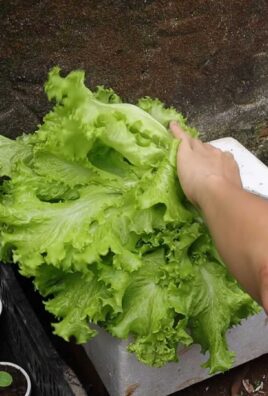
Die Ernte: Der Lohn der Mühe
Napa-Kohl ist erntereif, wenn die Köpfe fest und geschlossen sind. Das ist in der Regel etwa 70-80 Tage nach der Aussaat der Fall.
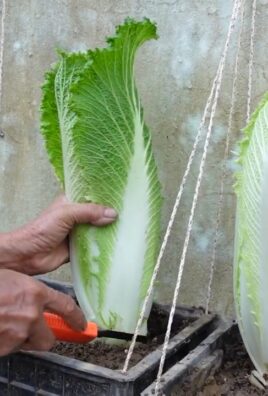
1. Ernten: Schneide die Köpfe mit einem scharfen Messer ab.
2. Lagern: Napa-Kohl kann im Kühlschrank etwa 1-2 Wochen gelagert werden.
Zusätzliche Tipps für eine erfolgreiche Ernte:
* Fruchtfolge beachten: Baue Napa-Kohl nicht jedes Jahr am selben Standort an. Wechsle die Anbaufläche, um Krankheiten und Schädlingen vorzubeugen.
* Sortenwahl: Es gibt verschiedene Napa-Kohl-Sorten. Wähle eine Sorte, die für dein Klima geeignet ist.
* Bodenanalyse: Eine Bodenanalyse kann dir helfen, den Nährstoffgehalt deines Bodens zu bestimmen und ihn entsprechend zu verbessern.
* Beobachtung: Beobachte deine Pflanzen regelmäßig, um Probleme frühzeitig zu erkennen und zu beheben.
Ich hoffe, diese Anleitung hilft dir dabei, Napa-Kohl erfolgreich in deinem eigenen Garten anzubauen. Viel Erfolg und guten Appetit!
Conclusion
Growing your own Napa cabbage in your backyard isn’t just a gardening project; it’s an investment in fresh, flavorful, and healthy eating. Forget the wilted, overpriced heads at the grocery store – imagine crisp, vibrant Napa cabbage, ready to be harvested just steps from your kitchen. This DIY approach offers unparalleled control over the quality of your produce, ensuring it’s free from harmful pesticides and packed with nutrients. You’ll be amazed at the difference in taste and texture compared to store-bought varieties.
But the benefits extend beyond just superior flavor. Cultivating your own Napa cabbage connects you to the natural world, providing a rewarding and therapeutic experience. From nurturing the seedlings to witnessing their growth, the process is both educational and fulfilling. Plus, you’ll be contributing to a more sustainable lifestyle by reducing your reliance on commercially grown produce and minimizing your carbon footprint.
Ready to take your Napa cabbage cultivation to the next level? Consider these variations:
* **Succession Planting:** Plant seeds every few weeks to ensure a continuous harvest throughout the growing season. This way, you’ll always have fresh Napa cabbage on hand.
* **Companion Planting:** Enhance your Napa cabbage’s growth by planting it alongside beneficial companions like dill, chamomile, or rosemary. These herbs can deter pests and attract pollinators, creating a healthier garden ecosystem.
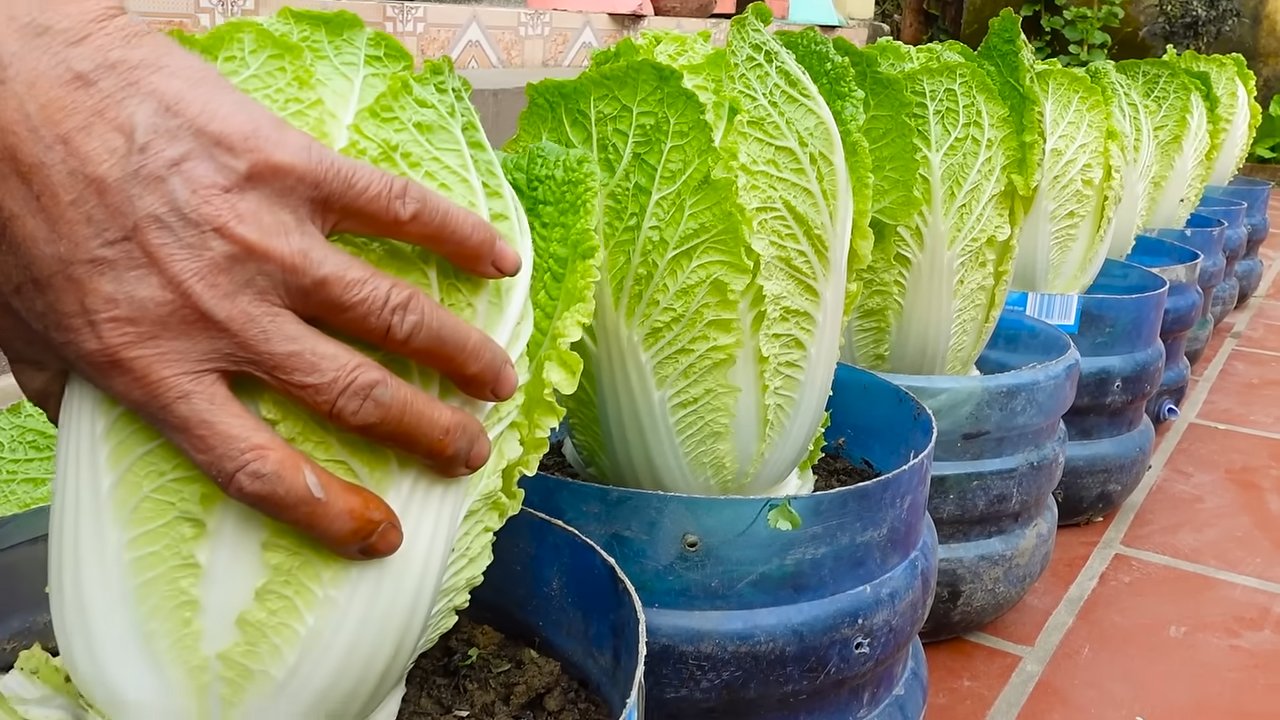
* **Container Gardening:** If you have limited space, don’t despair! Napa cabbage can thrive in large containers, making it accessible to apartment dwellers and those with small yards. Just ensure the container has adequate drainage and is placed in a sunny location.
* Experiment with Varieties: While traditional Napa cabbage is excellent, explore different cultivars like ‘Blues’, ‘Optiko’, or ‘China Express’ for variations in size, shape, and disease resistance.
Don’t be intimidated by the prospect of growing your own Napa cabbage. With a little planning and effort, you can enjoy a bountiful harvest of this versatile vegetable. We encourage you to embark on this rewarding journey and discover the joys of homegrown produce.
We’re confident that you’ll find this DIY trick to be a game-changer in your culinary adventures. So, grab your seeds, prepare your soil, and get ready to experience the satisfaction of growing your own delicious Napa cabbage.
We’d love to hear about your experiences! Share your tips, successes, and challenges in the comments below. Let’s build a community of passionate gardeners and inspire others to embrace the joys of homegrown food. What are you waiting for? Start growing your own Napa cabbage today!
Frequently Asked Questions (FAQ)
What is the best time of year to plant Napa cabbage?
The ideal time to plant Napa cabbage depends on your climate. In general, it’s best to plant it in the spring or late summer for a fall harvest. Napa cabbage prefers cooler temperatures and can bolt (go to seed) in hot weather. For spring planting, start seeds indoors 6-8 weeks before the last expected frost. For fall planting, sow seeds directly into the garden in late summer, about 6-8 weeks before the first expected frost. Check your local frost dates for the most accurate timing.
How much sunlight does Napa cabbage need?
Napa cabbage requires at least 6 hours of direct sunlight per day to thrive. Choose a location in your garden that receives ample sunlight throughout the day. If you’re growing Napa cabbage in containers, make sure to place them in a sunny spot. Insufficient sunlight can result in leggy growth and smaller heads.
What kind of soil is best for growing Napa cabbage?
Napa cabbage prefers well-drained, fertile soil that is rich in organic matter. Amend your soil with compost or well-rotted manure before planting to improve its fertility and drainage. The ideal soil pH for Napa cabbage is between 6.0 and 7.5. You can test your soil pH using a soil testing kit and adjust it accordingly.
How often should I water Napa cabbage?
Napa cabbage needs consistent moisture to grow properly. Water deeply and regularly, especially during dry periods. Aim to keep the soil consistently moist but not waterlogged. Mulching around the plants can help retain moisture and suppress weeds. Check the soil moisture regularly by sticking your finger into the soil about an inch deep. If it feels dry, it’s time to water.
What are some common pests and diseases that affect Napa cabbage?
Napa cabbage can be susceptible to several pests and diseases, including cabbage worms, aphids, flea beetles, clubroot, and downy mildew. Regularly inspect your plants for signs of infestation or disease. Use organic pest control methods, such as insecticidal soap or neem oil, to control pests. To prevent diseases, practice crop rotation, ensure good air circulation, and avoid overhead watering. If you encounter clubroot, amend the soil with lime to raise the pH.
How do I harvest Napa cabbage?
Napa cabbage is typically ready to harvest 70-80 days after planting. The head should be firm and compact. To harvest, use a sharp knife to cut the head at the base of the plant. Remove any yellowing or damaged outer leaves. You can store Napa cabbage in the refrigerator for several weeks.
Can I grow Napa cabbage in containers?
Yes, Napa cabbage can be successfully grown in containers. Choose a large container (at least 12 inches in diameter) with good drainage. Use a high-quality potting mix that is rich in organic matter. Water regularly and fertilize every few weeks with a balanced fertilizer. Place the container in a sunny location that receives at least 6 hours of direct sunlight per day.
How can I prevent Napa cabbage from bolting (going to seed)?
Bolting is often triggered by hot weather or stress. To prevent bolting, plant Napa cabbage at the appropriate time of year (spring or late summer) to avoid extreme temperatures. Provide consistent moisture and avoid letting the plants dry out. Mulching can also help keep the soil cool. Choose bolt-resistant varieties if you live in an area with hot summers.
What are some ways to use Napa cabbage in cooking?
Napa cabbage is a versatile vegetable that can be used in a variety of dishes. It can be eaten raw in salads, stir-fried, steamed, or used in soups and stews. It’s also a key ingredient in kimchi and other fermented dishes. The mild flavor of Napa cabbage makes it a great addition to many recipes.
Is Napa cabbage nutritious?
Yes, Napa cabbage is a nutritious vegetable that is low in calories and high in vitamins and minerals. It is a good source of vitamin C, vitamin K, folate, and potassium. It also contains antioxidants and fiber. Adding Napa cabbage to your diet can contribute to overall health and well-being.
Leave a Comment