
Grow string beans like a pro, even if you think you have a black thumb! Have you ever dreamed of stepping outside your back door and harvesting a basketful of crisp, delicious string beans, fresh from your own garden? I know I have! There’s something incredibly satisfying about nurturing a plant from seed to table, and with a few clever tricks and DIY hacks, you can experience that joy too.
String beans, also known as green beans or snap beans, have a rich history, cultivated for centuries across the globe. From their humble beginnings in South America, they’ve become a staple in cuisines worldwide. But beyond their culinary appeal, growing your own string beans offers a unique connection to nature and a sense of self-sufficiency.
Why bother with these DIY tricks, you ask? Well, let’s face it, gardening can sometimes feel overwhelming. Pests, diseases, and unpredictable weather can quickly turn your gardening dreams into a frustrating reality. That’s where these simple yet effective hacks come in. I’m going to share some of my favorite tips and tricks to help you grow string beans successfully, even if you’re short on space, time, or experience. Get ready to unlock the secrets to a bountiful harvest and enjoy the freshest, most flavorful string beans you’ve ever tasted!
DIY: From Seed to Supper – Growing String Beans Like a Pro!
Okay, so you want to grow string beans? Awesome! It’s easier than you think, and there’s nothing quite like the taste of fresh, homegrown beans. I’m going to walk you through everything you need to know, from picking the right spot to harvesting your bounty. Let’s get started!
Choosing Your Bean Variety
First things first, let’s talk beans! There are two main types: bush beans and pole beans.
* **Bush Beans:** These are compact and don’t need support. They’re great for smaller gardens or containers. They produce most of their beans at once, so you’ll have a big harvest all at the same time.
* **Pole Beans:** These are climbers! They need a trellis or other support to grow on. They produce beans over a longer period, giving you a steady supply throughout the season.
Some popular varieties include:
* **Bush:** Blue Lake Bush, Contender, Provider
* **Pole:** Kentucky Wonder, Scarlet Runner, Fortex
I personally love Kentucky Wonder pole beans because they’re super productive and taste amazing. But really, any of these will do the trick!
Preparing Your Garden Bed
String beans are pretty easygoing, but they do appreciate a little prep work.
* **Sunlight:** They need at least 6-8 hours of sunlight per day. So, pick a sunny spot in your garden.
* **Soil:** Well-drained soil is key. Beans don’t like to sit in soggy soil. If your soil is heavy clay, amend it with compost or other organic matter to improve drainage.
* **Soil pH:** Ideally, your soil pH should be between 6.0 and 7.0. You can test your soil with a home testing kit or send a sample to your local agricultural extension office.
* **Fertilizer:** Beans are legumes, which means they can actually fix nitrogen in the soil. So, you don’t need to add a lot of nitrogen fertilizer. In fact, too much nitrogen can actually hinder bean production. A balanced fertilizer like 10-10-10 applied at planting time is usually sufficient.
Planting Your String Beans
Alright, time to get those beans in the ground!
1. **Timing is Everything:** Wait until the danger of frost has passed and the soil has warmed up to at least 60°F (15°C). Planting too early in cold soil can lead to poor germination. I usually wait until a week or two after the last expected frost.
2. **Direct Sowing:** String beans are best direct-sown, meaning you plant the seeds directly in the garden. They don’t transplant well.
3. **Spacing:**
* **Bush Beans:** Plant seeds 1-2 inches deep and 2-4 inches apart in rows that are 18-24 inches apart.
* **Pole Beans:** Plant seeds 1-2 inches deep and 4-6 inches apart at the base of your trellis or support.
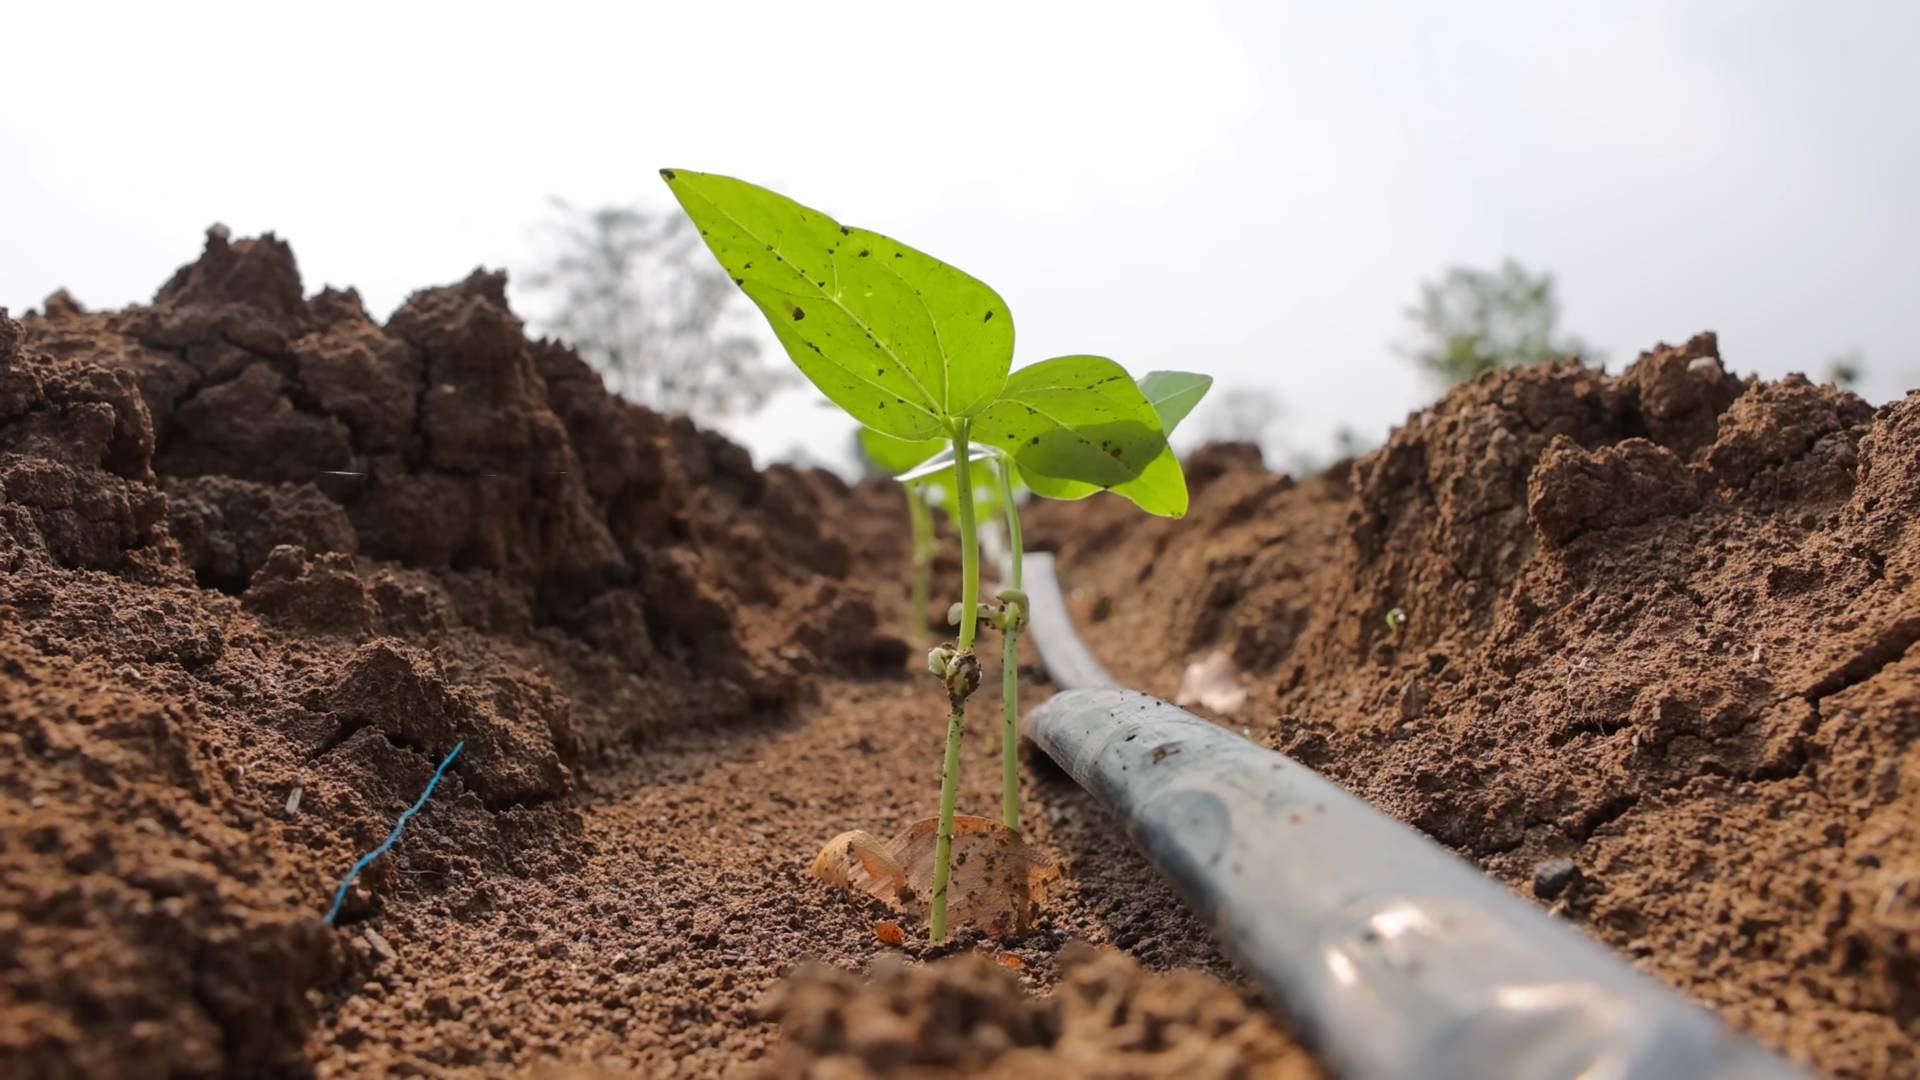
4. **Watering:** Water the soil thoroughly after planting. Keep the soil consistently moist, but not soggy, until the seeds germinate.
5. **Germination:** Bean seeds usually germinate in 5-10 days, depending on the soil temperature and moisture levels.
Building a Trellis for Pole Beans
If you’re growing pole beans, you’ll need a trellis or some other kind of support for them to climb on. Here are a few options:
* **Bamboo Trellis:** This is a simple and inexpensive option. You can lash bamboo poles together to create a teepee or A-frame trellis.
* **Netting:** You can stretch netting between two posts to create a climbing surface.
* **Wire Mesh:** A section of wire mesh can also be used as a trellis.
* **Existing Structures:** You can even train pole beans to climb up a fence or a sturdy shrub.
I personally like using bamboo poles because they’re natural and blend in well with the garden.
1. **Gather Your Materials:** You’ll need bamboo poles (or other sturdy poles), twine or wire, and a pair of scissors or wire cutters.
2. **Create the Frame:** Arrange the poles in a teepee shape, with the tops leaning towards each other.
3. **Secure the Top:** Use twine or wire to lash the tops of the poles together securely.
4. **Bury the Base:** Push the base of each pole firmly into the ground to create a stable structure.
5. **Add Horizontal Supports (Optional):** For extra support, you can add horizontal poles or twine between the vertical poles.
Caring for Your String Beans
Once your beans are up and growing, here’s what you need to do to keep them happy and healthy:
* **Watering:** Water regularly, especially during dry spells. Aim to keep the soil consistently moist, but not waterlogged. Water at the base of the plants to avoid wetting the foliage, which can lead to fungal diseases.
* **Weeding:** Keep the area around your bean plants free of weeds. Weeds compete with beans for water and nutrients.
* **Mulching:** Apply a layer of mulch around your bean plants to help retain moisture, suppress weeds, and regulate soil temperature. Straw, wood chips, or shredded leaves are all good options.
* **Fertilizing:** If your bean plants are looking pale or stunted, you can give them a boost with a side dressing of balanced fertilizer. Follow the instructions on the fertilizer package.
* **Pest Control:** Keep an eye out for common bean pests like aphids, bean beetles, and spider mites. You can control these pests with insecticidal soap, neem oil, or by handpicking them off the plants.
* **Supporting Pole Beans:** As your pole beans grow, gently guide them onto the trellis. They’ll eventually start climbing on their own, but a little encouragement can help.
Dealing with Common Bean Problems
Even with the best care, you might encounter a few problems along the way. Here are some common issues and how to deal with them:
* **Poor Germination:** If your bean seeds aren’t germinating, it could be due to cold soil, poor-quality seeds, or overwatering. Make sure the soil is warm enough, use fresh seeds, and avoid overwatering.
* **Yellowing Leaves:** Yellowing leaves can be a sign of nutrient deficiency, overwatering, or disease. Check your soil pH and nutrient levels, make sure the soil is well-drained, and look for signs of disease.
* **Bean Beetles:** Bean beetles are small, orange beetles that can skeletonize bean leaves. Handpick them off the plants or spray with insecticidal soap or neem oil.
* **Aphids:** Aphids are small, sap-sucking insects that can weaken bean plants. Spray them off with a strong stream of water or use insecticidal soap.
* **Fungal Diseases:** Fungal diseases like powdery mildew and bean rust can cause spots and discoloration on bean leaves. Improve air circulation around the plants, avoid wetting the foliage, and treat with a fungicide if necessary.
Harvesting Your String Beans
This is the best part! Harvesting your own string beans is so rewarding.
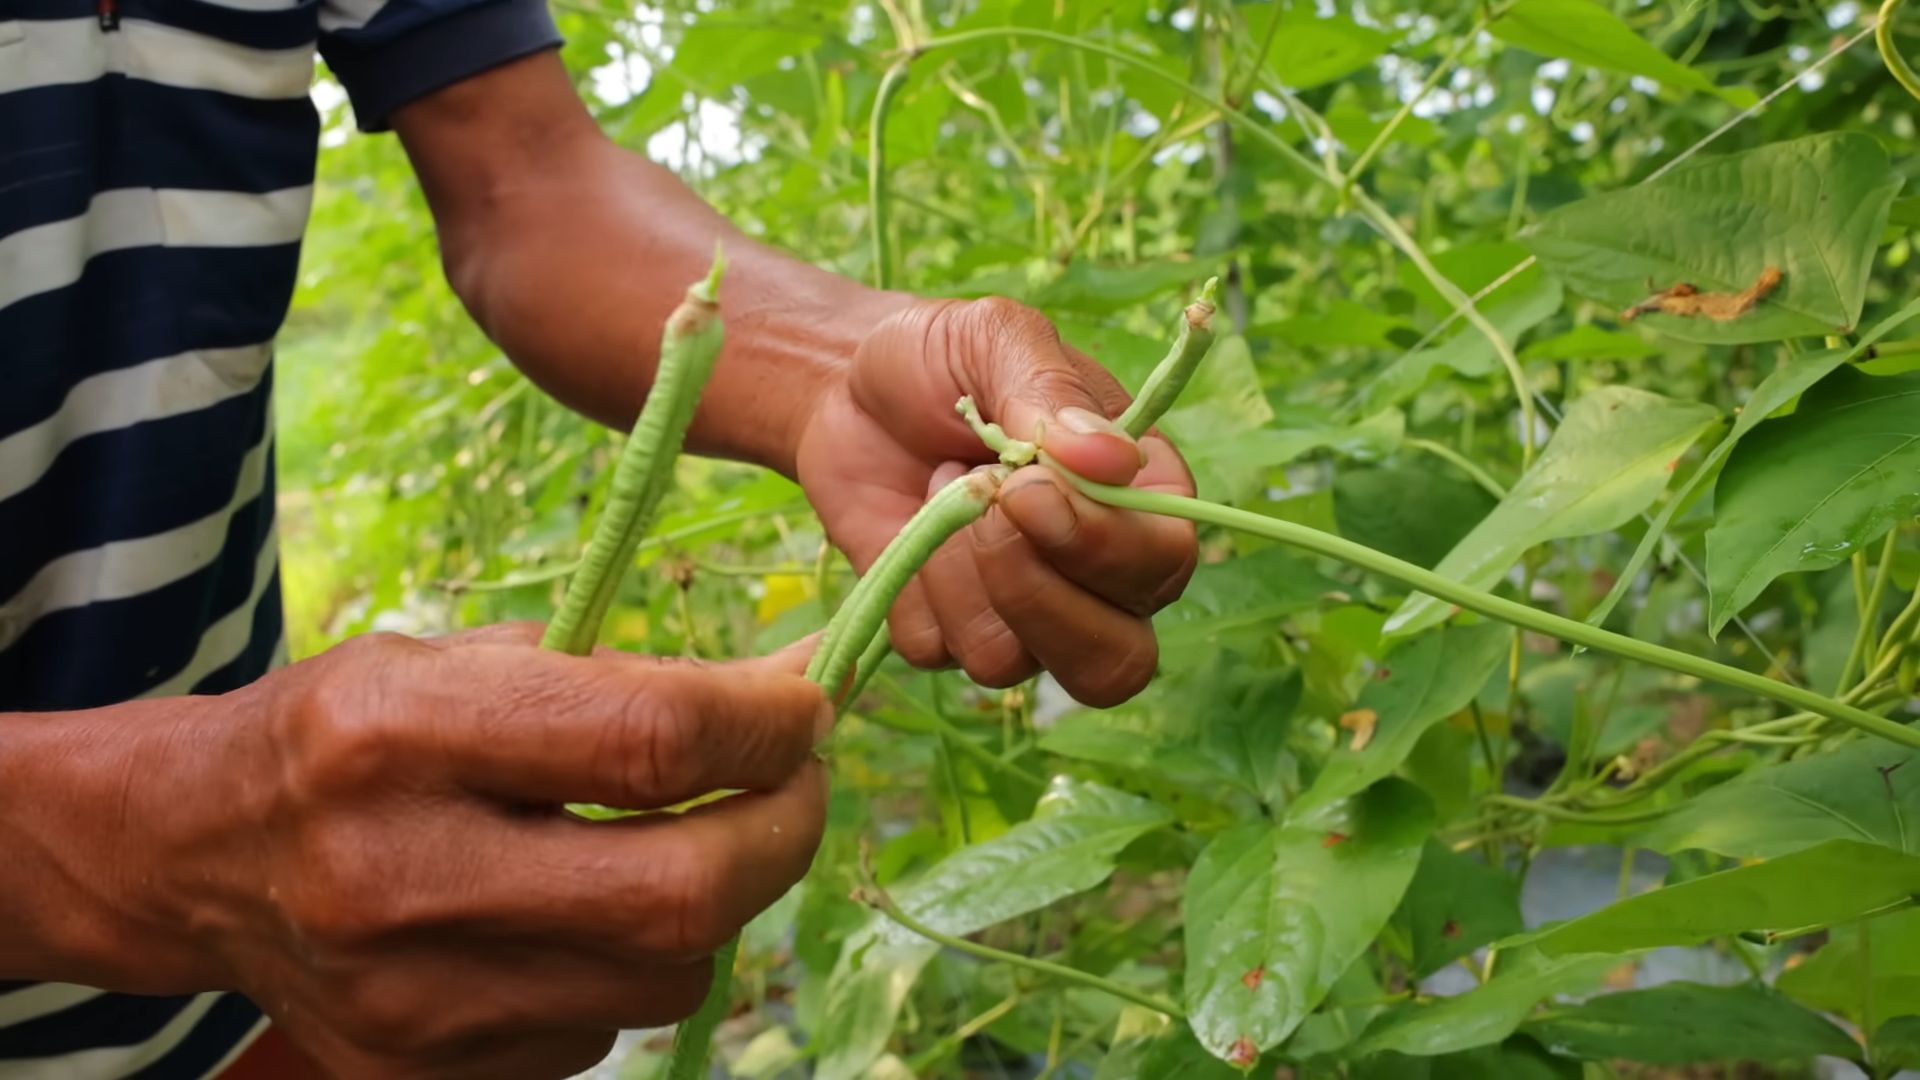
1. **Timing:** Harvest your string beans when they are young and tender, before the seeds inside the pods become too large. The pods should be firm and snap easily when bent.
2. **Frequency:** Harvest frequently, every few days, to encourage continued production.
3. **Technique:** Gently snap or cut the beans off the plant, being careful not to damage the stems.
4. **Storage:** Freshly harvested string beans are best eaten right away. You can store them in the refrigerator for a few days, but they will lose their crispness over time.
5. **Preserving:** If you have a bumper crop, you can preserve your string beans by canning, freezing, or pickling.
Enjoying Your Homegrown String Beans
Now that you’ve harvested your delicious string beans, it’s time to enjoy them! Here are a few ideas:
* **Steamed or Boiled:** Simply steam or boil your string beans until they are tender-crisp. Serve them with a little butter, salt, and pepper.
* **Sautéed:** Sauté your string beans in a pan with olive oil, garlic, and your favorite herbs.
* **Roasted:** Roast your string beans in the oven with olive oil, salt, and pepper.
* **In Salads:** Add raw or cooked string beans to salads for a crunchy and nutritious boost.
* **Pickled:** Pickle your string beans for a tangy and flavorful treat.
I personally love sautéing my string beans with garlic and a little bit of lemon juice. So simple, yet so delicious!
Saving Bean Seeds (Optional)
If you want to save seeds from your string beans for next year, here’s how:
1. **Choose Healthy Plants:** Select healthy, vigorous plants that produce high-quality beans.
2. **Allow Pods to Mature:** Allow some of the bean pods
Conclusion
So, there you have it! Growing your own string beans isn’t just a fun gardening project; it’s a gateway to incredibly fresh, flavorful, and nutritious meals. Forget those limp, often tasteless beans from the grocery store. With this simple DIY trick, you’ll be harvesting crisp, vibrant string beans right from your backyard, balcony, or even a sunny windowsill.
The beauty of this method lies in its simplicity and accessibility. You don’t need acres of land or a green thumb of mythical proportions. Just a few basic supplies, a little patience, and the willingness to get your hands dirty are all it takes to unlock a world of homegrown goodness. Think of the satisfaction of serving a dish featuring ingredients you nurtured from seed to table!
But the benefits extend beyond just taste and convenience. Growing your own food connects you to the natural world, reduces your carbon footprint by minimizing transportation, and gives you complete control over what goes into your produce. No pesticides, no questionable additives – just pure, unadulterated string bean goodness.
Ready to take your string bean game to the next level? Consider these variations:
* Trellising Techniques: Experiment with different trellising methods. While a simple stake works wonders, you could also try A-frame trellises, teepee trellises, or even repurpose old ladders for a rustic, charming look. Different trellises can affect airflow and sunlight exposure, potentially impacting your yield.
* Companion Planting: Explore the world of companion planting. Marigolds, for example, are known to deter bean beetles, while nasturtiums can attract aphids away from your precious string beans. Basil is another great companion plant, believed to improve the flavor of the beans.
* Succession Planting: Extend your harvest season by practicing succession planting. Sow new seeds every two to three weeks to ensure a continuous supply of fresh string beans throughout the summer and fall.
* Different Varieties: Don’t limit yourself to just one type of string bean! Explore the diverse world of bean varieties. Try bush beans for a compact, space-saving option, or pole beans for a climbing variety that maximizes vertical space. Consider different colors, shapes, and flavors – from the classic green to the vibrant purple of ‘Royal Burgundy’ or the unique texture of ‘Dragon Tongue’.
This DIY trick for growing string beans is more than just a gardening tip; it’s an invitation to embrace a more sustainable, flavorful, and rewarding way of life. So, grab your seeds, prepare your soil, and get ready to experience the joy of harvesting your own homegrown string beans.
We’re confident that you’ll be amazed by the results. And we’d love to hear about your experience! Share your photos, tips, and triumphs with us in the comments below. Let’s build a community of string bean enthusiasts and inspire others to discover the magic of growing their own food. Happy gardening!
Frequently Asked Questions (FAQ)
What kind of soil is best for growing string beans?
String beans thrive in well-drained soil that is rich in organic matter. A slightly acidic to neutral pH (around 6.0 to 7.0) is ideal. Before planting, amend your soil with compost or well-rotted manure to improve drainage and fertility. If your soil is heavy clay, consider adding sand or perlite to improve drainage. Avoid soils that are overly compacted or waterlogged, as this can lead to root rot. A soil test can provide valuable insights into your soil’s pH and nutrient levels, allowing you to make necessary adjustments before planting.
How much sunlight do string beans need?
String beans require at least 6-8 hours of direct sunlight per day to produce a bountiful harvest. Choose a planting location that receives ample sunlight throughout the day. If you’re growing string beans indoors, supplement with grow lights if necessary. Insufficient sunlight can result in leggy plants with poor yields. Observe your planting location throughout the day to ensure it receives adequate sunlight.
How often should I water my string beans?
String beans need consistent moisture, especially during germination and pod development. Water deeply and regularly, aiming to keep the soil consistently moist but not waterlogged. Avoid overhead watering, as this can promote fungal diseases. Instead, water at the base of the plants. Mulching around the plants can help retain moisture and suppress weeds. Check the soil moisture regularly by sticking your finger into the soil. If the top inch feels dry, it’s time to water.
When is the best time to harvest string beans?
String beans are typically ready to harvest about 50-60 days after planting, depending on the variety. Harvest them when the pods are firm, crisp, and tender, before the beans inside become too large and the pods become tough. Pick the beans regularly to encourage continued production. Use scissors or pruning shears to avoid damaging the plant. Overripe beans will be tough and less flavorful.
What are some common pests and diseases that affect string beans?
String beans can be susceptible to various pests and diseases, including bean beetles, aphids, spider mites, and fungal diseases like powdery mildew and rust. Regularly inspect your plants for signs of infestation or disease. Use organic pest control methods, such as insecticidal soap or neem oil, to control pests. Ensure good air circulation to prevent fungal diseases. Remove any infected leaves or plants promptly to prevent the spread of disease. Companion planting with marigolds or basil can also help deter pests.
Can I grow string beans in containers?
Yes, you can successfully grow string beans in containers, especially bush bean varieties. Choose a container that is at least 12 inches deep and wide to provide adequate space for the roots. Use a well-draining potting mix and ensure the container has drainage holes. Water regularly and fertilize as needed. Place the container in a sunny location that receives at least 6-8 hours of direct sunlight per day. Provide support for climbing varieties, such as a trellis or stake.
How do I fertilize my string beans?
String beans are relatively light feeders, but they benefit from a balanced fertilizer applied at planting and again during pod development. Use a fertilizer that is low in nitrogen and higher in phosphorus and potassium, as excessive nitrogen can promote leafy growth at the expense of pod production. Avoid over-fertilizing, as this can damage the plants. Compost tea or fish emulsion are excellent organic fertilizer options.
What is the best way to store string beans after harvesting?
Freshly harvested string beans are best stored in the refrigerator in a plastic bag or container. They will typically last for about a week. You can also blanch and freeze string beans for longer storage. To blanch, boil the beans for 2-3 minutes, then immediately transfer them to an ice bath to stop the cooking process. Drain well and freeze in freezer bags or containers.
My string bean plants are flowering, but not producing beans. What could be the problem?
Several factors can contribute to poor bean production, including insufficient pollination, extreme temperatures, and nutrient deficiencies. Ensure that your plants are receiving adequate sunlight and water. Avoid using pesticides that can harm pollinators. If temperatures are consistently above 90°F (32°C) or below 60°F (15°C), pollination may be inhibited. Consider hand-pollinating the flowers by gently shaking the plants or using a small brush to transfer pollen from one flower to another. Check the soil nutrient levels and amend as needed.
Are there any specific string bean varieties that are easier to grow for beginners?
Yes, some string bean varieties are known for their ease of growth and disease resistance, making them ideal for beginners. Bush bean varieties like ‘Blue Lake Bush’ and ‘Contender’ are popular choices. Pole bean varieties like ‘Kentucky Wonder’ are also relatively easy to grow, but they require a trellis or other support structure. Look for varieties that are labeled as “disease-resistant” or “easy to grow” when selecting your seeds.
Leave a Comment