
Grow Sweet Potatoes at Home and unlock the secrets to a bountiful harvest right in your backyard! Imagine sinking your teeth into a delicious, homegrown sweet potato, knowing you nurtured it from sprout to supper. Sounds rewarding, right? Well, it is! For centuries, sweet potatoes have been a staple crop in many cultures, prized for their nutritional value and versatility. From the indigenous peoples of South America, where they originated, to their widespread adoption across Asia and Africa, sweet potatoes have nourished generations.
But let’s face it, the thought of growing your own food can sometimes feel daunting. That’s where this DIY guide comes in. I’m here to show you that you don’t need acres of land or a green thumb to grow sweet potatoes at home successfully. Whether you have a sprawling garden or just a sunny balcony, I’ll share simple, effective tricks and hacks that will make the process easy and enjoyable.
In today’s world, where we’re increasingly conscious of where our food comes from, growing your own sweet potatoes is a fantastic way to connect with nature, reduce your carbon footprint, and enjoy fresh, healthy produce. Plus, there’s nothing quite like the satisfaction of harvesting your own sweet potatoes and sharing them with family and friends. So, let’s get started and transform your space into a sweet potato paradise!
Growing Sweet Potatoes at Home: A Beginner’s Guide
Hey there, fellow gardening enthusiasts! Ever thought about growing your own sweet potatoes? It’s surprisingly easier than you might think, and the reward of harvesting your own homegrown goodness is totally worth it. I’m going to walk you through the whole process, from sprouting slips to harvesting those delicious tubers. Let’s get started!
What You’ll Need
Before we dive in, let’s gather our supplies. Here’s a list of everything you’ll need to successfully grow sweet potatoes at home:
* Sweet Potatoes: Choose organic sweet potatoes from the grocery store or a local farmer’s market. Organic is key here, as non-organic ones might be treated to prevent sprouting.
* Glass Jars or Containers: These will be used to sprout your sweet potatoes. Mason jars work great!
* Toothpicks: To suspend the sweet potato in the water.
* Potting Mix: A well-draining potting mix is essential for starting your slips.
* Garden Soil: Rich, loose soil is ideal for planting your sweet potato slips in the garden. Amend your soil with compost if needed.
* Gardening Tools: Shovel, trowel, watering can, and gardening gloves.
* Optional: Rooting hormone (to encourage faster root development).
Sprouting Sweet Potato Slips: The Water Method
The first step in growing sweet potatoes is sprouting “slips.” These are the leafy shoots that will eventually become your sweet potato plants. Here’s how to do it using the water method:
1. Prepare the Sweet Potato: Wash your sweet potato thoroughly to remove any dirt or debris.
2. Insert Toothpicks: Insert toothpicks around the middle of the sweet potato, spacing them evenly. These toothpicks will act as supports to suspend the potato in the jar.
3. Suspend in Water: Fill your glass jar with water, leaving about an inch of space at the top. Carefully place the sweet potato in the jar, using the toothpicks to suspend it so that the bottom half is submerged in water.
4. Find a Sunny Spot: Place the jar in a warm, sunny location. A windowsill that receives plenty of sunlight is perfect.
5. Change the Water Regularly: Change the water every few days to prevent mold and keep it fresh.
6. Wait for Sprouts: Be patient! It can take several weeks for sprouts to appear. You’ll start to see small roots growing from the bottom of the potato and leafy shoots emerging from the top.
7. Harvesting the Slips: Once the slips are about 6-8 inches long, they’re ready to be harvested. Gently twist or cut the slips off the sweet potato, being careful not to damage the roots.
Sprouting Sweet Potato Slips: The Soil Method
Alternatively, you can sprout your sweet potatoes directly in soil. This method can sometimes result in stronger, more robust slips.
1. Prepare a Seed Tray or Pot: Fill a seed tray or pot with well-draining potting mix.
2. Bury the Sweet Potato: Partially bury the sweet potato in the potting mix, leaving the top third exposed.
3. Water Gently: Water the potting mix gently, ensuring it’s moist but not waterlogged.
4. Find a Warm, Sunny Spot: Place the tray or pot in a warm, sunny location.
5. Keep the Soil Moist: Keep the soil consistently moist, but avoid overwatering.
6. Wait for Sprouts: Similar to the water method, it will take several weeks for sprouts to appear.
7. Harvesting the Slips: Once the slips are about 6-8 inches long, carefully dig them up, trying to keep as much of the root system intact as possible.
Planting Your Sweet Potato Slips
Now that you have your sweet potato slips, it’s time to plant them in the garden!
1. Prepare the Garden Bed: Choose a sunny location with well-draining soil. Sweet potatoes thrive in loose, sandy soil. Amend your soil with compost to improve drainage and fertility.
2. Create Ridges or Hills: Sweet potatoes grow best in raised ridges or hills. This helps with drainage and allows the tubers to expand. Create ridges that are about 8-10 inches high and 12 inches wide.
3. Space the Slips: Space the slips about 12-18 inches apart along the ridges.
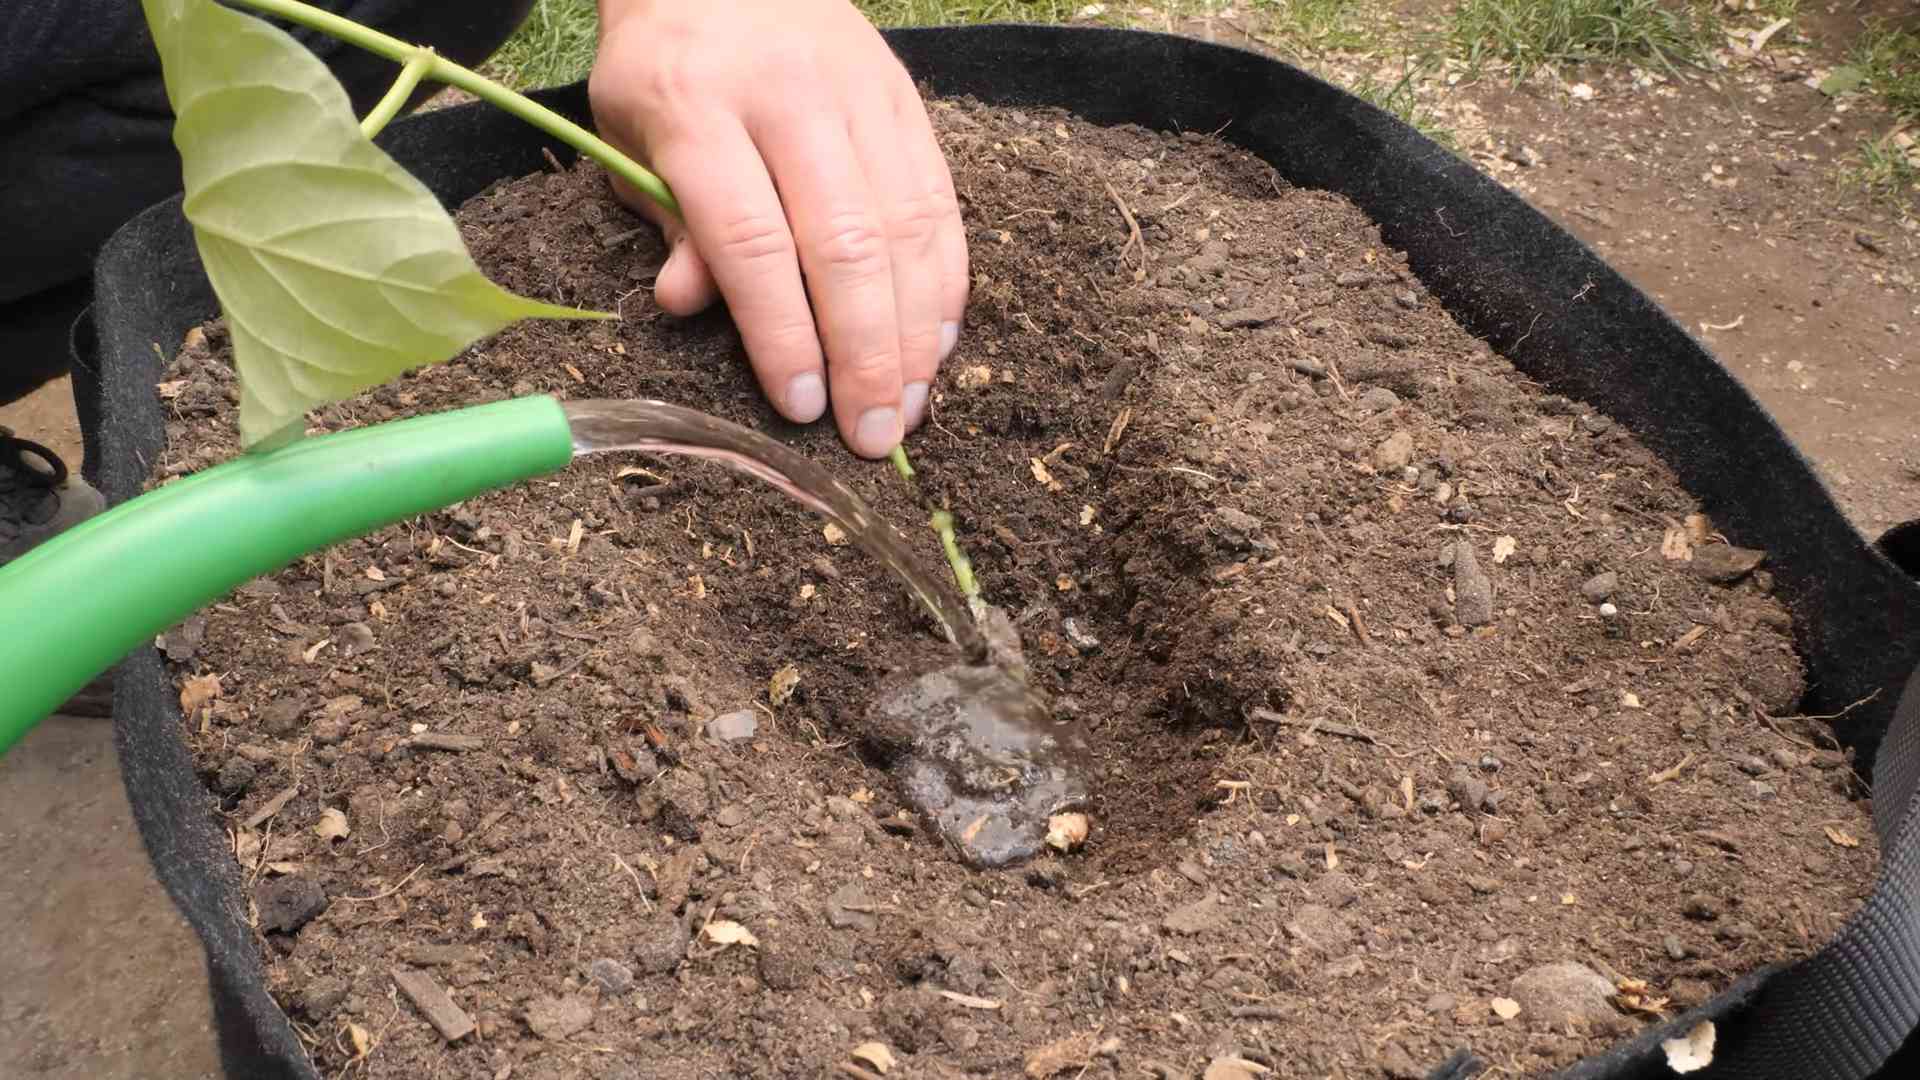
4. Plant the Slips: Dig a small hole in the top of the ridge and carefully plant the slip, burying the bottom 2-3 inches of the stem.
5. Water Thoroughly: Water the newly planted slips thoroughly to help them establish roots.
6. Optional: Rooting Hormone: Dip the cut end of the slip in rooting hormone before planting to encourage faster root development. I’ve found this helps, especially if the slips are a little weak.
Caring for Your Sweet Potato Plants
Once your sweet potato slips are planted, it’s important to provide them with the care they need to thrive.
1. Watering: Water your sweet potato plants regularly, especially during dry periods. Aim to keep the soil consistently moist, but avoid overwatering.
2. Weeding: Keep the garden bed free of weeds, as they can compete with your sweet potato plants for nutrients and water.
3. Fertilizing: Sweet potatoes don’t require a lot of fertilizer, but a light feeding of a balanced fertilizer can help boost growth. Avoid using fertilizers that are high in nitrogen, as this can promote leafy growth at the expense of tuber development.
4. Vine Management: Sweet potato vines can spread quite a bit. You can prune them back if they start to take over your garden, but be careful not to remove too much foliage.
5. Pest Control: Keep an eye out for pests such as aphids, flea beetles, and sweet potato weevils. Treat infestations promptly with organic pest control methods. I’ve had good luck with neem oil for aphids.
Harvesting Your Sweet Potatoes
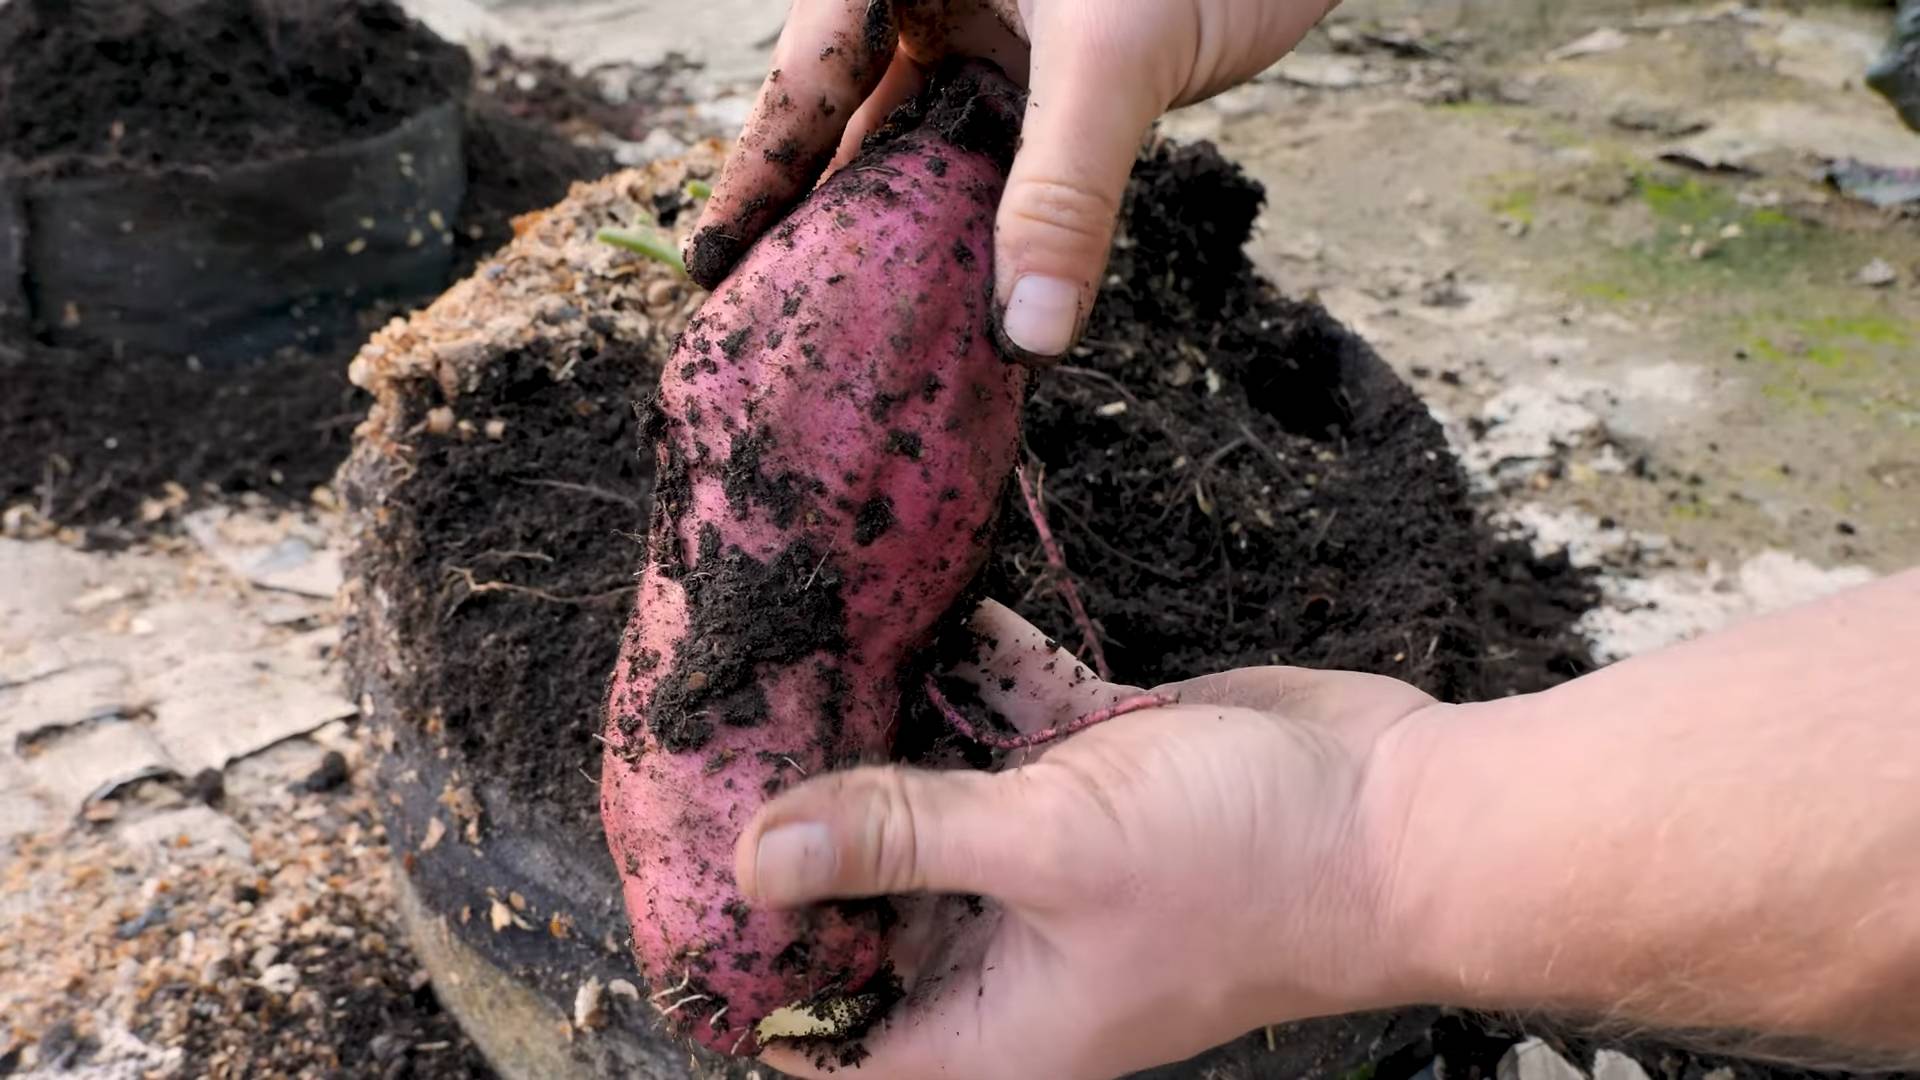
The moment you’ve been waiting for! Harvesting your own sweet potatoes is incredibly rewarding.
1. Timing: Sweet potatoes are typically ready to harvest about 90-120 days after planting. The leaves will start to turn yellow and the vines will begin to die back.
2. Choose a Dry Day: Harvest your sweet potatoes on a dry day to prevent rot.
3. Dig Carefully: Use a garden fork or shovel to carefully dig around the plants, being careful not to damage the tubers. Start digging a foot or so away from the plant to avoid accidentally spearing the sweet potatoes.
4. Lift the Tubers: Gently lift the tubers from the soil, brushing off any excess dirt.
5. Curing: Curing is an important step in preserving your sweet potatoes and improving their flavor. Place the harvested sweet potatoes in a warm, humid place (80-85°F and 85-90% humidity) for about 7-10 days. This allows the skins to harden and any minor cuts or bruises to heal. A greenhouse or a warm, humid room in your house works well.
6. Storage: After curing, store your sweet potatoes in a cool, dry, and dark place (55-60°F). Avoid storing them in the refrigerator, as this can cause them to develop a hard core. Properly cured and stored sweet potatoes can last for several months.
Troubleshooting
Even with the best planning, you might encounter some challenges along the way. Here are a few common problems and how to address them:
* Slips Not Sprouting: Make sure your sweet potato is organic and that it’s getting enough warmth and sunlight. Try a different sprouting method if one isn’t working.
* Yellowing Leaves: This could be a sign of nutrient deficiency or overwatering. Adjust your watering schedule and consider adding a balanced fertilizer.
* Pest Infestations: Regularly inspect your plants for pests and treat them promptly with organic pest control methods.
* Small Tubers: This could be due to poor soil, insufficient watering, or too much nitrogen fertilizer. Amend your soil with compost, water regularly, and avoid high-nitrogen fertilizers.
Enjoying Your Homegrown Sweet Potatoes
Congratulations! You’ve successfully grown your own sweet potatoes. Now it’s time to enjoy the fruits (or rather, tubers) of your labor. Sweet potatoes are incredibly versatile and can be used in a variety of dishes, from sweet potato fries and casseroles to soups and stews. I personally love roasting them with a little olive oil, salt, and pepper.
Growing sweet potatoes at home is a rewarding experience that connects you with nature and provides you with fresh, delicious produce. With a little patience and care, you can enjoy a bountiful harvest of homegrown sweet potatoes. Happy gardening!
Conclusion
So, there you have it! Growing sweet potatoes at home is not only achievable, but it’s also a deeply rewarding experience. Forget those bland, store-bought sweet potatoes – imagine biting into a freshly harvested, vibrant orange sweet potato that you nurtured from sprout to tuber. The flavor difference alone is enough to convince anyone to give this a try. Beyond the superior taste, you’ll also gain a sense of accomplishment and a connection to your food source that’s hard to replicate.
This DIY trick, starting sweet potato slips from a single sweet potato, is a game-changer for home gardeners. It’s cost-effective, sustainable, and surprisingly simple. You’re essentially creating your own sweet potato seedlings, bypassing the need to purchase them from a nursery. This method allows you to control the variety you grow, ensuring you get the exact sweet potato you crave.
But the benefits don’t stop there. Growing your own sweet potatoes allows you to control the growing environment, ensuring they are free from harmful pesticides and herbicides. You know exactly what went into nurturing your crop, giving you peace of mind and a healthier harvest.
Ready to take your sweet potato game to the next level? Consider experimenting with different varieties. Beauregard is a classic choice, known for its vibrant orange flesh and sweet flavor. But don’t be afraid to explore other options like Japanese sweet potatoes with their purple skin and creamy white flesh, or even the Covington variety, prized for its disease resistance.
You can also adapt the growing method to suit your space. If you have limited garden space, consider growing sweet potatoes in large containers or raised beds. Just ensure they have plenty of room to spread their roots. Vertical gardening techniques can also be employed to maximize space.
And remember, the key to success lies in providing the right conditions: plenty of sunlight, well-drained soil, and consistent moisture. Don’t be discouraged if your first attempt isn’t perfect. Gardening is a learning process, and each season brings new opportunities to refine your techniques.
We wholeheartedly encourage you to try this DIY trick for growing sweet potatoes at home. It’s a fantastic way to connect with nature, enjoy delicious and healthy food, and impress your friends and family with your gardening prowess. Once you’ve harvested your first crop, we’d love to hear about your experience! Share your photos, tips, and stories in the comments below. Let’s build a community of sweet potato enthusiasts and inspire others to embrace the joys of home gardening. Let us know what kind of sweet potato you grew!
Frequently Asked Questions (FAQ)
Q: How long does it take to grow sweet potatoes from slips?
A: The entire process, from sprouting slips to harvesting mature sweet potatoes, typically takes around 90 to 120 days. The slip sprouting phase usually takes 4-8 weeks, depending on temperature and humidity. Once the slips are transplanted into the garden, it takes another 75-100 days for the sweet potatoes to mature. Keep in mind that these are estimates, and the actual time may vary depending on your climate and growing conditions.
Q: What is the best time of year to start sweet potato slips?
A: The best time to start sweet potato slips is about 6-8 weeks before the last expected frost in your area. Sweet potatoes are warm-weather crops and thrive in temperatures between 75°F and 85°F (24°C and 29°C). Starting the slips indoors allows you to get a head start on the growing season and ensures that the plants are well-established before being transplanted outdoors. If you live in a warmer climate with a longer growing season, you can start the slips later in the spring.
Q: How do I know when my sweet potatoes are ready to harvest?
A: There are several indicators that your sweet potatoes are ready to harvest. The most obvious sign is the yellowing and browning of the vines. This usually occurs in the fall, before the first frost. You can also gently dig around the base of a plant to check the size of the sweet potatoes. They should be at least a few inches in diameter. Avoid waiting too long to harvest, as frost can damage the tubers and affect their flavor and storage life.
Q: What kind of soil is best for growing sweet potatoes?
A: Sweet potatoes prefer well-drained, sandy loam soil with a pH between 6.0 and 6.5. Heavy clay soil can restrict root growth and lead to misshapen tubers. If your soil is heavy, amend it with compost, sand, and other organic matter to improve drainage and aeration. Sweet potatoes also benefit from soil that is rich in potassium and phosphorus. Avoid using too much nitrogen fertilizer, as this can promote excessive vine growth at the expense of tuber development.
Q: How much sunlight do sweet potatoes need?
A: Sweet potatoes require at least 6-8 hours of direct sunlight per day to thrive. Choose a planting location that receives full sun throughout the growing season. Insufficient sunlight can result in smaller tubers and reduced yields.
Q: Can I grow sweet potatoes in containers?
A: Yes, you can successfully grow sweet potatoes in containers, provided you choose a large enough container. A container that is at least 20 gallons in size is recommended to allow ample room for root development. Use a well-draining potting mix and ensure that the container has drainage holes to prevent waterlogging. Container-grown sweet potatoes may require more frequent watering and fertilization than those grown in the ground.
Q: How do I store sweet potatoes after harvesting?
A: Proper curing is essential for storing sweet potatoes. After harvesting, gently brush off any excess soil and allow the sweet potatoes to cure in a warm, humid place (80-85°F or 27-29°C and 85-90% humidity) for about 7-10 days. This process helps to heal any cuts or bruises and converts starches into sugars, improving the flavor. After curing, store the sweet potatoes in a cool, dry, and dark place (55-60°F or 13-16°C) with good ventilation. Avoid storing them in the refrigerator, as this can cause them to develop a hard core and lose their flavor. Properly cured and stored sweet potatoes can last for several months.
Q: What are some common pests and diseases that affect sweet potatoes?
A: Some common pests that can affect sweet potatoes include sweet potato weevils, flea beetles, and wireworms. Diseases that can affect sweet potatoes include stem rot, black rot, and scurf. Practicing crop rotation, using disease-resistant varieties, and maintaining good soil health can help to prevent these problems. If you encounter pests or diseases, consider using organic pest control methods or consulting with your local agricultural extension office for advice.
Q: Can I eat the sweet potato leaves?
A: Yes, sweet potato leaves are edible and nutritious. They can be cooked and eaten like spinach or other leafy greens. Choose young, tender leaves for the best flavor and texture. Sweet potato leaves are a good source of vitamins A and C, as well as fiber and antioxidants.
Q: What if my sweet potato doesn’t sprout slips?
A: Sometimes, a sweet potato may be reluctant to sprout slips. Here are a few things to try:
* Ensure the sweet potato is healthy and firm, without any signs of rot or decay.
* Increase the temperature. Sweet potatoes sprout best in warm conditions (75-85°F or 24-29°C).
* Make sure the bottom half of the sweet potato is submerged in water.
* Try using a different sweet potato. Some varieties are more prolific sprouters than others.
* Be patient! It can sometimes take several weeks for slips to emerge.
Leave a Comment