
Grow sweet potatoes in bags? Absolutely! Forget sprawling garden beds and back-breaking digging. I’m here to let you in on a little secret that will revolutionize your sweet potato harvest: container gardening! For centuries, sweet potatoes have been a staple crop, deeply rooted in cultures around the globe, from South America to Asia. Their vibrant orange flesh and earthy sweetness have nourished generations. But what if you don’t have acres of land to dedicate to this delicious root vegetable?
That’s where this DIY trick comes in. Growing sweet potatoes in bags is not only space-saving but also incredibly rewarding. Imagine harvesting a bounty of sweet potatoes right from your patio or balcony! This method is perfect for urban gardeners, apartment dwellers, or anyone looking for an easier way to enjoy homegrown goodness. Plus, it’s a fantastic project for kids, teaching them about where their food comes from.
This article will guide you through every step, from choosing the right bag and soil to nurturing your sweet potato vines and harvesting your delicious crop. You’ll learn how to grow sweet potatoes in bags successfully, even if you’ve never gardened before. So, grab your gardening gloves, and let’s get started on this exciting adventure!
Süßkartoffeln im Sack anbauen: Eine einfache DIY-Anleitung
Hey Leute! Habt ihr Lust, eure eigenen Süßkartoffeln anzubauen, aber keinen Platz für ein riesiges Beet? Keine Sorge, ich zeige euch, wie ihr das ganz einfach in Säcken hinbekommt! Es ist super platzsparend und macht richtig Spaß. Los geht’s!
Was du brauchst:
* Säcke: Stabile Jutesäcke, Kartoffelsäcke oder sogar große, robuste Müllsäcke (die schwarzen, dicken). Wichtig ist, dass sie groß genug sind (mindestens 50 Liter Fassungsvermögen) und Löcher für die Drainage haben.
* Süßkartoffel-Setzlinge (Slips): Die bekommt ihr im Frühjahr in Gärtnereien oder online. Ihr könnt sie auch selbst ziehen, aber dazu später mehr.
* Erde: Eine Mischung aus Gartenerde, Kompost und etwas Sand ist ideal. Die Erde sollte gut durchlässig und nährstoffreich sein.
* Wasser: Klar, zum Gießen!
* Dünger: Organischer Dünger wie Komposttee oder ein Langzeitdünger für Gemüse.
* Optional: Mulch (Stroh, Holzhackschnitzel)
Süßkartoffel-Setzlinge (Slips) selbst ziehen (optional):
Wenn ihr eure Setzlinge selbst ziehen wollt, braucht ihr etwas Vorlaufzeit. Das geht so:
* Die Süßkartoffel vorbereiten: Nehmt eine gesunde Süßkartoffel (am besten Bio) und halbiert sie oder lasst sie ganz.
* Einlegen: Steckt Zahnstocher in die Mitte der Süßkartoffel, sodass sie auf einem Glas oder einer Schale mit Wasser ruhen kann. Die untere Hälfte sollte im Wasser sein.
* Warten und Geduld haben: Stellt das Glas an einen warmen, hellen Ort (aber nicht in die pralle Sonne). Nach ein paar Wochen sollten sich Wurzeln und Triebe (Slips) bilden.
* Slips abtrennen: Wenn die Triebe etwa 15-20 cm lang sind, könnt ihr sie vorsichtig abdrehen oder abschneiden.
* Bewurzeln: Stellt die Slips in ein Glas mit Wasser, bis sie eigene Wurzeln bilden. Das dauert ein paar Tage.
* Einpflanzen: Sobald die Slips Wurzeln haben, könnt ihr sie in kleine Töpfe mit Erde pflanzen und sie an einen sonnigen Ort stellen, bis es warm genug ist, um sie in die Säcke zu pflanzen.
Die Säcke vorbereiten und bepflanzen:
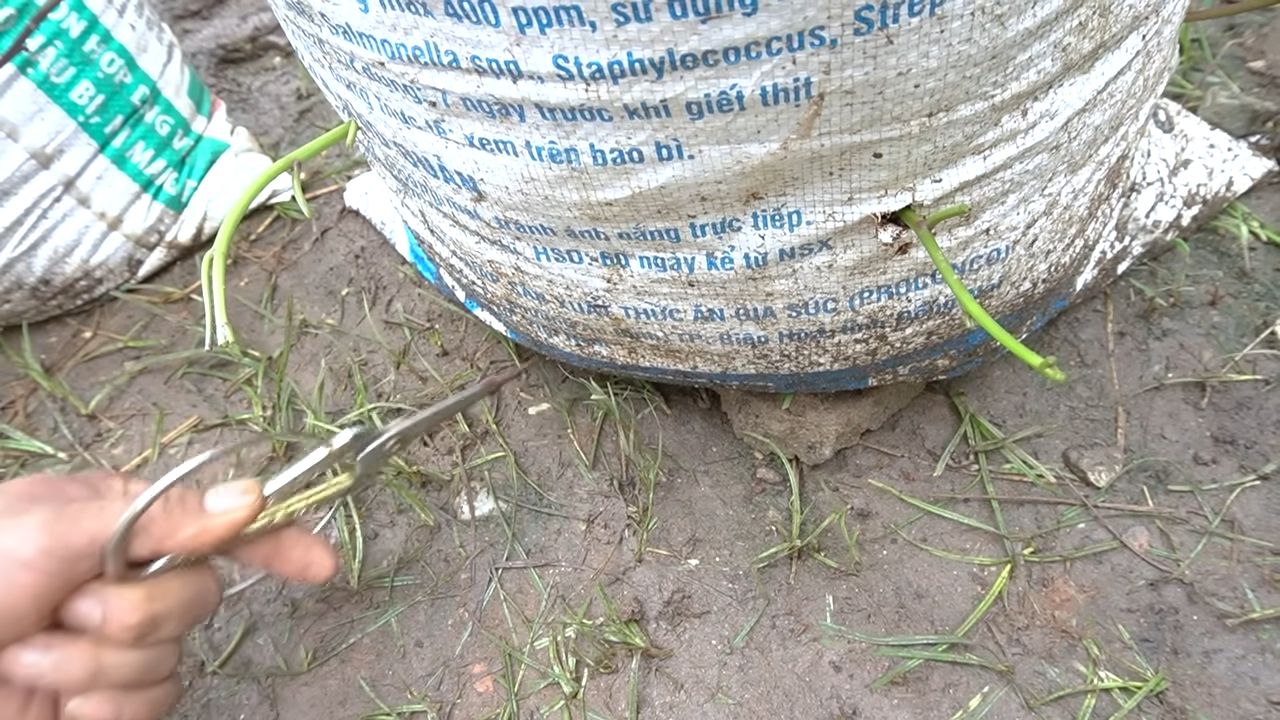
1. Drainagelöcher: Macht Löcher in den Boden der Säcke. Das ist super wichtig, damit das Wasser ablaufen kann und die Süßkartoffeln nicht faulen. Ich nehme dafür einfach ein Messer oder eine Schere.
2. Erde einfüllen: Füllt die Säcke etwa zu einem Drittel mit der Erdmischung. Achtet darauf, dass die Erde locker ist und nicht zu fest angedrückt wird.
3. Dünger hinzufügen: Mischt etwas organischen Dünger unter die Erde. Das gibt den Süßkartoffeln einen guten Start.
4. Setzlinge einpflanzen: Pflanzt die Süßkartoffel-Setzlinge in die Säcke. Je nach Größe des Sacks könnt ihr 2-3 Setzlinge pro Sack pflanzen. Achtet darauf, dass die Wurzeln gut mit Erde bedeckt sind.
5. Angießen: Gießt die Setzlinge nach dem Pflanzen gut an. Die Erde sollte feucht, aber nicht nass sein.
6. Sack auffüllen: Füllt den Sack nach und nach mit Erde auf, während die Pflanzen wachsen. Das fördert die Bildung von mehr Knollen. Wenn die Triebe größer werden, könnt ihr immer wieder Erde nachfüllen, bis der Sack fast voll ist.
7. Mulchen (optional): Verteilt eine Schicht Mulch um die Pflanzen. Das hilft, die Feuchtigkeit im Boden zu halten und Unkraut zu unterdrücken.
Pflege der Süßkartoffeln im Sack:
* Gießen: Gießt die Süßkartoffeln regelmäßig, besonders bei trockenem Wetter. Die Erde sollte immer leicht feucht sein. Vermeidet Staunässe.
* Düngen: Düngt die Süßkartoffeln alle paar Wochen mit organischem Dünger. Komposttee ist dafür super geeignet.
* Sonnenlicht: Süßkartoffeln brauchen viel Sonne. Stellt die Säcke an einen sonnigen Ort, wo sie mindestens 6 Stunden Sonne am Tag bekommen.
* Unkraut entfernen: Entfernt regelmäßig Unkraut, das in den Säcken wächst.
* Drehen: Dreht die Säcke ab und zu, damit alle Seiten der Pflanzen gleichmäßig Sonne bekommen.
Erntezeit!
Die Erntezeit für Süßkartoffeln ist im Herbst, bevor der erste Frost kommt.
* Anzeichen: Die Blätter der Pflanzen werden gelb und fangen an zu welken.
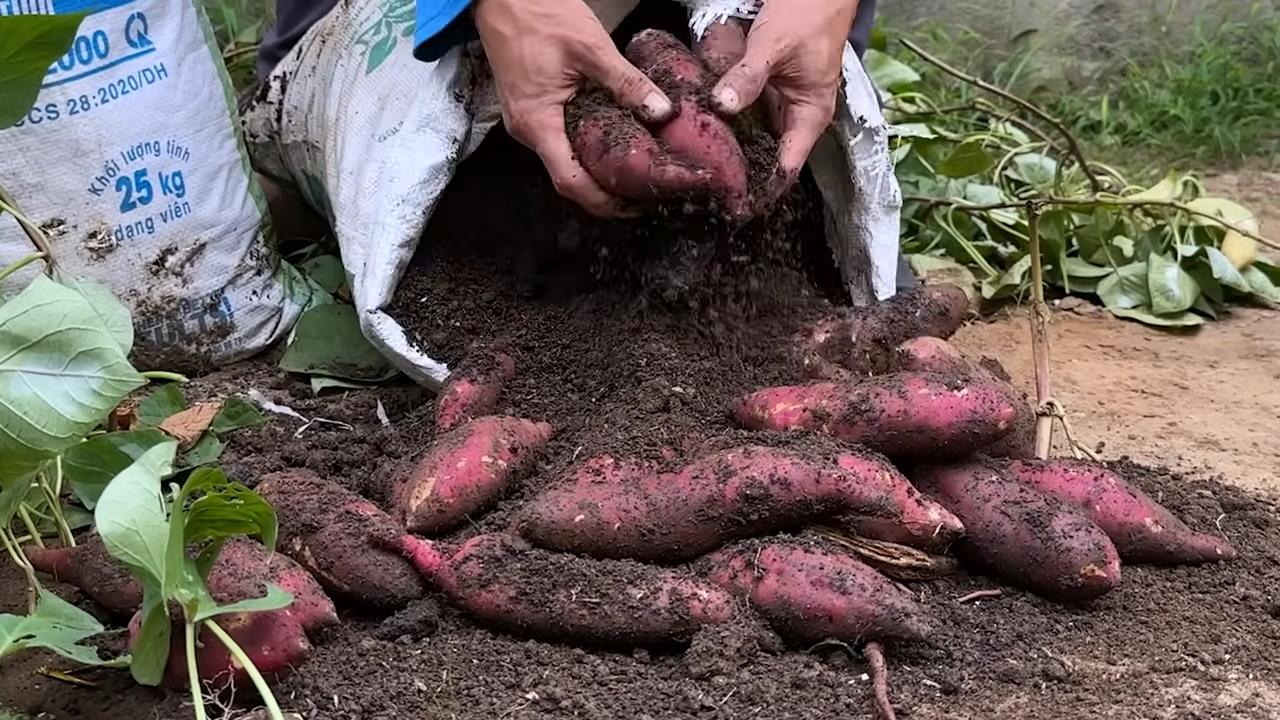
* Ernten: Kippt die Säcke vorsichtig aus und sucht nach den Süßkartoffeln. Sie sollten schön groß und prall sein.
* Trocknen: Lasst die Süßkartoffeln nach der Ernte ein paar Tage an einem warmen, trockenen Ort trocknen. Das verbessert den Geschmack und die Haltbarkeit.
* Lagern: Lagert die Süßkartoffeln an einem kühlen, dunklen und trockenen Ort. Sie halten sich so mehrere Monate.
Zusätzliche Tipps und Tricks:
* Sortenwahl: Es gibt verschiedene Süßkartoffelsorten. Informiert euch, welche Sorte für eure Region am besten geeignet ist.
* Schädlinge: Süßkartoffeln sind relativ robust, aber achtet auf Schädlinge wie Blattläuse oder Kartoffelkäfer. Bei Bedarf könnt ihr biologische Schädlingsbekämpfungsmittel einsetzen.
* Bodenverbesserung: Wenn ihr merkt, dass die Erde in den Säcken zu schnell austrocknet, könnt ihr etwas Vermiculit oder Perlit untermischen. Das verbessert die Wasserspeicherung.
* Vertikales Gärtnern: Ihr könnt die Säcke auch an einer Wand oder einem Zaun aufhängen, um noch mehr Platz zu sparen. Achtet aber darauf, dass die Säcke stabil befestigt sind.
* Kreativität: Verziert die Säcke mit Farbe oder Mustern, um sie zu einem Hingucker in eurem Garten oder auf eurem Balkon zu machen.
Häufige Probleme und Lösungen:
* Gelbe Blätter: Gelbe Blätter können ein Zeichen für Nährstoffmangel sein. Düngt die Pflanzen mit einem ausgewogenen Dünger.
* Kleine Knollen: Kleine Knollen können durch zu wenig Sonne oder zu wenig Dünger verursacht werden. Stellt die Säcke an einen sonnigeren Ort und düngt die Pflanzen regelmäßig.
* Faule Knollen: Faule Knollen sind meistens ein Zeichen für Staunässe. Achtet darauf, dass die Säcke gute Drainagelöcher haben und gießt nicht zu viel.
* Schädlinge: Kontrolliert die Pflanzen regelmäßig auf Schädlinge und bekämpft sie bei Bedarf mit biologischen Mitteln.
Warum Süßkartoffeln im Sack anbauen?
* Platzsparend: Ideal für kleine Gärten, Balkone oder Terrassen.
* Einfach: Auch für Anfänger geeignet.
* Mobil: Die Säcke können leicht umgestellt werden, um den Pflanzen optimales Sonnenlicht zu bieten.
* Kontrollierte Bedingungen: Ihr habt mehr Kontrolle über die Bodenqualität und die Bewässerung.
* Ertragreich: Mit der richtigen Pflege könnt ihr eine reiche Ernte erzielen.
* Nachhaltig: Ihr wisst genau, was in euren Süßkartoffeln steckt und könnt Pestizide vermeiden.
Ich hoffe, diese Anleitung hilft euch dabei, eure eigenen Süßkartoffeln im Sack anzubauen. Es ist wirklich ein tolles Gefühl, seine eigenen Lebensmittel anzubauen und zu ernten. Viel Spaß dabei! Und vergesst nicht, eure Erfolge mit mir zu teilen! Ich bin gespannt auf eure Ergebnisse!
Conclusion
So, there you have it! Growing sweet potatoes in bags is not just a gardening trend; it’s a game-changer for anyone with limited space, challenging soil, or simply a desire for a more controlled and rewarding harvest. This method offers a unique opportunity to witness the entire growth process, from the initial slips to the bountiful tubers nestled beneath the surface.
Why is this DIY trick a must-try? Because it democratizes sweet potato cultivation. No longer are these delicious and nutritious vegetables confined to sprawling gardens. With a few simple supplies and a sunny spot, you can cultivate your own supply of fresh, homegrown sweet potatoes, bursting with flavor and packed with vitamins. Imagine the satisfaction of harvesting your own food, knowing exactly where it came from and how it was grown. That’s the power of this simple yet effective technique.
Beyond the convenience and control, growing sweet potatoes in bags also allows for experimentation. Want to try a different variety? Go for it! From the classic Beauregard to the vibrant purple Okinawan, the possibilities are endless. You can also tailor the soil mix to your specific needs, ensuring optimal drainage and nutrient availability. Consider adding compost tea or other organic fertilizers to boost growth and enhance flavor.
And don’t be afraid to get creative with your container choices. While grow bags are ideal for their breathability and drainage, you can also use large plastic bins, repurposed containers, or even sturdy burlap sacks. Just make sure they have adequate drainage holes to prevent waterlogging.
We encourage you to embark on this exciting gardening adventure and discover the joys of growing sweet potatoes in bags. It’s a rewarding experience that will not only provide you with delicious food but also connect you with nature in a meaningful way.
Once you’ve harvested your sweet potato bounty, the culinary possibilities are endless. Roast them, mash them, bake them into pies, or add them to stews and soups. Their versatility and nutritional value make them a staple ingredient in countless dishes.
But the real magic lies in sharing your experience. We want to hear your stories, see your photos, and learn from your successes (and even your failures!). Share your tips and tricks with fellow gardeners, inspire others to try this method, and let’s build a community of sweet potato enthusiasts.
So, grab your supplies, get your hands dirty, and prepare to be amazed by the abundance that can be grown in a simple bag. Happy gardening! And remember, the key to successful sweet potato cultivation lies in patience, observation, and a little bit of love. Now go forth and grow some amazing sweet potatoes! This method of growing sweet potatoes in bags is sure to bring you joy and a delicious harvest.
Frequently Asked Questions (FAQ)
What kind of soil should I use for growing sweet potatoes in bags?
The ideal soil mix for growing sweet potatoes in bags is a well-draining, nutrient-rich blend. A good starting point is a mix of equal parts garden soil, compost, and perlite or vermiculite. The garden soil provides structure and nutrients, the compost adds organic matter and improves drainage, and the perlite or vermiculite enhances aeration and prevents compaction. You can also add a slow-release fertilizer to provide a steady supply of nutrients throughout the growing season. Avoid using heavy clay soil, as it can become waterlogged and hinder root development. A slightly acidic to neutral pH (around 6.0 to 7.0) is optimal for sweet potato growth.
How often should I water my sweet potatoes grown in bags?
Watering frequency depends on several factors, including the weather, the size of the bag, and the type of soil mix you’re using. Generally, you should water your sweet potatoes whenever the top inch of soil feels dry to the touch. During hot, dry weather, you may need to water them daily, while during cooler, wetter periods, you can reduce the frequency. Be sure to water deeply, allowing the water to penetrate the entire root zone. Avoid overwatering, as this can lead to root rot. A good way to check if your sweet potatoes need water is to stick your finger into the soil. If it feels dry, it’s time to water.
How much sunlight do sweet potatoes need when grown in bags?
Sweet potatoes are sun-loving plants and require at least 6-8 hours of direct sunlight per day to thrive. Choose a location for your bags that receives ample sunlight throughout the day. If you live in a particularly hot climate, you may want to provide some afternoon shade to prevent the plants from overheating. Insufficient sunlight can result in stunted growth, reduced tuber production, and pale, weak foliage. If you don’t have a sunny spot in your garden, you can supplement with grow lights.
When is the best time to harvest sweet potatoes grown in bags?
Sweet potatoes are typically ready to harvest about 90-120 days after planting the slips. A good indicator of maturity is when the foliage starts to turn yellow and die back. You can also gently dig around the base of the plant to check the size of the tubers. Harvest before the first frost, as frost can damage the sweet potatoes and reduce their storage life. To harvest, carefully tip the bag over and gently remove the sweet potatoes from the soil. Avoid bruising or cutting the tubers, as this can lead to rot.
How do I cure sweet potatoes after harvesting them from bags?
Curing is an essential step in preparing sweet potatoes for long-term storage. Curing allows the skins to harden and heal any minor wounds, preventing rot and improving flavor. To cure sweet potatoes, place them in a warm, humid environment (around 80-85°F and 85-90% humidity) for 7-10 days. A well-ventilated garage or shed can work well. After curing, store the sweet potatoes in a cool, dry, and dark place (around 55-60°F) for several months. Avoid storing them in the refrigerator, as this can cause them to develop a hard core.
Can I reuse the soil from the bags after harvesting sweet potatoes?
Yes, you can reuse the soil from the bags after harvesting sweet potatoes, but it’s important to replenish the nutrients and improve the soil structure. Remove any remaining plant debris and add fresh compost, aged manure, or other organic matter to enrich the soil. You can also add a slow-release fertilizer to provide a boost of nutrients for the next crop. Consider rotating crops to prevent the buildup of soilborne diseases and pests. If you suspect the soil is contaminated with diseases or pests, it’s best to discard it and start with fresh soil.
What are some common problems when growing sweet potatoes in bags and how can I fix them?
Some common problems include pests like sweet potato weevils and diseases like stem rot. Inspect your plants regularly for signs of infestation or disease. Use organic pest control methods, such as neem oil or insecticidal soap, to control pests. Ensure good air circulation and avoid overwatering to prevent diseases. If you encounter severe problems, consider removing the affected plants to prevent the spread of pests or diseases to other plants. Also, ensure your bags have adequate drainage to prevent root rot.
Can I grow different varieties of sweet potatoes in bags?
Absolutely! Growing sweet potatoes in bags is a great way to experiment with different varieties. Some popular varieties include Beauregard, Covington, Jewel, and Okinawan. Each variety has its own unique flavor, texture, and color. Consider the growing season length and your local climate when choosing varieties. Some varieties are better suited for shorter growing seasons, while others thrive in warmer climates. You can even grow multiple varieties in separate bags to compare their performance and flavor.
How do I get sweet potato slips to start growing in bags?
You can purchase sweet potato slips from a nursery or online retailer, or you can sprout your own from a sweet potato. To sprout your own slips, suspend a sweet potato in a jar of water, with the bottom half submerged. Place the jar in a warm, sunny location. After a few weeks, sprouts will emerge from the sweet potato. Once the sprouts are several inches long, gently twist them off and place them in a glass of water to root. Once the roots are about an inch long, they are ready to be planted in your bags.
Is growing sweet potatoes in bags organic?
Growing sweet potatoes in bags can be organic if you use organic soil, fertilizers, and pest control methods. Choose certified organic soil mixes and fertilizers. Avoid using synthetic pesticides and herbicides. Instead, opt for organic alternatives like neem oil, insecticidal soap, and beneficial insects. By following organic gardening practices, you can ensure that your sweet potatoes are free from harmful chemicals and pesticides.

Leave a Comment