
Grow sweeter honeydew melons? Absolutely! Imagine biting into a slice of honeydew so intensely sweet, it rivals the finest candy. That’s the dream, right? For generations, gardeners have sought the secret to unlocking the full sugary potential of this refreshing fruit. From ancient Egyptian irrigation techniques to modern-day grafting methods, the quest for the perfect melon has been a long and delicious journey.
But let’s be honest, sometimes our honeydews fall a little flat. They’re… fine. But not the explosion of flavor we crave. That’s where these DIY tricks come in! I’m going to share some simple, yet incredibly effective, hacks that will transform your honeydew harvest. You don’t need a fancy greenhouse or years of experience. Just a little know-how and a willingness to get your hands dirty.
Why do you need these tricks? Because life is too short for bland honeydew! These tips will help you optimize sunlight exposure, manage watering for maximum sweetness, and even protect your precious melons from pests and diseases. Get ready to grow sweeter honeydew melons than you ever thought possible, and impress your friends and family with your gardening prowess. Let’s get started!
So machst du deine Honigmelonen süßer: Ein DIY-Guide
Hey Leute! Habt ihr auch schon mal eine Honigmelone gekauft, die einfach nur… fad war? Ich kenne das nur zu gut! Aber keine Sorge, ich habe ein paar Tricks auf Lager, mit denen ihr eure Honigmelonen im eigenen Garten so richtig süß machen könnt. Es ist gar nicht so schwer, wie man denkt!
Grundlagen für süße Honigmelonen
Bevor wir loslegen, ist es wichtig, die Grundlagen zu verstehen. Honigmelonen brauchen bestimmte Bedingungen, um ihren vollen Geschmack zu entwickeln. Hier sind die wichtigsten Punkte:
* Sonne: Honigmelonen lieben die Sonne! Sie brauchen mindestens 6-8 Stunden direkte Sonneneinstrahlung pro Tag. Je mehr Sonne, desto süßer die Melone.
* Boden: Der Boden sollte gut durchlässig und reich an organischen Stoffen sein. Staunässe ist Gift für Honigmelonen.
* Wasser: Regelmäßige Bewässerung ist wichtig, besonders während der Fruchtbildung. Aber Vorsicht: Nicht zu viel gießen!
* Nährstoffe: Honigmelonen sind Starkzehrer. Sie brauchen ausreichend Nährstoffe, um süße Früchte zu produzieren.
* Bestäubung: Honigmelonen sind auf Bestäubung angewiesen. Sorge für genügend Bienen und andere Bestäuber in deinem Garten.
Die richtige Sorte wählen
Nicht alle Honigmelonen sind gleich. Einige Sorten sind von Natur aus süßer als andere. Hier sind ein paar Sorten, die ich empfehlen kann:
* ‘Honey Globe’: Eine klassische Sorte mit sehr süßem Fruchtfleisch.
* ‘Honeycrisp’: Bekannt für ihren knackigen Biss und süßen Geschmack.
* ‘Temptation’: Eine relativ neue Sorte, die sehr ertragreich und süß ist.
* ‘Jade Dew’: Eine asiatische Sorte mit einem einzigartigen, süßen Geschmack.
Informiert euch am besten vor dem Kauf über die verschiedenen Sorten und wählt diejenige aus, die am besten zu euren Vorlieben und den Bedingungen in eurem Garten passt.
Schritt-für-Schritt-Anleitung für süße Honigmelonen
Jetzt geht’s ans Eingemachte! Hier ist meine Schritt-für-Schritt-Anleitung, wie ihr eure Honigmelonen so richtig süß macht:
1. Vorbereitung des Bodens
1. Boden testen: Bevor ihr loslegt, solltet ihr euren Boden testen, um den pH-Wert und den Nährstoffgehalt zu bestimmen. Honigmelonen bevorzugen einen pH-Wert zwischen 6,0 und 6,8.
2. Boden verbessern: Wenn euer Boden zu sauer oder zu alkalisch ist, könnt ihr ihn mit Kalk oder Schwefel anpassen. Fügt außerdem reichlich Kompost oder anderen organischen Dünger hinzu, um den Boden zu verbessern und mit Nährstoffen anzureichern. Ich mische immer eine ordentliche Portion gut verrotteten Mist unter.
3. Drainage verbessern: Achtet darauf, dass der Boden gut durchlässig ist. Wenn euer Boden zu lehmig ist, könnt ihr Sand oder Perlit hinzufügen, um die Drainage zu verbessern.
2. Aussaat oder Pflanzung
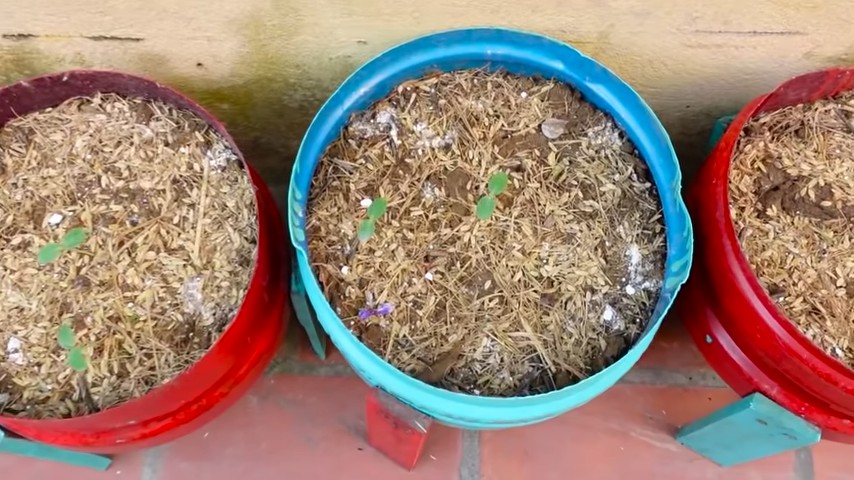
1. Aussaat: Ihr könnt Honigmelonen entweder direkt ins Freiland säen oder sie in Töpfen vorziehen. Ich bevorzuge die Vorzucht, da die Pflanzen dann einen Vorsprung haben.
2. Vorziehen: Säet die Samen etwa 4-6 Wochen vor dem letzten Frost in Töpfen aus. Haltet die Erde feucht und warm (ca. 25-30°C).
3. Pflanzung: Sobald die Frostgefahr vorüber ist und die Pflanzen kräftig genug sind, könnt ihr sie ins Freiland pflanzen. Achtet darauf, dass die Pflanzen genügend Platz haben (ca. 1 Meter Abstand).
3. Bewässerung und Düngung
1. Bewässerung: Gießt die Pflanzen regelmäßig, besonders während der Fruchtbildung. Vermeidet aber Staunässe. Am besten gießt ihr morgens, damit die Blätter tagsüber abtrocknen können.
2. Düngung: Düngt die Pflanzen regelmäßig mit einem ausgewogenen Dünger. Ich verwende gerne einen organischen Dünger, der speziell für Gemüse geeignet ist. Achtet darauf, dass der Dünger ausreichend Kalium enthält, da Kalium wichtig für die Fruchtbildung und den Geschmack ist.
3. Blattdüngung: Zusätzlich zur Bodendüngung könnt ihr die Pflanzen auch mit einer Blattdüngung unterstützen. Sprüht die Blätter regelmäßig mit einer verdünnten Düngerlösung ein.
4. Beschneiden und Ausdünnen
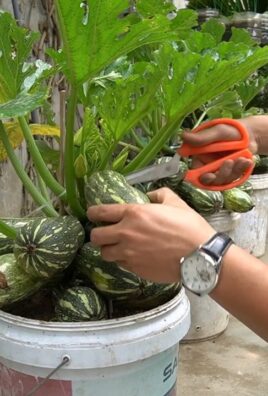
1. Beschneiden: Honigmelonen können stark wuchern. Um die Fruchtbildung zu fördern, könnt ihr die Pflanzen beschneiden. Entfernt überflüssige Seitentriebe und Blätter, die die Früchte beschatten.
2. Ausdünnen: Wenn zu viele Früchte an einer Pflanze wachsen, können sie nicht alle ausreichend mit Nährstoffen versorgt werden. Dünnt die Früchte aus, sodass nur 2-3 Früchte pro Pflanze übrig bleiben. Die verbleibenden Früchte werden dann größer und süßer.
5. Schutz vor Schädlingen und Krankheiten
1. Schädlinge: Honigmelonen können von verschiedenen Schädlingen befallen werden, wie z.B. Blattläusen, Schnecken und Gurkenkäfern. Kontrolliert die Pflanzen regelmäßig und bekämpft Schädlinge bei Bedarf mit geeigneten Mitteln. Ich verwende gerne natürliche Schädlingsbekämpfungsmittel wie Neemöl oder Schmierseife.
2. Krankheiten: Honigmelonen können auch von verschiedenen Krankheiten befallen werden, wie z.B. Mehltau und Fusariumwelke. Achtet auf eine gute Belüftung der Pflanzen und vermeidet Staunässe, um Krankheiten vorzubeugen. Bei Bedarf könnt ihr die Pflanzen mit Fungiziden behandeln.
6. Ernte
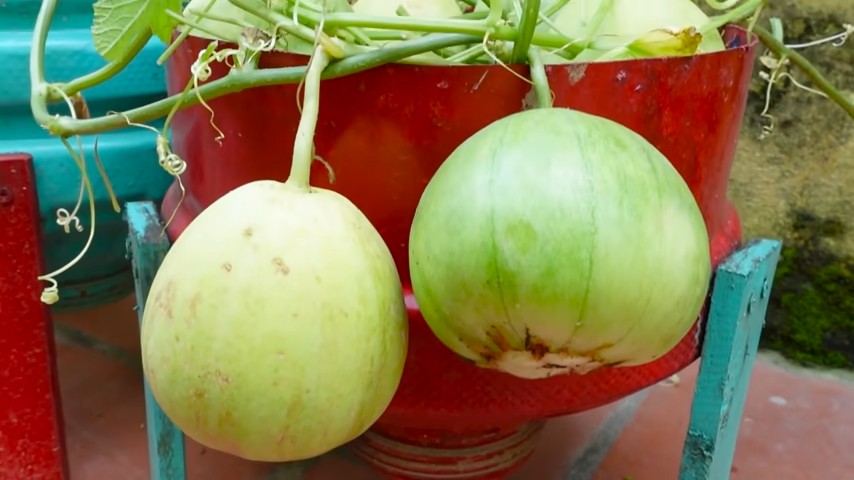
1. Reife erkennen: Die Reife einer Honigmelone ist nicht immer leicht zu erkennen. Achtet auf folgende Anzeichen:
* Die Schale verfärbt sich von grün nach gelblich-weiß.
* Die Melone duftet aromatisch.
* Der Stielansatz ist leicht rissig.
* Wenn ihr auf die Melone klopft, sollte sie hohl klingen.
2. Ernten: Schneidet die Melone vorsichtig vom Stiel ab. Lasst noch ein kleines Stück Stiel an der Melone, um sie länger haltbar zu machen.
Zusätzliche Tipps für noch süßere Honigmelonen
Hier sind noch ein paar zusätzliche Tipps, die euch helfen können, noch süßere Honigmelonen zu ernten:
* Stress vermeiden: Vermeidet Stress für die Pflanzen, wie z.B. Trockenheit, Nährstoffmangel oder Schädlingsbefall. Gestresste Pflanzen produzieren weniger süße Früchte.
* Kalium betonen: Kalium ist besonders wichtig für die Süße der Früchte. Achtet darauf, dass euer Dünger ausreichend Kalium enthält. Ihr könnt auch zusätzlich Kaliumsulfat düngen.
* Weniger Stickstoff: Zu viel Stickstoff kann das Wachstum der Blätter fördern, aber die Fruchtbildung und den Geschmack beeinträchtigen. Verwendet einen Dünger mit einem niedrigen Stickstoffgehalt.
* Sonnenlicht maximieren: Sorgt dafür, dass die Früchte möglichst viel Sonnenlicht bekommen. Entfernt Blätter, die die Früchte beschatten. Ihr könnt die Früchte auch auf eine reflektierende Oberfläche legen, um die Sonneneinstrahlung zu erhöhen.
* Weniger Wasser kurz vor der Ernte: Reduziert die Bewässerung kurz vor der Ernte, um den Zuckergehalt in den Früchten zu erhöhen. Aber Achtung: Die Pflanzen dürfen nicht austrocknen!
Häufige Fehler vermeiden
Hier sind ein paar häufige Fehler, die ihr vermeiden solltet:
* Zu frühe Ernte: Erntet die Melonen nicht zu früh. Lasst sie so lange wie möglich an der Pflanze reifen.
* Zu viel Wasser: Gießt die Pflanzen nicht zu viel. Staunässe kann zu Wurzelfäule führen und den Geschmack der Früchte beeinträchtigen.
* Falscher Dünger: Verwendet keinen Dünger mit einem zu hohen Stickstoffgehalt.
* Mangelnde Pflege: Vernachlässigt die Pflanzen nicht. Kontrolliert sie regelmäßig auf Schädlinge und Krankheiten und düngt sie bei Bedarf.
Fazit
Mit diesen Tipps und Tricks könnt ihr eure Honigmelonen im eigenen Garten so richtig süß machen. Es erfordert zwar etwas Arbeit und Geduld, aber es lohnt sich auf jeden Fall! Ich wünsche euch viel Erfolg und eine reiche Ernte! Lasst es euch schmecken!
Conclusion
So, there you have it! Unlocking the secret to growing sweeter honeydew melons isn’t about complicated techniques or expensive fertilizers. It’s about understanding the plant’s needs and employing a simple, yet effective DIY trick: strategic pruning and focused feeding. By carefully managing the vine’s energy and directing it towards fruit development, you can significantly enhance the sweetness and overall quality of your honeydew harvest.
This isn’t just about bigger melons; it’s about *better* melons. Imagine biting into a honeydew so intensely sweet and flavorful that it rivals anything you’ve ever bought at the store. That’s the potential you unlock with this method. Think of the possibilities! You can enjoy them fresh, blend them into refreshing smoothies, or even grill them for a unique and delicious side dish.
Don’t be afraid to experiment! While the core technique of pruning and feeding remains the same, you can adapt it to your specific growing conditions and preferences. For example, if you live in a particularly hot climate, you might want to provide some afternoon shade to protect the developing melons from sunburn. Or, if you’re growing in containers, you might need to adjust the frequency of watering and feeding to compensate for the limited soil volume.
Consider these variations:
* Honey Infusion: Try injecting a small amount of diluted honey water into the melon a few days before harvesting. This can further boost the sweetness, but be careful not to overdo it, as it can attract pests.
* Companion Planting: Plant basil or marigolds near your honeydew melons. These herbs are known to repel pests and attract beneficial insects, which can contribute to a healthier and more productive plant.
* Soil Amendment: Before planting, amend your soil with plenty of compost and well-rotted manure. This will provide your honeydew melons with the nutrients they need to thrive.
The key is to observe your plants closely and adjust your approach as needed. Every garden is different, and what works for one person might not work for another. But with a little patience and experimentation, you’ll be well on your way to growing the sweetest honeydew melons you’ve ever tasted.
We wholeheartedly encourage you to try this DIY trick for growing sweeter honeydew melons. It’s a rewarding experience that will not only improve the quality of your harvest but also deepen your connection to the natural world. And most importantly, we want to hear about your results! Share your experiences, tips, and photos in the comments below. Let’s learn from each other and create a community of honeydew-growing enthusiasts! What worked for you? What challenges did you face? Your insights could be invaluable to other gardeners. So, get out there, get your hands dirty, and get ready to enjoy the sweetest honeydew melons of your life!
Frequently Asked Questions (FAQ)
Q: How do I know when my honeydew melon is ripe?
A: Determining ripeness is crucial for enjoying the sweetest possible honeydew. Several indicators can help you. First, look for a creamy yellow color on the rind, especially on the underside where the melon rests on the ground. The skin should also feel slightly waxy. Second, check the stem end. A ripe honeydew will have a slight crack or give around the stem. Finally, smell the melon. A sweet, fragrant aroma emanating from the blossom end is a good sign of ripeness. Avoid melons that are still green or have a hard, smooth rind, as they are likely not fully ripe.
Q: How much should I prune my honeydew melon vines?
A: Pruning is essential for directing the plant’s energy towards fruit development. After the plant has set a few fruits (ideally 2-3 per vine), prune off any additional flowers or small melons that are forming. This will prevent the plant from wasting energy on producing more fruit than it can properly ripen. Also, remove any yellowing or diseased leaves to improve air circulation and prevent the spread of disease. Be careful not to prune too aggressively, as the leaves are necessary for photosynthesis.
Q: What kind of fertilizer should I use for honeydew melons?
A: Honeydew melons benefit from a balanced fertilizer with a slightly higher phosphorus content, which promotes fruit development. A fertilizer with an NPK ratio of 5-10-5 or similar is a good choice. Avoid fertilizers that are too high in nitrogen, as this can promote excessive vine growth at the expense of fruit production. You can also supplement with organic fertilizers such as compost tea or fish emulsion. Apply fertilizer according to the package directions, and be sure to water thoroughly after each application.
Q: How often should I water my honeydew melon plants?
A: Honeydew melons need consistent moisture, especially during fruit development. Water deeply and regularly, aiming to keep the soil consistently moist but not waterlogged. The frequency of watering will depend on your climate and soil type. In hot, dry weather, you may need to water daily, while in cooler, wetter weather, you can water less frequently. Use a soaker hose or drip irrigation to deliver water directly to the roots, avoiding wetting the foliage, which can increase the risk of fungal diseases.
Q: What are some common pests and diseases that affect honeydew melons?
A: Honeydew melons are susceptible to several pests and diseases, including aphids, squash bugs, vine borers, powdery mildew, and fusarium wilt. Regularly inspect your plants for signs of infestation or disease. Control aphids and squash bugs with insecticidal soap or neem oil. Protect against vine borers by wrapping the base of the stems with aluminum foil or netting. Prevent powdery mildew by ensuring good air circulation and avoiding overhead watering. Choose disease-resistant varieties and practice crop rotation to minimize the risk of fusarium wilt.
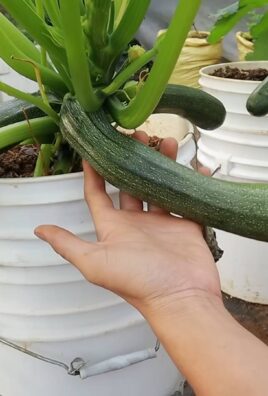
Q: Can I grow honeydew melons in containers?
A: Yes, you can grow honeydew melons in containers, but you’ll need a large container (at least 20 gallons) with good drainage. Choose a bush or dwarf variety of honeydew melon, as these are better suited for container growing. Use a high-quality potting mix and provide regular watering and fertilization. You may also need to provide support for the vines, such as a trellis or stake. Container-grown honeydew melons may require more frequent watering and feeding than those grown in the ground.
Q: How long does it take for honeydew melons to mature?
A: Honeydew melons typically take 75-100 days to mature from planting. The exact time will depend on the variety, climate, and growing conditions. Be patient and monitor your plants closely for signs of ripeness. Remember to use the tips mentioned earlier to determine when your melons are ready to harvest.
Q: What if my honeydew melons are not sweet even after trying this DIY trick?
A: Several factors can contribute to a lack of sweetness in honeydew melons, even with proper pruning and feeding. Insufficient sunlight, poor soil quality, and inadequate watering can all affect the sugar content of the fruit. Make sure your plants are getting at least 6-8 hours of direct sunlight per day. Amend your soil with plenty of compost and organic matter to improve its fertility and drainage. And ensure that your plants are receiving consistent moisture, especially during fruit development. Also, consider the variety of honeydew melon you are growing. Some varieties are naturally sweeter than others. If you’ve tried everything else and your melons are still not sweet, you may want to try a different variety next time.

Leave a Comment