
Home Gardening Kale Tips: Unlock the secrets to growing vibrant, delicious kale right in your own backyard! Have you ever dreamed of stepping outside and harvesting fresh, nutrient-packed kale for your salads, smoothies, or even a crispy kale chip snack? I know I have! But sometimes, getting those picture-perfect kale leaves can feel like a real challenge. That’s where these simple, yet effective, DIY tricks come in.
Kale, a nutritional powerhouse, has been cultivated for over 2,000 years, with its roots tracing back to the Mediterranean. It was a staple food in Roman times and has since become a beloved ingredient worldwide. But you don’t need to be a seasoned farmer to enjoy its benefits.
In this article, I’m going to share my favorite home gardening kale tips and DIY hacks that will help you overcome common kale-growing hurdles. From choosing the right variety and preparing your soil to warding off pests and maximizing your harvest, I’ve got you covered. Why spend money on store-bought kale when you can easily grow your own, knowing exactly what went into it? Plus, there’s nothing quite like the satisfaction of nurturing a plant from seed to table. Let’s get our hands dirty and transform your garden into a kale-growing haven!
Growing Kale Like a Pro: My DIY Guide to a Bountiful Harvest
Hey there, fellow gardening enthusiasts! I’m so excited to share my tried-and-true methods for growing kale that will have you swimming in leafy greens. Kale is a nutritional powerhouse, and growing it yourself is surprisingly easy and rewarding. I’ve learned a lot over the years, and I’m here to guide you through every step, from seed to salad. Let’s get started!
Choosing the Right Kale Variety
Before we even think about planting, let’s talk kale varieties. There are so many to choose from, each with its own unique flavor and texture. Here are a few of my favorites:
* **Curly Kale (Scotch Kale):** This is the classic kale you probably picture. It has tightly curled leaves and a slightly bitter taste that mellows when cooked.
* **Lacinato Kale (Dinosaur Kale or Tuscan Kale):** This variety has long, narrow, dark green leaves with a slightly bumpy texture. It’s milder and sweeter than curly kale and holds up well in soups and stews.
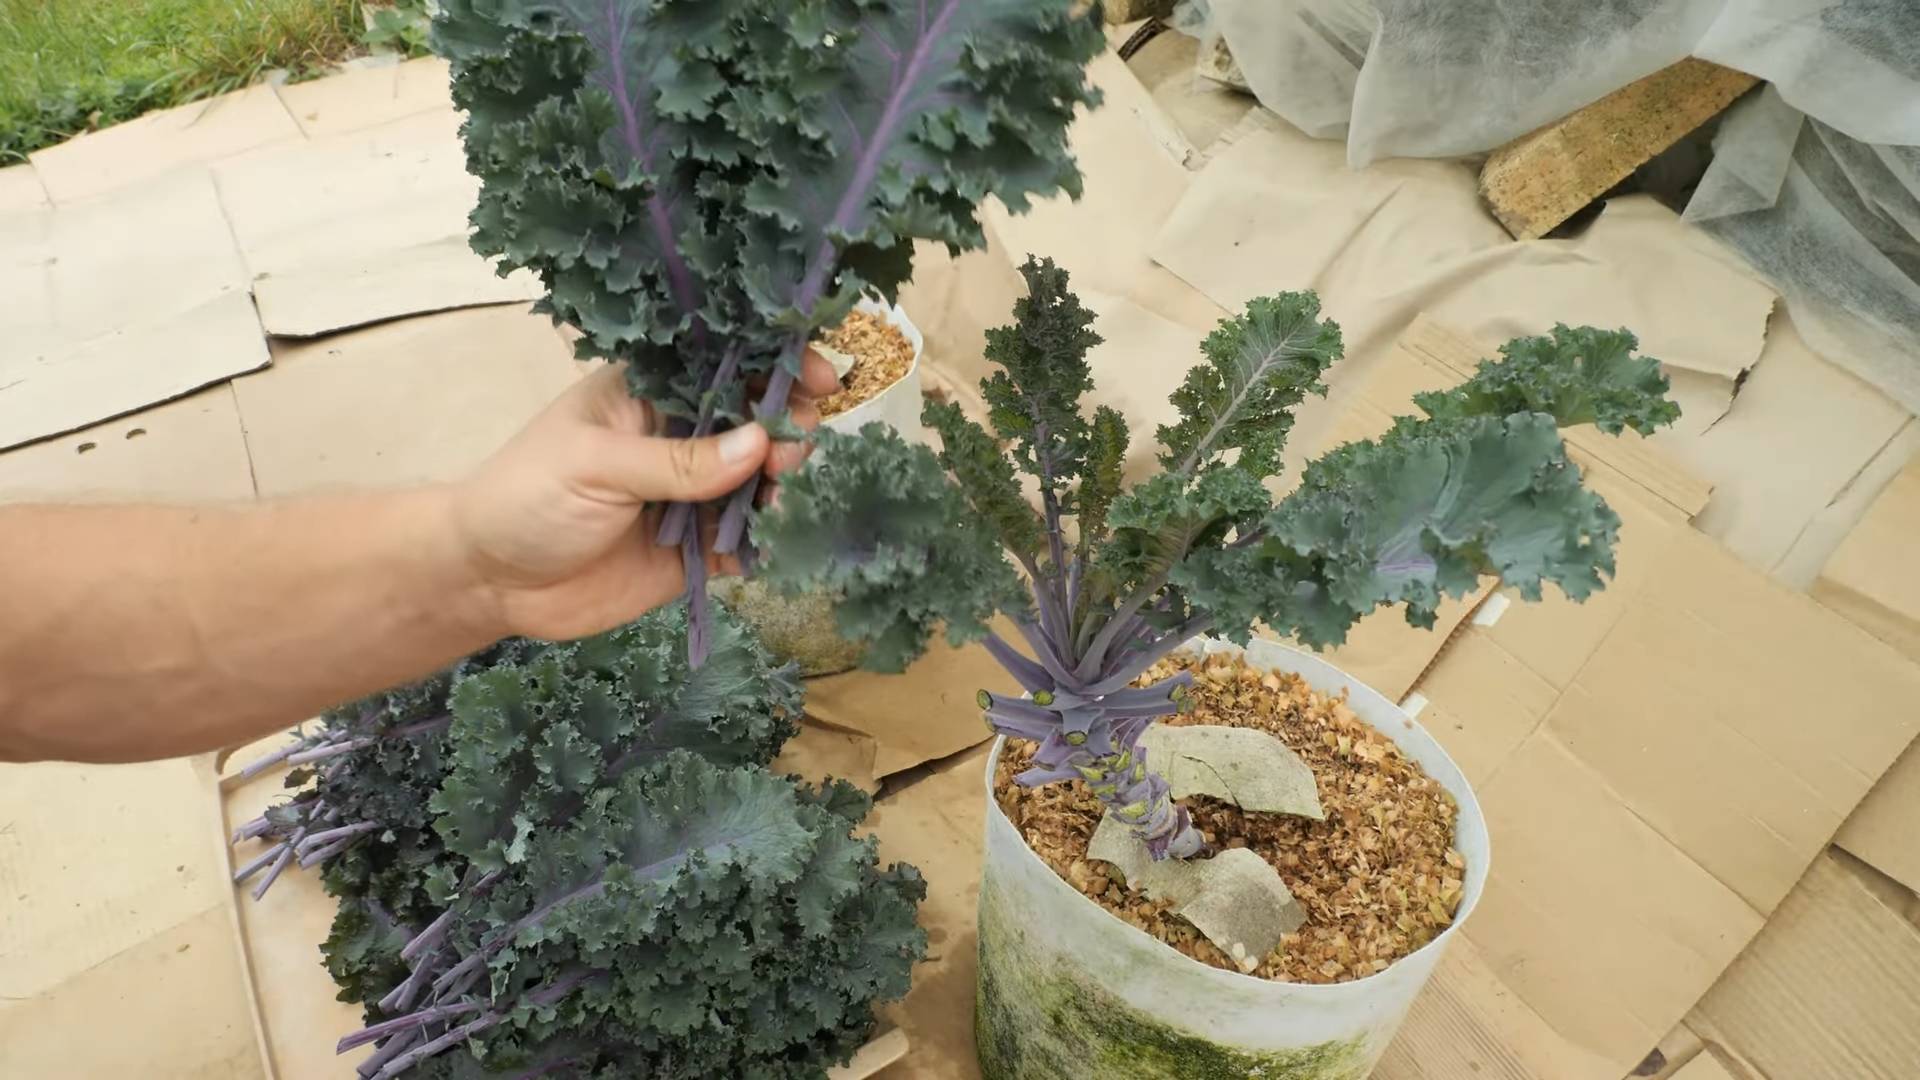
* **Red Russian Kale:** This kale has flat, fringed leaves with reddish-purple stems. It’s tender and sweet, especially when young, and adds a beautiful pop of color to your garden.
* **Redbor Kale:** This is an ornamental kale with deeply ruffled, purple leaves. It’s not only beautiful but also delicious!
Choosing the right variety depends on your taste preferences and what you plan to use the kale for. Experiment and find your favorites!
Preparing Your Garden Bed
Kale thrives in well-drained soil that’s rich in organic matter. Here’s how I prepare my garden bed for a kale explosion:
* **Sunlight:** Kale needs at least 6 hours of sunlight per day. Choose a sunny spot in your garden.
* **Soil Testing:** It’s always a good idea to test your soil’s pH. Kale prefers a pH between 6.0 and 7.5. You can buy a soil testing kit at most garden centers.
* **Amending the Soil:** If your soil is heavy clay or sandy, amend it with compost, aged manure, or other organic matter. This will improve drainage and provide essential nutrients. I usually add a generous layer of compost, about 2-3 inches thick.
* **Tilling or Digging:** Loosen the soil to a depth of at least 12 inches. This will allow the kale roots to grow easily.
* **Fertilizing:** Incorporate a slow-release fertilizer into the soil before planting. Look for a fertilizer that’s high in nitrogen, which promotes leafy growth.
Planting Kale: Seeds vs. Seedlings
You can start kale from seeds or buy seedlings from a nursery. I’ve done both, and here’s my take:
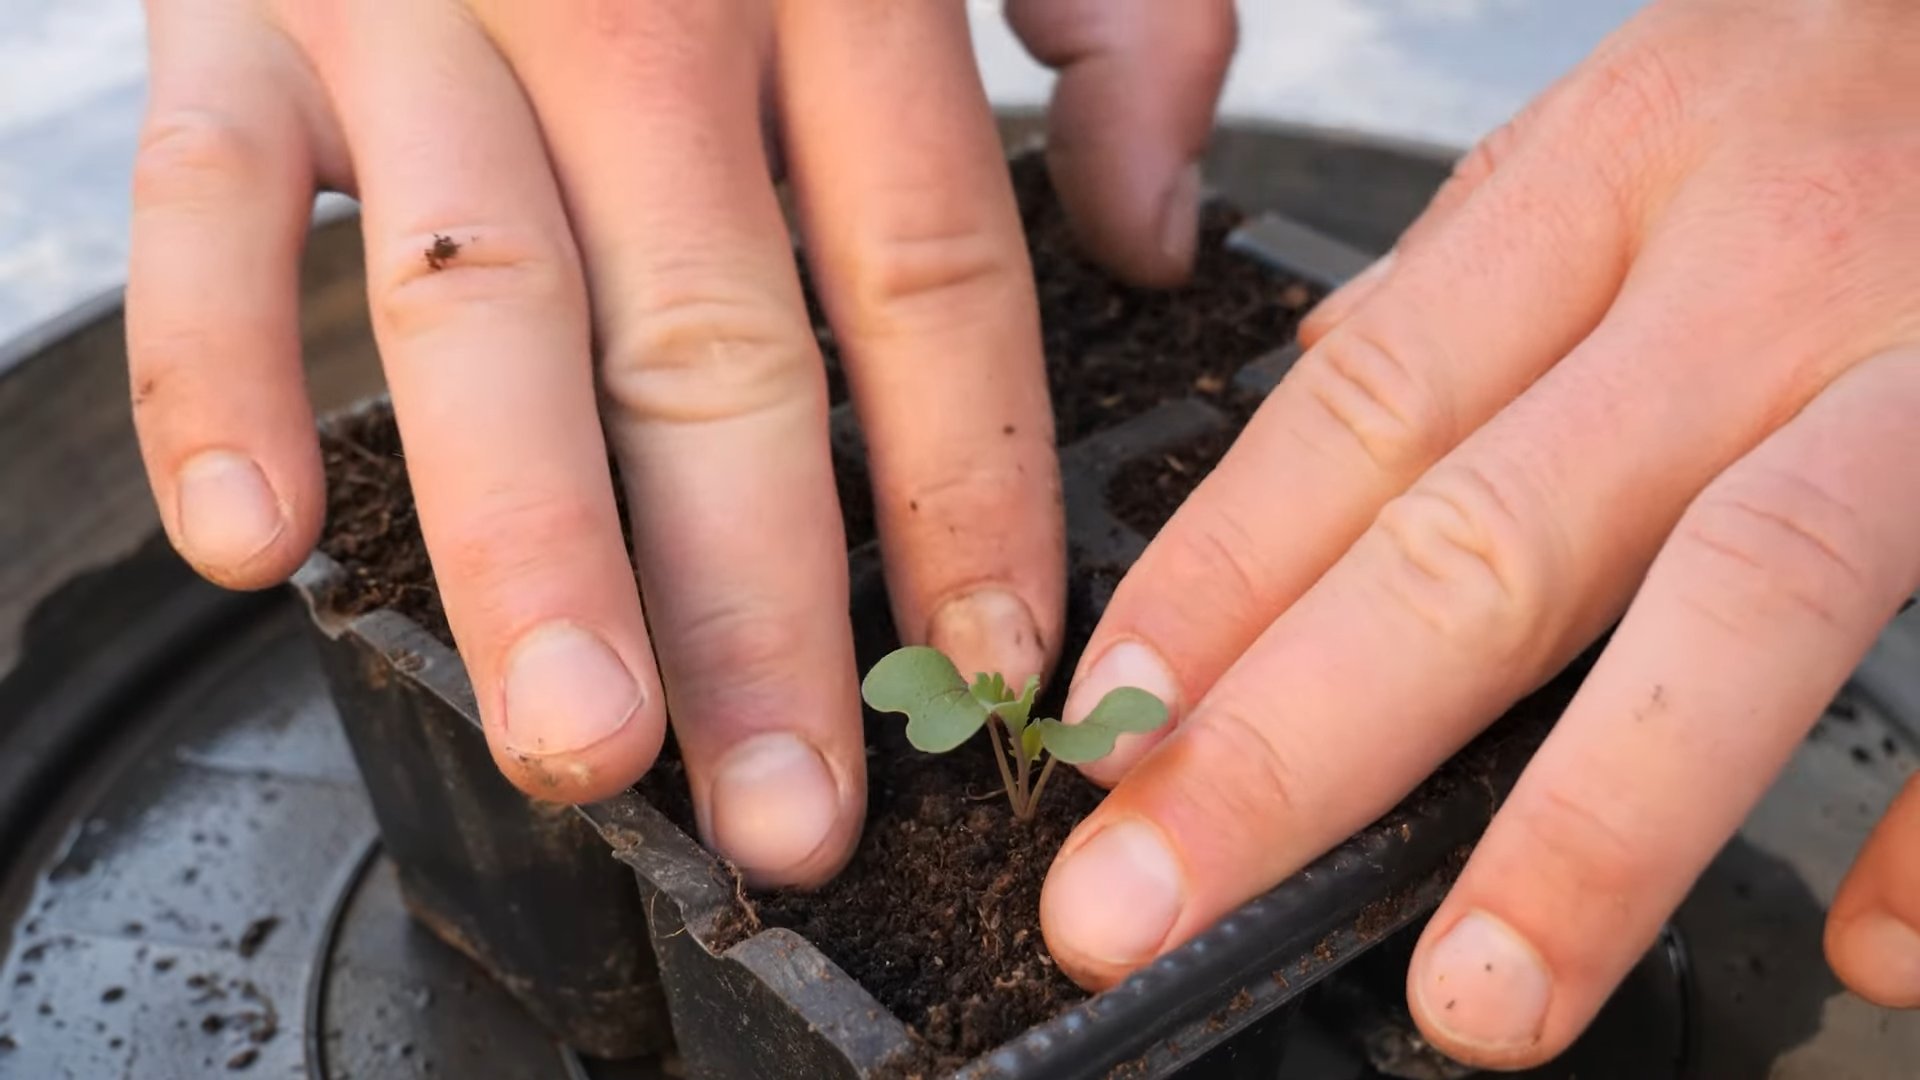
* **Starting from Seeds:** This is the more economical option, and it gives you more control over the varieties you grow. Start seeds indoors 6-8 weeks before the last expected frost. Sow seeds about 1/4 inch deep in seed-starting trays or pots. Keep the soil moist and warm. Once the seedlings have a few true leaves, you can transplant them into your garden.
* **Buying Seedlings:** This is the easier option, especially if you’re short on time or space. Choose healthy-looking seedlings with sturdy stems and green leaves.
No matter which method you choose, make sure to harden off your seedlings before transplanting them into the garden. This means gradually exposing them to outdoor conditions over a period of a week or two.
Step-by-Step Planting Guide
Okay, let’s get our hands dirty! Here’s my step-by-step guide to planting kale:
1. **Prepare the Planting Hole:** Dig a hole that’s slightly larger than the root ball of your seedling. If you’re planting seeds, sow them about 1/2 inch deep and 1 inch apart.
2. **Plant the Seedling:** Gently remove the seedling from its container and loosen the roots. Place the seedling in the hole and backfill with soil. Make sure the top of the root ball is level with the soil surface.
3. **Space the Plants:** Space kale plants 12-18 inches apart. This will give them enough room to grow and prevent overcrowding.
4. **Water Thoroughly:** Water the plants thoroughly after planting. This will help settle the soil and encourage root growth.
5. **Mulch:** Apply a layer of mulch around the plants. This will help retain moisture, suppress weeds, and regulate soil temperature. I like to use straw or shredded leaves.
Caring for Your Kale Plants
Once your kale plants are in the ground, it’s important to provide them with proper care. Here’s what I do to keep my kale happy and healthy:
* **Watering:** Kale needs consistent moisture, especially during hot, dry weather. Water deeply whenever the top inch of soil feels dry. Avoid overhead watering, which can lead to fungal diseases.
* **Fertilizing:** Fertilize your kale plants every few weeks with a balanced fertilizer. You can also side-dress them with compost or aged manure.
* **Weeding:** Keep the garden bed free of weeds. Weeds compete with kale plants for nutrients and water.
* **Pest Control:** Kale is susceptible to a few pests, including aphids, cabbage worms, and flea beetles. I prefer to use organic pest control methods, such as insecticidal soap or neem oil. You can also handpick pests off the plants.
* **Disease Prevention:** To prevent fungal diseases, make sure to provide good air circulation around the plants. Avoid overhead watering and remove any diseased leaves.
Harvesting Your Kale
The best part of growing kale is harvesting it! You can start harvesting kale leaves when they are about 6-8 inches long. Here’s how I do it:
1. **Harvest Outer Leaves:** Harvest the outer leaves first, leaving the inner leaves to continue growing.
2. **Cut or Snap:** You can either cut the leaves off with a knife or snap them off with your fingers.
3. **Harvest Regularly:** Harvest kale regularly to encourage new growth.
4. **Store Properly:** Store kale leaves in the refrigerator for up to a week. Wash and dry them thoroughly before storing.
Kale tastes best after a frost, as the cold weather sweetens the leaves.
Troubleshooting Common Kale Problems
Even with the best care, you might encounter a few problems when growing kale. Here are some common issues and how to address them:
* **Yellowing Leaves:** This could be a sign of nutrient deficiency, overwatering, or underwatering. Check the soil moisture and fertilize if necessary.
* **Holes in Leaves:** This is usually caused by pests, such as cabbage worms or flea beetles. Use insecticidal soap or neem oil to control pests.
* **Powdery Mildew:** This is a fungal disease that appears as a white, powdery coating on the leaves. Improve air circulation and apply a fungicide if necessary.
* **Bolting:** This happens when kale plants flower prematurely, usually due to hot weather. Once kale bolts, the leaves become bitter. To prevent bolting, plant kale in the spring or fall, when temperatures are cooler.
Extending Your Kale Season
I love having fresh kale year-round! Here are a few tips for extending your kale season:
* **Succession Planting:** Plant kale seeds or seedlings every few weeks to ensure a continuous harvest.
* **Cold Frames or Row Covers:** Use cold frames or row covers to protect kale plants from frost and extend the growing season into the winter.
* **Overwintering:** In mild climates, you can overwinter kale plants. Cut them back in the fall and cover them with mulch. They will start growing again in the spring.
Delicious Ways to Enjoy Your Homegrown Kale
Now that you have a bounty of kale, it’s time to enjoy it! Here are a few of my favorite ways to eat kale:
* **Kale Salad:** Massage kale leaves with olive oil, lemon juice, and salt. Add your favorite toppings, such as nuts, seeds, dried fruit, and cheese.
* **Kale Chips:** Toss kale leaves with olive oil and salt. Bake at 350°F (175°C) for 10-15 minutes, or until crispy.
* **Kale Smoothies:** Add kale to your favorite smoothie recipe for a boost of nutrients.
* **Kale Soup:** Kale is a great addition to soups and stews.
* **Sautéed Kale:** Sauté kale with garlic and olive oil for a simple and delicious side dish.
Don’t be afraid to experiment and find your own favorite ways to enjoy kale!
I hope this guide has inspired you to grow your own kale. It’s a rewarding experience that will provide you with a healthy and delicious harvest. Happy gardening!
Conclusion
So, there you have it! Mastering the art of growing your own kale at home is not only achievable but incredibly rewarding. From seed to salad, the journey of nurturing these leafy greens is a testament to the joys of home gardening. We’ve covered everything from selecting the right kale variety to warding off common pests, ensuring you have a thriving patch of this nutritional powerhouse.
But why is this DIY kale growing trick a must-try? Simply put, it empowers you to take control of your food source. You know exactly what goes into your kale – no harmful pesticides, no mysterious fertilizers, just pure, homegrown goodness. Plus, the taste of freshly harvested kale from your own garden is unparalleled. It’s sweeter, more tender, and bursting with flavor compared to store-bought varieties that have traveled miles and sat on shelves.
Beyond the basic tips, consider experimenting with different kale varieties. Curly kale is a classic, but don’t shy away from trying Lacinato (dinosaur) kale for its unique texture or Red Russian kale for its beautiful color and slightly sweeter taste. You can also adjust your planting schedule to extend your harvest season. Succession planting, where you sow seeds every few weeks, ensures a continuous supply of fresh kale throughout the spring, summer, and fall.
Another variation to consider is companion planting. Certain herbs and flowers, like marigolds and dill, can help deter pests and attract beneficial insects to your kale patch. This natural pest control method reduces the need for chemical interventions and promotes a healthier ecosystem in your garden.
Furthermore, think about the different ways you can use your homegrown kale. Beyond salads, kale can be added to smoothies, soups, stews, stir-fries, and even baked into crispy kale chips. The possibilities are endless! Get creative in the kitchen and discover new ways to incorporate this versatile vegetable into your diet.
We are confident that with these tips, you’ll be well on your way to enjoying a bountiful harvest of homegrown kale. The satisfaction of picking your own greens and knowing exactly where they came from is truly unmatched. It’s a sustainable, healthy, and delicious way to enhance your lifestyle.
Don’t just take our word for it, though. We wholeheartedly encourage you to try this DIY kale growing trick for yourself. Start small, be patient, and don’t be afraid to experiment. Every garden is unique, and what works for one person may not work for another. The key is to learn from your experiences and adapt your approach accordingly.
And most importantly, we want to hear about your journey! Share your experiences, successes, and challenges in the comments below. Let us know what kale varieties you’re growing, what pest control methods you’re using, and what delicious recipes you’re creating with your homegrown kale. Your insights can help inspire and educate other gardeners in our community. Together, we can cultivate a thriving network of kale enthusiasts and promote the joys of home gardening. So, grab your gardening gloves, get your hands dirty, and start growing your own delicious and nutritious kale today! This **home gardening kale** adventure awaits!
Frequently Asked Questions (FAQ)
What is the best time of year to plant kale?
The best time to plant kale depends on your climate. In general, kale is a cool-season crop, meaning it thrives in cooler temperatures. For a spring harvest, start seeds indoors 6-8 weeks before the last expected frost or direct sow seeds outdoors 2-4 weeks before the last frost. For a fall harvest, sow seeds outdoors in late summer, about 6-8 weeks before the first expected frost. Kale can tolerate light frosts and even tastes sweeter after a frost. In warmer climates, you can grow kale throughout the winter.
How much sunlight does kale need?
Kale needs at least 6 hours of sunlight per day to thrive. Choose a location in your garden that receives full sun for optimal growth. If you live in a particularly hot climate, some afternoon shade can be beneficial to prevent the leaves from scorching.
What kind of soil is best for growing kale?
Kale prefers well-drained soil that is rich in organic matter. Amend your soil with compost or other organic materials before planting to improve its fertility and drainage. Kale also prefers a slightly acidic to neutral soil pH, between 6.0 and 7.0. You can test your soil pH with a soil testing kit and amend it accordingly.
How often should I water kale?
Kale needs consistent moisture to thrive. Water deeply and regularly, especially during dry periods. Aim to keep the soil consistently moist but not waterlogged. Mulching around your kale plants can help retain moisture in the soil and suppress weeds.
What are some common pests that affect kale?
Common pests that affect kale include aphids, cabbage worms, flea beetles, and slugs. Regularly inspect your plants for signs of infestation and take action promptly. You can use organic pest control methods such as insecticidal soap, neem oil, or handpicking pests off the plants. Row covers can also be used to protect your kale from pests.
How do I harvest kale?
You can start harvesting kale leaves when they are about 4-6 inches long. Harvest the outer leaves first, leaving the inner leaves to continue growing. You can harvest kale leaves continuously throughout the growing season. Simply snap or cut the leaves off at the base of the stem.
How do I store kale after harvesting?
To store kale after harvesting, wash the leaves thoroughly and dry them completely. Wrap the kale leaves in a paper towel and store them in a plastic bag in the refrigerator. Kale can be stored in the refrigerator for up to a week.
Can I grow kale in containers?
Yes, you can grow kale in containers. Choose a large container with drainage holes and fill it with a well-draining potting mix. Make sure the container receives at least 6 hours of sunlight per day. Water regularly and fertilize every few weeks with a balanced fertilizer.
How do I prevent kale from bolting (going to seed)?
Bolting is when a plant prematurely flowers and goes to seed, which can make the leaves bitter. To prevent kale from bolting, avoid planting it during the hottest part of the summer. Also, ensure that your kale plants receive consistent moisture and are not stressed by drought.
Is kale a good source of nutrients?
Yes, kale is an excellent source of nutrients. It is packed with vitamins A, C, and K, as well as calcium, iron, and antioxidants. Kale is also a good source of fiber. Adding kale to your diet can help improve your overall health and well-being.

Leave a Comment