
Grow Taro at Home? Absolutely! Imagine harvesting your own creamy, nutty-flavored taro root, right from your backyard. It’s easier than you think, and this DIY guide will show you how. For centuries, taro has been a staple food in many cultures, particularly in the Pacific Islands and Asia. It’s more than just a food source; it’s deeply intertwined with cultural traditions and family gatherings. Think of Hawaiian poi, made from pounded taro root – a symbol of connection and heritage.
But why should you bother to grow taro at home? Well, for starters, store-bought taro can be expensive and sometimes hard to find. Plus, growing your own ensures you know exactly what’s going into your food – no mystery pesticides or questionable growing practices. Beyond the practical benefits, there’s something incredibly rewarding about nurturing a plant from start to finish and then enjoying the fruits (or, in this case, the roots!) of your labor. I’m going to guide you through the whole process, from selecting the right variety to harvesting your delicious taro. Let’s get our hands dirty and bring a little bit of the tropics to your garden!
Growing Taro at Home: A Beginner’s Guide
Hey there, fellow plant enthusiasts! Ever thought about growing your own taro? It might seem intimidating, but trust me, it’s totally doable, even if you don’t have a sprawling garden. I’m going to walk you through everything you need to know to cultivate this fascinating and delicious plant right at home.
Choosing Your Taro Variety
First things first, let’s talk about varieties. Taro comes in different shapes, sizes, and colors. Some are better suited for certain climates than others. Here are a few popular options:
* Bun Long: This is a common variety, known for its large corms (the edible part) and relatively easy cultivation. It’s a good starting point for beginners.
* Dasheen: Another widely grown variety, Dasheen produces smaller corms but is known for its excellent flavor.
* Eddoe: Eddoe taro produces smaller, more numerous corms compared to Dasheen. It’s often grown for its leaves as well.
* Black Magic: If you’re looking for something visually striking, Black Magic taro has dark purple to black leaves. It’s more ornamental but still produces edible corms.
Consider your local climate and what you plan to do with your taro (eat the corms, use the leaves, or both) when making your choice. I personally started with Bun Long because it’s readily available in my area and relatively forgiving.
Preparing Your Planting Medium
Taro loves moisture, so a well-draining but water-retentive soil is key. Here’s my go-to mix:
* Potting Soil: This forms the base of your mix. I usually use a good quality all-purpose potting soil.
* Compost: Compost adds nutrients and improves drainage. I like to use homemade compost, but store-bought works just as well.
* Peat Moss or Coco Coir: These help retain moisture. Coco coir is a sustainable alternative to peat moss.
* Perlite: Perlite improves drainage and aeration.
Mix these ingredients in roughly equal parts. The goal is a soil that holds moisture without becoming waterlogged.
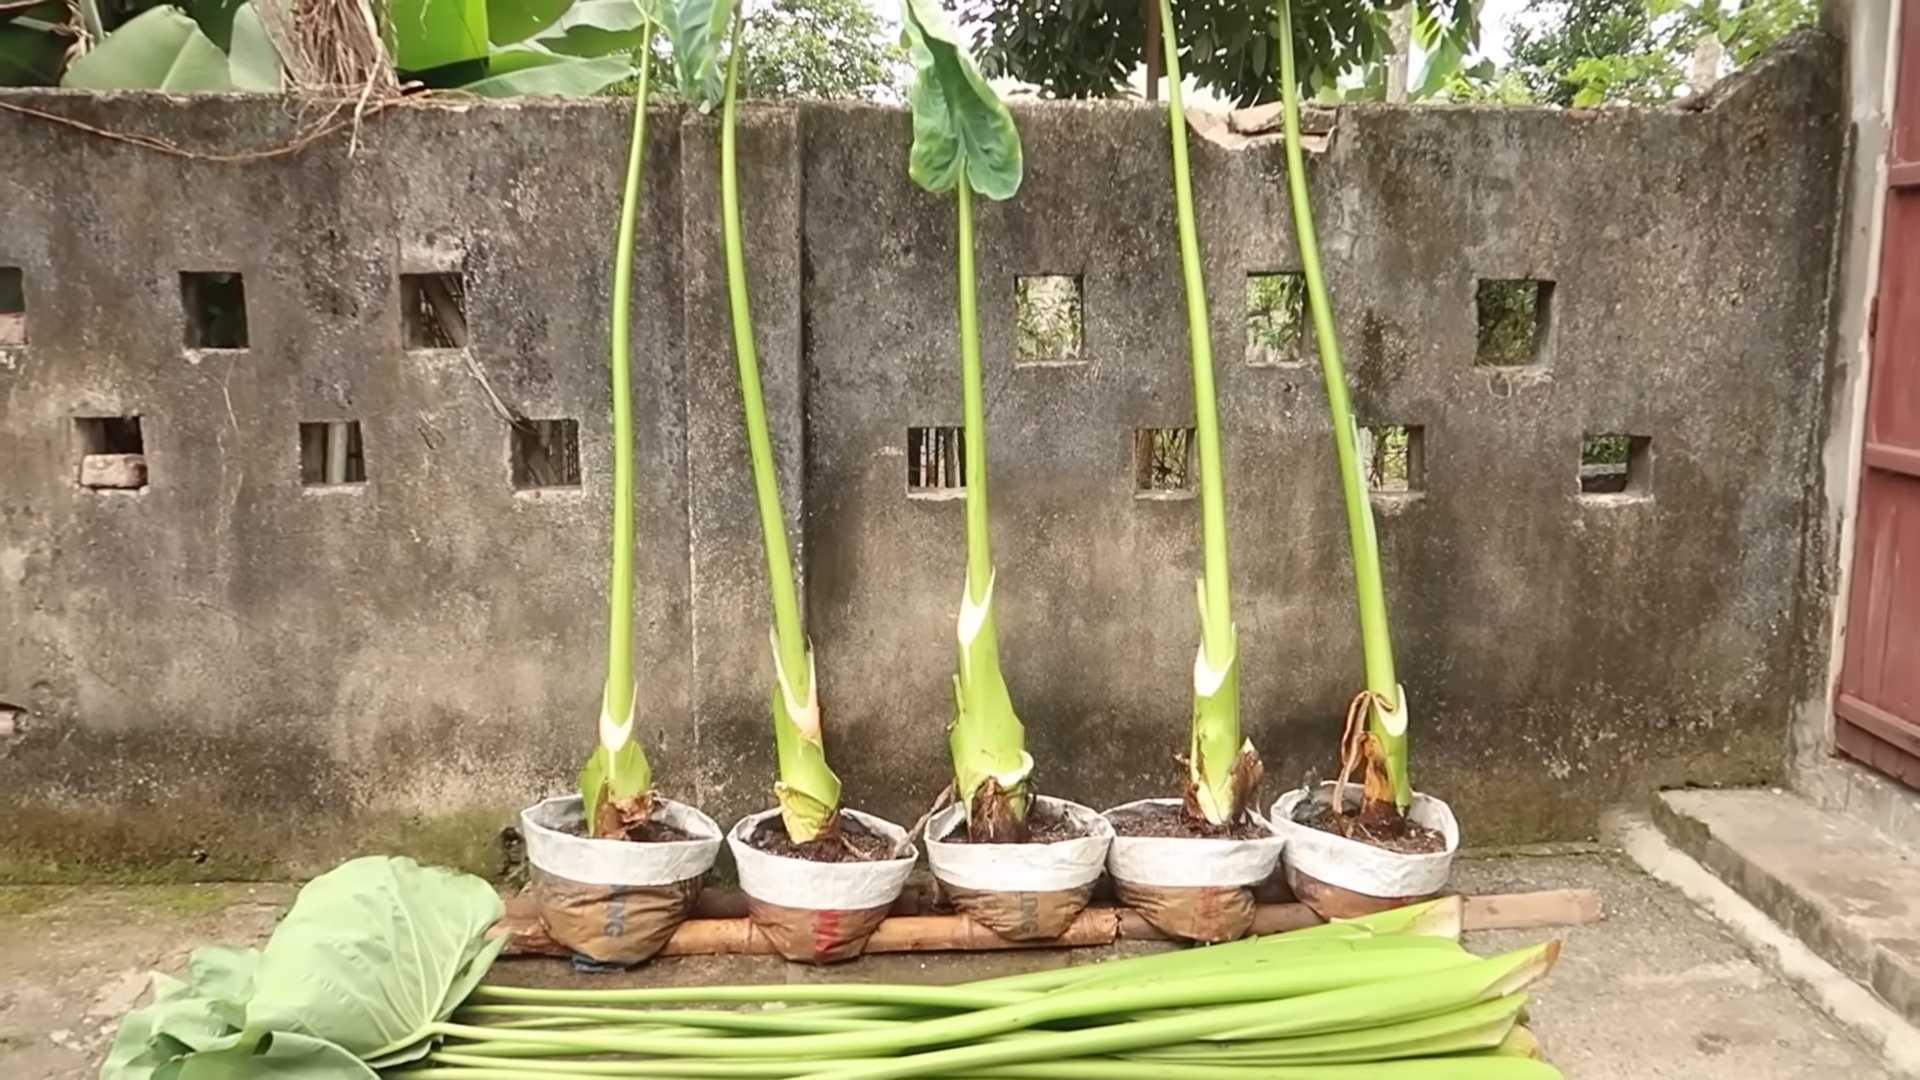
Planting Your Taro
You can start taro from corms (the underground stems) or from cuttings. I’ve had more success with corms, so that’s what I’ll focus on.
1. Choose a Container: Select a pot that’s at least 12 inches in diameter and 12 inches deep. Taro needs room for its roots to grow. Make sure the pot has drainage holes.
2. Fill the Pot: Fill the pot with your prepared planting medium, leaving a few inches of space at the top.
3. Plant the Corm: Place the taro corm on top of the soil, with the pointed end (where the shoots will emerge) facing upwards. Cover the corm with about 2-3 inches of soil.
4. Water Thoroughly: Water the pot thoroughly until water drains out of the drainage holes. This helps settle the soil and provides the corm with initial moisture.
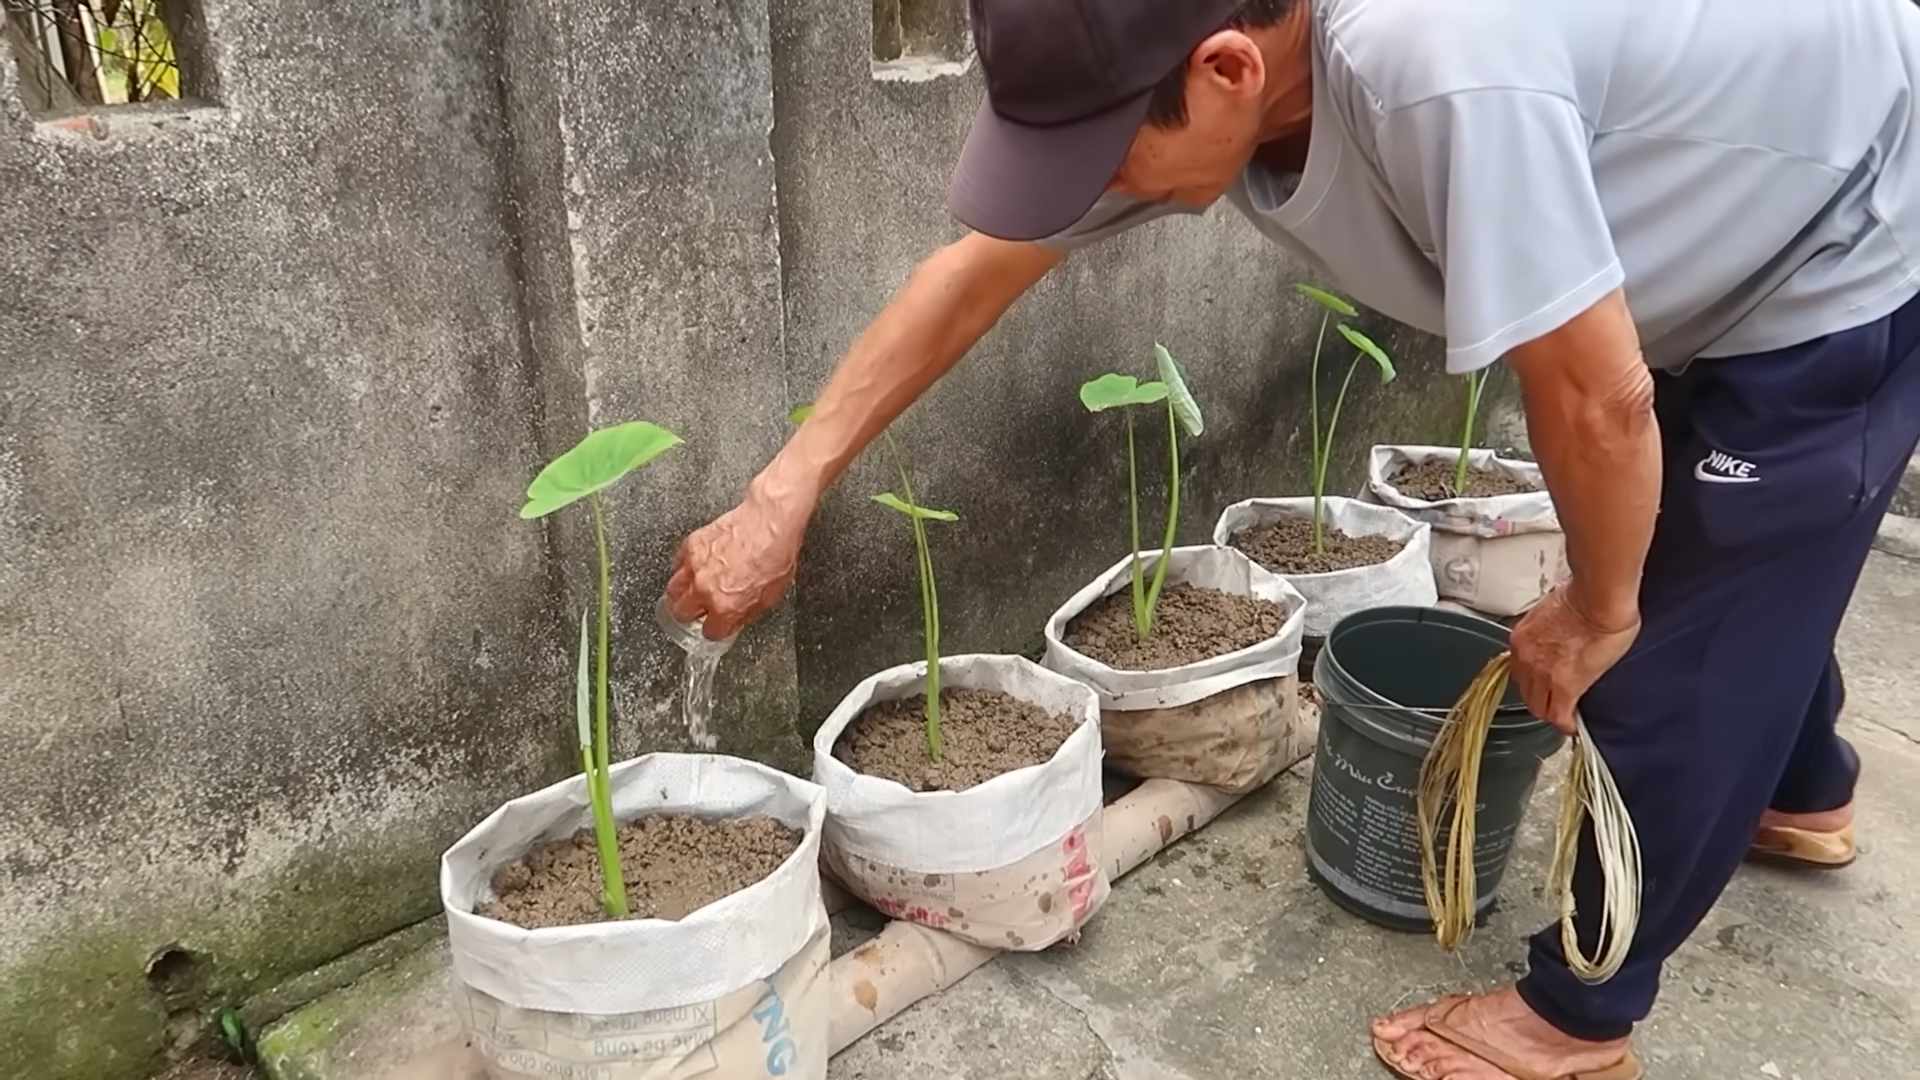
Caring for Your Taro Plant
Now comes the fun part: watching your taro grow! Here’s what you need to keep in mind:
* Sunlight: Taro thrives in bright, indirect sunlight. Avoid direct sunlight, especially during the hottest part of the day, as it can scorch the leaves. I keep mine on a covered patio that gets plenty of morning sun.
* Watering: Taro loves water! Keep the soil consistently moist, but not soggy. Water whenever the top inch of soil feels dry to the touch. You can even place the pot in a shallow tray of water to ensure consistent moisture.
* Humidity: Taro appreciates high humidity. If you live in a dry climate, consider misting the leaves regularly or using a humidifier.
* Fertilizing: Feed your taro plant every 2-3 weeks with a balanced liquid fertilizer during the growing season (spring and summer). Follow the instructions on the fertilizer label.
* Temperature: Taro prefers warm temperatures, ideally between 65°F and 85°F (18°C and 29°C). Protect it from frost and freezing temperatures.
* Pest Control: Keep an eye out for pests like aphids and spider mites. Treat infestations promptly with insecticidal soap or neem oil.
Harvesting Your Taro
Harvesting time depends on the variety and your growing conditions. Generally, taro is ready to harvest in 6-12 months. Here’s how to tell:
* Leaves: The leaves will start to turn yellow and die back.
* Corm Size: The corm should be large and firm.
To harvest, gently dig around the plant and lift the corm out of the soil. Be careful not to damage the corm.
Propagating Taro
Want more taro plants? You can propagate them from corms or from offsets (small plants that grow from the base of the main plant).
* From Corms: Simply plant a new corm as described above.
* From Offsets: Carefully separate the offsets from the main plant and plant them in their own pots.
Troubleshooting
Even with the best care, you might encounter some problems. Here are a few common issues and how to address them:
* Yellowing Leaves: This could be due to overwatering, underwatering, nutrient deficiency, or pest infestation. Check the soil moisture, fertilize if needed, and inspect for pests.
* Brown Leaf Tips: This is often caused by low humidity or dry air. Mist the leaves regularly or use a humidifier.
* Slow Growth: This could be due to insufficient sunlight, poor soil, or lack of fertilizer. Move the plant to a brighter location, amend the soil, and fertilize regularly.
* Root Rot: This is caused by overwatering and poor drainage. Make sure the pot has drainage holes and avoid overwatering. If root rot is severe, you may need to repot the plant with fresh soil.
Enjoying Your Homegrown Taro
Now that you’ve harvested your taro, it’s time to enjoy the fruits (or rather, corms) of your labor! Taro corms must be cooked before eating, as they contain calcium oxalate crystals that can cause irritation. Here are a few ways to prepare taro:
* Boiling: Boil the corms until they are tender.
* Steaming: Steam the corms until they are tender.
* Baking: Bake the corms until they are tender.
* Frying: Slice the corms and fry them into chips.
Taro can be used in a variety of dishes, from stews and soups to desserts. The leaves are also edible, but they must be cooked thoroughly to remove the calcium oxalate crystals.
Section 2: Growing Taro in Water (Hydroponically)
Did you know you can also grow taro in water? It’s a fun and relatively easy way to cultivate this plant without soil. Here’s how I do it:
1. Choose a Healthy Corm: Select a firm, healthy taro corm with visible buds or sprouts.
2. Prepare Your Container: You’ll need a container that can hold water and support the corm. A glass jar, vase, or even a plastic container will work. Make sure it’s clean.
3. Add Water: Fill the container with clean, dechlorinated water. Tap water contains chlorine, which can harm the plant. Let tap water sit out for 24 hours to allow the chlorine to evaporate, or use filtered water.
4. Support the Corm: The corm should be partially submerged in water, but the top part should remain above the waterline to prevent rotting. You can use pebbles, marbles, or even a small net to support the corm. I often use a layer of pebbles at the bottom of the jar.
5. Place in a Bright Location: Just like with soil-grown taro, water-grown taro needs bright, indirect sunlight. Avoid direct sunlight, which can overheat the water and damage the plant.
6. Change the Water Regularly: Change the water every 1-2 weeks to prevent algae growth and provide fresh nutrients.
7. Add Nutrients: While taro can grow in water alone, adding a diluted liquid fertilizer every few weeks will promote healthier growth. Use a balanced fertilizer and follow the instructions on the label. I usually use a hydroponic fertilizer solution.
8. Monitor for Algae: Algae can grow in the water, especially if the container is exposed to too much sunlight. If you notice algae growth, clean the container and change the water more frequently.
9. Watch it Grow: With proper care, your taro corm will start to sprout roots and leaves. It may take a few weeks or even months for significant growth to occur, so be patient.
Growing
Conclusion
So, there you have it! Growing taro at home, while it might seem like an exotic endeavor, is surprisingly achievable with a little patience and the right approach. We’ve walked you through the process, from selecting your taro corm to nurturing it into a thriving plant. But why should you even bother?
The answer is multifaceted. Firstly, there’s the sheer satisfaction of cultivating your own food. Watching a small corm transform into a lush, leafy plant, knowing you played a direct role in its growth, is incredibly rewarding. Secondly, homegrown taro offers a freshness and flavor that you simply can’t replicate with store-bought varieties. You control the growing conditions, ensuring a healthier, more flavorful final product. And thirdly, let’s not forget the cost savings! Over time, growing your own taro can significantly reduce your grocery bill.
This DIY trick is a must-try because it empowers you to connect with your food source, experience the joy of gardening, and enjoy the unique taste of freshly grown taro. It’s a project that’s both educational and delicious!
But the journey doesn’t end here. Feel free to experiment with different varieties of taro. Some are better suited for certain climates or culinary uses than others. Consider trying different soil mixtures to see what works best for your specific environment. You can also explore different planting methods, such as growing taro in containers or directly in the ground.
Don’t be afraid to get creative!
For those living in colder climates, consider growing taro in a large pot that can be brought indoors during the winter months. This allows you to enjoy the beauty of the plant year-round and potentially harvest corms even in colder regions. Another variation is to focus on growing taro primarily for its leaves, which are also edible and highly nutritious. They can be used in soups, stews, and other dishes.
We encourage you to embark on this exciting adventure of growing taro at home. It’s a rewarding experience that will connect you with nature and provide you with a delicious and nutritious food source. Once you’ve successfully grown your own taro, we’d love to hear about your experience! Share your tips, tricks, and photos with us in the comments below. Let’s build a community of taro enthusiasts and learn from each other’s successes and challenges. Your insights could be invaluable to other aspiring taro growers. So, get your hands dirty, embrace the process, and enjoy the fruits (or rather, corms) of your labor! Let us know how your **grow taro at home** project goes!
Frequently Asked Questions (FAQ)
1. What is taro, and why should I grow it?
Taro (Colocasia esculenta) is a starchy root vegetable, similar to potatoes or yams, that’s a staple food in many tropical and subtropical regions. It’s known for its slightly sweet and nutty flavor. You should grow it because it’s a rewarding gardening experience, provides fresh and flavorful produce, can save you money, and allows you to control the growing conditions for a healthier crop. Plus, the leaves are edible and nutritious!
2. What climate is best for growing taro?
Taro thrives in warm, humid climates with temperatures consistently above 70°F (21°C). It prefers full sun to partial shade and requires plenty of moisture. If you live in a cooler climate, you can still grow taro in containers and bring them indoors during the winter.
3. Where can I get taro corms to plant?
You can often find taro corms at Asian grocery stores, farmers’ markets, or online nurseries that specialize in tropical plants. Make sure the corms are firm and healthy, without any signs of rot or disease.
4. What kind of soil does taro need?
Taro prefers rich, well-draining soil that is high in organic matter. A mixture of potting soil, compost, and peat moss works well. The soil should be slightly acidic to neutral (pH 6.0-7.0).
5. How often should I water my taro plant?
Taro needs consistently moist soil. Water deeply whenever the top inch of soil feels dry to the touch. In hot weather, you may need to water daily. Taro can even be grown in standing water, mimicking its natural wetland habitat.
6. How long does it take for taro to mature?
Taro typically takes 6-12 months to mature, depending on the variety and growing conditions. You’ll know it’s ready to harvest when the leaves start to turn yellow and die back.
7. Can I grow taro in a container?
Yes, taro can be successfully grown in containers. Choose a large pot (at least 10 gallons) with drainage holes. Use a well-draining potting mix and water frequently. Container-grown taro may not produce as large corms as those grown in the ground, but it’s still a viable option, especially for those in cooler climates.
8. Are taro leaves edible?
Yes, taro leaves are edible, but they must be cooked thoroughly to remove calcium oxalate crystals, which can cause irritation. Boiling or steaming the leaves for at least 30 minutes will neutralize these crystals. Taro leaves are a good source of vitamins A and C, as well as fiber.
9. What are some common pests and diseases that affect taro?
Common pests that can affect taro include aphids, spider mites, and mealybugs. Diseases include root rot and leaf blight. Regularly inspect your plants for signs of pests or diseases and take appropriate action, such as using insecticidal soap or fungicide. Ensure good drainage to prevent root rot.
10. How do I harvest taro corms?
To harvest taro corms, carefully dig around the plant and lift it from the soil. Separate the corms from the roots and wash them thoroughly. Store the corms in a cool, dry place.
11. Can I propagate taro from cuttings?
While taro is typically propagated from corms, it is possible to propagate it from stem cuttings, although it’s less common. Take a cutting from a healthy stem with at least one node and place it in water until roots develop. Then, transplant the cutting into a pot with well-draining soil.
12. Is taro poisonous if eaten raw?
Yes, taro is poisonous if eaten raw due to the presence of calcium oxalate crystals. These crystals can cause a burning sensation in the mouth and throat. Cooking taro thoroughly breaks down these crystals and makes it safe to eat.
13. What are some ways to cook taro?
Taro can be cooked in a variety of ways, including boiling, steaming, baking, and frying. It can be used in soups, stews, curries, and desserts. In Hawaii, taro is traditionally pounded into poi.
14. How do I store taro corms after harvesting?
Store taro corms in a cool, dry, and well-ventilated place. Avoid storing them in the refrigerator, as this can cause them to spoil. Properly stored taro corms can last for several weeks.
15. What if my taro plant isn’t growing well?
If your taro plant isn’t growing well, consider the following factors: sunlight, water, soil, and nutrients. Make sure it’s getting enough sunlight and water, and that the soil is well-draining and rich in organic matter. You may also need to fertilize the plant with a balanced fertilizer. Check for pests or diseases and address them promptly.

Leave a Comment