
Grow water spinach, also known as ong choy or kangkong, right in your backyard! Imagine stepping outside and harvesting fresh, vibrant greens for your stir-fries, salads, or soups. Forget those wilted, overpriced bunches at the grocery store – with a few simple tricks, you can cultivate your own thriving patch of this delicious and nutritious vegetable.
Water spinach has a rich history, deeply rooted in Southeast Asian cuisine and culture. For centuries, it’s been a staple ingredient, prized for its versatility and ease of cultivation. It’s more than just a vegetable; it’s a connection to tradition and a symbol of resourcefulness.
But why should you bother learning to grow water spinach at home? Well, besides the obvious benefit of having fresh, organic produce at your fingertips, it’s incredibly rewarding! It’s a fast-growing plant, so you’ll see results quickly, boosting your confidence as a home gardener. Plus, it’s a fantastic way to reduce your carbon footprint and connect with nature. In this article, I’m going to share some easy DIY tricks and hacks that will help you successfully grow water spinach, even if you’re a complete beginner. Get ready to unleash your inner gardener and enjoy the delicious rewards!
Wasserspinat selbst anbauen: So geht’s!
Hey Leute, habt ihr schon mal Wasserspinat probiert? Dieses knackige, leicht nussige Gemüse ist super lecker und total einfach selbst anzubauen! Ich zeige euch, wie ihr das ganz easy zu Hause hinbekommt, egal ob im Garten, auf dem Balkon oder sogar in der Wohnung. Los geht’s!
Was du für den Wasserspinat-Anbau brauchst:
* Samen oder Stecklinge: Wasserspinat kann aus Samen gezogen oder durch Stecklinge vermehrt werden. Samen sind leichter zu bekommen, aber Stecklinge wachsen schneller.
* Behälter: Ein großer Topf, Eimer oder sogar eine Wanne. Wasserspinat braucht Platz!
* Erde: Normale Blumenerde oder eine Mischung aus Gartenerde und Kompost.
* Wasser: Viel Wasser! Wasserspinat liebt es feucht.
* Sonnenlicht: Mindestens 6 Stunden Sonne am Tag.
* Optional: Flüssigdünger für Gemüse.
Wasserspinat aus Samen ziehen:
1. Samen vorbereiten: Um die Keimung zu beschleunigen, weiche ich die Samen gerne für 24 Stunden in lauwarmem Wasser ein. Das macht die Schale weicher und hilft den kleinen Pflänzchen beim Durchbrechen.
2. Aussaat: Fülle deinen Behälter mit Erde und befeuchte sie gut. Verteile die Samen gleichmäßig auf der Oberfläche und bedecke sie mit einer dünnen Schicht Erde (ca. 1 cm).
3. Feuchtigkeit halten: Halte die Erde feucht, aber nicht nass. Am besten sprühst du sie regelmäßig mit einer Sprühflasche ein.
4. Keimung: Die Samen keimen normalerweise innerhalb von 7-14 Tagen. Stelle den Behälter an einen warmen und sonnigen Ort.
5. Pikieren (optional): Wenn die Sämlinge groß genug sind (ca. 5-7 cm), kannst du sie in größere Töpfe pikieren, um ihnen mehr Platz zum Wachsen zu geben. Das ist aber nicht unbedingt notwendig, wenn du genügend Platz im ursprünglichen Behälter hast.
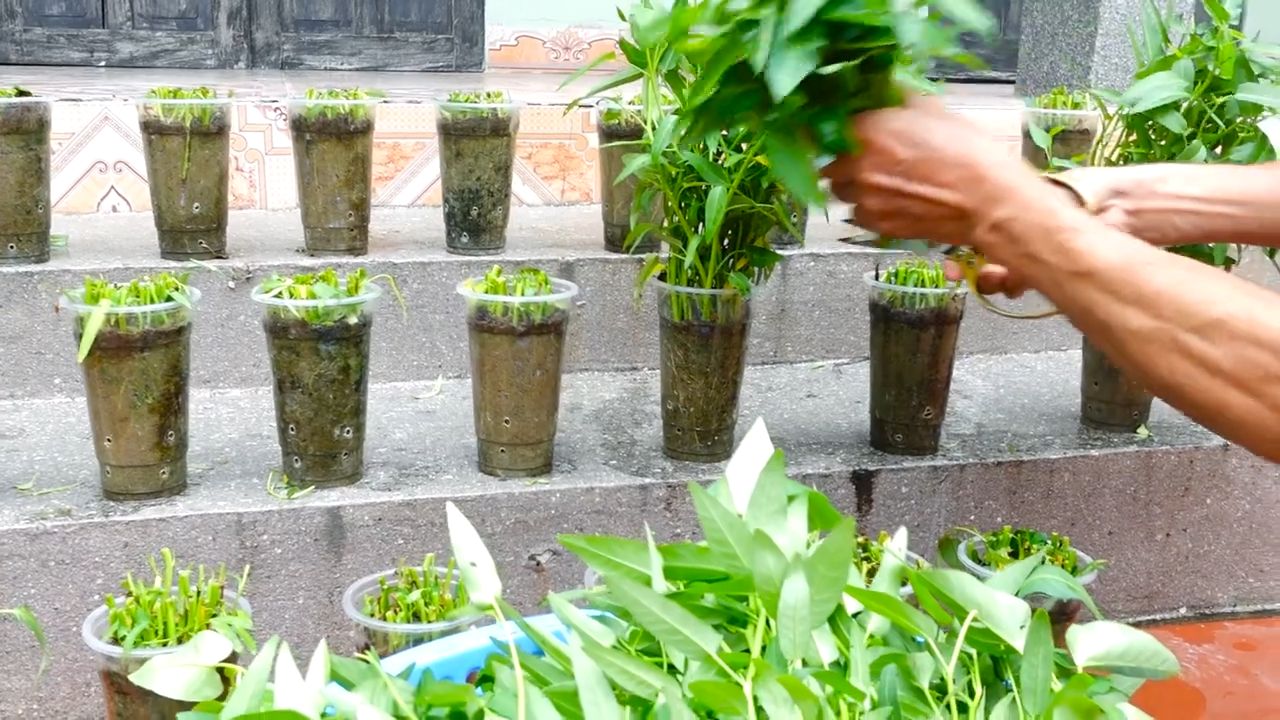
Wasserspinat durch Stecklinge vermehren:
1. Stecklinge schneiden: Schneide gesunde, kräftige Triebe von einer bestehenden Wasserspinatpflanze ab. Die Stecklinge sollten etwa 10-15 cm lang sein und mindestens 2-3 Blattknoten haben.
2. Blätter entfernen: Entferne die unteren Blätter von den Stecklingen, damit sie nicht im Wasser faulen.
3. Bewurzeln: Stelle die Stecklinge in ein Glas Wasser. Achte darauf, dass die Blattknoten unter Wasser sind. Stelle das Glas an einen hellen Ort, aber nicht in die pralle Sonne.
4. Wurzelbildung: Innerhalb von 1-2 Wochen sollten sich Wurzeln bilden. Wechsle das Wasser alle paar Tage, um es sauber zu halten.
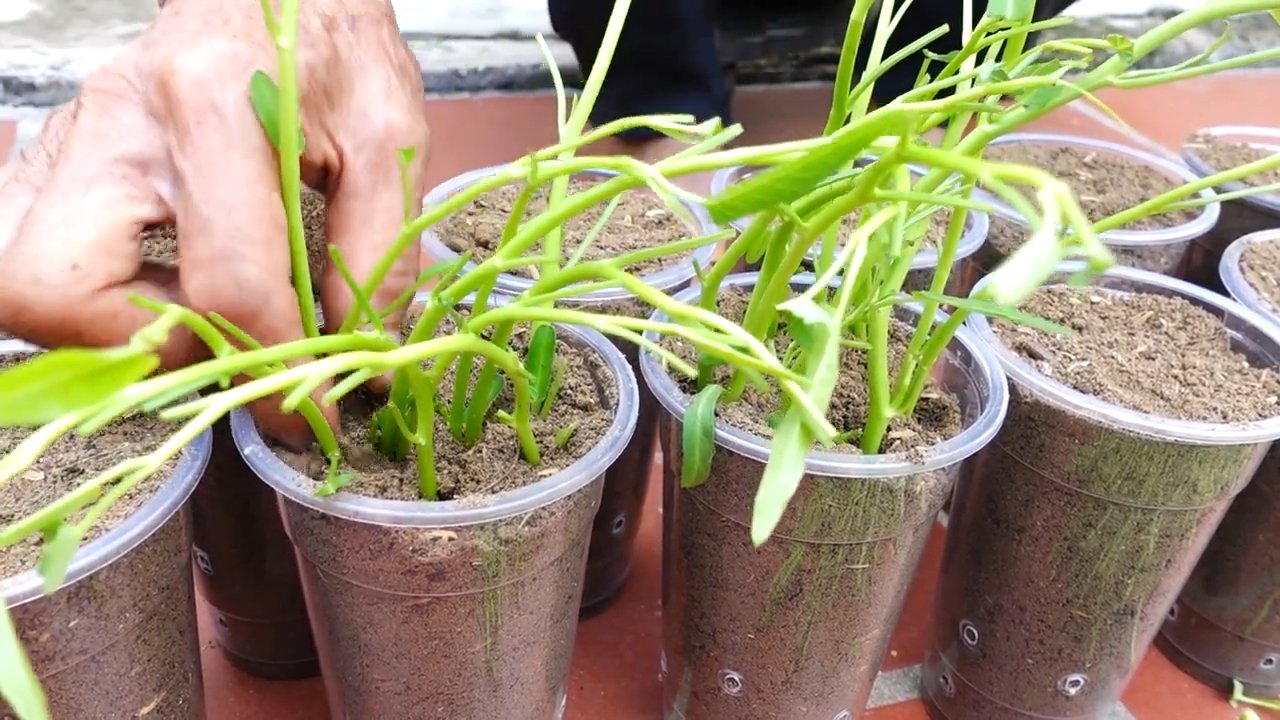
5. Einpflanzen: Sobald die Wurzeln etwa 2-3 cm lang sind, kannst du die Stecklinge in Erde pflanzen.
Die richtige Pflege für deinen Wasserspinat:
* Gießen: Wasserspinat braucht viel Wasser! Die Erde sollte immer feucht sein. An heißen Tagen musst du möglicherweise mehrmals täglich gießen. Ich stelle meinen Topf oft in eine Schale mit Wasser, damit sich die Pflanze selbst versorgen kann.
* Düngen: Dünge deinen Wasserspinat alle 2-3 Wochen mit einem Flüssigdünger für Gemüse. Das sorgt für ein kräftiges Wachstum und eine reiche Ernte.
* Sonnenlicht: Wasserspinat liebt die Sonne! Stelle ihn an einen Ort, an dem er mindestens 6 Stunden Sonne am Tag bekommt.
* Schneiden: Schneide die Triebe regelmäßig zurück, um das Wachstum anzuregen und eine buschigere Pflanze zu erhalten. Du kannst die abgeschnittenen Triebe natürlich gleich essen!
* Schädlinge: Wasserspinat ist relativ resistent gegen Schädlinge. Gelegentlich können Blattläuse auftreten. Diese kannst du einfach mit einem Wasserstrahl abspülen oder mit einem biologischen Insektizid bekämpfen.
Erntezeit!
* Wann ernten? Du kannst deinen Wasserspinat ernten, sobald die Triebe etwa 20-30 cm lang sind.
* Wie ernten? Schneide die Triebe einfach mit einer Schere oder einem Messer ab. Lasse dabei die unteren Blätter stehen, damit die Pflanze weiterwachsen kann.
* Wie oft ernten? Du kannst deinen Wasserspinat mehrmals ernten, solange du ihn gut pflegst.
Wasserspinat in der Küche:
Wasserspinat ist super vielseitig in der Küche! Du kannst ihn roh in Salaten essen, gedünstet als Beilage servieren oder in Wok-Gerichten verwenden. Er passt hervorragend zu Knoblauch, Chili und Sojasauce. Probiert es einfach aus!
Extra Tipps für den erfolgreichen Anbau:
* Der richtige Standort: Wähle einen sonnigen und windgeschützten Standort für deinen Wasserspinat.
* Die richtige Erde: Achte darauf, dass die Erde gut durchlässig ist, damit sich keine Staunässe bildet.
* Die richtige Bewässerung: Gieße deinen Wasserspinat regelmäßig und reichlich, besonders an heißen Tagen.
* Die richtige Düngung: Dünge deinen Wasserspinat regelmäßig, um ein kräftiges Wachstum zu fördern.
* Schutz vor Schädlingen: Kontrolliere deinen Wasserspinat regelmäßig auf Schädlinge und bekämpfe sie bei Bedarf.
* Überwinterung: Wasserspinat ist nicht winterhart. In kälteren Regionen kannst du ihn im Herbst ins Haus holen und an einem hellen Ort überwintern. Allerdings ist es oft einfacher, ihn im Frühjahr neu auszusäen oder Stecklinge zu ziehen.
Häufige Probleme und Lösungen:
* Gelbe Blätter: Gelbe Blätter können ein Zeichen für Nährstoffmangel sein. Dünge deinen Wasserspinat mit einem Flüssigdünger.
* Schlaffe Blätter: Schlaffe Blätter können ein Zeichen für Wassermangel sein. Gieße deinen Wasserspinat reichlich.
* Blattläuse: Blattläuse können mit einem Wasserstrahl abgespült oder mit einem biologischen Insektizid bekämpft werden.
* Pilzkrankheiten: Pilzkrankheiten können durch zu hohe Luftfeuchtigkeit entstehen. Sorge für eine gute Belüftung und vermeide Staunässe.
Wasserspinat im Hydrokultur-System:
Wusstest du, dass Wasserspinat sich auch super für den Anbau im Hydrokultur-System eignet? Das ist eine tolle Option, wenn du keinen Garten oder Balkon hast.
1. System vorbereiten: Wähle ein geeignetes Hydrokultur-System, z.B. ein Deep Water Culture (DWC) System oder ein Nutrient Film Technique (NFT) System.
2. Nährlösung: Verwende eine spezielle Nährlösung für Hydrokultur-Systeme. Achte darauf, dass sie alle wichtigen Nährstoffe für das Wachstum von Wasserspinat enthält.
3. Pflanzen: Pflanze die Wasserspinat-Sämlinge oder Stecklinge in die dafür vorgesehenen Behälter im Hydrokultur-System.
4. Pflege: Überwache regelmäßig den pH-Wert und die Nährstoffkonzentration der Nährlösung. Passe sie bei Bedarf an.
5. Ernte: Ernte den Wasserspinat, sobald er die gewünschte Größe erreicht hat.
Fazit:
Wasserspinat selbst anzubauen ist wirklich kinderleicht und macht total Spaß! Mit ein bisschen Pflege und Aufmerksamkeit kannst du schon bald deine eigene Ernte genießen. Also, worauf wartest du noch? Ran an die Samen oder Stecklinge und los geht’s! Ich wünsche euch viel Erfolg und eine reiche Ernte! Lasst es euch schmecken!
Conclusion
So, there you have it! Growing your own water spinach, also known as kangkong or ong choy, is not only surprisingly simple, but also incredibly rewarding. Forget those wilted, overpriced bunches at the grocery store. With a little effort and this straightforward DIY trick, you can have a constant supply of fresh, crisp, and vibrant water spinach right at your fingertips.
Why is this a must-try? Because it puts you in control. You know exactly where your food is coming from, what (or rather, what isn’t) going into it, and you get the satisfaction of nurturing something from seed (or cutting!) to table. Plus, the taste difference is undeniable. Homegrown water spinach boasts a fresher, cleaner flavor that store-bought varieties simply can’t match.
But the benefits don’t stop there. Growing water spinach is a fantastic way to introduce children to gardening and the wonders of nature. It’s also an excellent project for urban dwellers with limited space, as water spinach thrives in containers and even hydroponic setups.
Looking for variations? Experiment with different growing mediums. While soil works perfectly well, you can also try growing water spinach in pure water with added nutrients for a truly hydroponic experience. This method can lead to even faster growth and incredibly tender leaves. Another variation involves the harvesting method. You can harvest the entire plant at once, or you can continually harvest the tender shoots and leaves, allowing the plant to keep producing. This cut-and-come-again method extends your harvest and provides a continuous supply of fresh greens. Consider adding companion plants like basil or mint to deter pests naturally and enhance the overall health of your water spinach.
Don’t be intimidated by the prospect of growing your own vegetables. This DIY trick for growing water spinach is designed to be accessible to everyone, regardless of their gardening experience. It’s a low-maintenance, high-reward project that will quickly become a staple in your gardening repertoire.
We wholeheartedly encourage you to give this a try. Imagine the delicious stir-fries, soups, and salads you can create with your own homegrown water spinach. Picture the pride you’ll feel when you serve a meal featuring ingredients you nurtured yourself.
So, grab some seeds or cuttings, find a sunny spot, and get ready to embark on your water spinach growing adventure. And most importantly, don’t forget to share your experiences with us! We’d love to hear about your successes, your challenges, and any variations you try. Share your photos and tips in the comments below – let’s build a community of water spinach enthusiasts! Let us know if this DIY trick helped you grow the best water spinach you’ve ever tasted!
Frequently Asked Questions (FAQ)
What are the best conditions for growing water spinach?
Water spinach thrives in warm, humid environments with plenty of sunlight. Aim for at least 6 hours of direct sunlight per day. The ideal temperature range is between 70°F and 90°F (21°C and 32°C). While it prefers consistently moist soil, it can also tolerate slightly drier conditions once established. However, for optimal growth, keep the soil consistently damp.
How often should I water my water spinach?
Water spinach loves water, as its name suggests! Water deeply and regularly, especially during hot and dry periods. The soil should always be moist but not waterlogged. If you’re growing water spinach in containers, check the soil moisture daily and water when the top inch feels dry to the touch. In hydroponic setups, ensure the water level is maintained and the nutrient solution is replenished regularly.
What kind of soil is best for water spinach?
Water spinach is not particularly picky about soil, but it prefers a well-draining soil that is rich in organic matter. A loamy soil amended with compost or well-rotted manure is ideal. If you’re growing in containers, use a good-quality potting mix. Avoid heavy clay soils, as they can become waterlogged and inhibit growth.
How long does it take for water spinach to grow?
Water spinach is a fast-growing vegetable. You can typically start harvesting leaves within 4-6 weeks of planting seeds or cuttings. The exact time will depend on the growing conditions, such as temperature, sunlight, and water availability. With optimal conditions, you can expect to harvest regularly for several months.
What are some common pests and diseases that affect water spinach?
Water spinach is generally resistant to pests and diseases, but it can occasionally be affected by aphids, spider mites, and leaf miners. These pests can be controlled with insecticidal soap or neem oil. Fungal diseases, such as powdery mildew, can also occur in humid conditions. Ensure good air circulation and avoid overhead watering to prevent fungal problems.
Can I grow water spinach indoors?
Yes, you can grow water spinach indoors, but you’ll need to provide adequate light. A sunny windowsill or a grow light can provide the necessary illumination. Ensure the temperature is warm and the humidity is relatively high. Indoor-grown water spinach may not grow as quickly or as vigorously as outdoor-grown plants, but it’s still a viable option, especially in colder climates.
How do I harvest water spinach?
You can harvest water spinach by cutting the stems about 4-6 inches from the base of the plant. This will encourage new growth and allow you to harvest repeatedly. Alternatively, you can harvest the entire plant at once. The best time to harvest is in the morning, when the leaves are crisp and fresh.
Can I eat the stems of water spinach?
Yes, the stems of water spinach are edible and delicious! They have a slightly crunchy texture and a mild, slightly sweet flavor. The stems can be stir-fried, steamed, or added to soups and stews.
How do I store water spinach?
Water spinach is best used fresh, but it can be stored in the refrigerator for a few days. Wrap the leaves in a damp paper towel and store them in a plastic bag. Avoid storing water spinach near ethylene-producing fruits, such as bananas and apples, as this can cause the leaves to yellow and wilt.
Is water spinach nutritious?
Yes, water spinach is a highly nutritious vegetable. It is a good source of vitamins A and C, as well as iron, calcium, and fiber. It is also low in calories and fat. Incorporating water spinach into your diet can provide numerous health benefits.
Can I grow water spinach from cuttings?
Absolutely! Growing water spinach from cuttings is a very easy and effective method. Simply take cuttings that are about 6-8 inches long and place them in a glass of water. Roots will typically develop within a week or two. Once the roots are a few inches long, you can transplant the cuttings into soil or a hydroponic system. This is a great way to propagate water spinach and create new plants quickly.
What are some good companion plants for water spinach?
Good companion plants for water spinach include basil, mint, and other herbs. These plants can help to deter pests and attract beneficial insects. Marigolds are also a good choice, as they can help to repel nematodes. Avoid planting water spinach near plants that are susceptible to the same pests and diseases.
Is water spinach invasive?
In some regions, water spinach is considered an invasive species. It can spread rapidly and outcompete native plants. If you live in an area where water spinach is considered invasive, it’s important to grow it in containers to prevent it from spreading. Also, be sure to dispose of any plant waste properly to avoid accidental introduction into natural waterways. Always check with your local agricultural extension office to determine if water spinach is considered invasive in your area.
Can I use fertilizer on my water spinach?
Yes, you can use fertilizer on your water spinach to promote healthy growth. A balanced fertilizer with equal amounts of nitrogen, phosphorus, and potassium is a good choice. You can also use organic fertilizers, such as compost tea or fish emulsion. Apply fertilizer according to the package directions. Avoid over-fertilizing, as this can lead to excessive vegetative growth and reduced yields.
What if my water spinach leaves are turning yellow?
Yellowing leaves can indicate several problems, including nutrient deficiencies, overwatering, or underwatering. Check the soil moisture and ensure that it is consistently moist but not waterlogged. If the soil is too dry, water more frequently. If the soil is too wet, improve drainage. You may also need to fertilize your water spinach to provide it with the necessary nutrients. A lack of nitrogen is a common cause of yellowing leaves.


Leave a Comment