
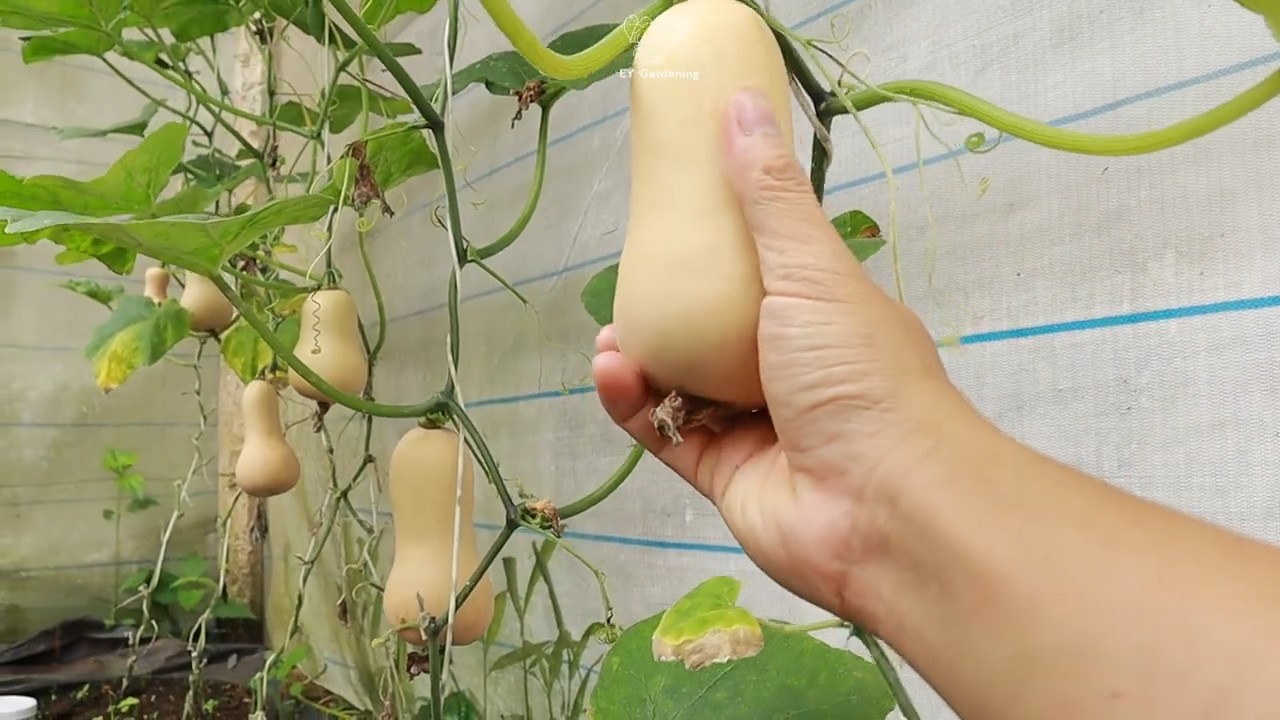
Growing butternut squash tires can feel like a Herculean task, right? You envision those beautiful, tan-skinned gourds gracing your autumn table, but the reality often involves sprawling vines, powdery mildew, and… well, not much squash. But don’t despair, fellow gardeners! I’m here to tell you that a bountiful butternut harvest is within your reach, and it doesn’t require a green thumb blessed by the garden gods.
For centuries, squash has been a staple crop in many cultures, providing sustenance and even playing a role in spiritual ceremonies. From the ancient civilizations of the Americas to modern-day home gardens, the desire to cultivate these versatile vegetables has persisted. But let’s be honest, sometimes traditional methods just don’t cut it, especially when space is limited or pests are particularly persistent.
That’s where these DIY tricks and hacks come in! I’ve compiled a collection of simple, yet effective strategies that will help you overcome common butternut squash growing challenges. Whether you’re struggling with pollination, battling squash vine borers, or simply trying to maximize your yield in a small space, I’ve got you covered. These tips are designed to make growing butternut squash tires a thing of the past, replacing them with the joy of harvesting your own delicious, homegrown gourds. So, grab your gardening gloves, and let’s get started!
DIY Butternut Squash Trellis: Vertical Gardening for Bountiful Harvests
Hey there, fellow gardeners! Are you tired of your butternut squash vines taking over your entire garden? Do you dream of a more organized and productive squash patch? Well, I’ve got just the solution for you: a DIY butternut squash trellis! Growing butternut squash vertically not only saves space but also improves air circulation, reduces the risk of disease, and makes harvesting a breeze. Let’s dive into how you can build your own sturdy and effective trellis.
Materials You’ll Need
Before we get started, let’s gather all the necessary materials. This list might seem long, but trust me, having everything ready beforehand will make the process much smoother.
* Wooden Posts: Four 4×4 inch wooden posts, at least 8 feet long. The length depends on how high you want your trellis, but remember to bury a significant portion in the ground.
* Wooden Boards: Several 2×4 inch wooden boards. The length will depend on the size of your trellis frame. I recommend having enough to create a sturdy rectangular frame.
* Heavy-Duty Wire Mesh or Cattle Panel: This will be the climbing surface for your squash vines. Choose a mesh with openings large enough for you to reach through and harvest the squash. A cattle panel is a great option for its strength and durability.
* Wood Screws: Various sizes, including 3-inch and 1 1/4-inch screws. Make sure they are exterior-grade to withstand the elements.
* Galvanized Staples or U-Nails: For attaching the wire mesh to the wooden frame.
* Post Hole Digger or Shovel: To dig the holes for the wooden posts.
* Level: Essential for ensuring your trellis is straight and stable.
* Measuring Tape: For accurate measurements.
* Drill with Drill Bits: For pre-drilling holes and driving screws.
* Hammer: For driving staples or U-nails.
* Wire Cutters: For cutting the wire mesh or cattle panel.
* Gloves: To protect your hands.
* Safety Glasses: Always a good idea when working with tools.
* Wood Preservative or Stain (Optional): To protect the wood from rot and decay.
* Concrete Mix (Optional): For setting the posts in concrete for extra stability.
Planning Your Trellis
Before you start digging and building, it’s crucial to plan the size and location of your trellis.
* Location: Choose a sunny spot in your garden with well-drained soil. Butternut squash needs at least 6-8 hours of sunlight per day.
* Size: Consider the number of butternut squash plants you want to grow. Each plant will need ample space to spread out. A trellis that is 6-8 feet wide and 6-8 feet tall should be sufficient for a few plants.
* Design: Decide on the overall design of your trellis. A simple rectangular frame with wire mesh is a good starting point. You can also get creative and add decorative elements.
Building the Butternut Squash Trellis: Step-by-Step Guide
Alright, let’s get our hands dirty and build this trellis!
Phase 1: Setting the Posts
This is the foundation of your trellis, so take your time and make sure the posts are sturdy and well-anchored.
1. Mark the Post Locations: Use your measuring tape to mark the locations for the four corner posts. Ensure the posts are spaced evenly to create a rectangular shape. I usually aim for a rectangle that is 6 feet wide and 8 feet long.
2. Dig the Post Holes: Use your post hole digger or shovel to dig holes for the posts. The holes should be at least 2 feet deep. The deeper the holes, the more stable your trellis will be.
3. Set the Posts: Place the wooden posts into the holes. Use your level to ensure the posts are plumb (perfectly vertical).
4. Secure the Posts (Optional): For extra stability, you can set the posts in concrete. Mix the concrete according to the manufacturer’s instructions and pour it into the holes around the posts. Allow the concrete to cure completely before proceeding to the next step. If you’re not using concrete, backfill the holes with soil, tamping it down firmly around the posts.
5. Check Alignment: Double-check that all the posts are level and aligned correctly. This is crucial for the overall stability and appearance of your trellis.
Phase 2: Constructing the Frame
Now, let’s build the frame that will support the wire mesh and the weight of the squash vines.
1. Measure and Cut the Boards: Measure the distance between the posts and cut the 2×4 inch wooden boards to the appropriate lengths. You’ll need boards for the top, bottom, and sides of the frame.
2. Attach the Boards: Use your drill and 3-inch wood screws to attach the boards to the posts. Pre-drill pilot holes to prevent the wood from splitting. Make sure the boards are flush with the posts and securely fastened.
3. Create a Rectangular Frame: Attach the boards to all four posts, creating a sturdy rectangular frame. Use your level to ensure the frame is level and square.
4. Add Additional Support (Optional): For added strength, you can add diagonal braces to the frame. Cut additional 2×4 inch boards at a 45-degree angle and attach them to the corners of the frame.
Phase 3: Attaching the Wire Mesh
This is where the magic happens! The wire mesh will provide the climbing surface for your butternut squash vines.
1. Measure and Cut the Wire Mesh: Measure the inside dimensions of the frame and cut the wire mesh or cattle panel to the appropriate size. Use wire cutters to make clean cuts.
2. Attach the Wire Mesh: Carefully position the wire mesh inside the frame. Use galvanized staples or U-nails and a hammer to attach the mesh to the wooden frame. Space the staples or U-nails every few inches to ensure the mesh is securely fastened.
3. Smooth Out Sharp Edges: Check for any sharp edges on the wire mesh and smooth them out with pliers or wire cutters to prevent injuries.
Phase 4: Finishing Touches
Almost there! Let’s add some finishing touches to protect your trellis and make it look great.
1. Apply Wood Preservative or Stain (Optional): If you want to protect the wood from rot and decay, apply a wood preservative or stain to the entire trellis. Follow the manufacturer’s instructions for application.
2. Inspect the Trellis: Carefully inspect the trellis for any loose screws, staples, or sharp edges. Make any necessary repairs or adjustments.
3. Prepare the Soil: Prepare the soil around the base of the trellis by adding compost or other organic matter. This will provide your butternut squash plants with the nutrients they need to thrive.
Planting and Training Your Butternut Squash
Now that your trellis is complete, it’s time to plant your butternut squash and train the vines to climb.
1. Plant the Butternut Squash: Plant your butternut squash seedlings or seeds at the base of the trellis, spacing them according to the variety’s recommendations. I usually plant them about 12-18 inches apart.
2. Water Thoroughly: Water the newly planted squash thoroughly.
3. Train the Vines: As the squash vines grow, gently guide them onto the wire mesh. You can use plant ties or twine to secure the vines to the trellis.
4. Provide Support for the Squash: As the butternut squash fruits develop, they may need additional support. You can use slings made from old pantyhose or fabric scraps to support the weight of the squash.
5. Monitor for Pests and Diseases: Keep an eye out for pests and diseases and take appropriate action if necessary.
6. Harvest Your Butternut Squash: Harvest your butternut squash when they are mature and the skin is hard.
Tips for Success
Here are a few extra tips to help you succeed with your butternut squash trellis:
* Choose the Right Variety: Select a butternut squash variety that is well-suited for vertical growing. Some varieties are more compact and easier to train than others.
* Water Regularly: Butternut squash needs consistent moisture, especially during hot weather. Water deeply and regularly, especially when the fruits are developing.
* Fertilize Regularly: Feed your butternut squash plants with a balanced fertilizer every few weeks to promote healthy growth and abundant fruit production.
* Prune the Vines: Pruning the vines can help improve air circulation and reduce the risk of disease. Remove any yellowing or damaged leaves.
* Protect from Frost: Butternut squash is sensitive to frost. Protect your plants from frost by covering them with blankets or tarps.
Enjoy Your Vertical Garden!
Conclusion
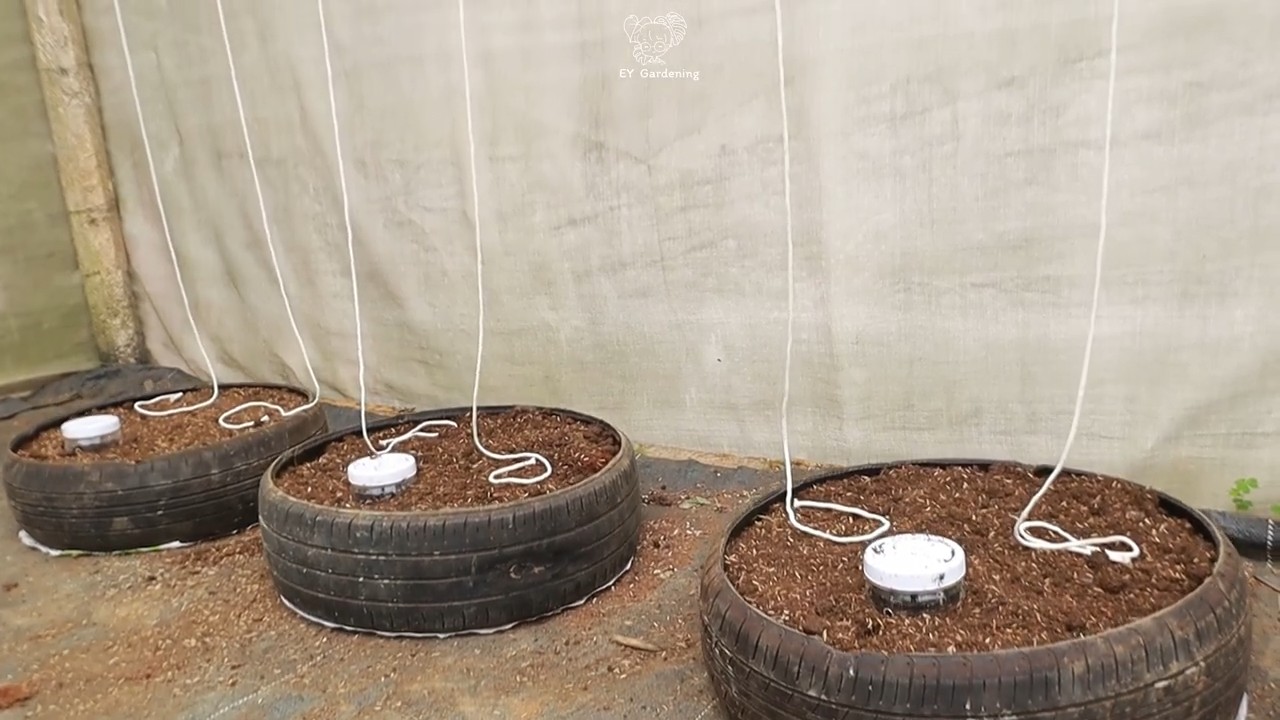
So, there you have it! Transforming old tires into thriving butternut squash planters is more than just a quirky gardening hack; it’s a sustainable, efficient, and surprisingly effective way to cultivate these delicious winter squashes. We’ve explored how this method offers superior soil warming, improved drainage, and a contained environment that minimizes pest access and maximizes your yield.
But why is this DIY trick a must-try? Beyond the obvious environmental benefits of repurposing old tires, the advantages for your butternut squash are undeniable. The dark color of the tire absorbs sunlight, creating a warmer microclimate that encourages faster germination and robust growth, especially crucial in regions with shorter growing seasons. The contained space also allows you to precisely control the soil composition and nutrient levels, giving your butternut squash the perfect foundation to flourish. Plus, the elevated position can make harvesting easier and less back-breaking!
Ready to take your butternut squash game to the next level? Don’t be afraid to experiment! Consider these variations to personalize your tire planters:
* Stacking Tires: For deeper-rooted varieties or to maximize vertical space, stack two or three tires on top of each other. Just be sure to secure them properly.
* Painting the Tires: While the dark color is beneficial for heat absorption, you can paint the exterior of the tires with lighter colors to reflect excess heat during scorching summer months. Use non-toxic, weather-resistant paint. Get creative with designs!
* Adding Drainage Layers: Before filling the tires with soil, add a layer of gravel or broken pottery at the bottom to further enhance drainage and prevent waterlogging.
* Companion Planting: Utilize the space around the tires to plant companion herbs and flowers like marigolds, basil, or nasturtiums, which can deter pests and attract beneficial insects.
* Different Tire Sizes: Experiment with different tire sizes based on the space you have available and the number of butternut squash plants you want to grow in each tire. Larger tires can accommodate more plants.
Growing butternut squash in tires is a rewarding experience that combines sustainability with bountiful harvests. It’s a testament to the ingenuity of gardeners and a practical solution for repurposing waste materials. We are confident that this method will not only simplify your gardening efforts but also significantly improve the quality and quantity of your butternut squash crop.
We wholeheartedly encourage you to give this DIY trick a try. It’s a fun, affordable, and environmentally conscious way to enjoy fresh, homegrown butternut squash. And most importantly, we want to hear about your experiences! Share your photos, tips, and challenges in the comments below. Let’s build a community of tire-planting butternut squash enthusiasts and learn from each other’s successes (and occasional mishaps!). Your insights could inspire others to embrace this innovative gardening technique and contribute to a more sustainable future. Happy gardening!
Frequently Asked Questions (FAQ)
1. Are tires safe to use for growing butternut squash? Won’t chemicals leach into the soil and affect the plants?
This is a valid concern, and it’s important to address it directly. While tires do contain chemicals, the risk of significant leaching into the soil and affecting your butternut squash is generally considered low, especially with proper precautions. Modern tires are manufactured with stricter environmental regulations than in the past. However, to minimize any potential risk, we recommend the following:
* Choose Older Tires: If possible, opt for older tires that have been weathered and exposed to the elements for some time. This can help to reduce the amount of readily leachable chemicals.
* Thoroughly Clean the Tires: Before using the tires, scrub them thoroughly with soap and water to remove any dirt, debris, or loose rubber particles.
* Line the Tires (Optional): For added peace of mind, you can line the inside of the tires with a thick plastic liner or landscape fabric. This will create a barrier between the soil and the tire, further minimizing the risk of chemical leaching. Make sure to still provide drainage holes.
* Use High-Quality Soil: Use a high-quality, organic potting mix or garden soil that is free from contaminants. This will help to ensure that your butternut squash plants have access to the nutrients they need without being exposed to harmful chemicals.
* Monitor Your Plants: Keep an eye on your butternut squash plants for any signs of stress or nutrient deficiencies. If you notice anything unusual, consider testing your soil to check for any potential contaminants.
It’s also worth noting that many gardeners have successfully grown a wide variety of vegetables and fruits in tires for years without any apparent negative effects. The benefits of using tires for gardening, such as improved soil warming and drainage, often outweigh the potential risks. However, it’s always best to err on the side of caution and take steps to minimize any potential exposure to chemicals.
2. What type of soil is best for growing butternut squash in tires?
Butternut squash thrives in well-draining, fertile soil that is rich in organic matter. When growing butternut squash in tires, it’s crucial to provide them with the ideal soil conditions to ensure healthy growth and abundant yields. Here’s what we recommend:
* Well-Draining: Butternut squash roots are susceptible to rot if they sit in waterlogged soil. Choose a soil mix that drains well to prevent this issue.
* Rich in Organic Matter: Incorporate plenty of compost, aged manure, or other organic matter into the soil. This will improve drainage, aeration, and nutrient retention.
* Slightly Acidic to Neutral pH: Butternut squash prefers a soil pH between 6.0 and 7.0. You can test your soil pH using a soil testing kit and amend it accordingly.
* Loamy Texture: A loamy soil texture, which is a mixture of sand, silt, and clay, provides the ideal balance of drainage and water retention.
A good soil mix for growing butternut squash in tires would be a combination of:
* 50% high-quality potting mix or garden soil
* 25% compost or aged manure
* 25% perlite or vermiculite (to improve drainage)
Before planting, amend the soil with a slow-release fertilizer that is specifically formulated for vegetables. This will provide your butternut squash plants with a steady supply of nutrients throughout the growing season.
3. How many butternut squash plants can I grow in one tire?
The number of butternut squash plants you can grow in one tire depends on the size of the tire and the variety of butternut squash you are growing. As a general rule, it’s best to allow at least 2-3 feet of space between plants to ensure adequate airflow and sunlight penetration.
* Small Tires (e.g., car tires): One butternut squash plant per tire is ideal. This will give the plant plenty of room to spread out and develop a strong root system.
* Medium Tires (e.g., light truck tires): You can potentially grow two butternut squash plants in a medium-sized tire, but be sure to space them adequately.
* Large Tires (e.g., tractor tires): Larger tires can accommodate three or even four butternut squash plants, depending on the variety.
When planting multiple butternut squash plants in a single tire, be sure to monitor them closely and provide them with adequate water and nutrients. If the plants start to become overcrowded, you may need to thin them out to ensure that each plant has enough space to thrive.
4. How often should I water butternut squash growing in tires?
Watering frequency depends on several factors, including the weather, soil type, and the size of the plants. However, as a general guideline, you should water your butternut squash plants deeply whenever the top inch of soil feels dry to the touch.
* Check the Soil Moisture: Use your finger to check the moisture level of the soil. If the top inch feels dry, it’s time to water.
* Water Deeply: When you water, water deeply enough to saturate the entire root zone. This will encourage the roots to grow deeper and stronger.
* Avoid Overwatering: Overwatering can lead to root rot and other problems. Be sure to allow the soil to dry out slightly between waterings.
* Water in the Morning: Water your butternut squash plants in the morning to allow the foliage to dry out before nightfall. This will help to prevent fungal diseases.
* Use a Soaker Hose or Drip Irrigation: Consider using a soaker hose or drip irrigation system to deliver water directly to the roots of your plants. This will help to conserve water and reduce the risk of fungal diseases.
During hot, dry weather, you may need to water your butternut squash plants more frequently. Conversely, during cool, wet weather, you may need to water them less often.
5. Do I need to fertilize butternut squash growing in tires?
Yes, butternut squash are heavy feeders and benefit from regular fertilization. As mentioned earlier, amending the soil with a slow-release fertilizer at planting time is a good start. However, you will also need to supplement with additional fertilizer throughout the growing season.
* Use a Balanced Fertilizer: Choose a balanced fertilizer with equal amounts of nitrogen, phosphorus, and potassium (e.g., 10-10-10).
* Fertilize Regularly: Fertil
Leave a Comment