
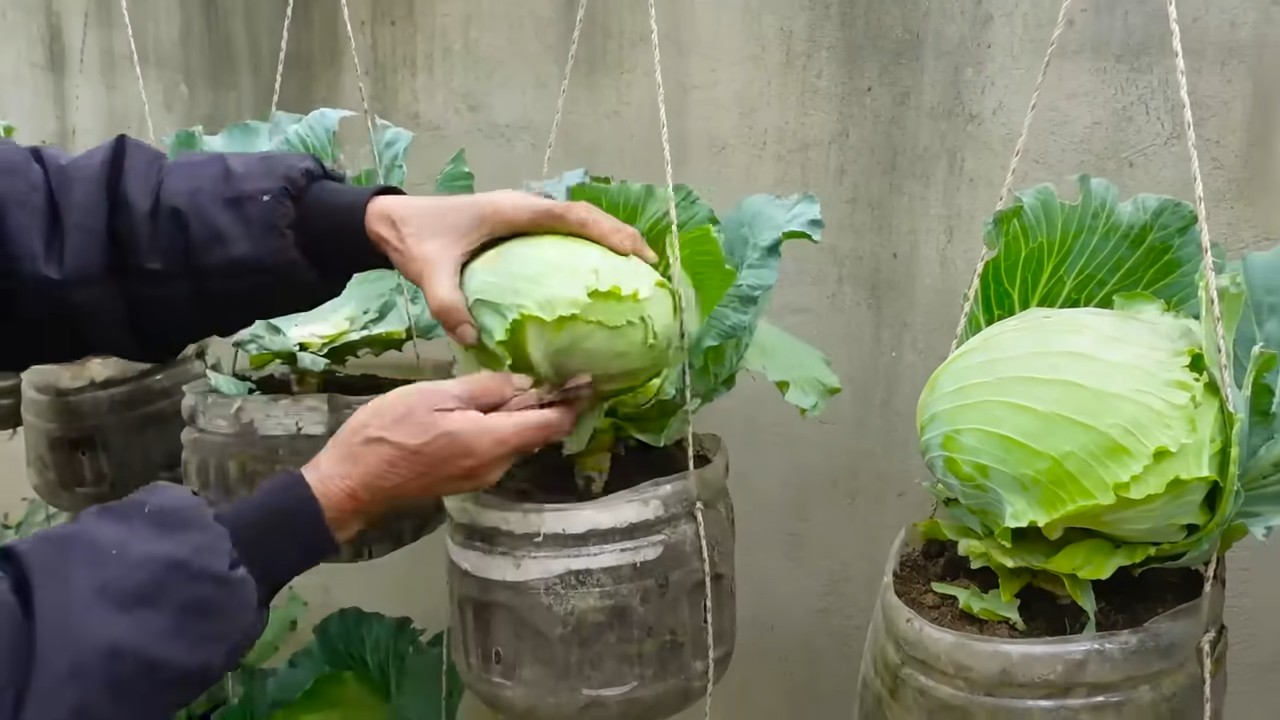
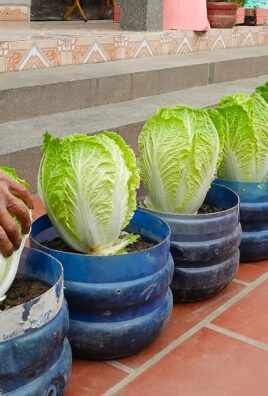
Growing Cabbage in Bottles: Sounds a little crazy, right? But trust me, this quirky DIY project is about to revolutionize your small-space gardening game! Forget sprawling garden beds; we’re taking cabbage cultivation vertical and compact.
For centuries, cabbage has been a staple in diets across the globe, from sauerkraut in Eastern Europe to kimchi in Korea. Its resilience and nutritional value have made it a vital crop. But what if you don’t have acres of land to dedicate to this leafy green? That’s where our bottle-growing hack comes in!
Let’s be honest, traditional gardening can be intimidating. Space constraints, soil quality, and pesky pests often discourage aspiring gardeners. But with this simple, budget-friendly method of growing cabbage in bottles, anyone can enjoy fresh, homegrown produce, even if you only have a balcony or a sunny windowsill. I’m going to show you how to repurpose those plastic bottles and turn them into mini-cabbage farms. Not only is it a fantastic way to recycle, but it also provides a controlled environment, minimizing pest problems and maximizing your yield. Get ready to impress your friends and family with your innovative gardening skills!
Kohl im Flaschengarten: Eine DIY-Anleitung für den urbanen Gärtner
Hey Leute! Habt ihr Lust, etwas Ungewöhnliches auszuprobieren und euren eigenen Kohl in Flaschen zu züchten? Klingt verrückt, oder? Aber es ist tatsächlich möglich und macht super viel Spaß! Ich zeige euch, wie ihr mit ein paar einfachen Schritten und recycelten Plastikflaschen euren eigenen kleinen Kohl-Garten anlegen könnt. Das ist nicht nur platzsparend, sondern auch eine tolle Möglichkeit, Kindern die Natur näherzubringen und gleichzeitig etwas für die Umwelt zu tun. Los geht’s!
Was du brauchst:
* Plastikflaschen: Am besten große PET-Flaschen (z.B. 1,5 Liter oder 2 Liter). Je größer die Flasche, desto mehr Platz hat der Kohl zum Wachsen.
* Kohl-Samen: Wähle eine Kohlsorte, die dir schmeckt. Frühkohl, Spitzkohl oder Rosenkohl eignen sich gut für den Anbau in Flaschen.
* Erde: Hochwertige Blumenerde oder Gemüseerde ist ideal. Du kannst auch deine eigene Erde mischen (siehe unten).
* Schere oder Messer: Zum Zuschneiden der Flaschen.
* Bohrer oder Nagel: Für die Drainage-Löcher.
* Gießkanne oder Sprühflasche: Zum Bewässern.
* Optional: Anzuchttöpfe oder Eierkartons für die Voranzucht.
* Optional: Dünger (organisch oder mineralisch) für die Nährstoffversorgung.
* Optional: Kleine Steine oder Kies für die Drainage.
Vorbereitung ist alles: Die Flaschen präparieren
1. Flaschen reinigen: Zuerst musst du die Plastikflaschen gründlich reinigen. Entferne alle Etiketten und spüle sie mit warmem Wasser und Spülmittel aus. Achte darauf, dass keine Spülmittelreste zurückbleiben.
2. Flaschen zuschneiden: Jetzt kommt der spannende Teil! Du hast zwei Möglichkeiten, die Flaschen zuzuschneiden:
* Variante 1: Schneide die Flasche etwa 10-15 cm unterhalb des Flaschenhalses ab. Der obere Teil (mit dem Flaschenhals) wird später als “Deckel” verwendet.
* Variante 2: Schneide die Flasche in der Mitte durch. Der obere Teil wird umgedreht in den unteren Teil gesteckt.
Ich persönlich bevorzuge Variante 1, weil sie stabiler ist und weniger Erde verloren geht. Aber probiere einfach aus, was dir besser gefällt!
3. Drainage-Löcher bohren: Damit das Wasser gut ablaufen kann und keine Staunässe entsteht, musst du Drainage-Löcher in den Boden der Flasche bohren. Verwende dafür einen Bohrer oder einen Nagel. 4-5 Löcher reichen in der Regel aus.
4. Optional: Drainage-Schicht anlegen: Um die Drainage zu verbessern, kannst du eine Schicht aus kleinen Steinen oder Kies auf den Boden der Flasche legen. Das verhindert, dass die Erde die Löcher verstopft.
Aussaat und Voranzucht (optional, aber empfehlenswert)
1. Warum vorziehen? Die Voranzucht hat den Vorteil, dass die kleinen Kohlpflanzen einen Wachstumsvorsprung haben und widerstandsfähiger sind, wenn du sie später in die Flaschen umpflanzt. Außerdem kannst du so die besten und kräftigsten Pflanzen auswählen.
2. Anzuchtgefäße vorbereiten: Fülle Anzuchttöpfe oder Eierkartons mit Anzuchterde.
3. Samen aussäen: Lege 1-2 Samen pro Topf/Zelle auf die Erde und bedecke sie leicht mit Erde.
4. Bewässern: Befeuchte die Erde vorsichtig mit einer Sprühflasche. Sie sollte feucht, aber nicht nass sein.
5. Standort: Stelle die Anzuchtgefäße an einen hellen und warmen Ort (z.B. Fensterbank).
6. Geduld haben: Nach einigen Tagen (je nach Kohlsorte) sollten die Samen keimen. Halte die Erde weiterhin feucht und dünne die Keimlinge gegebenenfalls aus, sodass nur die kräftigste Pflanze pro Topf/Zelle übrig bleibt.
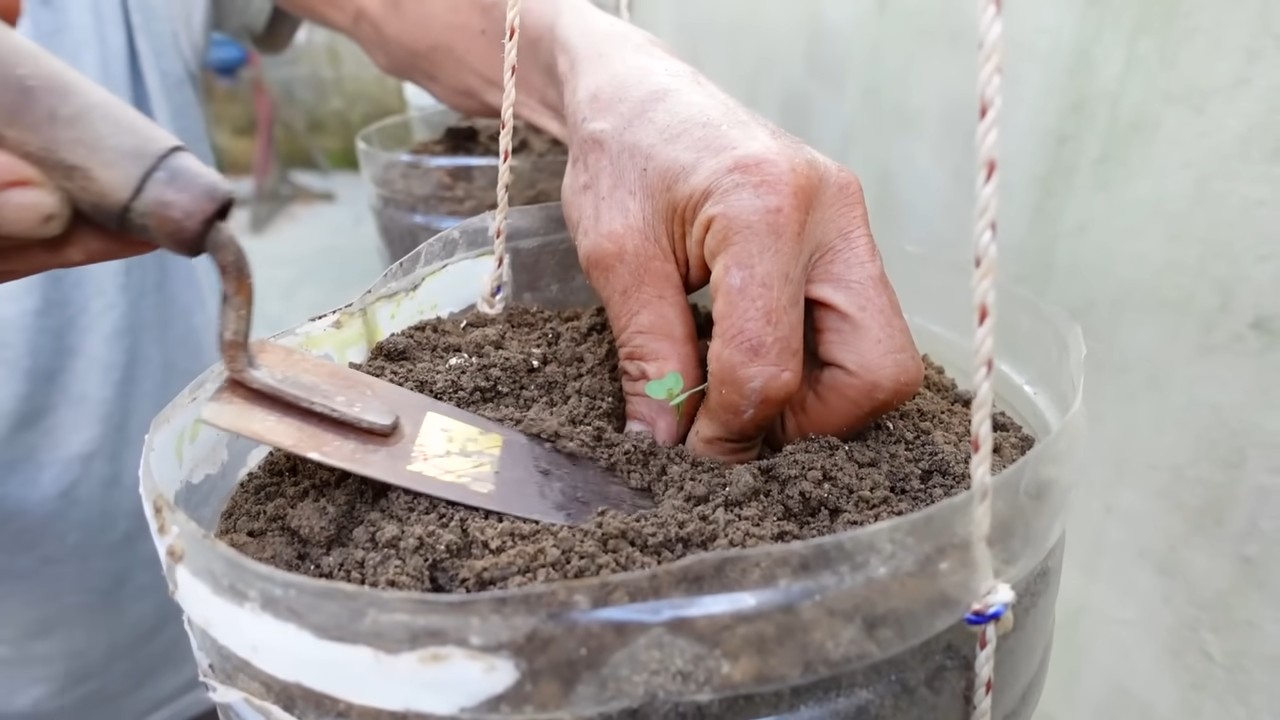
Die Flaschen bepflanzen: Der Kohl zieht ein
1. Flaschen mit Erde füllen: Fülle die vorbereiteten Flaschen mit Erde. Lasse etwa 2-3 cm Platz bis zum Rand.
2. Umpflanzen (wenn vorgezogen): Wenn du die Kohlpflanzen vorgezogen hast, kannst du sie jetzt vorsichtig aus den Anzuchtgefäßen nehmen und in die Flaschen umpflanzen. Achte darauf, die Wurzeln nicht zu beschädigen.
3. Direktsaat (wenn nicht vorgezogen): Wenn du die Samen direkt in die Flaschen säen möchtest, lege 2-3 Samen pro Flasche auf die Erde und bedecke sie leicht mit Erde.
4. Bewässern: Gieße die Erde vorsichtig an. Sie sollte gut durchfeuchtet sein.
Pflege und Wachstum: Dem Kohl beim Wachsen zusehen
1. Standort: Stelle die bepflanzten Flaschen an einen sonnigen Standort. Kohl braucht viel Licht, um gut zu wachsen.
2. Bewässerung: Gieße die Pflanzen regelmäßig, aber vermeide Staunässe. Die Erde sollte immer leicht feucht sein. An heißen Tagen musst du möglicherweise täglich gießen.
3. Düngung: Kohl ist ein Starkzehrer und benötigt viele Nährstoffe. Dünge die Pflanzen regelmäßig mit einem organischen oder mineralischen Dünger. Beachte dabei die Dosierungsanleitung auf der Verpackung. Ich verwende gerne Brennnesseljauche als natürlichen Dünger.
4. Schutz vor Schädlingen: Kohl ist leider anfällig für Schädlinge wie Kohlweißlinge, Erdflöhe und Schnecken. Kontrolliere die Pflanzen regelmäßig und bekämpfe Schädlinge bei Bedarf mit natürlichen Mitteln (z.B. Neemöl, Knoblauchsud). Ein Netz über den Pflanzen kann auch helfen, Kohlweißlinge fernzuhalten.
5. Belüftung: Achte auf eine gute Belüftung, um Pilzkrankheiten vorzubeugen. Stelle die Flaschen nicht zu eng nebeneinander und entferne regelmäßig abgestorbene Blätter.
6. Drehen der Flaschen: Damit der Kohl gleichmäßig wächst, solltest du die Flaschen regelmäßig drehen, sodass alle Seiten ausreichend Licht bekommen.
Erntezeit: Endlich frischer Kohl aus dem Flaschengarten!
1. Wann ernten? Der Zeitpunkt der Ernte hängt von der Kohlsorte ab. Frühkohl kann oft schon nach wenigen Wochen geerntet werden, während Rosenkohl länger braucht. Achte auf die Reifezeichen der jeweiligen Sorte.
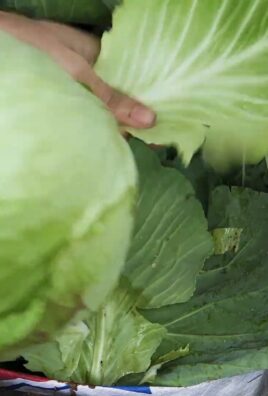
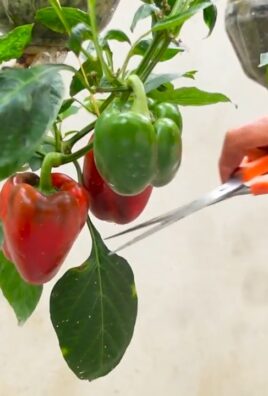
2. Wie ernten? Schneide den Kohlkopf mit einem scharfen Messer ab. Bei Rosenkohl kannst du die Röschen einzeln ernten, sobald sie fest und geschlossen sind.
3. Genießen: Jetzt kannst du deinen selbstgezogenen Kohl genießen! Ob roh im Salat, gekocht als Gemüsebeilage oder eingelegt – der Fantasie sind keine Grenzen gesetzt.
Zusätzliche Tipps und Tricks:
* Erde selber mischen: Du kannst deine eigene Erde mischen, indem du Blumenerde, Kompost und Sand im Verhältnis 2:1:1 mischst. Das sorgt für eine gute Drainage und Nährstoffversorgung.
* Mulchen: Eine Mulchschicht aus Stroh oder Rasenschnitt hält die Erde feucht und unterdrückt Unkraut.
* Sortenwahl: Informiere dich vor der Aussaat über die verschiedenen Kohlsorten und wähle Sorten, die für den Anbau in Töpfen geeignet sind.
* Vertikale Gärten: Du kannst die bepflanzten Flaschen auch an einer Wand oder einem Zaun befestigen, um einen vertikalen Garten zu gestalten. Das spart Platz und sieht toll aus!
* Kreativität: Bemal die Flaschen oder beklebe sie mit bunten Papieren, um deinen Flaschengarten noch individueller zu gestalten.
Häufige Probleme und Lösungen:
* Gelbe Blätter: Gelbe Blätter können ein Zeichen für Nährstoffmangel sein. Dünge die Pflanzen mit einem geeigneten Dünger.
* Schädlinge:
Conclusion
So, there you have it! Growing cabbage in bottles might sound unconventional, but it’s a surprisingly effective and rewarding method, especially for urban gardeners or those with limited space. This DIY trick offers a fantastic solution for maximizing your yield, protecting your precious cabbage from pests, and even extending your growing season. It’s a win-win-win!
Think about it: no more battling cabbage white butterflies laying eggs on your leaves, no more worrying about slugs munching away at your hard work, and the controlled environment inside the bottle can help your cabbage thrive even when the weather isn’t cooperating. Plus, let’s be honest, a collection of cabbage-filled bottles is quite the conversation starter!
But the beauty of this method lies in its adaptability. Feel free to experiment! Try using different types of bottles – larger water cooler bottles could accommodate larger cabbage varieties. Consider adding a layer of gravel at the bottom of the bottle for improved drainage. You could even try painting the bottles white to reflect sunlight and keep the soil cooler in hotter climates.
Don’t be afraid to get creative with your soil mix either. While a standard potting mix works well, you can amend it with compost, worm castings, or other organic materials to provide your cabbage with an extra boost of nutrients. Remember to monitor the moisture levels regularly, as the enclosed environment can sometimes lead to overwatering.
This isn’t just about growing cabbage; it’s about embracing a sustainable and innovative approach to gardening. It’s about finding creative solutions to common gardening challenges and making the most of the resources available to you. It’s about connecting with nature in a unique and meaningful way.
We strongly encourage you to give this DIY trick a try. It’s a relatively simple project that can yield impressive results. And the best part? It’s incredibly satisfying to harvest a beautiful, healthy head of cabbage that you’ve grown yourself, especially when you’ve done it in such an innovative way.
Once you’ve tried growing cabbage in bottles, we’d love to hear about your experience! Share your photos, tips, and tricks in the comments below. Let’s create a community of bottle-cabbage growers and learn from each other. What varieties did you try? What challenges did you face? What successes did you celebrate? Your insights could help other gardeners discover the joys of this unique method. So, grab some bottles, some soil, and some cabbage seedlings, and get ready to embark on a gardening adventure! Happy growing!
Frequently Asked Questions (FAQ)
What type of cabbage is best suited for growing in bottles?
Smaller cabbage varieties, such as ‘Golden Acre’ or ‘Early Jersey Wakefield,’ are generally better suited for growing in bottles. These varieties tend to mature more quickly and don’t require as much space as larger varieties like ‘Savoy’ or ‘January King.’ However, with larger bottles (like those from water coolers), you might be able to successfully grow some of the medium-sized varieties. Experimentation is key! Consider the mature size of the cabbage head when selecting your variety. You want to ensure it has enough room to develop within the confines of the bottle.
How often should I water my cabbage plants growing in bottles?
Watering frequency will depend on several factors, including the size of the bottle, the type of soil you’re using, the climate, and the stage of growth of your cabbage plants. Generally, you should aim to keep the soil consistently moist but not waterlogged. Check the soil moisture level regularly by sticking your finger about an inch into the soil. If it feels dry, it’s time to water. Be careful not to overwater, as this can lead to root rot, especially in the enclosed environment of the bottle. Good drainage is crucial.
How do I ensure proper drainage in the bottles?
Proper drainage is essential to prevent root rot. Before adding soil, place a layer of gravel or small stones at the bottom of the bottle. This will create a space for excess water to drain away from the roots. You can also add some horticultural charcoal to the bottom layer to help absorb excess moisture and prevent odors. When watering, be mindful of the amount of water you’re adding and allow any excess water to drain out. If you notice water pooling at the bottom of the bottle, you may need to improve the drainage.
What kind of soil should I use for growing cabbage in bottles?
A well-draining potting mix is ideal for growing cabbage in bottles. You can use a commercially available potting mix or create your own by combining equal parts of garden soil, compost, and perlite or vermiculite. The compost will provide essential nutrients for your cabbage plants, while the perlite or vermiculite will improve drainage and aeration. Avoid using heavy clay soil, as it can become waterlogged and suffocate the roots.
How do I fertilize cabbage plants growing in bottles?
Cabbage plants are heavy feeders and require regular fertilization. You can use a balanced liquid fertilizer, such as a 10-10-10 or 20-20-20, diluted to half strength. Apply the fertilizer every two to three weeks, following the instructions on the label. You can also amend the soil with compost or worm castings at planting time to provide a slow-release source of nutrients. Avoid over-fertilizing, as this can lead to excessive foliage growth and reduced head formation.
How do I protect my cabbage plants from pests and diseases inside the bottles?
One of the main advantages of growing cabbage in bottles is that it provides a physical barrier against many common pests, such as cabbage white butterflies and slugs. However, aphids and other small pests can still find their way into the bottles. To prevent infestations, inspect your plants regularly and remove any pests you find by hand. You can also use insecticidal soap or neem oil to control pests. To prevent diseases, ensure good air circulation and avoid overwatering. If you notice any signs of disease, such as yellowing leaves or spots, remove the affected leaves immediately.
Can I grow cabbage in bottles indoors?
Yes, you can grow cabbage in bottles indoors, but you’ll need to provide adequate light. Cabbage plants require at least six hours of direct sunlight per day. If you don’t have a sunny window, you can use grow lights to supplement the natural light. Place the grow lights about 6-12 inches above the plants and keep them on for 12-16 hours per day. Indoor growing can be a great option for extending the growing season or for gardeners who live in climates with harsh winters.
How long does it take to grow cabbage in bottles?
The time it takes to grow cabbage in bottles will depend on the variety of cabbage you’re growing, the growing conditions, and the size of the bottle. Generally, it takes about 60-100 days from transplanting seedlings to harvest. Shorter season varieties will mature more quickly. Monitor your plants regularly and harvest the cabbage when the head is firm and the desired size.
What are the benefits of growing cabbage in bottles compared to traditional gardening methods?
Growing cabbage in bottles offers several benefits, including:
* **Pest protection:** The bottles provide a physical barrier against many common pests.
* **Space saving:** Bottles allow you to grow cabbage in a small space, making it ideal for urban gardeners.
* **Extended growing season:** The bottles can help protect plants from frost and extend the growing season.
* **Water conservation:** The enclosed environment helps to retain moisture, reducing the need for frequent watering.
* **Unique and attractive:** Cabbage-filled bottles can add a unique and decorative touch to your garden.
Can I reuse the bottles for growing other plants after harvesting the cabbage?
Absolutely! Once you’ve harvested your cabbage, you can clean the bottles thoroughly and reuse them for growing other plants. They’re great for starting seedlings, growing herbs, or even cultivating other small vegetables. Just make sure to sterilize the bottles before reusing them to prevent the spread of diseases. This makes growing cabbage in bottles a truly sustainable and eco-friendly gardening method.
Leave a Comment