
Growing Cauliflower at Home might seem daunting, but trust me, with a few simple tricks and a dash of DIY spirit, you can harvest your own creamy, delicious cauliflower heads right in your backyard! Forget those bland, overpriced heads at the grocery store – imagine the satisfaction of serving up a dish featuring cauliflower you nurtured from seedling to table.
For centuries, cauliflower has been a culinary staple, enjoyed by cultures around the globe. Originating in the Mediterranean, this versatile vegetable has found its way into countless cuisines, from Indian curries to Italian gratins. But why rely on store-bought when you can cultivate your own?
Let’s face it, fresh produce can be expensive, and sometimes the quality just isn’t there. Plus, there’s nothing quite like the taste of homegrown vegetables. This DIY guide will equip you with the knowledge and simple hacks you need to successfully growing cauliflower at home, even if you’re a beginner gardener. We’ll cover everything from choosing the right variety to protecting your precious plants from pests. Get ready to roll up your sleeves and discover the joy of homegrown cauliflower!
Growing Cauliflower at Home: A Comprehensive DIY Guide
Hey there, fellow garden enthusiasts! I’m so excited to share my tried-and-true method for growing cauliflower right in your own backyard. It might seem intimidating at first, but trust me, with a little patience and these simple steps, you’ll be harvesting beautiful, delicious cauliflower heads in no time!
Choosing the Right Cauliflower Variety
Before we even get our hands dirty, let’s talk about choosing the right cauliflower variety. This is crucial because different varieties thrive in different climates and have varying maturity times.
* Consider your climate: Are you in a warm, temperate, or cool climate? Some varieties are more heat-tolerant than others.
* Think about maturity time: Do you want to harvest early, mid-season, or late in the season? This will depend on your growing season length.
* Popular varieties: Some of my favorites include ‘Snowball Y Improved’ (early maturity, classic white head), ‘Cheddar’ (orange head, mild flavor), ‘Graffiti’ (purple head, adds a pop of color), and ‘Romanesco’ (unique spiral shape, nutty flavor).
Preparing the Soil
Cauliflower is a heavy feeder, meaning it needs nutrient-rich soil to thrive. Proper soil preparation is key to a successful harvest.
* Soil type: Cauliflower prefers well-drained, fertile soil with a pH between 6.0 and 7.0.
* Soil testing: I highly recommend getting your soil tested to determine its pH and nutrient levels. You can usually get this done at your local garden center or agricultural extension office.
* Amending the soil: Based on your soil test results, amend the soil with plenty of organic matter, such as compost, well-rotted manure, or leaf mold. This will improve drainage, aeration, and nutrient content.
* Fertilizing: Incorporate a balanced fertilizer (e.g., 10-10-10) into the soil before planting. Follow the instructions on the fertilizer package for application rates.
Starting Cauliflower Seeds (Optional)
While you can purchase cauliflower seedlings from a nursery, starting your own from seed gives you more control over the process and allows you to choose from a wider variety of options.
* Timing: Start seeds indoors 4-6 weeks before the last expected frost in spring, or 12-14 weeks before the first expected frost in fall.
* Seed starting mix: Use a high-quality seed starting mix that is lightweight and well-draining.
* Planting: Sow seeds ¼ inch deep in individual cells or containers.
* Watering: Keep the soil consistently moist but not waterlogged.
* Light: Provide seedlings with plenty of light, either from a sunny window or grow lights.
* Hardening off: Before transplanting seedlings outdoors, gradually acclimate them to outdoor conditions by exposing them to increasing amounts of sunlight and fresh air over a period of 7-10 days.
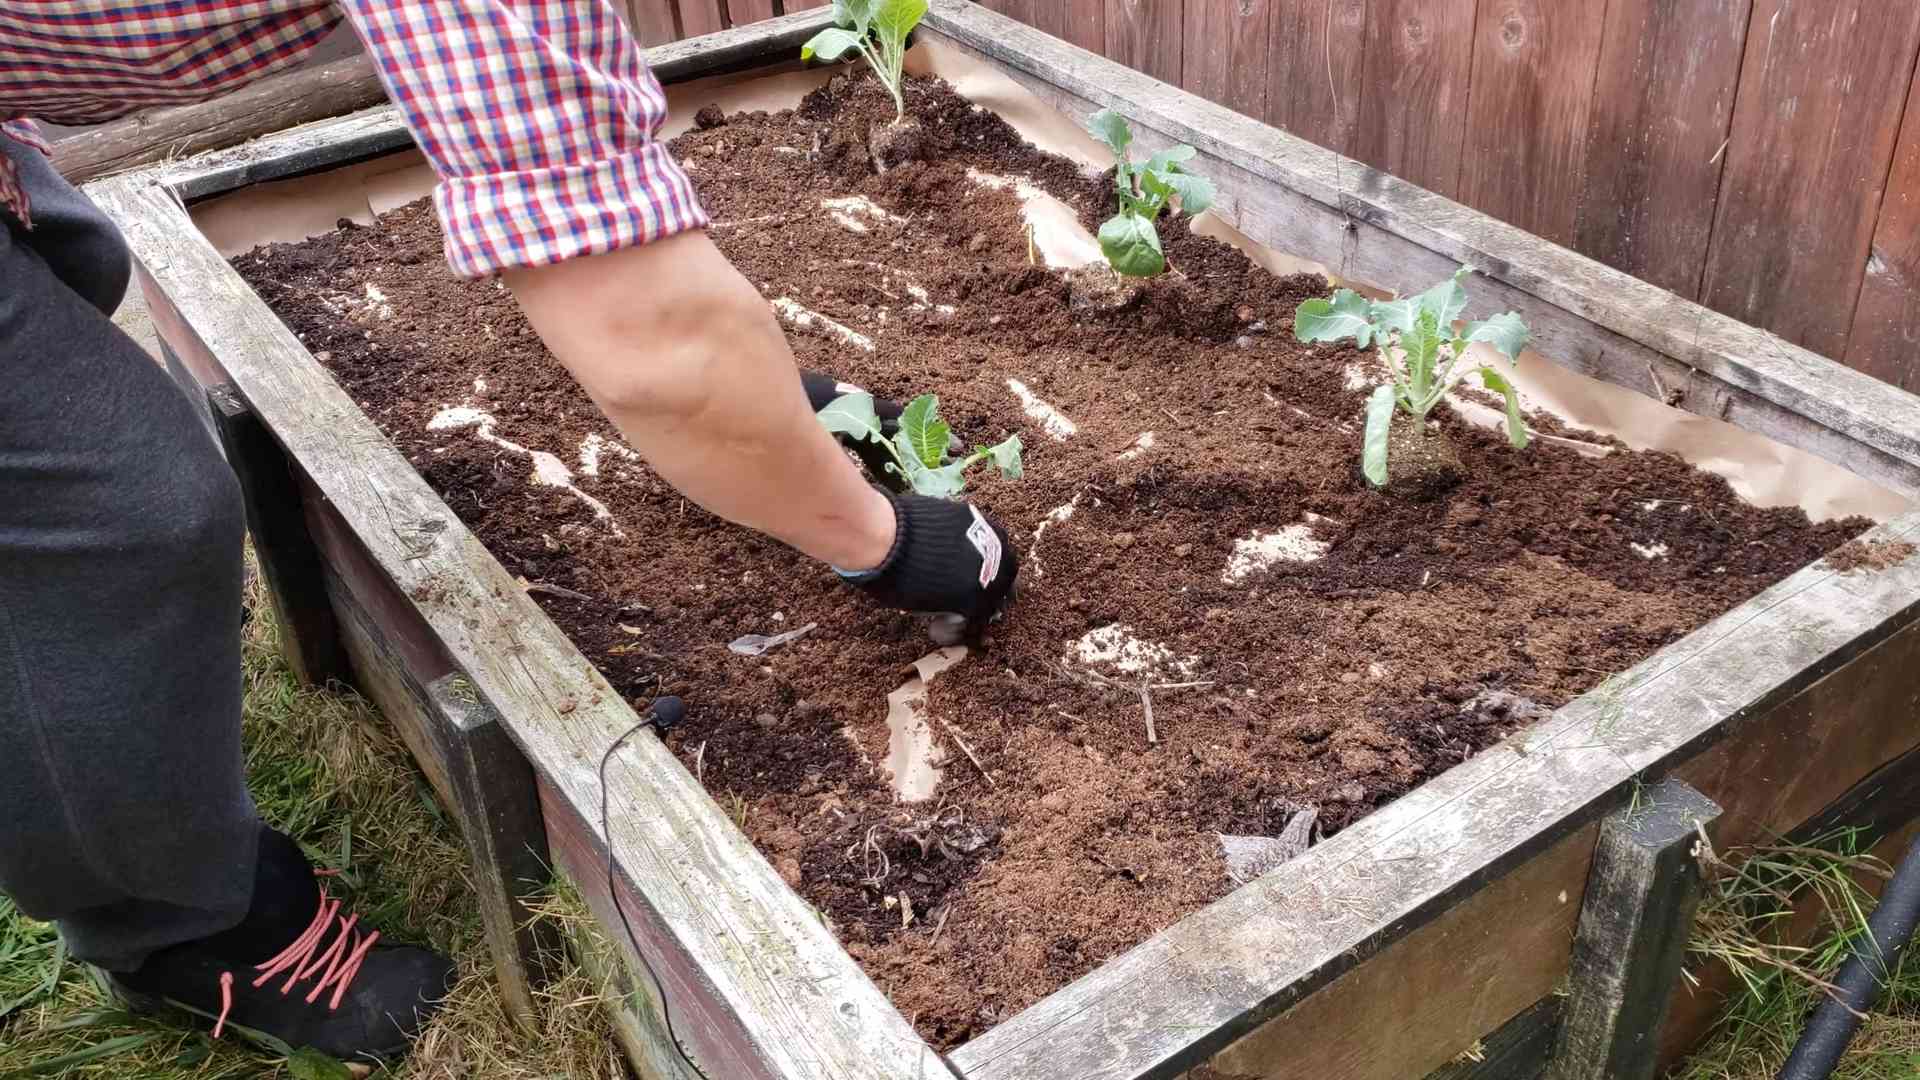
Transplanting Cauliflower Seedlings
Whether you started your own seedlings or purchased them from a nursery, transplanting them into the garden is the next crucial step.
* Timing: Transplant seedlings outdoors after the last expected frost in spring, or 2-4 weeks before the first expected frost in fall.
* Spacing: Space plants 18-24 inches apart in rows that are 24-36 inches apart. This allows for adequate air circulation and sunlight penetration.
* Planting depth: Plant seedlings at the same depth they were growing in their containers.
* Watering: Water thoroughly after transplanting to help settle the soil around the roots.
Caring for Your Cauliflower Plants
Once your cauliflower plants are in the ground, it’s important to provide them with the care they need to thrive.
* Watering: Cauliflower needs consistent moisture, especially during head formation. Water deeply and regularly, aiming for about 1-2 inches of water per week.
* Fertilizing: Side-dress plants with a nitrogen-rich fertilizer every 2-3 weeks to promote healthy growth.
* Weeding: Keep the area around your cauliflower plants free of weeds, which can compete for nutrients and water.
* Mulching: Apply a layer of mulch around the plants to help retain moisture, suppress weeds, and regulate soil temperature.
* Pest control: Cauliflower can be susceptible to various pests, such as cabbage worms, aphids, and flea beetles. Monitor your plants regularly and take action if you notice any signs of infestation. I prefer using organic pest control methods like insecticidal soap or neem oil.
* Blanching (for white varieties): When the cauliflower head reaches about 2-3 inches in diameter, blanch it by tying the outer leaves together over the head. This will prevent the head from turning yellow or brown and will result in a whiter, more tender head. This is not necessary for colored varieties.
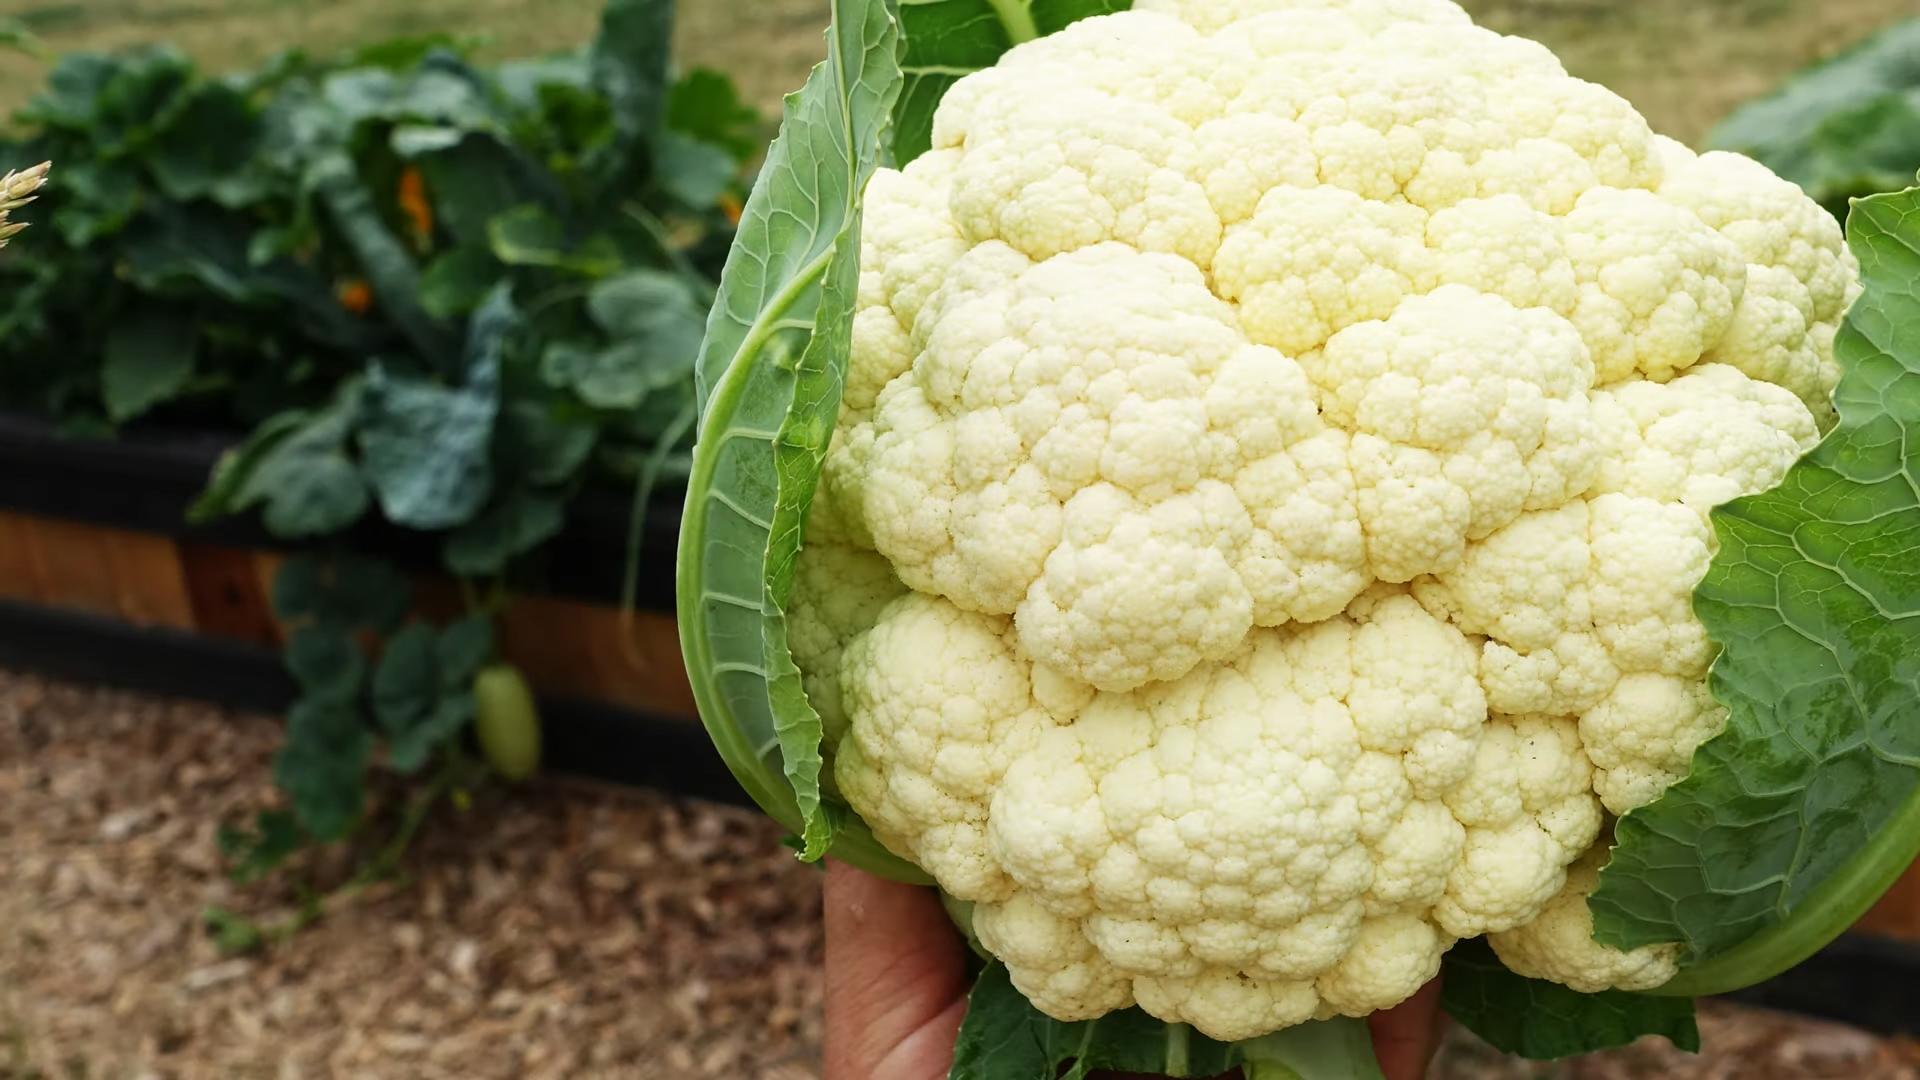
Harvesting Cauliflower
Harvesting cauliflower at the right time is essential for optimal flavor and texture.
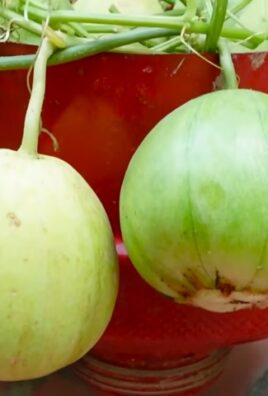
* Timing: Harvest cauliflower when the head is firm, compact, and has reached its desired size. The size will vary depending on the variety, but most heads are ready to harvest when they are 6-8 inches in diameter.
* Cutting: Use a sharp knife to cut the head from the plant, leaving a few leaves attached to protect the head.
* Storage: Store cauliflower in the refrigerator for up to a week.
Step-by-Step Instructions: From Seed to Harvest
Okay, let’s break down the entire process into easy-to-follow steps:
1. Choose your cauliflower variety: Research different varieties and select one that is well-suited to your climate and growing season.
2. Prepare the soil: Amend the soil with plenty of organic matter and a balanced fertilizer. Ensure the soil is well-drained and has a pH between 6.0 and 7.0.
3. Start seeds indoors (optional): Sow seeds indoors 4-6 weeks before the last expected frost in spring, or 12-14 weeks before the first expected frost in fall. Use a seed starting mix and provide plenty of light.
4. Harden off seedlings (if starting from seed): Gradually acclimate seedlings to outdoor conditions over a period of 7-10 days.
5. Transplant seedlings outdoors: Transplant seedlings after the last expected frost in spring, or 2-4 weeks before the first expected frost in fall. Space plants 18-24 inches apart in rows that are 24-36 inches apart.
6. Water regularly: Water deeply and regularly, aiming for about 1-2 inches of water per week.
7. Fertilize: Side-dress plants with a nitrogen-rich fertilizer every 2-3 weeks.
8. Weed: Keep the area around your cauliflower plants free of weeds.
9. Mulch: Apply a layer of mulch around the plants to help retain moisture, suppress weeds, and regulate soil temperature.
10. Monitor for pests: Check your plants regularly for signs of pests and take action if necessary.
11. Blanch (for white varieties): When the cauliflower head reaches about 2-3 inches in diameter, blanch it by tying the outer leaves together over the head.
12. Harvest: Harvest cauliflower when the head is firm, compact, and has reached its desired size.
Troubleshooting Common Problems
Even with the best care, you might encounter some challenges along the way. Here are a few common problems and how to address them:
* Buttoning (small heads): This can be caused by stress, such as lack of water, nutrients, or sunlight. Ensure your plants are getting adequate water, fertilizer, and sunlight.
* Yellowing leaves: This can be a sign of nutrient deficiency, pest infestation, or disease. Check your soil pH and nutrient levels, monitor for pests, and treat any diseases promptly.
* Pest infestations: Cabbage worms, aphids, and flea beetles are common pests of cauliflower. Use organic pest control methods like insecticidal soap or neem oil.
* Clubroot: This is a soilborne disease that can cause stunted growth and swollen roots. Prevent clubroot by practicing crop rotation and maintaining a soil pH above 7.0.
Tips for a Bountiful Harvest
Here are a few extra tips to help you maximize your cauliflower harvest:
* Choose disease-resistant varieties: This can help prevent problems with clubroot and other diseases.
* Rotate your crops: Avoid planting cauliflower in the same location year after year to prevent soilborne diseases.
* Provide adequate spacing: Crowded plants are more susceptible to pests and diseases.
* Water deeply and regularly: Consistent moisture is essential for healthy growth.
* Fertilize regularly: Cauliflower is a
Conclusion
So, there you have it! Growing cauliflower at home, while it might seem daunting at first, is an incredibly rewarding experience. It’s a chance to connect with your food, nurture something from seed to table, and enjoy the unparalleled flavor of freshly harvested produce. But why is this DIY trick a must-try? It boils down to control, freshness, and flavor.
Think about it: store-bought cauliflower, no matter how carefully selected, has traveled a distance and spent time in storage. That means it’s lost some of its vital nutrients and that vibrant, just-picked taste. When you grow your own, you’re in charge of every step, from choosing the perfect variety for your climate to ensuring it receives the optimal amount of sunlight and water. You can even tailor your growing practices to be completely organic, avoiding harmful pesticides and herbicides. The result? A cauliflower that’s bursting with flavor, packed with nutrients, and undeniably superior to anything you can buy in a store.
Beyond the basic techniques, there’s a whole world of cauliflower experimentation waiting to be explored. Consider trying different varieties. Purple cauliflower adds a vibrant splash of color to your dishes, while Romanesco cauliflower, with its fractal florets, is a stunning visual masterpiece. You can also experiment with different planting times to extend your harvest season. Succession planting, where you sow seeds every few weeks, ensures a continuous supply of fresh cauliflower throughout the growing season.
Another exciting variation is to focus on companion planting. Certain plants, like marigolds and nasturtiums, can help deter pests and attract beneficial insects, creating a healthier and more productive growing environment for your cauliflower. Interplanting with herbs like rosemary and thyme can also enhance the flavor of your cauliflower and provide additional culinary delights.
Don’t be afraid to get your hands dirty and embrace the learning process. Growing cauliflower at home is an adventure, and there will be challenges along the way. But with a little patience, persistence, and the knowledge you’ve gained from this guide, you’ll be well on your way to harvesting your own delicious and nutritious cauliflower.
We wholeheartedly encourage you to give this DIY trick a try. Start small, perhaps with just a few plants, and gradually expand your garden as you gain confidence and experience. And most importantly, don’t forget to share your experiences with us! We’d love to hear about your successes, your challenges, and any tips or tricks you’ve discovered along the way. Share your photos, your recipes, and your stories in the comments section below. Let’s build a community of home gardeners who are passionate about growing their own food and enjoying the simple pleasures of fresh, homegrown cauliflower. This is more than just a gardening project; it’s a step towards a healthier, more sustainable, and more flavorful lifestyle. So, grab your seeds, get your hands dirty, and start growing your own amazing cauliflower today!
Frequently Asked Questions (FAQ)
What are the most common problems when growing cauliflower and how can I prevent them?
Growing cauliflower can present a few challenges, but understanding the potential issues and implementing preventative measures can significantly increase your success rate. One common problem is clubroot, a soilborne disease that causes swollen and distorted roots, hindering the plant’s ability to absorb nutrients. To prevent clubroot, ensure your soil is well-drained and has a pH of 6.5 to 7.5. Crop rotation is also crucial; avoid planting cauliflower or other brassicas (like broccoli, cabbage, and kale) in the same spot for at least three years. Adding lime to the soil can help raise the pH and reduce the risk of clubroot.
Another frequent issue is cabbage worms, which are the larvae of white butterflies. These pests can quickly decimate your cauliflower plants by chewing holes in the leaves and heads. To control cabbage worms, inspect your plants regularly and handpick any worms you find. You can also use row covers to prevent butterflies from laying eggs on your plants. Bacillus thuringiensis (Bt), a naturally occurring bacterium, is an effective and safe insecticide for controlling cabbage worms.
Finally, cauliflower is susceptible to nutrient deficiencies, particularly boron deficiency, which can cause hollow stems and stunted growth. To prevent nutrient deficiencies, amend your soil with compost or well-rotted manure before planting. You can also use a balanced fertilizer specifically formulated for vegetables. Soil testing can help you identify any specific nutrient deficiencies and adjust your fertilization accordingly.
How much sunlight does cauliflower need?
Cauliflower thrives in full sun, requiring at least six hours of direct sunlight per day. Adequate sunlight is essential for photosynthesis, the process by which plants convert light energy into chemical energy for growth and development. Insufficient sunlight can lead to leggy growth, smaller heads, and reduced yields. When choosing a location for your cauliflower plants, select a spot that receives unobstructed sunlight throughout the day. If you live in a particularly hot climate, some afternoon shade may be beneficial to prevent heat stress.
What is the best soil for growing cauliflower?
Cauliflower prefers well-drained, fertile soil that is rich in organic matter. The ideal soil pH is between 6.5 and 7.5. Before planting, amend your soil with compost, well-rotted manure, or other organic materials to improve its structure, drainage, and nutrient content. Heavy clay soils can be improved by adding sand and organic matter to increase drainage. Sandy soils can be improved by adding organic matter to increase water retention. A soil test can help you determine the pH and nutrient levels of your soil and make any necessary adjustments.
How often should I water cauliflower?
Cauliflower needs consistent moisture to thrive. Water deeply and regularly, especially during dry periods. Aim to keep the soil consistently moist but not waterlogged. Overwatering can lead to root rot, while underwatering can stress the plants and reduce yields. A good rule of thumb is to water when the top inch of soil feels dry to the touch. Mulching around your cauliflower plants can help retain moisture and suppress weeds.
When is the best time to harvest cauliflower?
The best time to harvest cauliflower is when the head is firm, compact, and has reached its desired size. The size of the head will vary depending on the variety, but most varieties are ready to harvest when the head is 6 to 8 inches in diameter. Check the head regularly for signs of maturity. If the florets start to separate or the head becomes loose, it’s time to harvest. To harvest, cut the stem just below the head, leaving a few leaves attached to protect the head.
Can I grow cauliflower in containers?
Yes, you can grow cauliflower in containers, but you’ll need to choose a large container that is at least 12 inches in diameter and 12 inches deep. Use a high-quality potting mix that is well-draining and rich in organic matter. Container-grown cauliflower will need more frequent watering and fertilization than cauliflower grown in the ground. Choose a sunny location for your container and monitor the plants closely for signs of pests or diseases.
How can I prevent cauliflower from turning yellow?
Cauliflower heads can sometimes turn yellow due to sun exposure. To prevent this, you can blanch the head by tying the outer leaves together over the head when it reaches about 3 inches in diameter. This will protect the head from the sun and keep it white. Alternatively, you can choose self-blanching varieties that naturally curl their leaves over the head.
What are some good companion plants for cauliflower?
Companion planting can help improve the health and productivity of your cauliflower plants. Some good companion plants for cauliflower include:
* Marigolds: Deter pests like nematodes and cabbage moths.
* Nasturtiums: Attract aphids away from cauliflower.
* Rosemary: Deters cabbage moths and other pests.
* Thyme: Repels cabbage white butterflies.
* Garlic: Deters pests and improves soil health.
* Onions: Repel cabbage root flies.
* Lettuce: Provides ground cover and helps retain moisture.
Is it possible to get a second harvest from my cauliflower plant?
While cauliflower plants primarily produce one main head, some varieties may produce smaller side shoots after the main head is harvested. These side shoots can be harvested as they mature, providing a smaller but still valuable second harvest. To encourage side shoot production, leave a few leaves on the plant after harvesting the main head and continue to water and fertilize as needed.
How do I store harvested cauliflower?
To store harvested cauliflower, trim off any excess leaves and store the head in a plastic bag in the refrigerator. Cauliflower can be stored for up to a week in the refrigerator. For longer storage, you can blanch and freeze cauliflower florets. To blanch, cut the cauliflower into florets and boil them for 3 minutes. Then, immediately transfer them to an ice bath to stop the cooking process. Drain the florets and freeze them in a single layer on a baking sheet. Once frozen, transfer them to a freezer bag or container.
Leave a Comment