
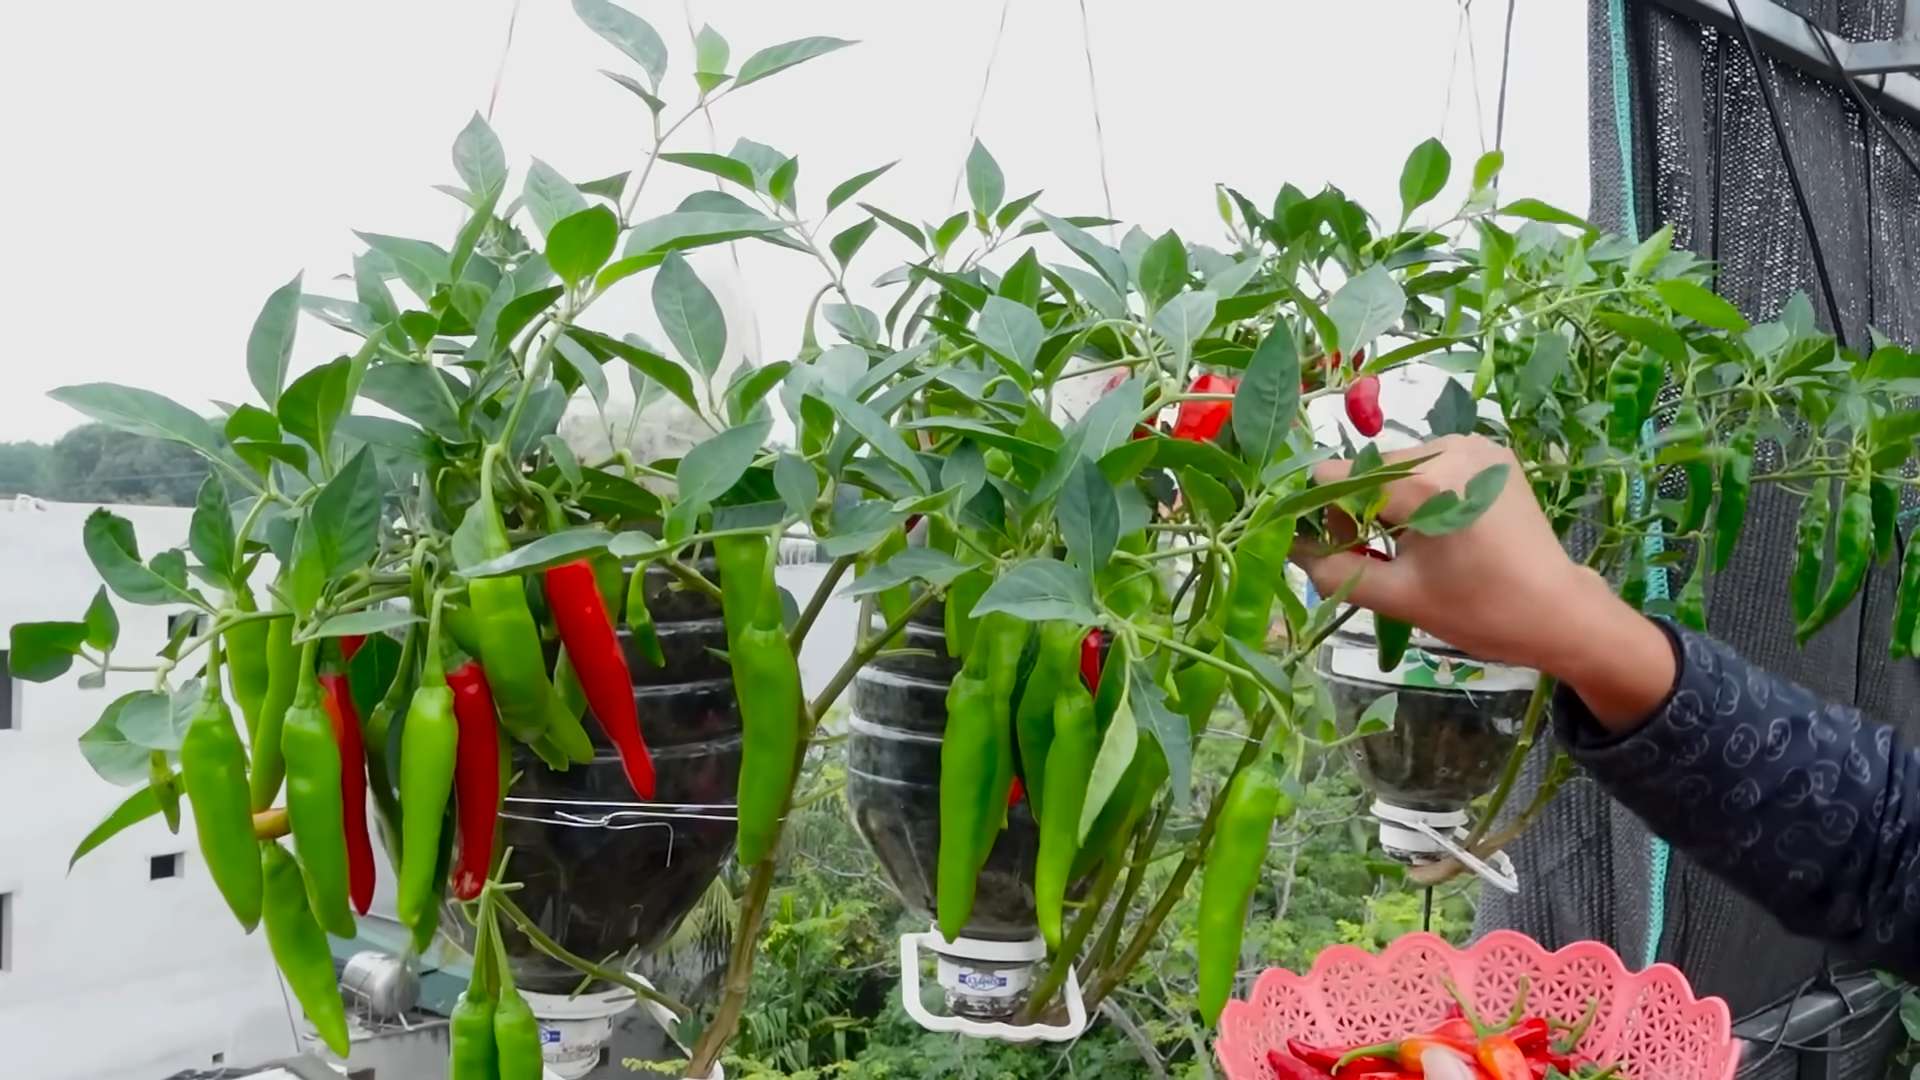
Growing Chili in Bottles: Sounds a little crazy, right? But trust me, it’s a game-changer for anyone who loves fresh chilies and wants to maximize their space! I’m so excited to share this incredibly simple and effective DIY trick that will have you harvesting fiery peppers in no time, even if you only have a tiny balcony or patio.
For centuries, resourceful gardeners have been finding innovative ways to cultivate food in limited spaces. From ancient terrace farming to modern-day vertical gardens, the desire to grow our own food is deeply ingrained in our history. This bottle gardening method taps into that same spirit of ingenuity, offering a sustainable and space-saving solution for urban dwellers and gardening enthusiasts alike.
Let’s face it, not everyone has a sprawling backyard to dedicate to a vegetable garden. And even if you do, sometimes you just want a convenient and contained way to grow your favorite herbs and spices. That’s where this DIY chili-growing hack comes in! Growing Chili in Bottles is not only a fun and rewarding project, but it also allows you to control the growing environment, protect your plants from pests, and enjoy a continuous supply of fresh chilies right at your fingertips. Plus, it’s a fantastic way to recycle those plastic bottles and reduce your environmental footprint. So, grab your bottles, some soil, and let’s get started!
Growing Chili Peppers in Plastic Bottles: A DIY Guide
Hey there, fellow chili enthusiasts! Ever thought about turning those empty plastic bottles into mini chili pepper gardens? It’s a fantastic way to recycle, save space, and grow your own spicy goodness. I’ve been doing this for a while now, and I’m excited to share my step-by-step guide to growing chili peppers in plastic bottles. Let’s get started!
What You’ll Need
Before we dive in, let’s gather all the necessary materials. This will make the process smoother and more enjoyable.
* Plastic Bottles: The star of the show! I prefer using 2-liter soda bottles or larger water bottles. Make sure they’re clean and free of any residue.
* Chili Pepper Seeds: Choose your favorite varieties! I personally love growing jalapeños, habaneros, and serranos. You can find seeds online, at your local garden center, or even harvest them from existing chili peppers.
* Potting Mix: A good quality potting mix is crucial for healthy chili pepper growth. Avoid using garden soil, as it can be too dense and may contain pests or diseases.
* Perlite or Vermiculite: These help improve drainage and aeration in the potting mix.
* Scissors or a Utility Knife: For cutting the plastic bottles. Be careful!
* Drill or Nail: To create drainage holes.
* Watering Can or Spray Bottle: For watering your chili pepper plants.
* Fertilizer: A balanced liquid fertilizer will provide essential nutrients for optimal growth.
* Gloves: To protect your hands.
* Optional: Small pebbles or gravel for the bottom of the bottle to further improve drainage.
* Optional: Plant labels to keep track of your chili varieties.
Preparing the Bottles
This is where we transform those empty bottles into cozy homes for our chili peppers.
1. Clean the Bottles: Thoroughly wash the plastic bottles with soap and water to remove any dirt or residue. Rinse them well and let them dry completely.
2. Cut the Bottles: There are a couple of ways to cut the bottles, depending on the size and your preference.
* Method 1 (For Larger Bottles): Cut the bottle in half horizontally. You’ll be using the bottom half as the planting container and the top half as a mini-greenhouse (optional).
* Method 2 (For Smaller Bottles): Cut off the top third of the bottle. You’ll be using the bottom two-thirds as the planting container.
Important: Be careful when using scissors or a utility knife. Always cut away from yourself and use a stable surface.
3. Create Drainage Holes: This is essential to prevent waterlogging, which can lead to root rot. Use a drill or a nail to create several drainage holes in the bottom of the bottle. I usually make about 5-7 holes, depending on the size of the bottle.
4. Optional: Add a Drainage Layer: Place a layer of small pebbles or gravel at the bottom of the bottle. This will further improve drainage and prevent the potting mix from clogging the drainage holes.
Sowing the Seeds
Now comes the exciting part – planting the chili pepper seeds!
1. Prepare the Potting Mix: In a large container, mix the potting mix with perlite or vermiculite. I usually use a ratio of 3 parts potting mix to 1 part perlite/vermiculite. This will create a well-draining and aerated growing medium.
2. Fill the Bottles: Fill the prepared plastic bottles with the potting mix, leaving about an inch of space at the top.
3. Sow the Seeds: Sprinkle the chili pepper seeds evenly over the surface of the potting mix. I usually sow 2-3 seeds per bottle to increase the chances of germination.
4. Cover the Seeds: Gently cover the seeds with a thin layer of potting mix (about ¼ inch).
5. Water Gently: Use a watering can or spray bottle to gently water the potting mix. Be careful not to dislodge the seeds. The soil should be moist but not waterlogged.
6. Create a Mini-Greenhouse (Optional): If you cut the bottle using Method 1, you can place the top half of the bottle over the bottom half to create a mini-greenhouse. This will help retain moisture and warmth, which can speed up germination. Remove the top half once the seedlings emerge.
7. Label the Bottles: Use plant labels to identify the different chili pepper varieties you’ve planted. This will help you keep track of your plants as they grow.
Caring for Your Chili Pepper Plants
Once the seeds have been sown, it’s important to provide the right conditions for germination and growth.
1. Location: Place the bottles in a warm, sunny location. Chili peppers need at least 6-8 hours of direct sunlight per day. A south-facing window or a sunny balcony is ideal.
2. Watering: Water the plants regularly, keeping the potting mix moist but not waterlogged. Check the soil moisture by sticking your finger into the soil. If the top inch feels dry, it’s time to water. Avoid overwatering, as this can lead to root rot.
3. Temperature: Chili peppers thrive in warm temperatures (70-85°F). Protect the plants from frost and cold drafts.
4. Fertilizing: Once the seedlings have developed a few sets of true leaves, start fertilizing them with a balanced liquid fertilizer. Follow the instructions on the fertilizer label. I usually fertilize my chili pepper plants every 2-3 weeks.
5. Thinning: If more than one seed germinates in a bottle, thin out the seedlings, leaving only the strongest one. Gently pull out the weaker seedlings, being careful not to disturb the roots of the remaining plant.
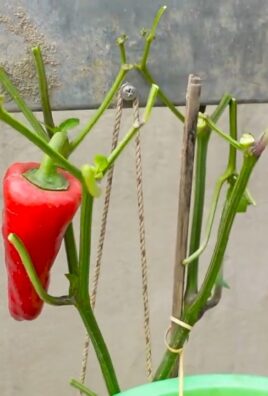
6. Support: As the chili pepper plants grow taller, they may need support to prevent them from falling over. You can use small stakes or bamboo sticks to support the stems.
7. Pest Control: Keep an eye out for pests such as aphids, spider mites, and whiteflies. If you notice any pests, treat them with an appropriate insecticide or organic pest control method. I prefer using neem oil, which is a natural and effective insecticide.
8. Pollination: Chili peppers are self-pollinating, but you can help them along by gently shaking the plants or using a small brush to transfer pollen from one flower to another. This is especially important if you’re growing the plants indoors.
Transplanting (If Necessary)
If your chili pepper plants outgrow their plastic bottle containers, you may need to transplant them into larger pots or into the ground.
1. Choose a Larger Container: Select a pot that is at least 8-10 inches in diameter.
2. Prepare the Potting Mix: Use the same potting mix you used for sowing the seeds.
3. Gently Remove the Plant: Carefully remove the chili pepper plant from the plastic bottle. If the roots are tightly bound, gently loosen them before transplanting.
4. Plant the Chili Pepper: Place the chili pepper plant in the center of the larger pot and fill the pot with potting mix.
5. Water Thoroughly: Water the plant thoroughly after transplanting.
6. Provide Support: If necessary, provide support for the plant using stakes or bamboo sticks.
Harvesting Your Chili Peppers
The moment we’ve all been waiting for – harvesting those fiery chili peppers!
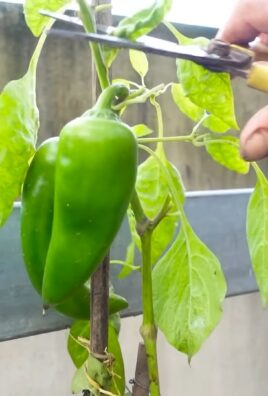
1. Maturity: Chili peppers are typically ready to harvest when they have reached their mature color and size. The color will vary depending on the variety.
2. Harvesting: Use scissors or pruning shears to cut the chili peppers from the plant. Be careful not to damage the plant.
3. Enjoy: Enjoy your homegrown chili peppers in your favorite dishes! You can use them fresh, dried, or pickled.
Tips for Success
Here are a few extra tips to help you succeed in growing chili peppers in plastic bottles:
* Choose the Right Variety: Some chili pepper varieties are better suited for container growing than others. Look for compact or dwarf varieties.
* Provide Adequate Sunlight: Chili peppers need plenty of sunlight to thrive. If you don’t have enough natural sunlight, you can supplement with grow lights.
* Don’t Overwater: Overwatering is a common mistake that can lead to root rot. Allow the soil to dry out slightly between waterings.
* Fertilize Regularly: Chili peppers are heavy feeders and need regular fertilization to produce a good crop.
* Protect from Pests: Keep an eye out for pests and treat them promptly.
* Be Patient: Growing chili peppers takes time and patience. Don’t get discouraged if you don’t see results immediately.
Growing chili peppers in plastic bottles

Conclusion
So, there you have it! Growing chili in bottles is not just a quirky gardening experiment; it’s a genuinely effective and space-saving method that can bring a fiery touch to even the smallest of balconies or patios. We’ve explored the simplicity of the process, from selecting the right bottle and preparing the growing medium to nurturing your chili plants and reaping the rewards of a bountiful harvest.
But why is this DIY trick a must-try? Beyond the sheer novelty, growing chili in bottles offers several compelling advantages. Firstly, it’s incredibly space-efficient. If you’re limited by a small garden or apartment living, this method allows you to cultivate chili plants vertically, maximizing your growing potential. Secondly, the bottles provide excellent drainage, preventing waterlogging and root rot, common problems in traditional gardening. Thirdly, the enclosed environment can offer some protection from pests and diseases, leading to healthier and more productive plants. Finally, it’s a fantastic way to recycle plastic bottles, turning waste into something beautiful and useful.
Don’t be afraid to experiment with variations! Try using different types of bottles – larger water bottles, juice containers, or even repurposed soda bottles. Consider painting the bottles to add a splash of color to your garden or to help regulate soil temperature. You can also explore different chili varieties, from mild bell peppers to scorching habaneros, depending on your taste and tolerance for heat. For an extra boost, try adding a slow-release fertilizer to the growing medium or supplementing with liquid fertilizer during the growing season. You can also add companion plants like basil or marigolds to deter pests and attract pollinators.
Growing chili in bottles is a rewarding experience that connects you with nature and provides a delicious and sustainable source of fresh chilies. It’s a project that’s accessible to gardeners of all skill levels, from beginners to seasoned pros. The satisfaction of harvesting your own homegrown chilies, knowing that you nurtured them from seed to fruit, is truly unparalleled.
We wholeheartedly encourage you to give this DIY trick a try. It’s a fun, affordable, and environmentally friendly way to grow your own chilies, regardless of your space constraints. So, gather your bottles, prepare your growing medium, and get ready to embark on a chili-growing adventure!
And most importantly, we want to hear about your experience! Share your photos, tips, and challenges in the comments below. Let’s create a community of bottle-growing chili enthusiasts and learn from each other’s successes and failures. Your insights could inspire others to take the plunge and discover the joys of growing chili in bottles. Happy gardening!
Frequently Asked Questions (FAQ)
What type of chili is best for growing in bottles?
The best type of chili to grow in bottles depends on your personal preference and the size of the bottle you’re using. Smaller chili varieties, such as Thai chilies, bird’s eye chilies, or even ornamental peppers, tend to thrive in smaller bottles. Larger bottles can accommodate larger chili varieties like jalapenos, serranos, or even bell peppers. Consider the mature size of the plant when making your selection. Also, think about your climate. Some chili varieties are more tolerant of cooler temperatures than others. Researching the specific needs of the chili you choose will increase your chances of success.
What kind of soil should I use for growing chili in bottles?
The ideal soil for growing chili in bottles is a well-draining potting mix that’s rich in organic matter. Avoid using garden soil, as it can be too heavy and compact, leading to drainage problems. A good potting mix will provide the necessary nutrients and aeration for healthy root growth. You can also amend the potting mix with compost or other organic materials to further improve its fertility and drainage. Adding perlite or vermiculite can also help to improve drainage and aeration. A slightly acidic to neutral pH is generally preferred by chili plants.
How often should I water my chili plants in bottles?
Watering frequency depends on several factors, including the size of the bottle, the type of soil, the climate, and the stage of growth of the plant. Generally, you should water your chili plants when the top inch of soil feels dry to the touch. Avoid overwatering, as this can lead to root rot. Ensure that the bottle has adequate drainage holes to prevent water from accumulating at the bottom. During hot weather, you may need to water more frequently. Check the soil moisture regularly and adjust your watering schedule accordingly. A good rule of thumb is to water deeply but infrequently, allowing the soil to dry out slightly between waterings.
How much sunlight do chili plants need when grown in bottles?
Chili plants thrive in full sun, requiring at least 6-8 hours of direct sunlight per day. If you’re growing your chili plants indoors, place them near a sunny window or supplement with grow lights. Insufficient sunlight can lead to leggy growth, reduced flowering, and smaller fruit. If you live in a particularly hot climate, you may need to provide some afternoon shade to prevent the plants from overheating. Observe your plants closely and adjust their position as needed to ensure they receive adequate sunlight.
How do I fertilize chili plants growing in bottles?
Chili plants are heavy feeders and benefit from regular fertilization. Start fertilizing your plants a few weeks after transplanting them into the bottles. Use a balanced fertilizer with an NPK ratio (nitrogen, phosphorus, potassium) of 10-10-10 or 14-14-14. You can also use a fertilizer specifically formulated for tomatoes or peppers, as these plants have similar nutrient requirements. Follow the instructions on the fertilizer packaging for application rates. You can fertilize every 2-4 weeks during the growing season. Consider using a slow-release fertilizer or supplementing with liquid fertilizer for an extra boost.
How do I prevent pests and diseases when growing chili in bottles?
Growing chili in bottles can help to minimize pest and disease problems, but it’s still important to take preventative measures. Inspect your plants regularly for signs of pests or diseases. Common pests that affect chili plants include aphids, spider mites, and whiteflies. You can control these pests with insecticidal soap, neem oil, or by handpicking them off the plants. Diseases such as powdery mildew and fungal leaf spots can be prevented by ensuring good air circulation and avoiding overwatering. Remove any infected leaves promptly. You can also use a fungicide if necessary. Companion planting with herbs like basil or marigolds can also help to deter pests.
How long does it take for chili plants to produce fruit when grown in bottles?
The time it takes for chili plants to produce fruit depends on the variety of chili, the growing conditions, and the climate. Generally, it takes about 60-90 days from transplanting for chili plants to start producing fruit. Some varieties may take longer, while others may mature more quickly. Ensure that your plants are receiving adequate sunlight, water, and nutrients to promote fruit production. Pruning the plants can also help to encourage flowering and fruiting. Be patient and persistent, and you’ll soon be rewarded with a bountiful harvest of homegrown chilies.
Can I grow chili in bottles indoors?
Yes, you can absolutely grow chili in bottles indoors! This is a great option for those who live in colder climates or have limited outdoor space. To successfully grow chili indoors, you’ll need to provide adequate light, either through a sunny window or with grow lights. Ensure that the plants receive at least 6-8 hours of light per day. You’ll also need to monitor the temperature and humidity levels. Chili plants prefer warm temperatures and moderate humidity. Water the plants regularly, but avoid overwatering. Fertilize as needed. With proper care, you can enjoy a bountiful harvest of homegrown chilies indoors.
What do I do with my chili plants after the growing season?
Depending on your climate, you may be able to overwinter your chili plants and bring them back for another growing season. Before the first frost, prune the plants back and move them indoors to a cool, bright location. Water sparingly during the winter months. In the spring, gradually acclimate the plants to outdoor conditions before transplanting them back into their bottles. Alternatively, you can save seeds from your harvested chilies and start new plants the following year. This is a great way to ensure a continuous supply of homegrown chilies.
Leave a Comment