
Growing Coconut Trees at Home might seem like a tropical dream reserved for beachfront properties, but I’m here to tell you that with a little know-how, you can cultivate your own little slice of paradise, even if you’re miles from the coast! For centuries, the coconut palm has been revered in tropical cultures, not just for its delicious fruit and refreshing water, but also for its versatility – providing everything from building materials to medicinal remedies. Think of the iconic images of swaying palms against turquoise waters; it’s a symbol of relaxation and abundance.
But why should you consider growing coconut trees at home? Well, beyond the sheer joy of nurturing a plant from seed to maturity, imagine harvesting your own fresh coconuts! Store-bought coconuts simply can’t compare to the flavor and satisfaction of enjoying one you’ve grown yourself. Plus, coconut trees are surprisingly adaptable and can thrive in containers, making them a viable option for even those with limited space. This DIY guide will walk you through every step, from selecting the right coconut to providing the optimal growing conditions, ensuring your success in growing coconut trees at home. I’ll share some simple yet effective tricks and hacks that will make the process easier and more rewarding. Get ready to embark on a green adventure and bring a touch of the tropics to your own backyard!
Growing Coconut Trees at Home: A DIY Guide
Okay, so you want to grow your own coconut tree? Awesome! It’s a bit of a journey, but totally rewarding. I’m going to walk you through everything I’ve learned about getting those tropical vibes right in your backyard (or even indoors!). Let’s get started!
Choosing Your Coconut
This is the first, and arguably most important, step. Not all coconuts are created equal when it comes to germination.
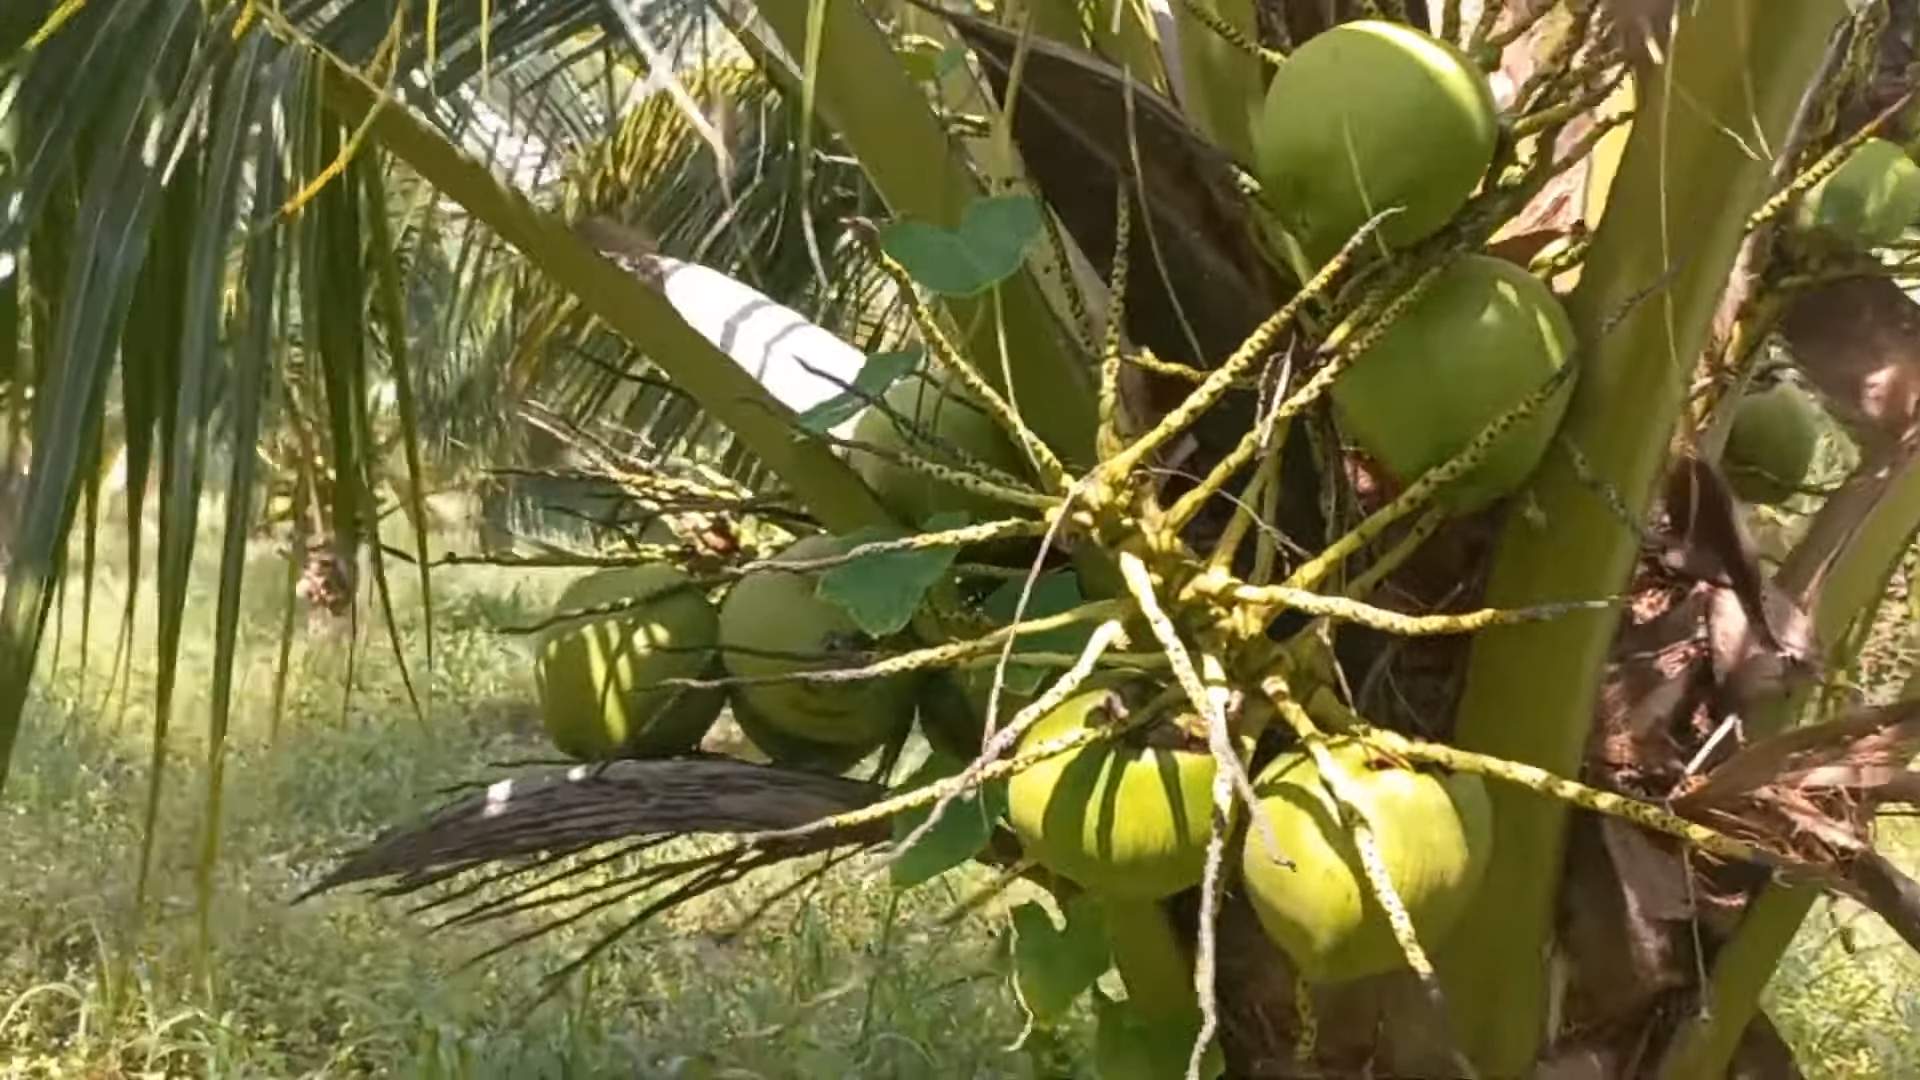
* Look for Mature Coconuts: You want a mature coconut, meaning it’s brown, heavy, and still has its husk intact. Avoid the ones you find in the grocery store that are already husked and ready to eat. Those are usually too young and won’t sprout.
* Shake Test: Give the coconut a good shake. You should hear plenty of water sloshing around inside. This indicates that the coconut is still viable. If it sounds dry or empty, it’s probably not going to sprout.
* Check for Cracks or Damage: Inspect the coconut carefully for any cracks, bruises, or signs of mold. Any damage can compromise its ability to germinate.
* Source Matters: If possible, get your coconut from a local nursery or a source that specializes in tropical plants. They’ll likely have coconuts that are specifically intended for planting.
Preparing the Coconut for Germination
Now that you’ve got your perfect coconut, it’s time to get it ready to sprout. This involves creating the ideal environment for root and shoot development.
* Soaking the Coconut (Optional but Recommended): Soaking the coconut in water for 2-3 days can help to soften the husk and encourage germination. Change the water daily to prevent bacterial growth. I usually use lukewarm water for this.
* Choosing a Germination Method: There are a couple of ways to germinate your coconut. I’ll cover both:
* The Bag Method: This is my preferred method because it’s clean and easy to monitor.
* The Potting Mix Method: This is more natural but requires a bit more space.
Germination Method 1: The Bag Method
This method is great if you want to keep a close eye on the sprouting process.
1. Prepare the Bag: Get a large, clear plastic bag (a gallon-sized freezer bag works well). Add a generous amount of moist (not soaking wet!) coco coir or peat moss to the bag. This will provide a humid environment for the coconut.
2. Position the Coconut: Place the coconut horizontally in the bag, burying about one-third to one-half of the coconut in the moist coco coir. The “eyes” (the three soft spots on one end of the coconut) should be facing upwards or sideways.
3. Seal the Bag: Seal the bag tightly, leaving a small opening for air circulation. You don’t want it to be completely airtight.
4. Find a Warm Spot: Place the bag in a warm location with indirect sunlight. A temperature between 85-95°F (29-35°C) is ideal. A sunny windowsill or a spot near a heater (but not directly on it!) can work well.
5. Monitor and Mist: Check the bag regularly (every few days) to make sure the coco coir is still moist. If it’s drying out, mist it lightly with water. Also, check for any signs of mold or rot. If you see any, remove the affected area and replace the coco coir.
6. Patience is Key: Germination can take anywhere from 2-6 months, so don’t get discouraged if you don’t see anything happening right away. Just keep the environment warm and humid, and eventually, you should see a sprout emerging from one of the “eyes.”
Germination Method 2: The Potting Mix Method
This method mimics the natural environment of a coconut palm.
1. Choose a Large Pot: Select a large pot (at least 12 inches in diameter) with drainage holes.
2. Prepare the Potting Mix: Fill the pot with a well-draining potting mix. A mixture of potting soil, perlite, and sand works well.
3. Position the Coconut: Place the coconut horizontally in the pot, burying about one-third to one-half of the coconut in the potting mix. Again, the “eyes” should be facing upwards or sideways.
4. Water Thoroughly: Water the potting mix thoroughly until water drains out of the drainage holes.
5. Find a Warm Spot: Place the pot in a warm location with indirect sunlight. The same temperature range as the bag method applies (85-95°F or 29-35°C).
6. Water Regularly: Keep the potting mix consistently moist, but not waterlogged. Water when the top inch of soil feels dry to the touch.
7. Monitor and Wait: Just like the bag method, germination can take several months. Be patient and keep the soil moist and warm.
Planting the Sprouted Coconut
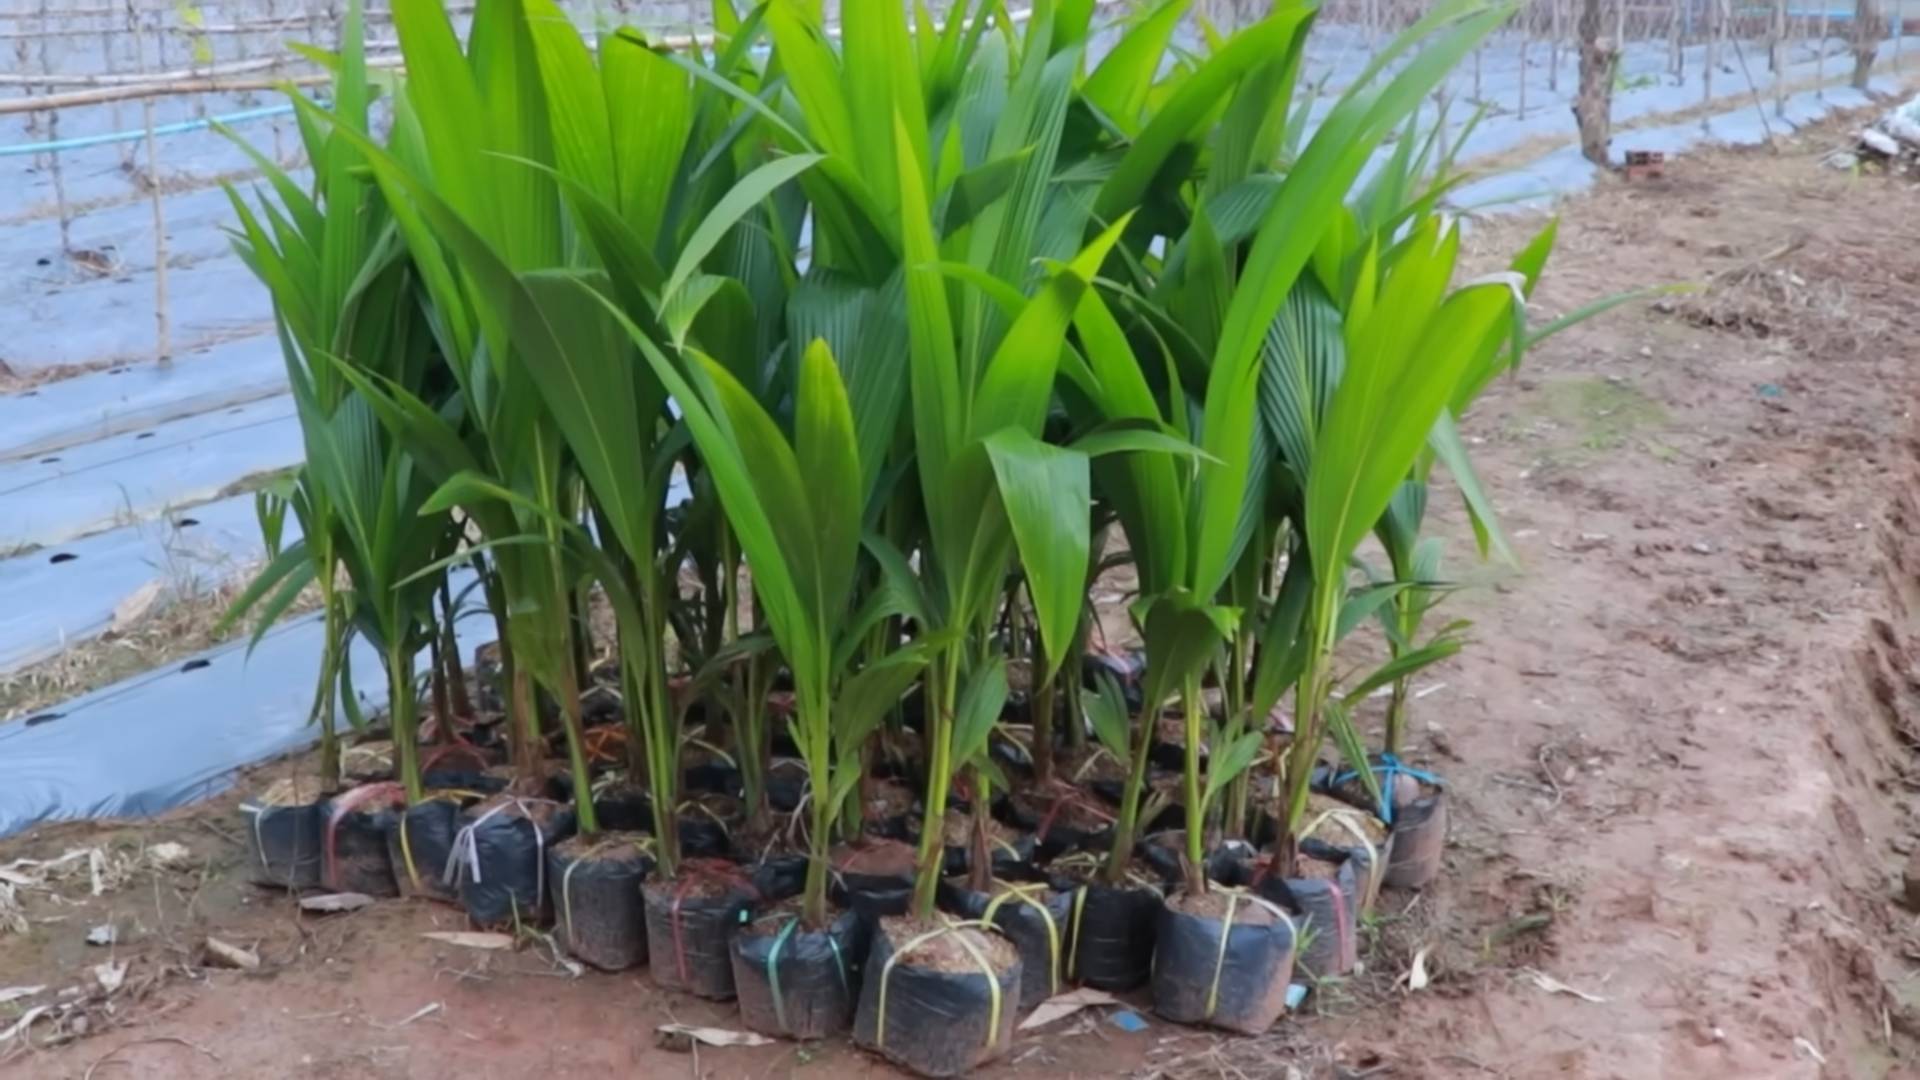
Once your coconut has sprouted and has a few leaves, it’s time to plant it in a larger container or directly in the ground (if you live in a suitable climate).
1. Choosing the Right Location: Coconut palms need plenty of sunlight (at least 6-8 hours per day) and well-draining soil. If you’re planting it in a container, make sure the container is large enough to accommodate the growing root system. If you’re planting it in the ground, choose a location that is sheltered from strong winds.
2. Preparing the Planting Hole: Dig a hole that is slightly larger than the coconut itself.
3. Planting the Coconut: Carefully remove the sprouted coconut from the bag or pot, being careful not to damage the roots. Place the coconut in the hole, making sure that the top of the coconut is slightly above the soil level.
4. Backfilling the Hole: Backfill the hole with soil, gently firming it around the coconut.
5. Watering Thoroughly: Water the newly planted coconut thoroughly.
Caring for Your Coconut Palm
Now that your coconut palm is planted, it’s important to provide it with the proper care to ensure its continued growth and health.
* Watering: Water your coconut palm regularly, especially during dry periods. Coconut palms prefer consistently moist soil, but they don’t like to be waterlogged.
* Fertilizing: Fertilize your coconut palm regularly with a balanced fertilizer that is specifically formulated for palm trees. Follow the instructions on the fertilizer label. I usually fertilize mine every 2-3 months during the growing season (spring and summer).
* Sunlight: Coconut palms need plenty of sunlight, so make sure your palm is getting at least 6-8 hours of direct sunlight per day.
* Temperature: Coconut palms are tropical plants and prefer warm temperatures. They can tolerate temperatures as low as 60°F (15°C), but they thrive in temperatures between 70-90°F (21-32°C). If you live in a colder climate, you’ll need to bring your coconut palm indoors during the winter months.
* Pruning: Prune your coconut palm as needed to remove any dead or damaged fronds.
* Pest and Disease Control: Keep an eye out for pests and diseases, such as spider mites, scale, and fungal infections. Treat any infestations or infections promptly with appropriate pesticides or fungicides.
Dealing with Common Problems
Even with the best care, you might encounter some problems along the way. Here are a few common issues and how to address them:
* Yellowing Leaves: Yellowing leaves can be a sign of nutrient deficiency, overwatering, or underwatering. Check the soil moisture and adjust your watering schedule accordingly. Also, make sure you’re fertilizing your palm regularly.
* Brown Leaf Tips: Brown leaf tips are often caused by dry air or salt buildup in the soil. Increase the humidity around your palm by misting it regularly or placing it on a pebble tray filled with water. Also, flush the soil with water periodically to remove any salt buildup.
* Slow Growth: Slow growth can be caused by a variety of factors, including insufficient sunlight, poor soil, or nutrient deficiency. Make sure your palm is getting enough sunlight and that the soil is well-draining and fertile. Fertilize your palm regularly to provide it with the nutrients it needs to grow.
* No Coconuts: Don’t expect coconuts right away! It can take several years for a coconut palm to mature enough to produce fruit. Also, some coconut palm varieties are more likely to produce coconuts than others. If you’re really keen on getting coconuts, choose a variety that is known for its fruit production.
Bringing the Tropics Home
Growing a coconut tree is a labor of love, but it’s totally worth it. There’
Conclusion
So, there you have it! Growing coconut trees at home might seem like a tropical dream reserved for those living in sun-drenched locales, but with this simple DIY trick, you can significantly increase your chances of success, no matter where you are. This isn’t just about planting a seed; it’s about creating the optimal environment for germination and early growth, giving your coconut palm the best possible start in life.
Why is this DIY trick a must-try? Because it addresses the two biggest hurdles in coconut germination: maintaining consistent warmth and humidity. By creating a mini-greenhouse environment, you’re essentially mimicking the tropical conditions that coconuts thrive in. This dramatically improves germination rates and reduces the risk of the seed rotting before it has a chance to sprout. Think of it as giving your coconut a head start in the race to become a majestic palm!
But don’t stop there! Experimentation is key to gardening success. Consider these variations to personalize your approach:
* Soil Amendments: While the basic potting mix works well, you can enrich it further with compost or well-rotted manure. This provides extra nutrients to fuel early growth.
* Humidity Control: If you live in a particularly dry climate, consider misting the inside of the bag regularly to maintain high humidity levels. A small humidifier placed near the bag can also be beneficial.
* Light Exposure: Once the seedling emerges, gradually introduce it to more sunlight. Start with indirect light and slowly increase exposure to direct sunlight over a period of a week or two to prevent shock.
* Container Size: As the seedling grows, you’ll need to transplant it into a larger container. Choose a pot that’s at least twice the size of the original and has good drainage.
* Coconut Variety: Different coconut varieties have different growth rates and tolerances. Research the best variety for your climate and growing conditions. Dwarf varieties are often better suited for container growing.
Growing coconut trees at home is a rewarding experience that connects you to the tropics, no matter where you live. It’s a testament to the power of DIY ingenuity and the resilience of nature. Don’t be intimidated by the perceived difficulty; this trick makes the process accessible to anyone with a little patience and a love for gardening.
We wholeheartedly encourage you to try this DIY trick and embark on your own coconut-growing adventure. Witness the miracle of life as a humble coconut transforms into a vibrant palm, right in your own home. And most importantly, share your experience with us! We’d love to hear about your successes, challenges, and any variations you’ve tried. Post pictures, share tips, and let’s create a community of coconut enthusiasts! Your insights could inspire others to take the plunge and experience the joy of growing their own coconut trees. Let’s get those coconuts sprouting!
Frequently Asked Questions (FAQ)
Q: What kind of coconut should I use?
A: You’ll want to use a mature coconut that still has its husk intact. Look for coconuts that feel heavy for their size and have some liquid sloshing around inside. Avoid coconuts that are cracked, damaged, or show signs of mold. You can often find suitable coconuts at Asian or Latin American grocery stores. Sprouted coconuts are ideal, but not always necessary.
Q: How long does it take for a coconut to germinate using this method?
A: Germination time can vary depending on factors like temperature, humidity, and the freshness of the coconut. Generally, you can expect to see sprouts emerge within 2-6 months. Be patient and maintain consistent conditions. Don’t give up if you don’t see results immediately!
Q: What kind of potting mix should I use?
A: A well-draining potting mix is crucial. A mixture of equal parts peat moss, perlite, and vermiculite works well. You can also use a commercially available potting mix specifically formulated for palms or tropical plants. Avoid using garden soil, as it can be too heavy and compact, hindering root growth.
Q: How often should I water the coconut while it’s germinating?
A: The goal is to keep the potting mix consistently moist, but not waterlogged. Water thoroughly when the top inch of the soil feels dry to the touch. Ensure that the container has good drainage to prevent root rot. The humidity inside the bag will also help retain moisture.
Q: What temperature is ideal for coconut germination?
A: Coconuts thrive in warm temperatures. Aim for a consistent temperature between 85-95°F (29-35°C). You can use a heat mat designed for seed germination to provide bottom heat, especially in cooler climates.
Q: How much light does the coconut need after it sprouts?
A: Once the seedling emerges, it will need bright, indirect light. Avoid exposing it to direct sunlight initially, as this can scorch the leaves. Gradually increase the amount of direct sunlight over a period of a week or two. A south-facing window is often a good option.
Q: When should I transplant the coconut seedling?
A: Transplant the seedling when it has developed a few leaves and the roots are starting to fill the container. Choose a pot that’s at least twice the size of the original and has good drainage. Be careful not to damage the roots during transplanting.
Q: Can I grow a coconut tree indoors permanently?
A: While it’s possible to grow a coconut tree indoors, it can be challenging to provide the ideal conditions for long-term growth. Coconut trees need plenty of sunlight, warmth, and humidity. Dwarf varieties are generally better suited for indoor growing. You may need to supplement natural light with grow lights.
Q: What are some common problems when growing coconut trees?
A: Some common problems include root rot (caused by overwatering), nutrient deficiencies (yellowing leaves), and pest infestations (spider mites, scale). Proper watering, fertilization, and regular inspection can help prevent these problems.
Q: Can I use this method to grow other tropical plants?
A: Yes, this method can be adapted for other tropical plants that require warm, humid conditions for germination. Just be sure to research the specific needs of the plant you’re trying to grow.
Q: What kind of fertilizer should I use for my coconut tree?
A: Use a balanced fertilizer specifically formulated for palms or tropical plants. Look for a fertilizer with a ratio of 8-4-8 or similar. Fertilize regularly during the growing season (spring and summer), following the instructions on the fertilizer label.
Q: My coconut sprouted, but the leaves are turning yellow. What should I do?
A: Yellowing leaves can indicate several issues. It could be due to overwatering, underwatering, nutrient deficiencies, or pest infestations. Check the soil moisture, fertilize with a balanced palm fertilizer, and inspect the leaves for pests. Ensure the plant is receiving adequate light.
Q: Is it possible to grow a coconut tree in a cold climate?
A: Growing a coconut tree in a cold climate is challenging, but not impossible. You’ll need to provide a warm, humid environment indoors, especially during the winter months. Consider using a greenhouse or a dedicated indoor growing space with supplemental heating and lighting. Choose a dwarf variety that’s better suited for container growing.
Leave a Comment