
Growing Collard Greens might seem like a task best left to seasoned farmers, but I’m here to tell you that this leafy green powerhouse is surprisingly easy to cultivate right in your own backyard! Forget those wilted, overpriced bunches at the grocery store. Imagine stepping outside and harvesting fresh, vibrant collard greens whenever you crave a healthy and delicious meal.
Collard greens have a rich history, deeply rooted in Southern American cuisine and culture. Brought over by enslaved Africans, these greens became a staple, representing resilience, resourcefulness, and a connection to heritage. They’re more than just a vegetable; they’re a symbol of comfort and tradition.
But beyond their cultural significance, why should you bother with growing collard greens yourself? Well, for starters, homegrown produce simply tastes better! Plus, you have complete control over what goes into your food, avoiding harmful pesticides and ensuring maximum freshness. In today’s world, where healthy eating and sustainable living are becoming increasingly important, mastering the art of growing collard greens is a fantastic way to take charge of your well-being and connect with nature. So, let’s dive into some simple DIY tricks and hacks that will have you harvesting a bountiful crop in no time!
Kopfkohl Anbauen: Dein DIY-Leitfaden für eine reiche Ernte
Ich liebe es, frisches Gemüse direkt aus meinem Garten zu ernten, und Kopfkohl (Collard Greens) ist da keine Ausnahme! Er ist super gesund, vielseitig in der Küche und relativ einfach anzubauen, selbst wenn du kein erfahrener Gärtner bist. In diesem Artikel zeige ich dir Schritt für Schritt, wie du deinen eigenen Kopfkohl anbauen kannst, von der Aussaat bis zur Ernte. Los geht’s!
Was du für den Kopfkohlanbau brauchst:
* Kopfkohlsamen oder Jungpflanzen: Du kannst entweder mit Samen beginnen oder dir den Prozess erleichtern und Jungpflanzen kaufen.
* Gartenwerkzeug: Spaten, Harke, Gießkanne oder Gartenschlauch.
* Gute Erde: Kopfkohl braucht nährstoffreichen Boden.
* Kompost oder Dünger: Für eine optimale Nährstoffversorgung.
* Mulch: Um die Feuchtigkeit im Boden zu halten und Unkraut zu unterdrücken.
* Pflanzschilder: Damit du weißt, wo du was gepflanzt hast.
* Schutz vor Schädlingen: Je nach Region können Netze oder biologische Schädlingsbekämpfungsmittel sinnvoll sein.
Der richtige Zeitpunkt für die Aussaat oder Pflanzung:
Der Zeitpunkt ist entscheidend für eine erfolgreiche Ernte. Kopfkohl ist relativ kälteresistent, aber extreme Hitze mag er nicht so gerne.
* Frühjahrspflanzung: In den meisten Regionen ist das Frühjahr (März/April) eine gute Zeit, um Kopfkohl zu pflanzen, sobald der Boden bearbeitet werden kann.
* Herbstpflanzung: Eine Herbstpflanzung (August/September) ist ideal für eine Ernte im Winter oder frühen Frühjahr. Das ist besonders in Regionen mit milden Wintern super.
Schritt-für-Schritt-Anleitung: Kopfkohl anbauen
1. Vorbereitung des Bodens
1. Wähle einen sonnigen Standort: Kopfkohl braucht mindestens 6 Stunden Sonne pro Tag.
2. Lockere den Boden auf: Grabe den Boden mit einem Spaten um und entferne Steine und Wurzeln.
3. Verbessere die Bodenqualität: Mische Kompost oder gut verrotteten Mist unter die Erde. Das sorgt für eine gute Nährstoffversorgung und Drainage.
4. Glätte die Oberfläche: Harke den Boden, um eine ebene Fläche zu schaffen.
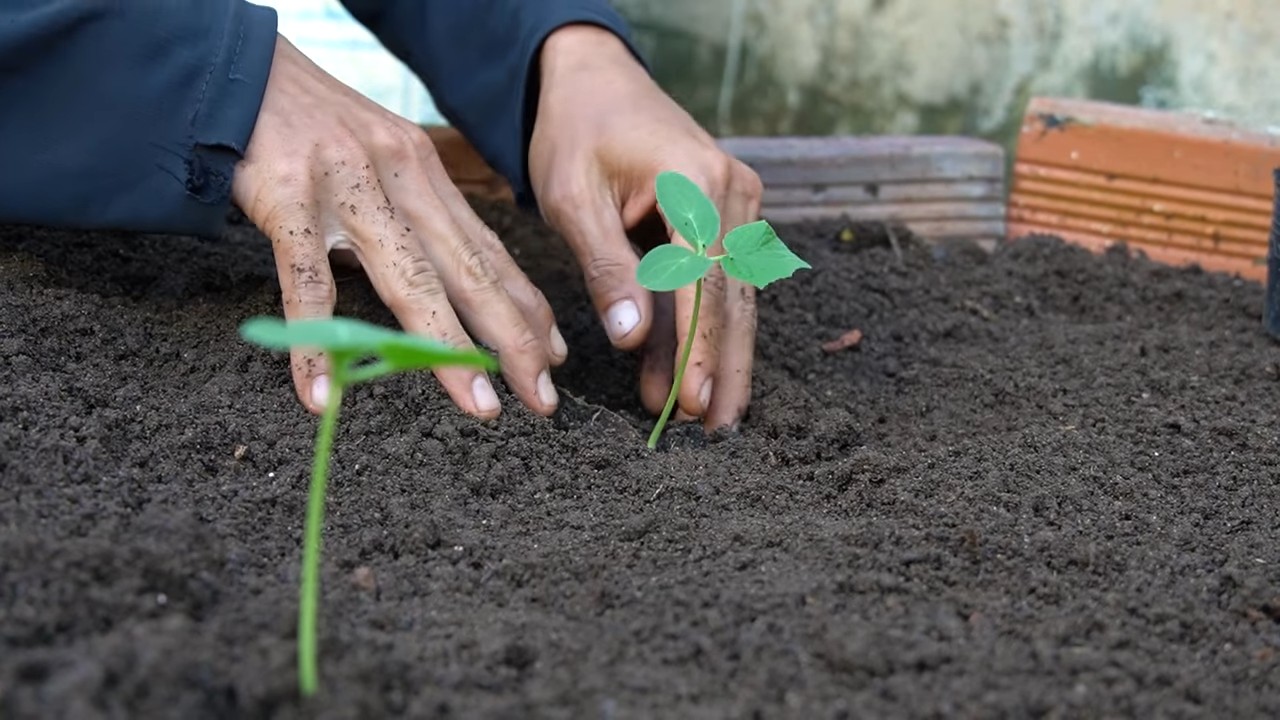
2. Aussaat (wenn du mit Samen beginnst)
1. Säe die Samen: Drücke die Samen etwa 1 cm tief in die Erde.
2. Halte den Abstand ein: Lasse zwischen den Samen etwa 5-7 cm Platz.
3. Bedecke die Samen: Bedecke die Samen leicht mit Erde.
4. Gieße vorsichtig: Befeuchte die Erde sanft mit einer Gießkanne.
5. Halte die Erde feucht: Die Erde sollte während der Keimung immer feucht sein.
6. Pikiere die Sämlinge: Sobald die Sämlinge ein paar Blätter haben, kannst du sie pikieren (vereinzeln) und in separate Töpfe umpflanzen, wenn du sie nicht direkt ins Beet säen möchtest.
3. Pflanzung (wenn du Jungpflanzen verwendest)
1. Grabe Pflanzlöcher: Grabe Löcher, die etwas größer sind als die Wurzelballen der Jungpflanzen.
2. Halte den Abstand ein: Lasse zwischen den Pflanzen etwa 45-60 cm Platz. Kopfkohl braucht Platz zum Wachsen.
3. Setze die Pflanzen ein: Nimm die Jungpflanzen vorsichtig aus ihren Töpfen und setze sie in die Pflanzlöcher. Achte darauf, dass der Wurzelballen nicht beschädigt wird.
4. Fülle die Löcher: Fülle die Löcher mit Erde und drücke sie leicht an.
5. Gieße gründlich: Gieße die Pflanzen nach dem Einsetzen gründlich.
4. Pflege des Kopfkohls
1. Gießen: Gieße den Kopfkohl regelmäßig, besonders während trockener Perioden. Die Erde sollte immer leicht feucht sein.
2. Düngen: Dünge den Kopfkohl alle paar Wochen mit einem organischen Dünger oder Komposttee. Das fördert das Wachstum und die Blattbildung.
3. Unkraut jäten: Entferne regelmäßig Unkraut, das um die Nährstoffe konkurriert.
4. Mulchen: Trage eine Schicht Mulch um die Pflanzen auf. Das hilft, die Feuchtigkeit im Boden zu halten, Unkraut zu unterdrücken und den Boden kühl zu halten.
5. Schädlingsbekämpfung: Kontrolliere die Pflanzen regelmäßig auf Schädlinge wie Kohlweißlinge, Blattläuse oder Schnecken.
* Kohlweißlinge: Diese Schmetterlinge legen ihre Eier auf die Blätter, und die Raupen fressen dann den Kopfkohl. Du kannst sie absammeln oder ein Netz über die Pflanzen spannen.
* Blattläuse: Diese kleinen Schädlinge saugen den Pflanzensaft aus. Du kannst sie mit einem Wasserstrahl abspritzen oder mit einem biologischen Insektizid bekämpfen.
* Schnecken: Schnecken lieben Kopfkohl. Du kannst Schneckenkorn verwenden oder Fallen aufstellen.
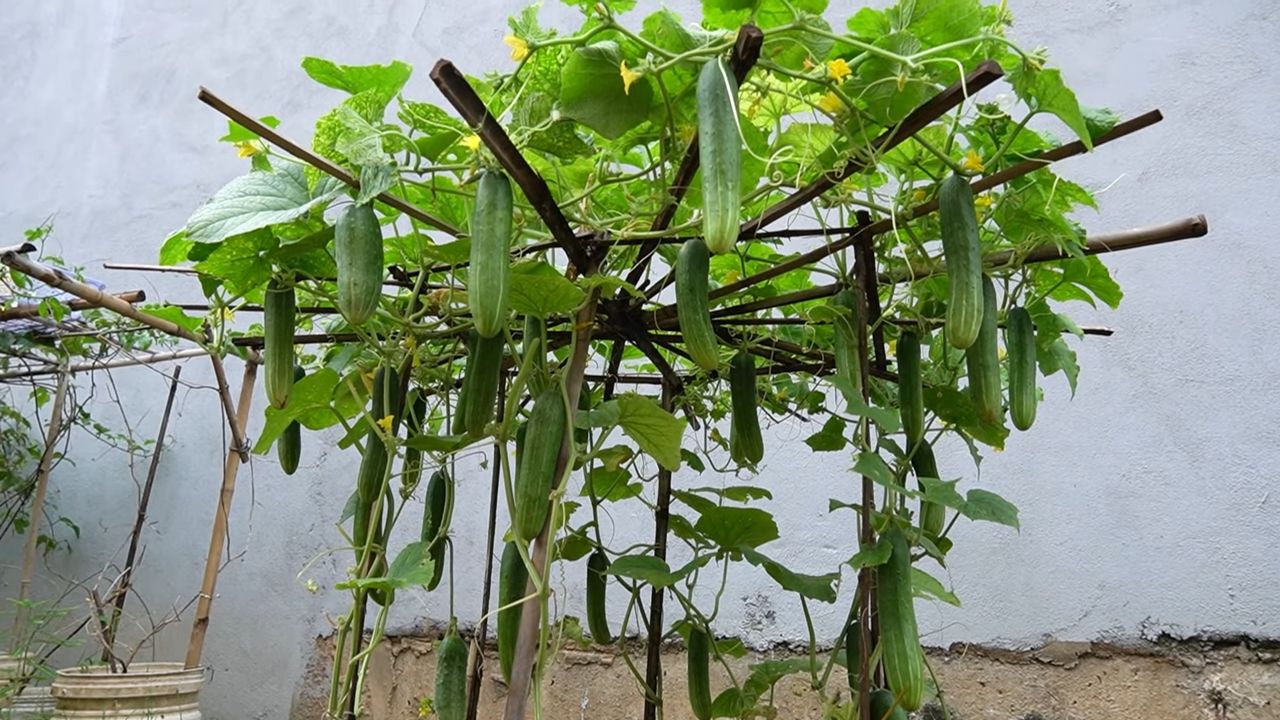
5. Ernte des Kopfkohls
1. Wann ernten: Du kannst den Kopfkohl ernten, sobald die Blätter groß genug sind, um sie zu verwenden. In der Regel dauert es etwa 60-80 Tage von der Aussaat bis zur Ernte.
2. Wie ernten: Schneide die äußeren Blätter mit einem scharfen Messer ab. Die inneren Blätter wachsen weiter, so dass du über einen längeren Zeitraum ernten kannst.
3. Lagerung: Kopfkohl hält sich im Kühlschrank etwa eine Woche. Du kannst ihn auch einfrieren, nachdem du ihn blanchiert hast.
Zusätzliche Tipps für eine erfolgreiche Ernte:
* Fruchtfolge: Pflanze Kopfkohl nicht jedes Jahr am selben Standort. Das hilft, Krankheiten und Schädlinge zu vermeiden.
* Begleitpflanzung: Pflanze Kopfkohl zusammen mit anderen Pflanzen, die ihn vor Schädlingen schützen oder sein Wachstum fördern. Gute Begleitpflanzen sind zum Beispiel Ringelblumen, Dill oder Thymian.
* Bodenanalyse: Wenn du unsicher bist, ob dein Boden die richtigen Nährstoffe enthält, kannst du eine Bodenanalyse durchführen lassen.
* Sortenwahl: Es gibt verschiedene Kopfkohlsorten. Wähle eine Sorte, die für dein Klima und deine Bedürfnisse geeignet ist. Einige Sorten sind kälteresistenter als andere.
* Beobachtung: Beobachte deine Pflanzen regelmäßig und reagiere schnell auf Probleme wie Schädlinge oder Krankheiten.
Häufige Probleme und Lösungen:
* Gelbe Blätter: Gelbe Blätter können ein Zeichen für Nährstoffmangel oder Überwässerung sein. Dünge die Pflanzen oder passe die Bewässerung an.
* Löcher in den Blättern: Löcher in den Blättern werden oft durch Schädlinge verursacht. Kontrolliere die Pflanzen auf Schädlinge und bekämpfe sie gegebenenfalls.
* Krankheiten: Kopfkohl kann von verschiedenen Krankheiten befallen werden, wie zum Beispiel Mehltau oder Kohlhernie. Achte auf Anzeichen von Krankheiten und behandle sie gegebenenfalls mit einem geeigneten Fungizid.
Kopfkohl in der Küche:
Kopfkohl ist unglaublich vielseitig in der Küche. Du kannst ihn kochen, dünsten, braten oder roh in Salaten verwenden. Er ist reich an Vitaminen und Mineralstoffen und schmeckt einfach köstlich! Hier sind ein paar Ideen:
* Gekochter Kopfkohl: Klassisch und einfach. Mit etwas Butter und Salz ein Genuss.
* Gedünsteter Kopfkohl: Mit Knoblauch und Olivenöl gedünstet.
* Kopfkohl-Chips: Im Ofen gebacken für einen gesunden Snack.
* Kopfkohl-Suppe: Eine wärmende und nahrhafte Suppe.
* Kopfkohl-Salat: Fein
Conclusion
So, there you have it! Growing collard greens at home is not only achievable, but also incredibly rewarding. From the satisfaction of nurturing a plant from seed to the joy of harvesting fresh, vibrant leaves for your favorite Southern dishes, the entire process is a testament to the power of DIY and the bounty of nature.
Why is this DIY trick a must-try? Because it puts you in control. You dictate the quality of the soil, the amount of sunlight, and the absence of harmful pesticides. Store-bought collard greens, while convenient, often lack the freshness and robust flavor that homegrown varieties possess. Plus, there’s a certain pride that comes with serving a meal featuring ingredients you cultivated yourself. It’s a conversation starter, a source of personal accomplishment, and a delicious way to connect with the earth.
But the benefits extend beyond just taste and satisfaction. Growing your own collard greens is also a budget-friendly way to enjoy this nutritious vegetable. Think about it: a single packet of seeds can yield a continuous harvest throughout the growing season, far exceeding the cost of repeatedly purchasing bunches from the grocery store. And let’s not forget the environmental impact. By growing your own food, you’re reducing your carbon footprint associated with transportation and packaging.
Ready to take your collard green game to the next level? Consider these variations and suggestions:
* Succession Planting: Plant new seeds every few weeks to ensure a continuous harvest throughout the growing season. This is especially helpful in regions with longer growing seasons.
* Companion Planting: Plant collard greens alongside herbs like rosemary, thyme, and sage to deter pests naturally. Marigolds are also excellent companion plants for their pest-repelling properties.
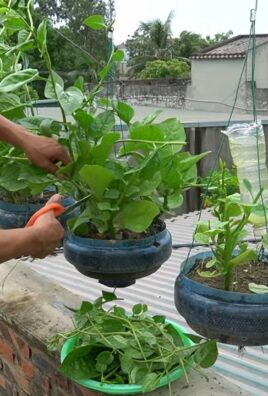
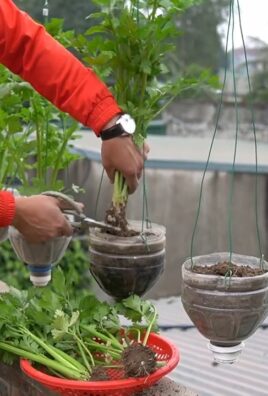
* Container Gardening: If you’re short on space, don’t despair! Collard greens thrive in containers, making them perfect for patios, balconies, and small gardens. Just be sure to choose a large enough container (at least 12 inches in diameter) and use a well-draining potting mix.
* Different Varieties: Experiment with different varieties of collard greens to find your favorite. Some popular options include ‘Georgia Southern,’ ‘Champion,’ and ‘Vates.’ Each variety offers a slightly different flavor and texture.
* Overwintering: In milder climates, collard greens can be overwintered for an even earlier spring harvest. Simply protect the plants with a layer of mulch or a cold frame during the coldest months.
We are confident that you’ll find growing collard greens at home to be a rewarding and enjoyable experience. So, grab your seeds, prepare your soil, and get ready to embark on this green adventure! We encourage you to try this DIY trick and share your experiences with us. What variety did you choose? What challenges did you face? What delicious dishes did you create? Share your tips, tricks, and triumphs in the comments below. Let’s build a community of collard green enthusiasts! Happy gardening!
Frequently Asked Questions (FAQ)
What is the best time of year to plant collard greens?
The best time to plant collard greens depends on your climate. In warmer climates with mild winters, you can plant them in the fall for a winter or early spring harvest. In colder climates, plant them in the spring after the last frost for a summer or fall harvest. You can also start seeds indoors 6-8 weeks before the last frost and transplant them outdoors once the weather warms up.
How much sunlight do collard greens need?
Collard greens need at least 6 hours of sunlight per day to thrive. Choose a location in your garden that receives full sun for the best results. If you’re growing them in containers, make sure to place them in a sunny spot.
What kind of soil is best for growing collard greens?
Collard greens prefer well-drained soil that is rich in organic matter. Amend your soil with compost or aged manure before planting to improve its fertility and drainage. A soil pH of 6.0 to 7.5 is ideal.
How often should I water collard greens?
Water collard greens regularly, especially during dry periods. Aim to keep the soil consistently moist but not waterlogged. Water deeply at the base of the plants to encourage strong root growth. Mulching around the plants can help retain moisture and suppress weeds.
What are some common pests and diseases that affect collard greens?
Common pests that affect collard greens include aphids, cabbage worms, flea beetles, and slugs. Diseases include black rot, downy mildew, and clubroot. To prevent pests and diseases, practice good garden hygiene, such as removing plant debris and rotating crops. You can also use organic pest control methods, such as insecticidal soap or neem oil.
How do I harvest collard greens?
You can begin harvesting collard greens when the leaves are about 10-12 inches long. Harvest the outer leaves first, leaving the inner leaves to continue growing. This will allow you to enjoy a continuous harvest throughout the growing season. Simply snap or cut the leaves off near the base of the plant.
Can I eat collard greens after they have been exposed to frost?
Yes, in fact, many people believe that collard greens taste even better after they have been exposed to a light frost. The frost can help to sweeten the leaves and improve their flavor.
How do I store harvested collard greens?
To store harvested collard greens, wash them thoroughly and pat them dry. Wrap them in a damp paper towel and place them in a plastic bag in the refrigerator. They should keep for up to a week.
Can I freeze collard greens?
Yes, you can freeze collard greens for longer storage. To freeze them, wash and chop the leaves, then blanch them in boiling water for 2-3 minutes. Drain them well and pack them into freezer bags or containers. They can be stored in the freezer for up to 12 months.
Are collard greens nutritious?
Absolutely! Collard greens are packed with vitamins, minerals, and antioxidants. They are an excellent source of vitamins A, C, and K, as well as calcium, iron, and fiber. They are also low in calories and fat, making them a healthy addition to any diet.
What are some popular ways to cook collard greens?
Collard greens are a versatile vegetable that can be cooked in many different ways. Some popular methods include braising, steaming, sautéing, and boiling. They are often cooked with ham hocks, bacon, or other smoked meats for added flavor. They can also be added to soups, stews, and salads.
Can I grow collard greens indoors?
While it’s possible to grow collard greens indoors, it can be challenging to provide them with enough light. If you want to try growing them indoors, choose a sunny window or use grow lights to supplement the natural light.
How long does it take for collard greens to mature?
Collard greens typically take 55-75 days to mature from seed. However, you can start harvesting the outer leaves earlier, as soon as they are large enough to eat.
What are the benefits of growing my own collard greens?
Growing your own collard greens allows you to enjoy fresh, flavorful, and nutritious vegetables that are free from pesticides and other harmful chemicals. It’s also a rewarding and budget-friendly way to add more greens to your diet. Plus, you get the satisfaction of knowing you grew them yourself!
Leave a Comment