
Growing corn in concrete might sound like an impossible feat, a horticultural oxymoron! But what if I told you that with a little ingenuity and some DIY magic, you could actually harvest sweet, juicy corn even without a traditional garden plot? Forget sprawling fields; we’re talking urban oasis, balcony bounty, and patio perfection!
For centuries, corn has been a staple crop, deeply woven into the fabric of countless cultures. From the ancient civilizations of Mesoamerica, where it was revered as a sacred gift, to its modern-day role as a global food source, corn’s history is rich and fascinating. But access to land shouldn’t be a barrier to enjoying this versatile grain. That’s where our DIY adventure begins!
Let’s face it, not everyone has the luxury of a sprawling backyard. Apartment dwellers, city residents, and those with limited mobility often miss out on the joy of growing their own food. But with this DIY trick, you can bypass the limitations of traditional gardening and unlock a world of fresh, homegrown goodness. Growing corn in concrete is not only possible, but it’s also a fantastic way to recycle materials, create a unique garden feature, and impress your friends with your green thumb skills. So, grab your tools, and let’s get ready to transform concrete into a cornucopia!
Maisanbau im Beton: Ein ungewöhnliches DIY-Projekt
Hey Leute! Habt ihr schon mal darüber nachgedacht, Mais in Beton anzubauen? Klingt verrückt, oder? Aber es ist tatsächlich möglich und kann ein super cooles und einzigartiges DIY-Projekt sein. Ich zeige euch, wie ihr das hinbekommt! Es ist eine tolle Möglichkeit, einen kleinen Garten auf einer Terrasse, einem Balkon oder sogar in einem kleinen Hinterhof zu schaffen. Und mal ehrlich, wer kann schon von sich behaupten, Mais in Beton anzubauen?
Was ihr braucht: Die Materialliste
Bevor wir loslegen, hier eine Liste mit allen Materialien, die ihr benötigt. Keine Sorge, das meiste davon ist leicht zu bekommen:
* Betonmischung: Je nachdem, wie groß euer Betonbehälter werden soll, braucht ihr entsprechend viel Betonmischung. Achtet darauf, eine hochwertige Mischung zu wählen, die für den Außenbereich geeignet ist.
* Wasser: Zum Anmischen des Betons.
* Zwei Behälter in unterschiedlichen Größen: Ein größerer Behälter für die Außenseite eures Betonpflanzgefäßes und ein kleinerer Behälter für die Innenseite. Diese Behälter definieren die Form und Größe eures Pflanzgefäßes. Plastikeimer, alte Töpfe oder sogar Pappkartons (die ihr mit Plastik auskleidet) funktionieren gut.
* Pflanzenöl oder Trennmittel: Damit sich der Beton später leichter von den Behältern löst.
* Schaufel oder Spachtel: Zum Mischen und Verteilen des Betons.
* Eimer oder Mörtelkübel: Zum Anmischen des Betons.
* Bohrmaschine mit Steinbohrer: Für die Entwässerungslöcher.
* Maiskörner: Am besten Bio-Saatgut, um sicherzustellen, dass ihr gesunde Pflanzen bekommt.
* Pflanzerde: Hochwertige Pflanzerde, die gut Wasser speichert und gleichzeitig gut drainiert.
* Gießkanne oder Schlauch: Zum Bewässern eurer Maispflanzen.
* Handschuhe: Zum Schutz eurer Hände beim Umgang mit Beton.
* Schutzbrille: Zum Schutz eurer Augen vor Betonspritzern.
* Optional: Farbpigmente für Beton, um eurem Pflanzgefäß eine individuelle Note zu verleihen.
* Optional: Deko-Elemente wie Steine, Muscheln oder Glasstücke, die ihr in den Beton einarbeiten könnt.
Schritt-für-Schritt-Anleitung: So baut ihr euer Beton-Maisbeet
Okay, jetzt geht’s ans Eingemachte! Hier ist eine detaillierte Anleitung, wie ihr euer eigenes Beton-Maisbeet baut:
1. Vorbereitung ist alles
* Arbeitsbereich vorbereiten: Sucht euch einen gut belüfteten Arbeitsbereich im Freien. Legt eine Plane oder alte Zeitungen aus, um euren Arbeitsbereich zu schützen.
* Behälter vorbereiten: Reinigt die beiden Behälter gründlich. Tragt dann eine dünne Schicht Pflanzenöl oder Trennmittel auf die Innenseite des größeren Behälters und die Außenseite des kleineren Behälters auf. Das verhindert, dass der Beton an den Behältern kleben bleibt.
2. Beton anmischen
* Betonmischung vorbereiten: Befolgt die Anweisungen auf der Verpackung der Betonmischung. Gebt die Betonmischung in einen Eimer oder Mörtelkübel und fügt langsam Wasser hinzu, während ihr mit einer Schaufel oder einem Spachtel umrührt.
* Konsistenz prüfen: Die Betonmischung sollte eine zähflüssige Konsistenz haben, ähnlich wie dicker Brei. Sie sollte nicht zu flüssig sein, da sie sonst nicht richtig aushärtet.
* Optional: Farbpigmente hinzufügen: Wenn ihr eurem Betonpflanzgefäß eine Farbe verleihen möchtet, könnt ihr jetzt Farbpigmente hinzufügen. Rührt die Pigmente gut in die Betonmischung ein, bis die Farbe gleichmäßig verteilt ist.
3. Beton gießen
* Erste Schicht gießen: Gebt eine Schicht Betonmischung (ca. 5-10 cm dick) in den größeren Behälter. Achtet darauf, dass der Boden gleichmäßig bedeckt ist.
* Kleineren Behälter platzieren: Drückt den kleineren Behälter vorsichtig in die Betonmischung. Achtet darauf, dass der kleinere Behälter zentriert ist und genügend Abstand zum Rand des größeren Behälters hat (mindestens 5-7 cm).
* Beschweren: Füllt den kleineren Behälter mit Steinen oder Sand, um zu verhindern, dass er sich beim Gießen des restlichen Betons verschiebt oder aufschwimmt.
* Restlichen Beton gießen: Gießt den restlichen Beton in den Zwischenraum zwischen den beiden Behältern. Achtet darauf, dass der Beton gleichmäßig verteilt ist und keine Luftblasen entstehen. Klopft leicht gegen die Außenseite des größeren Behälters, um eventuelle Luftblasen zu entfernen.
* Oberfläche glätten: Glättet die Oberfläche des Betons mit einem Spachtel oder einer Kelle.
4. Aushärten lassen
* Abdecken: Decken Sie den Betonbehälter mit Plastikfolie ab, um ihn vor dem Austrocknen zu schützen.
* Aushärtezeit: Lasst den Beton mindestens 24-48 Stunden aushärten. Je nach Wetterbedingungen kann es auch länger dauern. Überprüft regelmäßig die Feuchtigkeit des Betons und befeuchtet ihn gegebenenfalls mit einem Wassersprüher.
5. Behälter entfernen
* Behälter lösen: Nachdem der Beton ausreichend ausgehärtet ist, könnt ihr die Behälter entfernen. Löst zuerst den kleineren Behälter vorsichtig aus dem Beton. Wenn er sich nicht leicht löst, könnt ihr ihn leicht drehen oder mit einem Hammer vorsichtig abklopfen.
* Größeren Behälter entfernen: Entfernt dann den größeren Behälter. Auch hier könnt ihr ihn leicht drehen oder abklopfen, falls er sich nicht leicht löst.
6. Entwässerungslöcher bohren
* Löcher markieren: Markiert mit einem Stift oder Bleistift mehrere Stellen am Boden des Betonpflanzgefäßes, an denen ihr Entwässerungslöcher bohren möchtet.
* Löcher bohren: Bohrt mit einer Bohrmaschine und einem Steinbohrer vorsichtig Entwässerungslöcher in den Boden des Betonpflanzgefäßes. Achtet darauf, dass die Löcher groß genug sind, damit das Wasser gut ablaufen kann.
7. Bepflanzen mit Mais
* Pflanzerde einfüllen: Füllt das Betonpflanzgefäß mit hochwertiger Pflanzerde. Lasst oben einen kleinen Rand frei.
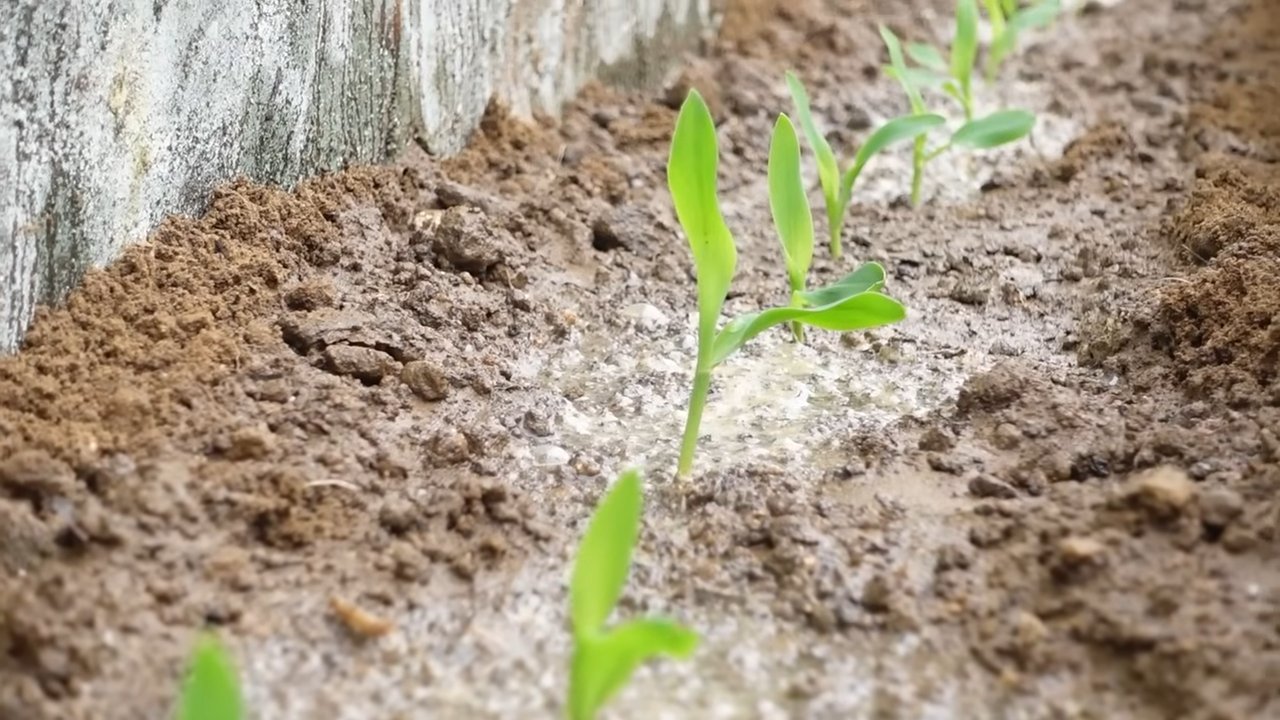
* Maiskörner säen: Säet die Maiskörner gemäß den Anweisungen auf der Saatguttüte. In der Regel werden die Körner etwa 2-3 cm tief in die Erde gelegt.
* Angießen: Gießt die Erde vorsichtig an, damit die Körner gut mit Feuchtigkeit versorgt sind.
8. Pflege eurer Maispflanzen
* Bewässerung: Haltet die Erde feucht, aber nicht nass. Gießt regelmäßig, besonders bei trockenem Wetter.
* Standort: Stellt das Betonpflanzgefäß an einen sonnigen Standort, an dem die Maispflanzen mindestens 6-8 Stunden Sonnenlicht pro Tag bekommen.
* Düngung: Düngt die Maispflanzen regelmäßig mit einem geeigneten Dünger für Gemüse. Befolgt die Anweisungen auf der Düngerverpackung.
* Schutz vor Schädlingen: Achtet auf Schädlinge wie Schnecken oder Blattläuse und bekämpft sie gegebenenfalls mit geeigneten Mitteln.
* Stützen: Wenn die Maispflanzen größer werden, kann es notwendig sein, sie mit Stäben oder Schnüren zu stützen, um zu verhindern, dass sie umknicken.
Zusätzliche Tipps und Tricks
* Beton verstärken: Für größere Pflanzgefäße könnt ihr den Beton mit Drahtgeflecht oder Fiberglasfasern verstärken, um die Stabilität zu erhöhen.
* Oberfläche versiegeln: Um den Beton vor Witterungseinflüssen zu schützen, könnt ihr die Oberfläche mit einem speziellen Betonversiegelungsmittel versiegeln
Conclusion
So, there you have it! Growing corn in concrete might sound unconventional, even a little crazy, but as we’ve explored, it’s a surprisingly effective and rewarding method, especially when space is at a premium or soil conditions are less than ideal. This DIY trick isn’t just about defying expectations; it’s about embracing innovation and finding creative solutions to common gardening challenges.
Why is this a must-try? Because it offers a multitude of benefits. First and foremost, it allows you to cultivate fresh, delicious corn even if you’re limited to a balcony, patio, or small urban garden. No more longing for the taste of homegrown corn when you’re surrounded by concrete! Second, it provides excellent drainage, preventing root rot and other moisture-related issues that can plague corn grown directly in the ground. Third, it’s a fantastic way to repurpose old concrete containers or blocks, giving them a new lease on life and reducing waste. Finally, and perhaps most importantly, it’s a conversation starter! Imagine the looks of amazement and curiosity when your friends and neighbors see your thriving corn stalks emerging from concrete planters.
But the beauty of this DIY trick lies in its adaptability. Feel free to experiment with different varieties of corn to find what grows best in your specific climate and container size. Consider adding companion plants, such as beans or squash, to your concrete planters to create a mini-ecosystem that benefits all the plants involved. You could even try painting your concrete containers with bright, cheerful colors to add a touch of personality to your garden.
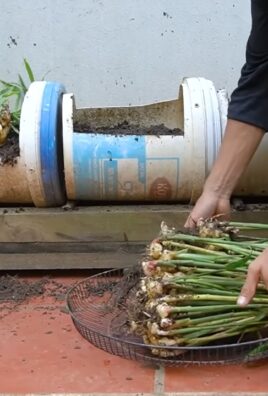
For those looking to take their concrete corn growing to the next level, consider incorporating a self-watering system. This can be as simple as burying a perforated pipe in the container and filling it with water regularly, or as sophisticated as installing a drip irrigation system. This will help to ensure that your corn plants receive consistent moisture, even during hot and dry spells.
Another variation to consider is the type of concrete container you use. While large, pre-cast concrete planters are ideal, you can also create your own using concrete blocks or even repurposed concrete pipes. Just be sure to provide adequate drainage and support for the growing corn plants.
Don’t be intimidated by the thought of growing corn in concrete. It’s a surprisingly simple and straightforward process, and the rewards are well worth the effort. The taste of freshly picked, homegrown corn is simply unbeatable, and the satisfaction of knowing that you grew it yourself, in an unconventional way, is even greater.
So, grab your seeds, your concrete containers, and your gardening gloves, and get ready to embark on a unique and rewarding gardening adventure. We encourage you to try this DIY trick and share your experiences with us. Let us know what varieties of corn you’re growing, what challenges you’ve encountered, and what successes you’ve achieved. Share your photos and videos on social media using the hashtag #ConcreteCorn, and let’s inspire others to embrace the possibilities of urban gardening. We can’t wait to see what you create!
Frequently Asked Questions (FAQ)
What type of corn grows best in concrete containers?
The best type of corn to grow in concrete containers are shorter, more compact varieties. Sweet corn varieties like ‘Early Sunglow’ or ‘Golden Bantam’ are good choices because they mature quickly and don’t require as much space as taller varieties. Popcorn varieties can also be successful, but be sure to choose a variety that is known for its shorter stalk height. Dent corn, typically used for animal feed, can also be grown, but it may require larger containers and more support due to its larger size. Ultimately, the best variety will depend on your local climate and the size of your containers, so experiment to see what works best for you.
How big should my concrete containers be for growing corn?
The size of your concrete containers will depend on the variety of corn you’re growing, but as a general rule, aim for containers that are at least 12 inches in diameter and 12 inches deep. Larger containers are always better, as they provide more room for the roots to grow and hold more moisture. If you’re growing a taller variety of corn, you may need even larger containers, up to 24 inches in diameter and depth. Ensure that the containers have adequate drainage holes to prevent waterlogging.
What type of soil should I use for growing corn in concrete?
Use a well-draining potting mix that is rich in organic matter. Avoid using garden soil, as it can become compacted in containers and doesn’t provide adequate drainage. You can amend your potting mix with compost, aged manure, or other organic materials to improve its fertility and water-holding capacity. A slightly acidic to neutral pH is ideal for corn.
How often should I water my corn plants in concrete containers?
Corn plants in concrete containers will need to be watered regularly, especially during hot and dry weather. Check the soil moisture daily, and water when the top inch of soil feels dry to the touch. Be sure to water deeply, until the water drains out of the drainage holes. Avoid overwatering, as this can lead to root rot. Consider using a moisture meter to help you determine when to water.
How much sunlight do corn plants need when grown in concrete?
Corn plants need at least 6-8 hours of direct sunlight per day to thrive. Choose a location for your concrete containers that receives plenty of sunlight throughout the day. If you live in a particularly hot climate, you may need to provide some afternoon shade to prevent the plants from overheating.
Do I need to fertilize my corn plants in concrete containers?
Yes, corn plants are heavy feeders and will need to be fertilized regularly, especially when grown in containers. Use a balanced fertilizer, such as a 10-10-10 or 14-14-14, and follow the instructions on the label. You can also use organic fertilizers, such as compost tea or fish emulsion. Fertilize every 2-3 weeks during the growing season.
How do I pollinate my corn plants in concrete containers?
Corn is wind-pollinated, so you’ll need to help the plants pollinate if they’re grown in a sheltered location. When the tassels (the male flowers at the top of the plant) begin to shed pollen, gently shake the plants to release the pollen. You can also collect the pollen in a paper bag and then sprinkle it onto the silks (the female flowers that emerge from the developing ears of corn). Repeat this process every day for several days to ensure good pollination.
How do I know when my corn is ready to harvest from my concrete garden?
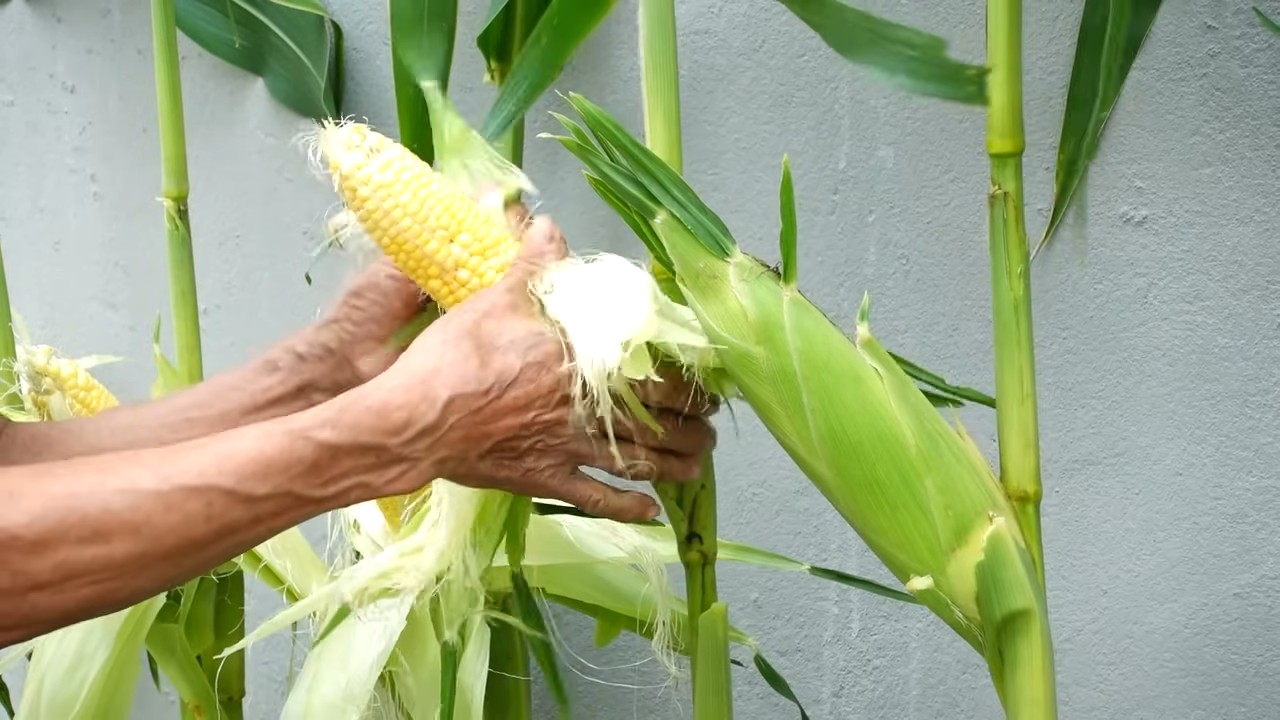
Corn is typically ready to harvest about 20-25 days after the silks emerge. The silks will turn brown and dry, and the ears of corn will feel plump and full. To check for ripeness, peel back a portion of the husk and puncture a kernel with your fingernail. If the liquid that comes out is milky, the corn is ready to harvest. If the liquid is clear, the corn is not yet ripe. If the liquid is doughy, the corn is overripe.
What are some common pests and diseases that affect corn grown in concrete?
Some common pests that can affect corn include corn earworms, aphids, and spider mites. Diseases that can affect corn include rust, smut, and leaf blight. Monitor your plants regularly for signs of pests or diseases, and take action promptly to prevent them from spreading. You can use organic pest control methods, such as insecticidal soap or neem oil, to control pests. For diseases, remove infected leaves and improve air circulation around the plants.
Can I grow other vegetables in the same concrete container as my corn?
Yes, you can grow companion plants in the same concrete container as your corn. Good companion plants for corn include beans, squash, and cucumbers. These plants can help to improve soil fertility, suppress weeds, and attract beneficial insects. Avoid planting tomatoes or peppers near corn, as they can compete for nutrients and water.

Leave a Comment