
Growing Eggplants at Home can seem daunting, but trust me, with a few simple tricks, you can be harvesting your own delicious, glossy eggplants in no time! Imagine serving up a homemade eggplant parmesan, knowing you nurtured those beauties from tiny seedlings. That’s the magic we’re unlocking today!
Eggplants, also known as aubergines, have a rich history, tracing back to ancient India and China. They weren’t always the familiar purple vegetable we know and love; early varieties came in a range of colors and sizes, some even resembling eggs, hence the name! For centuries, they’ve been a staple in cuisines around the world, from the Mediterranean to Asia, adding depth and flavor to countless dishes.
But why bother growing eggplants at home? Well, for starters, homegrown produce simply tastes better! Plus, you have complete control over what goes into your food, avoiding harmful pesticides and ensuring the freshest possible ingredients. In this DIY article, I’m going to share my favorite tips and tricks for successfully cultivating eggplants, even if you have limited space or gardening experience. We’ll cover everything from choosing the right varieties to troubleshooting common problems, so you can enjoy a bountiful harvest of these versatile vegetables. Let’s get started!
Auberginen selbst anbauen: Dein umfassender DIY-Leitfaden
Hallo Gartenfreunde! Ich freue mich riesig, euch heute in die Welt des Auberginenanbaus einzuführen. Auberginen, auch Eierfrüchte genannt, sind nicht nur lecker, sondern auch wunderschön anzusehen. Mit diesem Leitfaden zeige ich euch, wie ihr diese mediterranen Schönheiten auch in eurem Garten oder sogar auf dem Balkon erfolgreich anbauen könnt. Keine Angst, es ist einfacher als ihr denkt!
Was du für den Auberginenanbau brauchst:
* Auberginensamen oder Jungpflanzen: Wähle Sorten, die für dein Klima geeignet sind. Es gibt unzählige Varianten, von klassischen lilafarbenen bis hin zu weißen, grünen oder gestreiften Auberginen.
* Anzuchttöpfe oder -schalen: Für die Voranzucht im Haus.
* Anzuchterde: Spezielle Erde für die Anzucht, die nährstoffarm und locker ist.
* Pflanztöpfe (falls du Auberginen im Topf anbauen möchtest): Mindestens 10 Liter Volumen pro Pflanze.
* Gartenerde oder Pflanzerde: Für das Auspflanzen ins Beet oder in Töpfe.
* Kompost oder organischer Dünger: Für eine gute Nährstoffversorgung.
* Pflanzstäbe oder Rankhilfen: Auberginenpflanzen können recht hoch werden und brauchen Unterstützung.
* Gießkanne oder Gartenschlauch: Zum regelmäßigen Gießen.
* Gartenschere: Zum Ausgeizen und Ernten.
* (Optional) Frühbeet oder Gewächshaus: Für eine frühere Ernte und besseren Schutz vor Kälte.
Aussaat und Voranzucht: Der Start ins Auberginen-Abenteuer
Auberginen brauchen eine lange Wachstumsperiode, daher ist die Voranzucht im Haus unerlässlich, besonders in kühleren Klimazonen.
1. Aussaatzeitpunkt bestimmen: Beginne mit der Aussaat etwa 8-10 Wochen vor dem letzten erwarteten Frost. In Deutschland ist das meistens im Februar oder März.
2. Anzuchttöpfe vorbereiten: Fülle die Anzuchttöpfe mit Anzuchterde. Drücke die Erde leicht an.
3. Samen aussäen: Lege 1-2 Samen pro Topf etwa 0,5 cm tief in die Erde.
4. Angießen: Befeuchte die Erde vorsichtig mit einer Sprühflasche oder einer Gießkanne mit feinem Brausekopf.
5. Warm und hell stellen: Stelle die Töpfe an einen warmen und hellen Ort. Die ideale Keimtemperatur liegt bei 22-25°C. Ein Mini-Gewächshaus oder eine Heizmatte können helfen, die Temperatur zu halten.
6. Feucht halten: Halte die Erde gleichmäßig feucht, aber nicht nass.
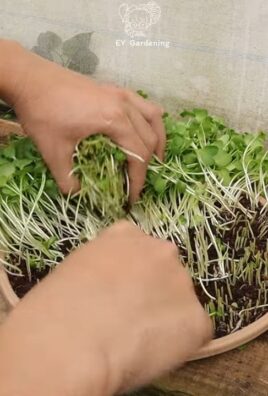
7. Pikieren: Sobald die Sämlinge 2-4 echte Blätter haben (neben den Keimblättern), ist es Zeit zum Pikieren. Das bedeutet, dass du die stärksten Pflanzen in größere Töpfe umpflanzt.
* Fülle größere Töpfe (ca. 8-10 cm Durchmesser) mit Anzuchterde.
* Hebe die Sämlinge vorsichtig mit einem Pikierstab oder einem Löffel aus den Anzuchttöpfen. Achte darauf, die Wurzeln nicht zu beschädigen.
* Setze die Sämlinge etwas tiefer in die neuen Töpfe, bis zu den ersten Blättern.
* Gieße die Pflanzen vorsichtig an.
Auspflanzen: Raus in die Freiheit!
Sobald keine Frostgefahr mehr besteht (Mitte Mai nach den Eisheiligen) und die Auberginenpflanzen kräftig genug sind, können sie ins Freie umziehen.
1. Abhärten: Bevor du die Pflanzen ins Freie pflanzt, solltest du sie einige Tage lang abhärten. Stelle sie tagsüber für ein paar Stunden nach draußen an einen geschützten Ort und hole sie abends wieder rein. So gewöhnen sie sich langsam an die veränderten Bedingungen.
2. Standort wählen: Auberginen lieben die Sonne! Wähle einen sonnigen, warmen und windgeschützten Standort. Der Boden sollte locker, durchlässig und nährstoffreich sein.
3. Boden vorbereiten: Lockere den Boden gründlich auf und mische Kompost oder organischen Dünger unter.
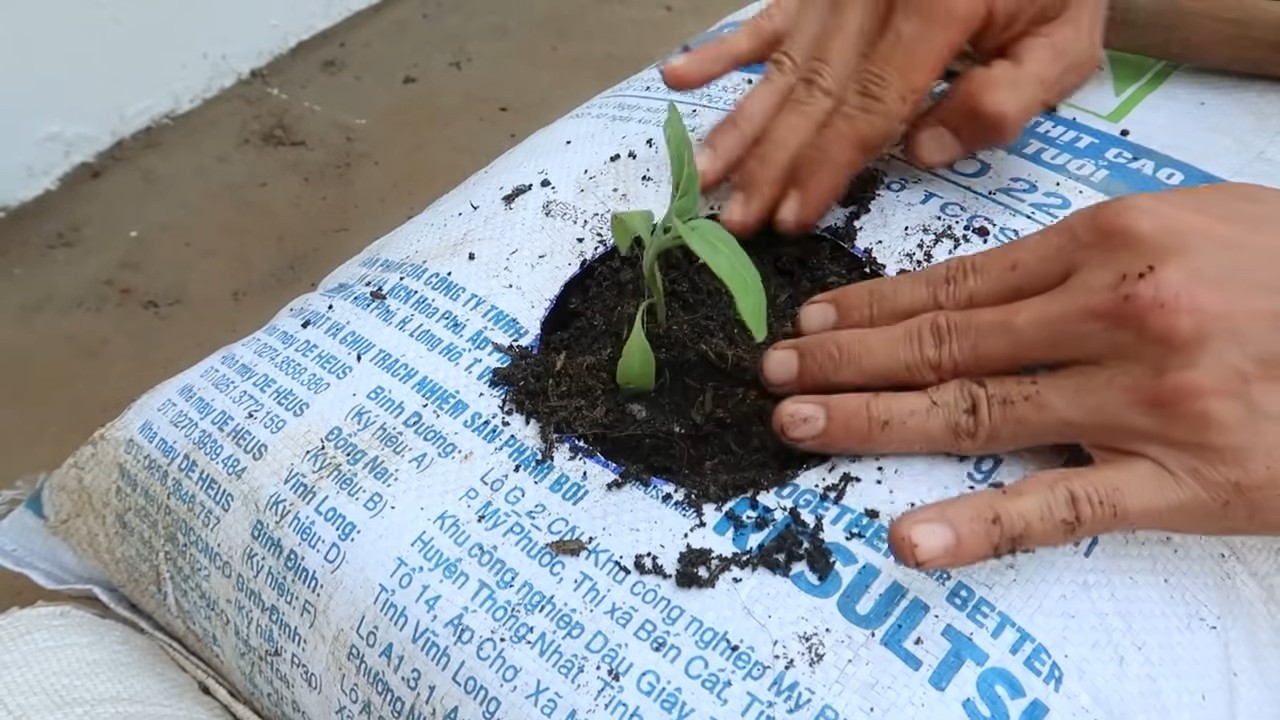
4. Pflanzlöcher ausheben: Hebe Pflanzlöcher aus, die etwas größer sind als die Wurzelballen der Auberginenpflanzen.
5. Pflanzen einsetzen: Setze die Auberginenpflanzen vorsichtig in die Pflanzlöcher. Achte darauf, dass die Oberseite des Wurzelballens mit der Erdoberfläche abschließt.
6. Angießen: Gieße die Pflanzen gründlich an.
7. Pflanzabstand beachten: Halte einen Pflanzabstand von etwa 50-60 cm zwischen den Pflanzen ein.
8. Stützen anbringen: Stecke Pflanzstäbe neben die Pflanzen und binde sie locker daran fest. Auberginenpflanzen können unter der Last der Früchte umknicken.
Pflege: Damit deine Auberginen prächtig gedeihen
Die richtige Pflege ist entscheidend für eine reiche Ernte.
1. Gießen: Auberginen brauchen regelmäßig Wasser, besonders während der Blütezeit und Fruchtbildung. Gieße am besten morgens, damit die Blätter bis zum Abend abtrocknen können. Vermeide Staunässe.
2. Düngen: Dünge die Auberginen alle 2-3 Wochen mit einem organischen Dünger oder einem speziellen Auberginendünger.
3. Ausgeizen: Entferne regelmäßig die Seitentriebe, die in den Blattachseln wachsen. Das Ausgeizen fördert die Bildung von größeren und reiferen Früchten. Lasse nur den Haupttrieb und 2-3 Seitentriebe stehen.
4. Mulchen: Bedecke den Boden um die Auberginenpflanzen mit Mulch (z.B. Stroh oder Rasenschnitt). Mulch hält den Boden feucht, unterdrückt Unkraut und schützt die Pflanzen vor Spritzwasser.
5. Schädlinge und Krankheiten: Achte auf Schädlinge wie Blattläuse, Kartoffelkäfer oder Spinnmilben. Bei Befall kannst du natürliche Schädlingsbekämpfungsmittel einsetzen. Auberginen können auch von Pilzkrankheiten wie der Kraut- und Braunfäule befallen werden. Sorge für eine gute Belüftung und vermeide Staunässe, um Krankheiten vorzubeugen.
Auberginen im Topf anbauen: Balkongärtner aufgepasst!
Auch auf dem Balkon kannst du erfolgreich Auberginen anbauen.
1. Große Töpfe wählen: Verwende Töpfe mit einem Volumen von mindestens 10 Litern pro Pflanze.
2. Gute Erde verwenden: Fülle die Töpfe mit hochwertiger Pflanzerde.
3. Regelmäßig gießen und düngen: Auberginen im Topf brauchen besonders viel Wasser und Nährstoffe. Gieße sie regelmäßig und dünge sie alle 1-2 Wochen.
4. Sonniger Standort: Stelle die Töpfe an einen sonnigen und warmen Ort auf dem Balkon.
5. Stützen anbringen: Auch Auberginen im Topf brauchen Unterstützung.
Ernte: Der Lohn deiner Mühe
Endlich ist es soweit: Die Auberginen sind reif und können geerntet werden!
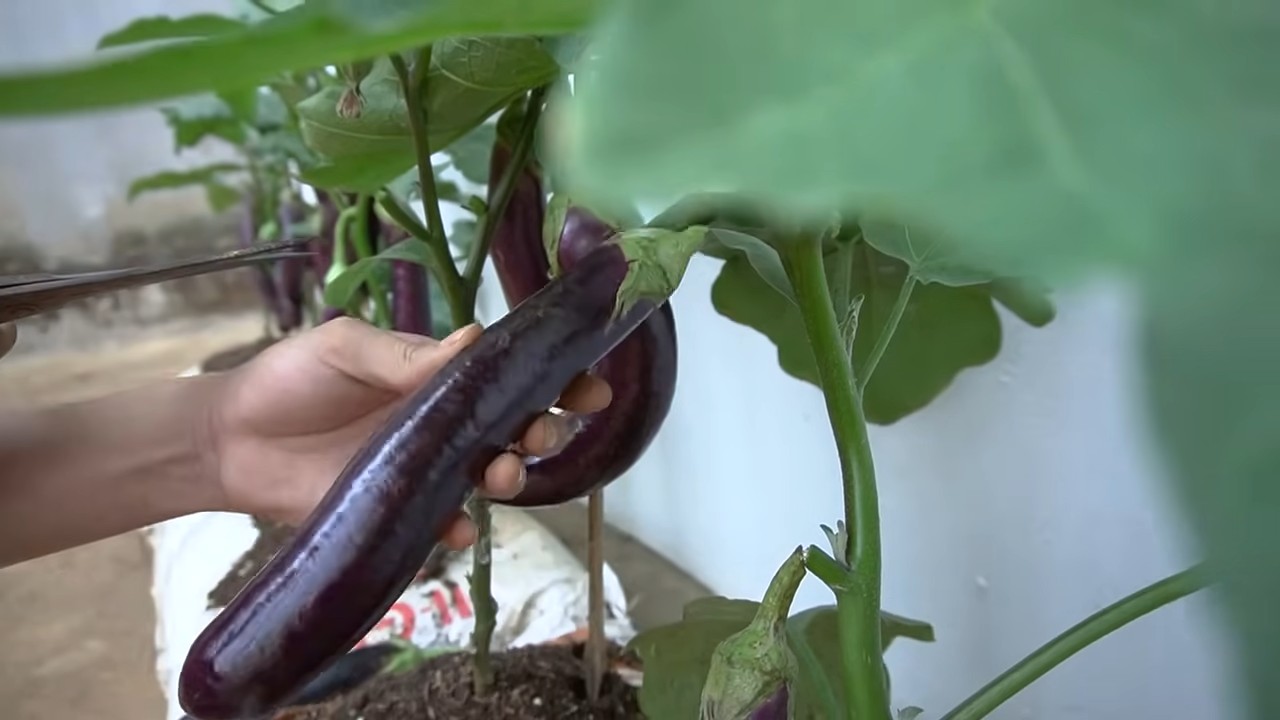
1. Reife erkennen: Auberginen sind reif, wenn sie eine glänzende, pralle Haut haben und sich leicht eindrücken lassen. Die Farbe sollte intensiv sein.
2. Ernten: Schneide die Auberginen mit einer Gartenschere ab. Lasse einen kleinen Stielansatz an der Frucht.
3. Regelmäßig ernten: Ernte die Auberginen regelmäßig, um die Bildung neuer Früchte anzuregen.
4. Lagerung: Auberginen sind nicht lange haltbar. Lagere sie im Kühlschrank und verbrauche sie
Conclusion
So, there you have it! Growing eggplants at home, while it might seem daunting at first, is incredibly rewarding and entirely achievable with a little patience and the right approach. We’ve covered everything from seed starting to harvesting those beautiful, glossy fruits. But the real magic lies in the DIY trick we discussed: creating your own nutrient-rich soil amendment using compost and aged manure. This simple step can dramatically improve your eggplant yield and the overall health of your plants.
Why is this DIY trick a must-try? Because it allows you to tailor the soil specifically to your eggplant’s needs. Commercial fertilizers can be expensive and sometimes lack the micronutrients that eggplants crave. By creating your own amendment, you’re providing a slow-release, organic source of nutrients that will feed your plants throughout the growing season. Plus, you’re reducing waste by composting kitchen scraps and yard waste!
But don’t stop there! Feel free to experiment with variations. Try adding bone meal to your soil amendment for an extra boost of phosphorus, which is essential for flowering and fruit development. Or, if you live in a particularly hot climate, consider adding a layer of mulch around your eggplant plants to help retain moisture and keep the soil cool. You can also try companion planting. Basil, for example, is said to deter pests and improve the flavor of eggplants. Marigolds are another great option for pest control.
The key is to observe your plants closely and adjust your approach as needed. Are the leaves turning yellow? They might need more nitrogen. Are the fruits small and underdeveloped? They might need more phosphorus or potassium. Growing eggplants at home is a learning process, and every season will bring new challenges and opportunities.
We’re confident that with a little effort, you can enjoy a bountiful harvest of delicious, homegrown eggplants. Imagine the satisfaction of serving a meal made with ingredients you grew yourself! From eggplant parmesan to baba ghanoush, the possibilities are endless.
So, what are you waiting for? Get your hands dirty and start growing eggplants at home today! We encourage you to try this DIY soil amendment trick and see the difference it makes. And most importantly, share your experiences with us! We’d love to hear about your successes, your challenges, and any variations you’ve tried. Post photos of your eggplants on social media and tag us. Let’s build a community of home gardeners who are passionate about growing their own food. Happy gardening!
Frequently Asked Questions (FAQ)
1. What exactly is the DIY soil amendment you’re recommending, and why is it better than store-bought fertilizer?
Our recommended DIY soil amendment is a mixture of compost and aged manure. The ratio we suggest is typically 2 parts compost to 1 part aged manure, but this can be adjusted based on your soil’s existing composition. Compost provides a wide range of nutrients, improves soil structure, and enhances water retention. Aged manure adds nitrogen, phosphorus, and potassium, essential macronutrients for eggplant growth.
This DIY approach is often superior to store-bought fertilizers for several reasons. First, it’s a slow-release fertilizer, meaning the nutrients are gradually released into the soil over time, providing a consistent food source for your eggplants. This reduces the risk of over-fertilization, which can burn the roots of your plants. Second, it’s organic, meaning it’s free of synthetic chemicals that can harm beneficial soil microbes. Third, it’s often more cost-effective, especially if you already have access to compost and aged manure. Finally, you have complete control over the ingredients, ensuring that your eggplants are getting exactly what they need.
2. Where can I get compost and aged manure?
Compost can be made at home using kitchen scraps, yard waste, and other organic materials. There are many resources available online and in libraries that can teach you how to compost effectively. Alternatively, you can purchase compost from garden centers, nurseries, or even some grocery stores.
Aged manure can be obtained from local farms, stables, or garden centers. It’s important to use aged manure, as fresh manure can be too strong and can burn the roots of your plants. Aged manure has been allowed to decompose for several months, reducing its ammonia content and making it safe for use in the garden. Make sure the manure is from herbivores like cows, horses, or chickens. Avoid using manure from pets like dogs or cats, as it can contain harmful pathogens.
3. How much of this DIY soil amendment should I use when planting my eggplants?
When planting your eggplants, dig a hole that is slightly larger than the root ball of the plant. Mix the DIY soil amendment into the soil at the bottom of the hole. A good starting point is to mix about one-quarter to one-third of the soil amendment with the existing soil. Place the eggplant plant in the hole and backfill with the amended soil. Water thoroughly after planting.
Throughout the growing season, you can side-dress your eggplants with additional soil amendment. This involves sprinkling a small amount of the amendment around the base of the plant and gently working it into the soil. Be careful not to damage the roots of the plant.
4. What are some common problems I might encounter when growing eggplants, and how can I address them?
Several common problems can affect eggplants, including pests, diseases, and nutrient deficiencies.
* **Pests:** Common eggplant pests include aphids, flea beetles, and tomato hornworms. Aphids can be controlled with insecticidal soap or a strong spray of water. Flea beetles can be deterred with row covers or diatomaceous earth. Tomato hornworms can be hand-picked off the plants.
* **Diseases:** Eggplants are susceptible to fungal diseases such as early blight and verticillium wilt. To prevent these diseases, ensure good air circulation around your plants, avoid overhead watering, and use disease-resistant varieties.
* **Nutrient Deficiencies:** Yellowing leaves can indicate a nitrogen deficiency, while small, underdeveloped fruits can indicate a phosphorus or potassium deficiency. Address nutrient deficiencies by amending the soil with appropriate fertilizers or compost.
5. What are the best eggplant varieties to grow at home?
The best eggplant varieties to grow at home depend on your climate and personal preferences. Some popular varieties include:
* **Black Beauty:** A classic, large, dark purple eggplant.
* **Ichiban:** A long, slender, Japanese eggplant with a mild flavor.
* **Fairy Tale:** A small, striped eggplant that is perfect for grilling.
* **Rosa Bianca:** A beautiful, lavender and white eggplant with a creamy texture.
* **Little Fingers:** A prolific producer of small, finger-sized eggplants.
Consider trying a few different varieties to see which ones grow best in your garden and which ones you enjoy the most.
6. How do I know when my eggplants are ripe and ready to harvest?
Eggplants are typically ready to harvest when they are firm, glossy, and have reached their mature size and color. The skin should be smooth and unblemished. Gently press the skin of the eggplant. If it springs back slightly, it’s ripe. If it’s hard and doesn’t give, it’s not quite ready. If it’s soft and mushy, it’s overripe. Use a sharp knife or pruning shears to cut the eggplant from the plant, leaving a small stem attached.
7. Can I grow eggplants in containers?
Yes, eggplants can be successfully grown in containers. Choose a large container that is at least 12 inches in diameter and 12 inches deep. Use a well-draining potting mix and amend it with the DIY soil amendment we discussed earlier. Water regularly and fertilize every few weeks with a balanced fertilizer. Place the container in a sunny location that receives at least 6-8 hours of sunlight per day. Container-grown eggplants may need to be staked to support the weight of the fruits.
8. What if I don’t have access to aged manure? Are there any alternatives?
If you don’t have access to aged manure, you can use other organic fertilizers such as blood meal, bone meal, or fish emulsion. Blood meal is a good source of nitrogen, bone meal is a good source of phosphorus, and fish emulsion is a good source of both nitrogen and phosphorus. Follow the instructions on the product label for application rates. You can also use compost tea, which is a liquid fertilizer made by steeping compost in water.
9. How important is sunlight for growing eggplants?
Sunlight is crucial for growing healthy eggplants. They need at least 6-8 hours of direct sunlight per day to thrive. If you live in a cloudy climate, you may need to supplement with artificial lighting. Insufficient sunlight can result in leggy plants, poor fruit production, and increased susceptibility to diseases. Choose a sunny location for your eggplant plants and ensure that they are not shaded by other plants or structures.
10. Can I save seeds from my homegrown eggplants to plant next year?
Yes, you can save seeds from your homegrown eggplants, but keep in mind that if you grew hybrid varieties, the seeds may not produce plants that are true to type. To save seeds, allow the eggplants to fully ripen on the plant until they are overripe and the skin becomes dull. Cut the eggplant open and scoop out the seeds. Rinse the seeds thoroughly to remove any pulp. Spread the

Leave a Comment