
Growing garlic from bulb is easier than you might think, and I’m here to show you how! Forget those expensive grocery store cloves – imagine harvesting your own pungent, flavorful garlic right from your backyard. This isn’t just about saving money; it’s about connecting with nature and experiencing the satisfaction of nurturing something from seed (or in this case, bulb!) to table.
Garlic has a rich history, dating back thousands of years. Ancient Egyptians revered it, feeding it to the pyramid builders for strength and endurance. In many cultures, garlic is believed to ward off evil spirits and promote good health. Beyond its mystical properties, garlic is a culinary staple, adding depth and zest to dishes around the world.
Why should you learn this DIY trick? Well, for starters, homegrown garlic often boasts a more intense flavor than store-bought varieties. Plus, you have complete control over the growing process, ensuring your garlic is free from harmful pesticides and chemicals. Growing garlic from bulb is also a fantastic way to extend your growing season and enjoy fresh, flavorful garlic throughout the year. So, let’s dive in and unlock the secrets to a bountiful garlic harvest!
Knoblauch aus der Knolle ziehen: Dein DIY-Guide für eine reiche Ernte
Hey Gartenfreunde! Habt ihr euch jemals gefragt, wie ihr euren eigenen Knoblauch anbauen könnt, ohne ständig zum Supermarkt rennen zu müssen? Ich zeige euch, wie ihr ganz einfach aus einer Knoblauchzehe eine ganze Knoblauchpflanze ziehen könnt. Es ist einfacher als ihr denkt und super befriedigend, wenn ihr eure eigenen Knoblauchknollen ernten könnt. Los geht’s!
Was du brauchst:
* Eine Knoblauchknolle (am besten Bio-Knoblauch, da dieser oft nicht mit Keimhemmern behandelt wurde)
* Einen Topf oder ein Beet im Garten
* Gute Blumenerde oder Gartenerde
* Wasser
* Optional: Kompost oder organischer Dünger
Die richtige Knoblauchsorte wählen
Bevor wir loslegen, ist es wichtig zu wissen, dass es verschiedene Knoblauchsorten gibt. Einige sind besser für den Anbau im Herbst geeignet, andere eher für das Frühjahr. Informiert euch am besten, welche Sorten in eurer Region gut wachsen. Ich persönlich habe gute Erfahrungen mit “German Extra Hardy” und “Silverskin” gemacht.
Schritt-für-Schritt-Anleitung: Knoblauch pflanzen
1. Die Knoblauchzehen vorbereiten
1. Zuerst trennt ihr die einzelnen Zehen vorsichtig von der Knoblauchknolle. Achtet darauf, die Zehen nicht zu beschädigen. Die größten Zehen sind in der Regel die besten für die Anpflanzung, da sie kräftigere Pflanzen hervorbringen.
2. Wählt die schönsten, prallsten Zehen aus. Beschädigte oder schrumpelige Zehen solltet ihr aussortieren.
2. Der richtige Standort und die Vorbereitung des Bodens
1. Knoblauch liebt die Sonne! Sucht euch einen sonnigen Platz im Garten oder auf dem Balkon. Mindestens sechs Stunden Sonne pro Tag sind ideal.
2. Der Boden sollte locker und gut durchlässig sein. Knoblauch mag keine Staunässe. Wenn ihr einen schweren Lehmboden habt, könnt ihr ihn mit Sand und Kompost auflockern.
3. Lockert den Boden gründlich auf und entfernt Unkraut.
4. Wenn ihr im Topf pflanzt, achtet darauf, dass der Topf groß genug ist (mindestens 20 cm Durchmesser) und Abzugslöcher hat.
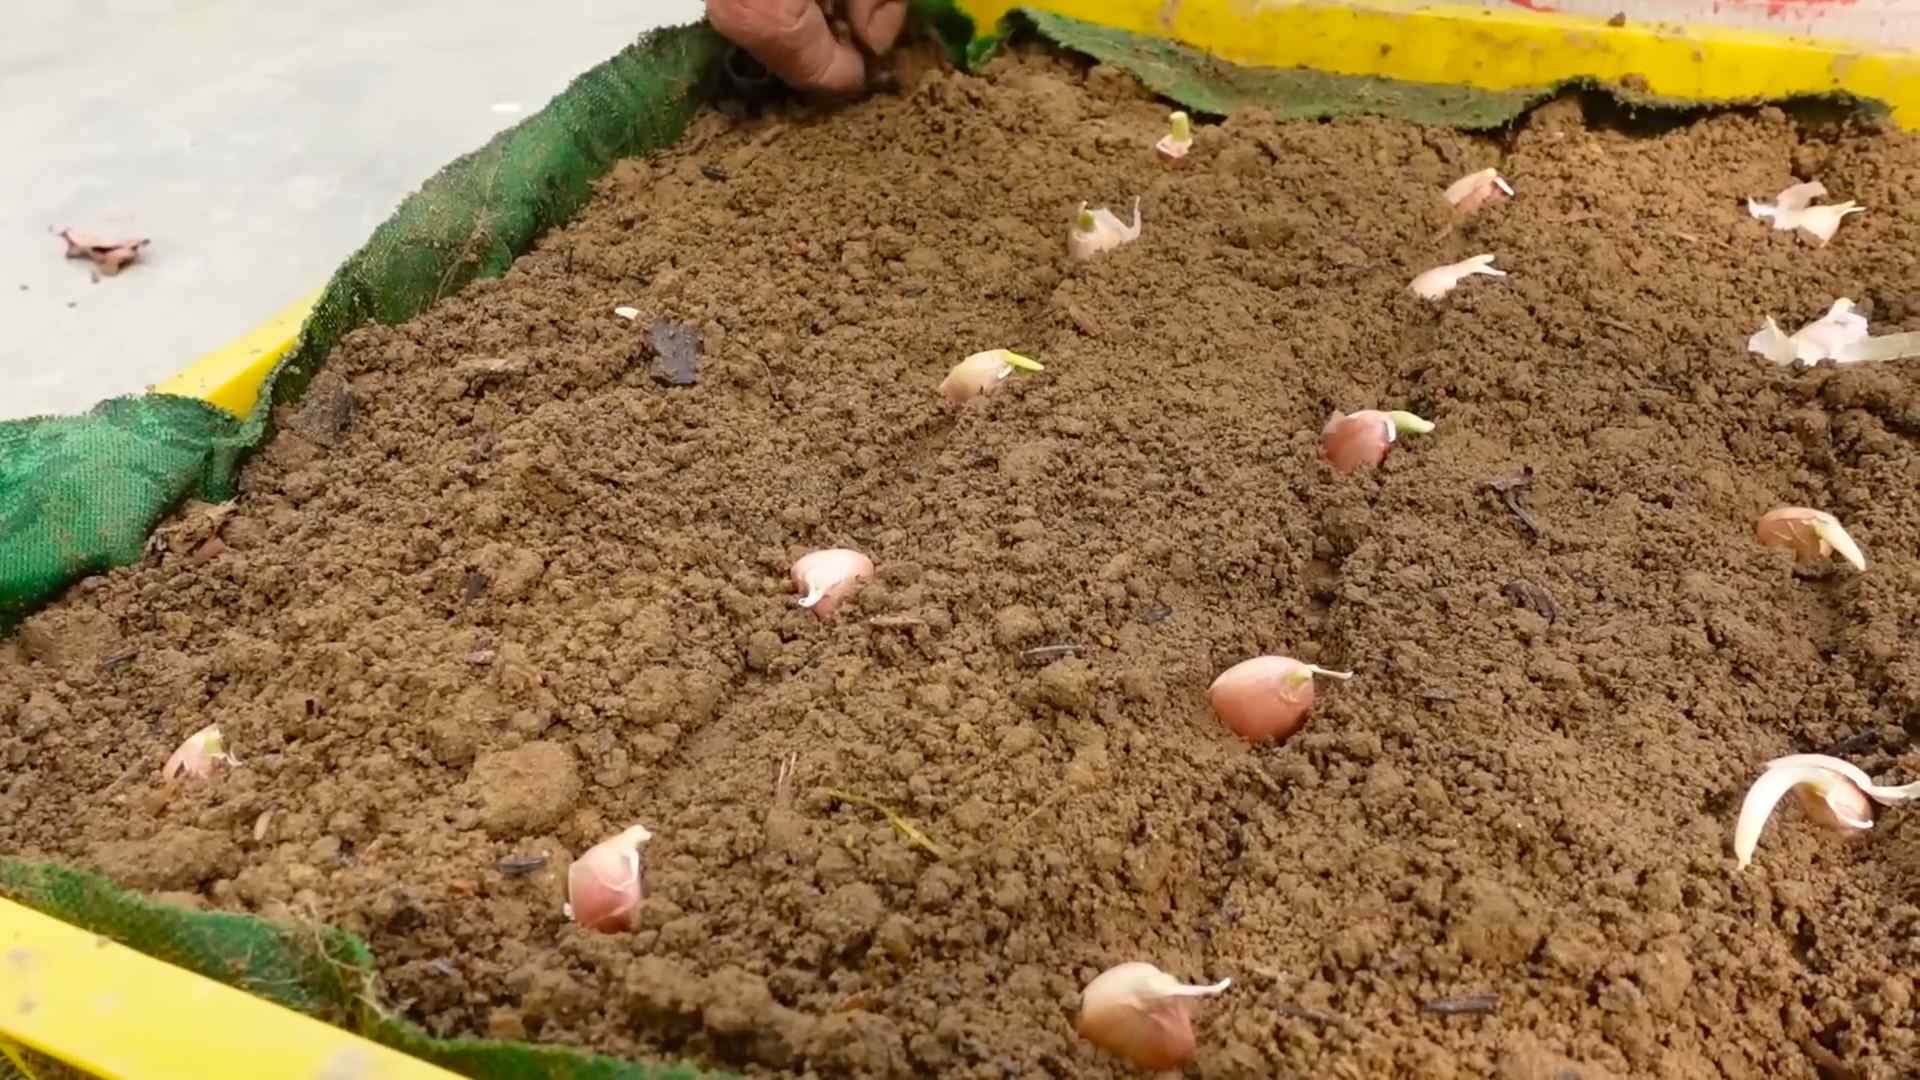
3. Die Knoblauchzehen pflanzen
1. Macht mit dem Finger oder einem kleinen Pflanzholz Löcher in die Erde. Die Löcher sollten etwa 5-8 cm tief sein.
2. Setzt die Knoblauchzehen mit der spitzen Seite nach oben in die Löcher. Der Abstand zwischen den Zehen sollte etwa 10-15 cm betragen.
3. Bedeckt die Zehen mit Erde und drückt sie leicht an.
4. Gießt die Erde vorsichtig an.
4. Die Pflege nach dem Pflanzen
1. Haltet die Erde feucht, aber nicht nass. Gießt regelmäßig, besonders in trockenen Perioden.
2. Entfernt regelmäßig Unkraut, damit der Knoblauch nicht von ihm überwuchert wird.
3. Optional: Düngt den Knoblauch nach einigen Wochen mit Kompost oder organischem Dünger. Achtet darauf, nicht zu viel zu düngen, da dies zu weichen Knollen führen kann.
4. Wenn ihr im Herbst gepflanzt habt, kann es sein, dass die Knoblauchpflanzen im Winter etwas zurückfrieren. Das ist normal. Im Frühjahr treiben sie wieder aus.
Knoblauch im Topf anbauen: Eine Alternative für Balkon-Gärtner
Kein Garten? Kein Problem! Knoblauch lässt sich auch wunderbar im Topf anbauen. Hier sind ein paar Tipps:
* Topfgröße: Wählt einen Topf mit einem Durchmesser von mindestens 20 cm.
* Erde: Verwendet hochwertige Blumenerde oder eine Mischung aus Gartenerde und Kompost.
* Drainage: Achtet darauf, dass der Topf Abzugslöcher hat, damit überschüssiges Wasser ablaufen kann.
* Standort: Stellt den Topf an einen sonnigen Platz.
* Gießen: Gießt regelmäßig, aber vermeidet Staunässe.
* Düngen: Düngt den Knoblauch im Topf etwas häufiger als im Garten, da die Nährstoffe im Topf schneller verbraucht werden.
Wann ist Erntezeit?
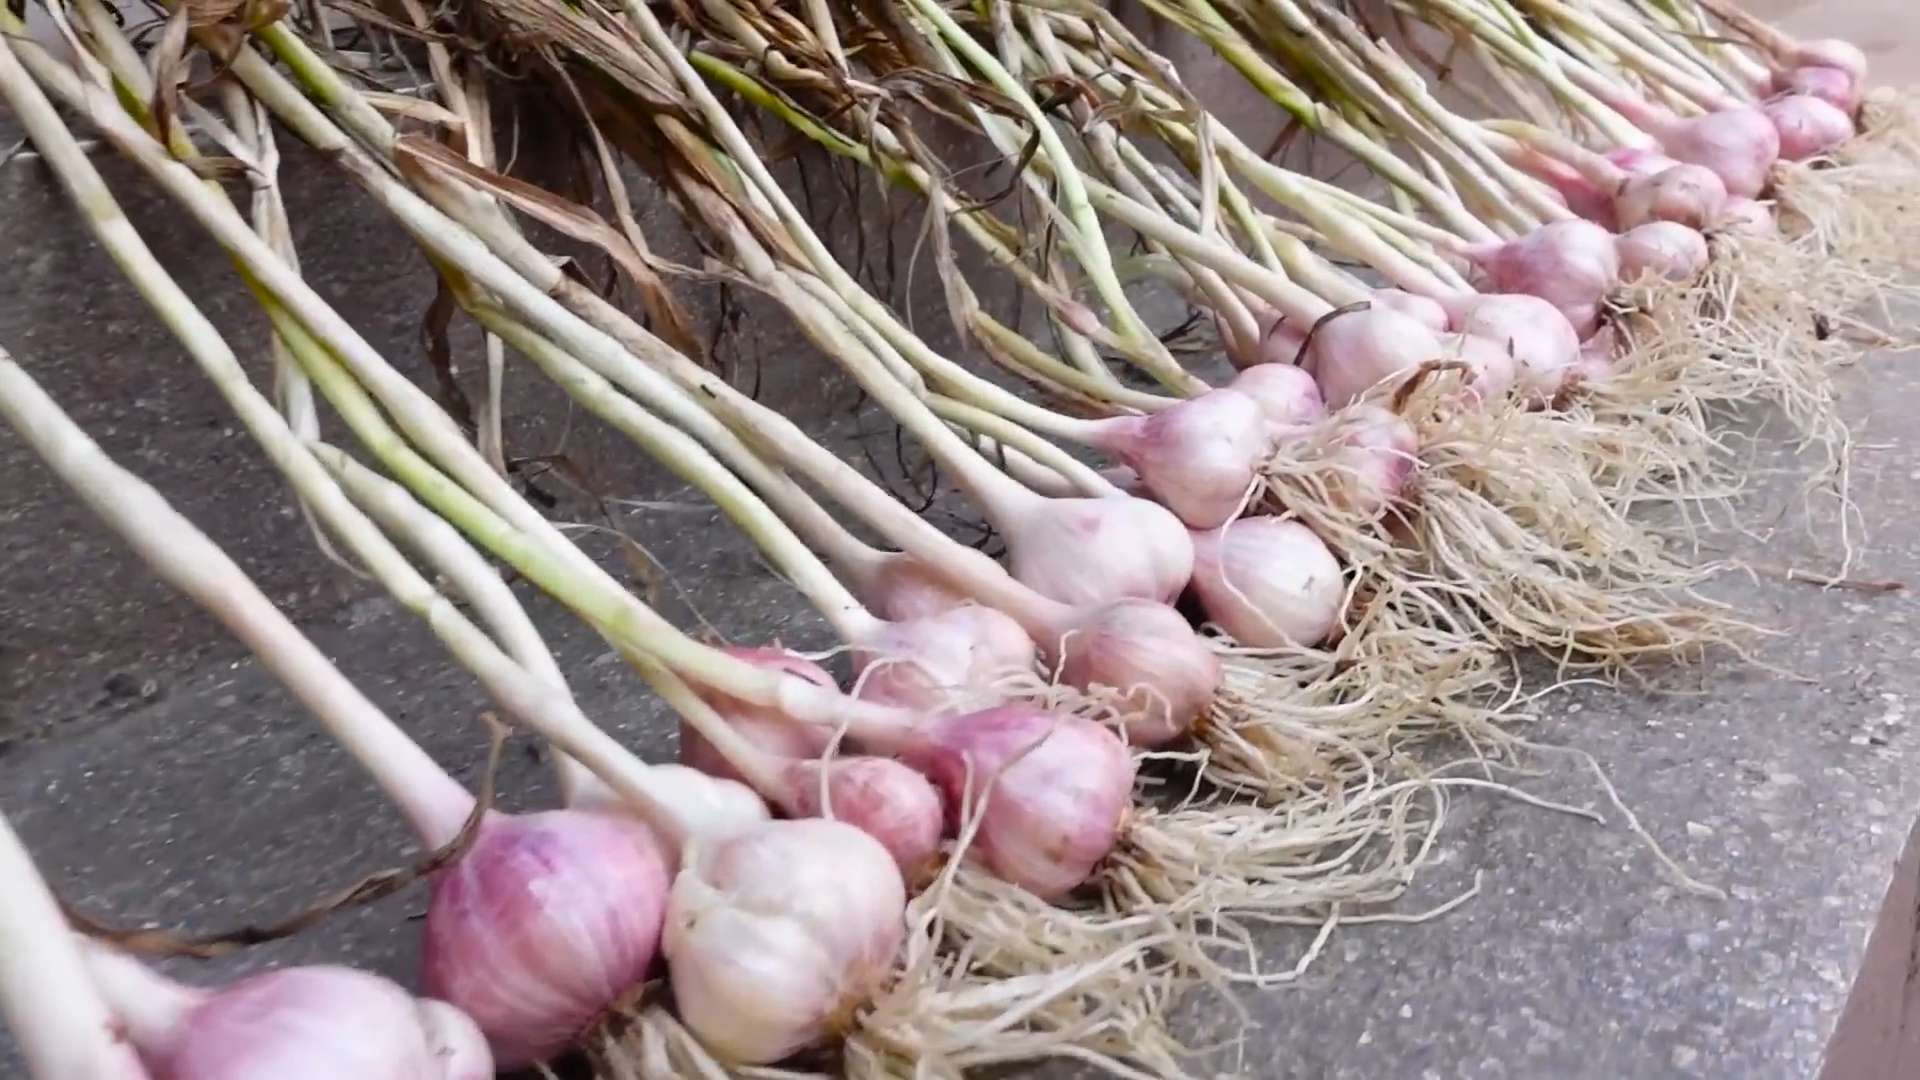
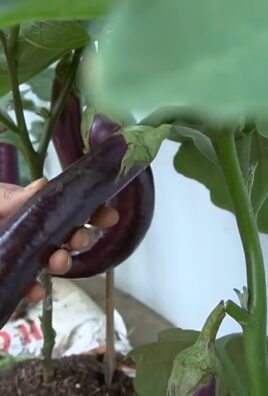
Die Erntezeit hängt von der Sorte und dem Zeitpunkt der Pflanzung ab. In der Regel ist der Knoblauch erntereif, wenn die Blätter gelb werden und umknicken. Das ist meist im Sommer, etwa im Juli oder August.
So erntet ihr den Knoblauch:
1. Lockert die Erde um die Knoblauchknollen vorsichtig auf.
2. Zieht die Knoblauchknollen vorsichtig aus der Erde.
3. Schüttelt die Erde ab und lasst die Knoblauchknollen an einem trockenen, luftigen Ort trocknen.
4. Nach dem Trocknen könnt ihr die Knoblauchknollen putzen und die äußeren Schichten entfernen.
Knoblauch richtig lagern
Damit ihr lange Freude an eurem selbst angebauten Knoblauch habt, ist die richtige Lagerung wichtig.
* Trocken lagern: Lagert den Knoblauch an einem trockenen, luftigen Ort.
* Nicht im Kühlschrank: Lagert den Knoblauch nicht im Kühlschrank, da er dort schnell schimmeln kann.
* Geflochten aufhängen: Eine traditionelle Methode ist es, den Knoblauch zu Zöpfen zu flechten und aufzuhängen. Das sieht nicht nur dekorativ aus, sondern sorgt auch für eine gute Belüftung.
Häufige Probleme und Lösungen
* Gelbe Blätter: Gelbe Blätter können verschiedene Ursachen haben, z.B. zu viel oder zu wenig Wasser, Nährstoffmangel oder Krankheiten. Überprüft die Bodenfeuchtigkeit und düngt gegebenenfalls.
* Schimmel: Schimmel kann durch zu hohe Luftfeuchtigkeit entstehen. Sorgt für eine gute Belüftung und entfernt befallene Blätter.
* Knoblauchfliege: Die Knoblauchfliege kann die Blätter und Knollen befallen. Schützt eure Pflanzen mit einem Insektenschutznetz.
Warum Bio-Knoblauch?
Ich empfehle euch, Bio-Knoblauch für die Anpflanzung zu verwenden. Konventionell angebauter Knoblauch wird oft mit Keimhemmern behandelt, damit er nicht vorzeitig austreibt. Diese Behandlung kann die Keimfähigkeit der Zehen beeinträchtigen. Bio-Knoblauch ist unbehandelt und keimt daher in der Regel besser. Außerdem unterstützt ihr mit dem Kauf von Bio-Knoblauch eine nachhaltige Landwirtschaft.
Knoblauch als natürliches Heilmittel
Knoblauch ist nicht nur lecker, sondern auch gesund! Er enthält viele wertvolle Inhaltsstoffe, die sich positiv auf unsere Gesundheit auswirken können. Knoblauch wirkt antibakteriell, antiviral und entzündungshemmend. Er kann helfen, den Cholesterinspiegel zu senken und das Immunsystem zu stärken.
Fazit: Knoblauch anbauen ist ein Kinderspiel!
Wie ihr seht, ist es gar nicht schwer, seinen eigenen Knoblauch anzubauen. Mit ein wenig Geduld und Pflege könnt ihr euch schon bald über eine reiche Ernte freuen. Und das Beste daran: Ihr wisst genau, wo euer Knoblauch herkommt und wie er angebaut wurde. Also, worauf wartet ihr noch? Ran an die Knoblauchzehen und los geht’s! Ich wünsche euch viel Erfolg und eine reiche Ernte!
Conclusion
So, there you have it! Growing garlic from bulb is not only surprisingly simple, but it’s also incredibly rewarding. Imagine the satisfaction of harvesting plump, flavorful garlic cloves that you nurtured from a single bulb. Forget those bland, imported garlic heads from the supermarket; with this DIY trick, you’ll have access to the freshest, most potent garlic imaginable, right from your own garden or even a pot on your balcony.
This isn’t just about saving a few dollars; it’s about connecting with the natural world, understanding where your food comes from, and enjoying the unparalleled taste of homegrown produce. The process is therapeutic, the results are delicious, and the knowledge you gain is invaluable.
But the benefits don’t stop there. By growing your own garlic, you can choose from a wider variety of garlic types than you’ll typically find in stores. Experiment with different hardneck and softneck varieties to discover your personal favorites. Hardneck garlics, known for their intense flavor and scapes (those delicious curly stems you can sauté or pickle), thrive in colder climates. Softneck varieties, on the other hand, are better suited for warmer regions and boast excellent storage capabilities.
Consider these variations to personalize your garlic-growing experience:
* Container Gardening: If you’re short on space, don’t despair! Garlic thrives in containers. Choose a pot that’s at least 8 inches deep and wide, and use a well-draining potting mix.
* Succession Planting: Plant garlic cloves at intervals throughout the fall to ensure a continuous harvest.
* Companion Planting: Garlic is a fantastic companion plant for many vegetables, as it helps to deter pests. Plant it near your tomatoes, peppers, and brassicas for added protection.
* Garlic Scapes: Don’t forget about the scapes! These curly stems are a culinary delicacy. Harvest them when they start to curl and use them in stir-fries, pesto, or as a flavorful addition to soups and stews.
* Fertilizing: While garlic isn’t a heavy feeder, a little fertilizer can go a long way. Amend your soil with compost or aged manure before planting, and consider side-dressing with a balanced fertilizer in the spring.
Growing garlic from bulb is a journey, not just a destination. There will be successes and perhaps a few learning curves along the way. But the end result – a bountiful harvest of delicious, homegrown garlic – is well worth the effort.
So, what are you waiting for? Grab a bulb of garlic, follow these simple steps, and embark on your own garlic-growing adventure. We’re confident that you’ll be amazed by the results. And once you’ve experienced the joy of growing your own garlic, we encourage you to share your experiences with us! Post photos of your garlic crop, share your tips and tricks, and let us know what varieties you’re growing. Together, we can create a community of garlic enthusiasts and spread the word about this simple, rewarding, and delicious DIY project. Happy growing!
Frequently Asked Questions (FAQ)
When is the best time to plant garlic?
The ideal time to plant garlic is in the fall, typically 4-6 weeks before the ground freezes. This allows the cloves to establish roots before winter sets in. In colder climates, planting in late September or early October is usually best. In warmer climates, you can plant later, around November or December. The key is to give the cloves enough time to develop roots but not enough time to sprout above ground before the first frost.
What type of garlic should I plant?
There are two main types of garlic: hardneck and softneck. Hardneck garlics are more cold-hardy and produce scapes (edible flower stalks). They typically have a stronger, more complex flavor. Softneck garlics are better suited for warmer climates and have a longer storage life. They don’t produce scapes. Choose the type of garlic that is best suited for your climate and your culinary preferences. Local nurseries or agricultural extension offices can provide recommendations for varieties that thrive in your area.
How do I prepare the soil for planting garlic?
Garlic prefers well-drained soil that is rich in organic matter. Before planting, amend your soil with compost, aged manure, or other organic materials. This will improve drainage, fertility, and soil structure. Ensure the soil is loose and friable to allow the roots to penetrate easily. A soil pH of 6.0 to 7.0 is ideal for garlic growth.
How deep and how far apart should I plant the garlic cloves?
Plant garlic cloves about 2 inches deep and 6 inches apart. Space rows about 12 inches apart. Plant the cloves with the pointed end facing up. This will ensure that the shoots emerge correctly.
How much water does garlic need?
Garlic needs consistent moisture, especially during the spring when it is actively growing. Water deeply whenever the top inch of soil feels dry. Avoid overwatering, as this can lead to rot. During the winter, garlic needs less water.
Does garlic need fertilizer?
While garlic isn’t a heavy feeder, a little fertilizer can help to boost growth and yield. Amend your soil with compost or aged manure before planting. In the spring, you can side-dress with a balanced fertilizer or a fertilizer that is high in nitrogen. Avoid over-fertilizing, as this can lead to excessive foliage growth at the expense of bulb development.
What are garlic scapes, and when should I harvest them?
Garlic scapes are the curly flower stalks that grow from hardneck garlic varieties. They are a culinary delicacy and can be used in stir-fries, pesto, or as a flavorful addition to soups and stews. Harvest scapes when they start to curl, typically in late spring or early summer. Cutting off the scapes encourages the plant to put more energy into bulb development.
How do I know when the garlic is ready to harvest?
Garlic is typically ready to harvest in mid-summer, about 8-9 months after planting. The leaves will start to turn yellow and brown, and the stems will begin to fall over. To check if the bulbs are ready, dig up a few plants and examine the bulbs. The bulbs should be plump and well-formed, with papery skins.
How do I cure and store garlic?
After harvesting, cure the garlic by laying it out in a well-ventilated, dry place for 2-3 weeks. This allows the bulbs to dry and the skins to harden. Once the garlic is cured, you can store it in a cool, dry, and dark place. Softneck garlic can be braided and hung for storage. Hardneck garlic typically has a shorter storage life than softneck garlic.
What are some common problems with growing garlic?
Some common problems with growing garlic include:
* Garlic rust: A fungal disease that causes orange spots on the leaves.
* White rot: A fungal disease that causes the bulbs to rot.
* Onion maggots: Pests that feed on the roots of garlic plants.
* Nematodes: Microscopic worms that can damage the roots of garlic plants.
To prevent these problems, choose disease-resistant varieties, practice crop rotation, and ensure good soil drainage.
Can I grow garlic in containers?
Yes, garlic can be grown in containers. Choose a pot that is at least 8 inches deep and wide, and use a well-draining potting mix. Plant the cloves as you would in the ground, and water regularly. Container-grown garlic may need more frequent watering and fertilizing than garlic grown in the ground.
Is growing garlic from bulb organic?
Yes, growing garlic from bulb can be organic. Use organic soil amendments, fertilizers, and pest control methods. Choose organic garlic bulbs to start with.
Leave a Comment