Growing Ginger in Pots: Unlock the secrets to cultivating your own spicy treasure, right on your patio! Imagine the satisfaction of snipping fresh ginger root whenever a recipe calls for it, knowing you nurtured it from rhizome to robust flavor. Forget those bland, store-bought pieces; homegrown ginger bursts with an intensity you simply can’t replicate.
Ginger, with its fiery zest, boasts a rich history stretching back thousands of years. Originating in South Asia, it was prized by ancient civilizations for its medicinal properties and culinary versatility. From traditional Ayurvedic remedies to the vibrant flavors of Asian cuisine, ginger has always held a special place. It’s even been used in various cultures as a symbol of prosperity and good health!
But why should *you* consider growing ginger in pots? Well, for starters, it’s incredibly rewarding! Plus, if you live in a cooler climate, container gardening allows you to easily move your ginger indoors during the colder months, ensuring a continuous harvest. I’ve found that many people struggle with finding fresh, high-quality ginger at their local grocery store, or they simply want to reduce their reliance on store-bought produce. This DIY guide will empower you to become a ginger-growing guru, providing you with a sustainable source of this incredible spice, all while adding a touch of green to your living space. Let’s get started!

Growing Ginger in Pots: A Beginner’s Guide
Hey there, fellow plant enthusiasts! Ever thought about growing your own ginger? It’s surprisingly easy, even if you don’t have a sprawling garden. Growing ginger in pots is a fantastic way to have fresh ginger on hand whenever you need it, and it’s a rewarding project to watch unfold. I’m going to walk you through everything you need to know, from choosing the right ginger to harvesting your own spicy rhizomes. Let’s get started!
What You’ll Need
Before we dive into the nitty-gritty, let’s gather our supplies. Here’s a checklist of everything you’ll need to successfully grow ginger in pots:
* Ginger Rhizome: Look for a plump, healthy-looking piece of ginger root at your local grocery store or nursery. It should have visible “eyes” or buds (those little bumps that look like they’re about to sprout). Organic ginger is often a better choice, as it’s less likely to have been treated with growth inhibitors.
* Pot: Choose a pot that’s at least 12 inches in diameter and 12 inches deep. Ginger roots grow horizontally, so a wider pot is better than a tall, narrow one. Make sure the pot has drainage holes to prevent waterlogging.
* Potting Mix: Use a well-draining potting mix. A mix of equal parts potting soil, compost, and perlite or vermiculite works well. This will provide the ginger with the nutrients it needs and ensure proper drainage.
* Watering Can: A watering can with a gentle spout is ideal for watering your ginger without disturbing the soil.
* Spray Bottle: Ginger likes humidity, so a spray bottle will help you keep the leaves happy.
* Optional:
* Organic fertilizer (like compost tea or fish emulsion)
* Mulch (like straw or wood chips)
Preparing Your Ginger Rhizome
This is a crucial step to give your ginger a head start. We want to encourage those little buds to sprout before planting.
1. Soaking the Rhizome: Soak the ginger rhizome in lukewarm water for 12-24 hours. This will rehydrate it and stimulate growth.
2. Cutting (Optional): If your ginger rhizome is large, you can cut it into smaller pieces, ensuring each piece has at least one or two “eyes.” Let the cut pieces air dry for a day or two to prevent rot. This allows the cut surfaces to callous over.
3. Sprouting (Optional but Recommended): Place the ginger rhizome in a plastic bag or container with some damp paper towels. Seal the bag or container and place it in a warm, dark place. Check on it every few days, misting the paper towels if they start to dry out. You should see sprouts emerging within a week or two. This step isn’t strictly necessary, but it gives your ginger a significant head start and increases your chances of success.
Planting Your Ginger
Now for the fun part – getting your ginger into its new home!
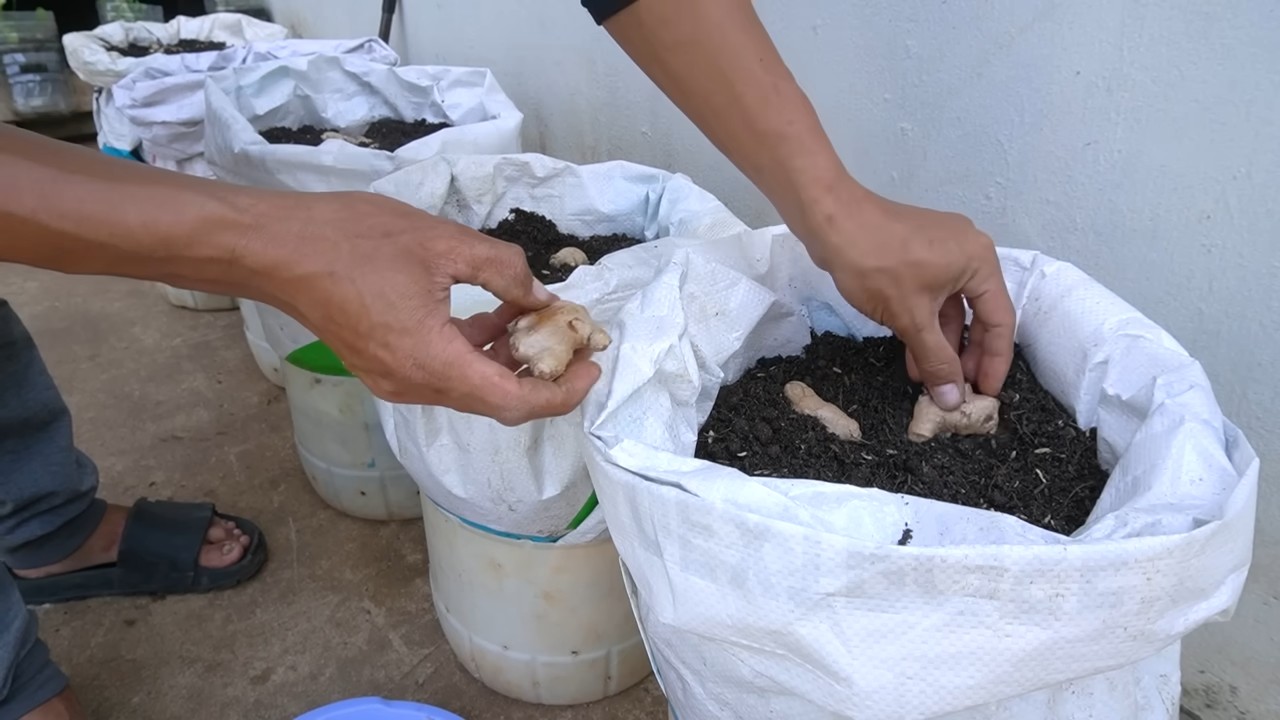
1. Fill the Pot: Fill your pot with the potting mix, leaving about an inch or two of space at the top.
2. Planting the Rhizome: Place the ginger rhizome on top of the soil, with the “eyes” or sprouts facing upwards.
3. Covering the Rhizome: Gently cover the rhizome with about an inch or two of potting mix.
4. Watering: Water the soil thoroughly until water drains out of the drainage holes.
5. Mulching (Optional): Add a layer of mulch around the base of the plant to help retain moisture and suppress weeds.
Caring for Your Ginger Plant
Ginger needs specific conditions to thrive. Here’s how to keep your plant happy and healthy:
1. Light: Ginger prefers bright, indirect sunlight. Avoid direct sunlight, which can scorch the leaves. An east-facing window or a spot with dappled shade is ideal.
2. Watering: Keep the soil consistently moist, but not waterlogged. Water when the top inch of soil feels dry to the touch. Reduce watering in the winter when the plant is dormant.
3. Humidity: Ginger loves humidity. Mist the leaves regularly with a spray bottle, especially in dry climates. You can also place the pot on a tray filled with pebbles and water. Make sure the bottom of the pot isn’t sitting directly in the water.
4. Temperature: Ginger thrives in warm temperatures, ideally between 65°F and 90°F (18°C and 32°C). Protect it from frost and cold drafts.
5. Fertilizing: Feed your ginger plant every few weeks with an organic fertilizer, such as compost tea or fish emulsion. Follow the instructions on the fertilizer packaging.
6. Pest Control: Ginger is generally pest-resistant, but keep an eye out for common houseplant pests like aphids or spider mites. If you spot any pests, treat them with insecticidal soap or neem oil.
Harvesting Your Ginger
Patience is key! It takes time for ginger to mature.
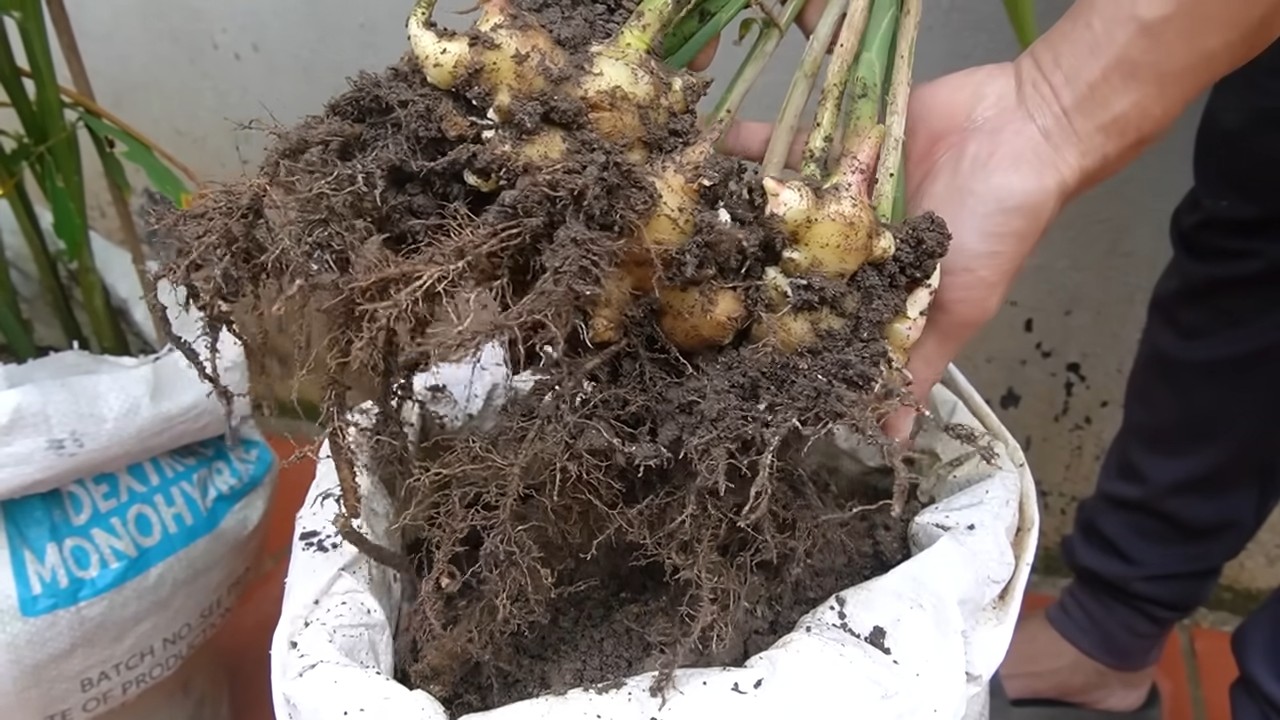
1. When to Harvest: You can start harvesting ginger about 8-10 months after planting. The leaves will start to turn yellow and die back, indicating that the rhizomes are mature.
2. Harvesting: Gently dig around the edges of the pot and carefully lift the ginger rhizomes out of the soil. You can harvest the entire plant or just a portion of the rhizomes, leaving the rest to continue growing.
3. Storing: Freshly harvested ginger can be stored in the refrigerator for several weeks. Wrap it in a paper towel and place it in a plastic bag. You can also freeze ginger for longer storage.
Troubleshooting
Even with the best care, you might encounter some challenges. Here are a few common problems and how to address them:
* Yellowing Leaves: This could be a sign of overwatering, underwatering, or nutrient deficiency. Check the soil moisture and adjust your watering accordingly. Fertilize the plant if necessary.
* Lack of Growth: This could be due to insufficient light, cold temperatures, or poor soil. Move the plant to a brighter location, ensure the temperature is warm enough, and repot it with fresh potting mix if needed.
* Rotting Rhizomes: This is usually caused by overwatering. Make sure the pot has good drainage and allow the soil to dry out slightly between waterings.
* Pests: Inspect your plant regularly for pests and treat them promptly with insecticidal soap or neem oil.
Tips for Success
Here are a few extra tips to help you grow the best ginger possible:
* Choose the Right Variety: While most ginger sold in grocery stores is suitable for growing, some varieties are better suited for container gardening. Look for varieties like ‘Chinese Ginger’ or ‘Baby Ginger.’
* Use a Large Pot: Ginger roots need space to spread out, so choose a pot that’s large enough to accommodate their growth.
* Provide Consistent Moisture: Ginger needs consistent moisture to thrive, but avoid overwatering, which can lead to root rot.
* Be Patient: Ginger takes time to mature, so don’t get discouraged if you don’t see results immediately. With proper care, you’ll be rewarded with a bountiful harvest of fresh ginger.
* Experiment: Don’t be afraid to experiment with different growing conditions to see what works best for your ginger plant. Every environment is different, so what works for one person might not work for another.
Growing ginger in pots is a rewarding and enjoyable experience. With a little patience and care, you can have a steady supply of fresh ginger right at your fingertips. Happy gardening!

Conclusion
So, there you have it! Growing ginger in pots isn’t just a gardening project; it’s an adventure that brings the vibrant flavors and health benefits of fresh ginger right to your fingertips. We’ve walked through the simple steps, from selecting the perfect rhizome to nurturing your plant to a bountiful harvest. But why is this DIY trick a must-try?
Firstly, consider the unparalleled freshness. Store-bought ginger, while convenient, simply can’t compare to the zing and aroma of freshly harvested ginger. Imagine adding a sliver of your own homegrown ginger to your morning tea, knowing exactly where it came from and how it was nurtured. The difference in taste is remarkable.
Secondly, growing ginger in pots offers incredible flexibility. Whether you have a sprawling garden or a small balcony, you can enjoy the process. The portability of pots allows you to move your ginger plant to the sunniest spot or shelter it from harsh weather, ensuring optimal growing conditions. This adaptability makes it accessible to gardeners of all levels and living situations.
Thirdly, it’s a sustainable and rewarding experience. By growing your own ginger, you’re reducing your reliance on commercially produced ginger, which often involves long transportation distances and potentially harmful pesticides. You’re also connecting with nature and experiencing the satisfaction of nurturing a plant from rhizome to harvest.
But the possibilities don’t end there! Feel free to experiment with different varieties of ginger. Explore the spicier types or those with unique citrusy notes. You can also try companion planting, placing herbs like basil or mint alongside your ginger to enhance its flavor and deter pests. Consider using different types of potting mix to see which yields the best results in your specific climate.
Ready to embark on your ginger-growing journey? Don’t hesitate! Gather your supplies, follow the steps outlined in this guide, and prepare to be amazed by the results. Remember to be patient, as ginger takes time to mature. But the wait is well worth it when you finally harvest your own supply of fresh, flavorful ginger.
We encourage you to share your experiences with us! Post photos of your ginger plants on social media using #HomegrownGinger and tag us. Let us know what challenges you faced, what successes you celebrated, and any tips you discovered along the way. Your insights can help other aspiring ginger growers and contribute to a thriving community of home gardeners.
Growing ginger in pots is more than just a gardening project; it’s a gateway to fresh flavors, sustainable living, and a deeper connection with nature. So, grab a pot, some soil, and a ginger rhizome, and let the adventure begin! You’ll be amazed at how easy and rewarding it is to cultivate your own supply of this versatile and beneficial spice. Embrace the joy of homegrown ginger and elevate your culinary creations to a whole new level.
Frequently Asked Questions (FAQ)
What kind of pot should I use for growing ginger?
The ideal pot for growing ginger should be at least 12 inches in diameter and 12 inches deep. This provides ample space for the rhizomes to spread and develop. Choose a pot made of terracotta, plastic, or any other durable material. Ensure the pot has drainage holes to prevent waterlogging, which can lead to root rot. Wider pots are generally better than deeper ones, as ginger roots tend to grow horizontally.
What type of soil is best for growing ginger in pots?
Ginger thrives in well-draining, nutrient-rich soil. A good potting mix should consist of equal parts of potting soil, compost, and perlite or vermiculite. The compost provides essential nutrients, while the perlite or vermiculite improves drainage and aeration. Avoid using heavy clay soil, as it can retain too much moisture and suffocate the roots. You can also add a slow-release fertilizer to the potting mix to provide a steady supply of nutrients throughout the growing season.
How often should I water my ginger plant?
Water your ginger plant regularly, keeping the soil consistently moist but not waterlogged. Water deeply when the top inch of soil feels dry to the touch. During the active growing season (spring and summer), you may need to water more frequently. Reduce watering during the dormant season (fall and winter). Always check the soil moisture before watering to avoid overwatering, which can lead to root rot.
How much sunlight does ginger need?
Ginger prefers partial shade, especially during the hottest part of the day. Direct sunlight can scorch the leaves. A location that receives morning sun and afternoon shade is ideal. If you’re growing ginger indoors, place it near a bright window but away from direct sunlight. You can also use sheer curtains to filter the sunlight. If the leaves start to turn yellow or brown, it may be a sign that the plant is getting too much sun.
When is the best time to plant ginger?
The best time to plant ginger is in early spring, after the last frost. This allows the plant to take advantage of the warm growing season. If you live in a colder climate, you can start the ginger indoors a few weeks before the last frost and then transplant it outdoors once the weather warms up. Ensure the soil temperature is at least 65°F (18°C) for optimal germination.
How long does it take for ginger to grow?
Ginger typically takes 8-10 months to mature. You can start harvesting small pieces of ginger after about 4 months, but the flavor will be milder. For a more intense flavor, wait until the plant is fully mature. The leaves will start to turn yellow and die back when the ginger is ready to harvest.
How do I harvest ginger from a pot?
To harvest ginger, gently dig around the edges of the pot and lift the entire plant out. You can then break off pieces of the rhizome as needed, leaving some in the pot to continue growing. Alternatively, you can harvest the entire plant and replant a small piece of the rhizome to start a new plant. Wash the harvested ginger thoroughly and store it in a cool, dry place.
Can I grow ginger indoors?
Yes, ginger can be successfully grown indoors, especially in colder climates. Provide the plant with bright, indirect light, consistent moisture, and a warm environment. Use a well-draining potting mix and ensure the pot has drainage holes. You may also need to increase the humidity around the plant by misting it regularly or placing it on a pebble tray filled with water.
What are some common problems when growing ginger and how do I fix them?
Some common problems when growing ginger include root rot, pests, and nutrient deficiencies. Root rot is caused by overwatering and can be prevented by ensuring the soil is well-draining and avoiding excessive watering. Pests such as aphids and spider mites can be controlled with insecticidal soap or neem oil. Nutrient deficiencies can be addressed by fertilizing the plant with a balanced fertilizer. Yellowing leaves can indicate overwatering, underwatering, or nutrient deficiencies, so adjust your watering and fertilizing accordingly.
Can I use store-bought ginger to grow a new plant?
Yes, you can use store-bought ginger to grow a new plant, but it’s important to choose a rhizome that is plump, firm, and has visible buds (eyes). Soak the ginger in water overnight to rehydrate it before planting. Avoid using ginger that is shriveled, soft, or has no buds. Organic ginger is often a better choice, as it is less likely to have been treated with growth inhibitors.


Leave a Comment