
Growing Gourds at Home can seem like a whimsical dream, conjuring images of charming autumn decorations and unique, handcrafted creations. But did you know that cultivating these fascinating fruits is more than just a decorative pursuit? For centuries, gourds have held cultural significance across the globe, serving as everything from practical containers and musical instruments to artistic canvases and symbols of good fortune. Think of the intricate carvings of calabash gourds in African cultures or the use of bottle gourds as water vessels in ancient civilizations.
Ready to ditch the store-bought decorations and embrace a rewarding, hands-on project? I’m here to tell you that growing gourds at home is surprisingly achievable, even if you don’t have acres of land! This DIY guide will unlock the secrets to successfully nurturing these versatile plants, transforming your garden (or even a sunny balcony!) into a gourd-growing haven.
Why should you embark on this gourd-growing adventure? Because in a world of mass-produced items, creating something beautiful and functional with your own two hands is incredibly satisfying. Plus, you’ll have a unique supply of materials for crafting, decorating, and even gifting! So, grab your gardening gloves, and let’s dive into the wonderful world of gourds!
Growing Gourds: From Seed to Stunning Decor!
Hey there, fellow DIY enthusiasts! I’m so excited to share my experience with growing gourds. It’s a rewarding project that lets you create unique, natural decorations for your home. Trust me, there’s nothing quite like displaying a gourd you’ve nurtured from a tiny seed! This guide will walk you through every step, from planting to curing, so you can enjoy your own gourd creations.
Choosing Your Gourd Variety
Before we get our hands dirty, let’s talk gourds! There are two main types: ornamental and hard-shelled (also called utility gourds).
* Ornamental Gourds: These are the colorful, bumpy, and oddly shaped gourds you often see in fall displays. They’re great for immediate decoration but don’t last as long as hard-shelled gourds. Think of the cute little warty gourds or the swan-shaped ones.
* Hard-Shelled Gourds: These are the workhorses of the gourd world! They have a thick shell that, once dried, becomes incredibly durable. You can carve them, paint them, and turn them into birdhouses, bowls, dippers, and so much more. Popular varieties include bottle gourds, dipper gourds, and birdhouse gourds.
I personally love growing a mix of both! It gives me a variety of options for crafting. Consider your climate and the space you have available when choosing your varieties. Some gourds can get HUGE!
Getting Started: Planting Your Gourd Seeds
Gourds need a long growing season (around 100-120 days), so starting them indoors is often the best approach, especially if you live in a cooler climate.
Materials You’ll Need:
* Gourd seeds (obviously!)
* Seed starting trays or small pots
* Seed starting mix (a light, well-draining mix is crucial)
* Watering can or spray bottle
* Warm, sunny location or grow lights
* Optional: Heat mat
Step-by-Step Planting Guide:
1. Soak Your Seeds: This is a trick I learned that really helps with germination. Soak your gourd seeds in warm water for 24-48 hours before planting. This softens the hard outer shell and encourages sprouting.
2. Prepare Your Seed Starting Trays: Fill your seed starting trays or pots with seed starting mix. Gently press down to remove any air pockets.
3. Plant the Seeds: Plant the seeds about 1 inch deep in the soil. I usually plant 2-3 seeds per cell or pot, just in case some don’t germinate.
4. Water Gently: Water the soil gently with a watering can or spray bottle. You want the soil to be moist but not soggy.
5. Provide Warmth and Light: Gourds need warmth to germinate. A heat mat can be helpful, but a warm, sunny location will also work. If you don’t have enough natural light, use grow lights. I keep my seedlings under grow lights for about 16 hours a day.
6. Keep the Soil Moist: Check the soil daily and water as needed to keep it moist. Don’t let it dry out completely.
7. Thin Seedlings (If Necessary): Once the seedlings emerge (usually in 7-14 days), thin them to one strong seedling per cell or pot. Snip off the weaker seedlings at the soil line with scissors.
Transplanting Your Gourd Seedlings
Once your seedlings have developed a few sets of true leaves (the leaves that look like miniature versions of the adult plant’s leaves), they’re ready to be transplanted outdoors.
Things to Consider Before Transplanting:
* Weather: Make sure all danger of frost has passed. Gourds are very sensitive to cold temperatures.
* Soil: Gourds need rich, well-drained soil. Amend your soil with compost or well-rotted manure before planting.
* Sunlight: Gourds need at least 6-8 hours of sunlight per day.
* Space: Gourds are vines that need plenty of space to spread. Give them at least 4-6 feet between plants. You can also grow them on a trellis or fence to save space.
Transplanting Steps:
1. Harden Off Seedlings: Before transplanting, you need to “harden off” your seedlings. This means gradually exposing them to outdoor conditions over a period of about a week. Start by placing them outside in a sheltered location for a few hours each day, gradually increasing the amount of time they spend outdoors.
2. Prepare the Planting Hole: Dig a hole that is slightly larger than the root ball of the seedling.
3. Gently Remove Seedling: Carefully remove the seedling from its pot or tray. Try to disturb the roots as little as possible.
4. Plant the Seedling: Place the seedling in the hole and backfill with soil. Gently firm the soil around the base of the plant.
5. Water Thoroughly: Water the seedling thoroughly after planting.
6. Mulch: Apply a layer of mulch around the base of the plant to help retain moisture and suppress weeds.
Caring for Your Growing Gourds
Now that your gourds are in the ground, it’s time to give them the care they need to thrive.
* Watering: Water your gourds regularly, especially during dry periods. They need consistent moisture to produce healthy fruit. Aim for deep watering, which encourages deep root growth.
* Fertilizing: Feed your gourds with a balanced fertilizer every few weeks. I like to use a fertilizer that is high in phosphorus, which promotes flowering and fruit development.
* Weeding: Keep the area around your gourds free of weeds. Weeds compete with gourds for water and nutrients.
* Pest Control: Keep an eye out for pests such as squash bugs, squash vine borers, and cucumber beetles. Handpicking pests is often effective, but you can also use insecticidal soap or other organic pest control methods.
* Pollination: Gourds have separate male and female flowers. Bees are the primary pollinators, but if you’re not seeing a lot of bee activity, you can hand-pollinate the flowers. To hand-pollinate, use a small paintbrush to transfer pollen from the male flower to the female flower. The female flower has a small gourd-like structure at the base.
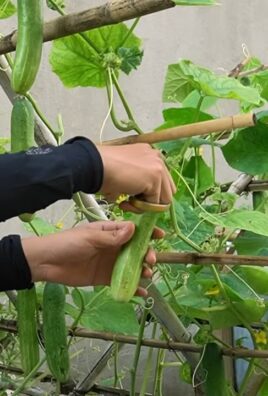
* Support: If you’re growing your gourds on a trellis or fence, make sure the vines are well-supported. Gourds can get heavy, so you may need to provide additional support for the fruit. I’ve used old pantyhose to create slings for larger gourds.
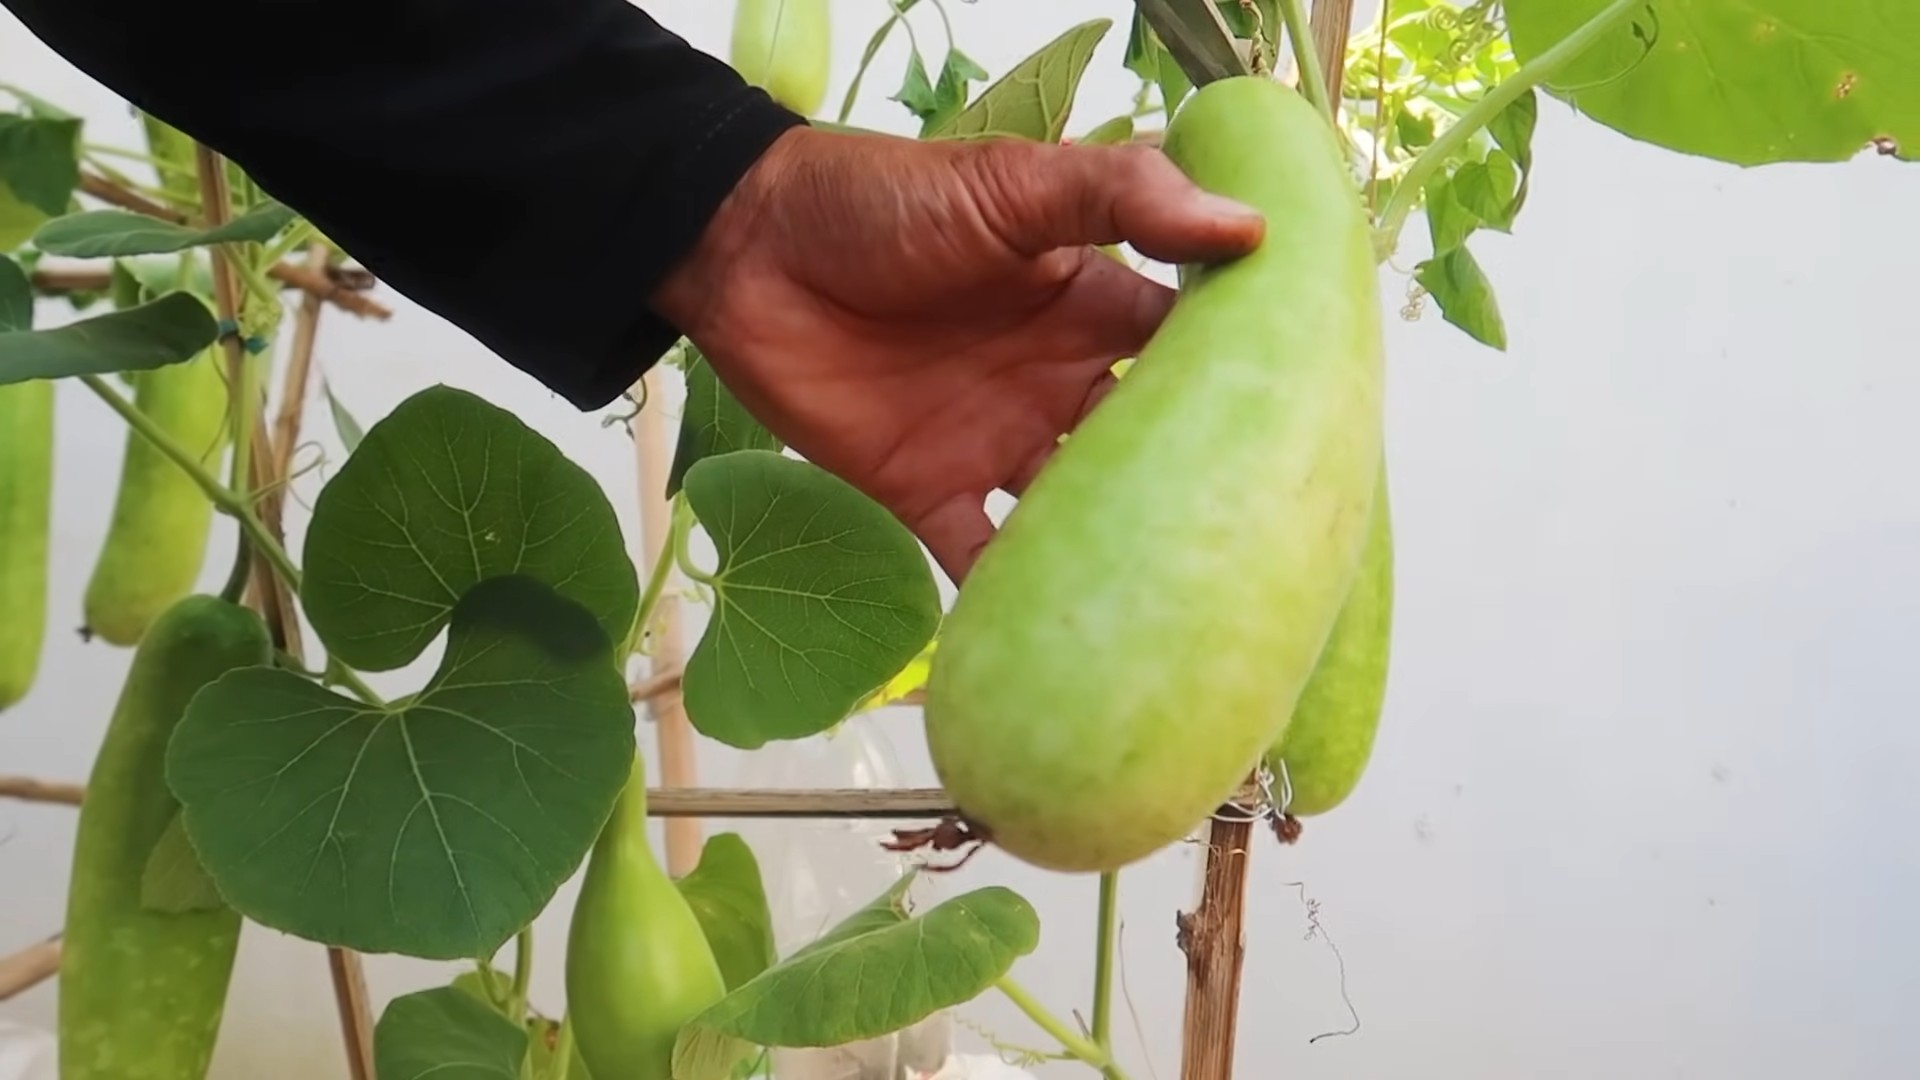
Harvesting Your Gourds
The moment you’ve been waiting for! Knowing when to harvest is key to successful gourd drying.
* Timing: Harvest your gourds when the vines have completely dried and turned brown. The gourds should feel hard and lightweight. A good test is to try to puncture the skin with your fingernail. If you can’t, they’re ready!
* Cutting: Use pruning shears or a sharp knife to cut the gourds from the vine, leaving a few inches of stem attached. This helps prevent rot.
* Handling: Handle the gourds carefully to avoid bruising or damaging the skin.
Curing Your Gourds: The Key to Long-Lasting Beauty
Curing is the most important step in the gourd-growing process. It’s what transforms a fresh gourd into a durable, long-lasting decoration.
Curing Process:
1. Cleaning: Gently wash the gourds with soapy water to remove any dirt or debris.
2. Drying Location: Find a well-ventilated, dry, and dark location to cure your gourds. A shed, garage, or attic works well. Avoid direct sunlight, which can cause the gourds to crack.
3. Arrangement: Place the gourds on a single layer on a wire rack or pallets. Make sure they are not touching each other to allow for good air circulation.
4. Patience is Key: This is the hardest part! Curing can take several weeks or even months, depending on the size and thickness of the gourds.
5. Monitoring: Check the gourds regularly for signs of rot or mold. If you see any, remove the affected gourd immediately to prevent it from spreading to the others.
6. The Waiting Game: As the gourds dry, they will lose weight and the outer skin will become hard and brittle. You may see mold growing on the surface – this is normal.
7. Shake Test: Once the gourds are completely dry, you should be able to hear the seeds rattling inside when you shake them. This is a good indication that they are ready to be cleaned and crafted.
Cleaning Your Cured Gourds
Once your gourds are fully cured, it

Conclusion
So, there you have it! Growing gourds at home isn’t just a gardening project; it’s an adventure in creativity, sustainability, and connection with nature. We’ve explored the ins and outs, from seed selection to harvesting and curing, equipping you with the knowledge to transform your garden into a gourd-filled paradise.
Why is this DIY trick a must-try? Because it offers so much more than just decorative items. It’s about the satisfaction of nurturing life from a tiny seed to a unique, handcrafted creation. It’s about reducing your reliance on mass-produced goods and embracing a more sustainable lifestyle. And it’s about the sheer joy of witnessing the incredible diversity and beauty that nature provides. Plus, think of the bragging rights when you tell your friends that stunning birdhouse or that quirky bowl was *grown* in your own backyard!
But don’t stop there! Experiment with different gourd varieties to discover your favorites. Try painting or carving your dried gourds to create personalized gifts or home décor. Consider using your gourds for practical purposes, like making dippers, scoops, or even musical instruments. The possibilities are truly endless.
For example, if you live in a colder climate, you might want to start your seeds indoors several weeks before the last expected frost. This will give your gourds a head start and ensure a longer growing season. Alternatively, if you’re short on space, consider growing smaller gourd varieties on a trellis or fence. This will maximize your vertical growing space and add a touch of whimsy to your garden. You can also try companion planting. Marigolds, for example, can help deter pests, while beans can fix nitrogen in the soil, benefiting your gourds.
The key to successful gourd growing is patience and observation. Pay attention to your plants’ needs, adjust your watering and fertilizing accordingly, and don’t be afraid to experiment. And most importantly, have fun!
We wholeheartedly encourage you to embark on this rewarding journey of growing gourds at home. It’s a project that will connect you with nature, unleash your creativity, and provide you with a bounty of unique and beautiful treasures.
Now, it’s your turn! Grab some seeds, prepare your garden, and get ready to witness the magic of gourd growing. And don’t forget to share your experiences with us! We’d love to see your gourd creations and hear about your successes (and challenges) along the way. Share your photos and stories on social media using #HomeGrownGourds or leave a comment below. Let’s build a community of gourd enthusiasts and inspire others to discover the joys of this amazing DIY trick. Happy growing!
Frequently Asked Questions (FAQ)
What is the best time to plant gourd seeds?
The ideal time to plant gourd seeds is after the last frost when the soil has warmed up to at least 65°F (18°C). Gourds are warm-season crops and require plenty of sunshine and warmth to thrive. In most regions, this typically falls between late spring and early summer. If you live in a colder climate with a shorter growing season, you can start your seeds indoors 4-6 weeks before the last expected frost and transplant them outdoors once the weather warms up.
How much space do gourds need to grow?
Gourds are vigorous vines that require ample space to spread. Depending on the variety, they can grow anywhere from 10 to 30 feet long. It’s recommended to space gourd plants at least 3-5 feet apart in rows that are 6-8 feet apart. If you’re growing gourds on a trellis or fence, you can space them closer together, but ensure they have enough room to climb and spread. Smaller gourd varieties can be grown in large containers, but they will still need plenty of sunlight and water.
What kind of soil is best for growing gourds?
Gourds prefer well-drained, fertile soil that is rich in organic matter. Before planting, amend your soil with compost, aged manure, or other organic amendments to improve its drainage and fertility. Gourds also benefit from a slightly acidic to neutral soil pH (around 6.0 to 7.0). You can test your soil pH with a soil testing kit and adjust it accordingly with lime or sulfur.
How often should I water my gourd plants?
Gourds need consistent moisture, especially during hot, dry weather. Water your gourd plants deeply and regularly, aiming to keep the soil consistently moist but not waterlogged. The frequency of watering will depend on your climate, soil type, and the size of your plants. As a general rule, water your gourds when the top inch of soil feels dry to the touch. Avoid overhead watering, as this can promote fungal diseases. Instead, water at the base of the plants or use a soaker hose.
What kind of fertilizer should I use for gourds?
Gourds are heavy feeders and benefit from regular fertilization. Before planting, incorporate a slow-release fertilizer into the soil. During the growing season, fertilize your gourds every 2-3 weeks with a balanced fertilizer or a fertilizer that is higher in phosphorus and potassium. Avoid using fertilizers that are too high in nitrogen, as this can promote excessive vine growth at the expense of fruit production. You can also supplement with organic fertilizers like compost tea or fish emulsion.
How do I prevent pests and diseases in my gourd patch?
Gourds can be susceptible to various pests and diseases, including squash bugs, squash vine borers, powdery mildew, and downy mildew. To prevent these problems, practice good garden hygiene, such as removing plant debris and weeds regularly. Inspect your plants frequently for signs of pests or diseases and take action promptly. You can use organic pest control methods like insecticidal soap, neem oil, or diatomaceous earth to control pests. For fungal diseases, ensure good air circulation around your plants and avoid overhead watering. You can also use copper-based fungicides or other organic fungicides to control fungal diseases. Crop rotation can also help prevent soil-borne diseases.
When are gourds ready to harvest?
Gourds are typically ready to harvest in the fall, after the vines have died back and the gourds have fully matured. The exact timing will depend on the variety of gourd and your climate. A good indication that a gourd is ready to harvest is when the stem connecting the gourd to the vine has dried and turned brown. The gourd should also feel hard and lightweight. Use pruning shears or a sharp knife to cut the gourd from the vine, leaving a few inches of stem attached.
How do I cure gourds after harvesting?
Curing is essential for preserving gourds and preventing them from rotting. To cure gourds, wash them with soapy water and dry them thoroughly. Then, place them in a well-ventilated area, such as a garage or shed, where they will be protected from frost and direct sunlight. Arrange the gourds so that they are not touching each other and allow them to dry for several weeks or months, until they are completely dry and lightweight. During the curing process, the outer skin of the gourds will harden and the inner flesh will dry out.
Can I eat gourds?
While some gourds are edible when young, most ornamental gourds are not palatable and can even be toxic. It’s important to identify the specific variety of gourd you are growing before attempting to eat it. If you are unsure, it’s best to err on the side of caution and avoid eating any gourds.
What can I do with my dried gourds?
The possibilities are endless! Dried gourds can be used for a wide variety of crafts and decorative purposes. You can paint them, carve them, burn designs into them, or use them to create birdhouses, bowls, dippers, musical instruments, and much more. Let your creativity run wild and transform your home-grown gourds into unique and beautiful treasures.
Leave a Comment