
Growing gourds at home can be an incredibly rewarding experience, transforming your backyard into a vibrant, artistic haven. Have you ever imagined crafting your own birdhouses, bowls, or even musical instruments from something you’ve grown yourself? This isn’t just a whimsical dream; it’s an achievable reality with a little know-how!
Gourds have a rich history, dating back thousands of years. Ancient civilizations across the globe, from Africa to Asia and the Americas, relied on gourds for everything from food storage and water containers to tools and ceremonial objects. They were truly a gift of nature, providing both sustenance and practicality.
But why should you consider growing gourds at home today? In our increasingly mass-produced world, there’s a deep satisfaction in creating something unique and sustainable. Plus, let’s be honest, store-bought decorations can be expensive and lack personality. With these simple DIY tricks and hacks, I’ll show you how to cultivate your own gourd patch, turning ordinary seeds into extraordinary creations. Imagine the joy of gifting a hand-painted gourd birdhouse or displaying a beautifully carved gourd bowl – a testament to your creativity and connection to nature. Let’s get our hands dirty and unlock the magic of gourds!
Growing Gourds: A Comprehensive DIY Guide
Hey there, fellow gardening enthusiasts! Ever dreamt of crafting your own birdhouses, bowls, or even musical instruments from homegrown gourds? Well, you’ve come to the right place! Growing gourds can be incredibly rewarding, and with a little patience and know-how, you can transform your backyard into a gourd-growing paradise. This guide will walk you through every step, from seed selection to harvesting and curing, ensuring you have a bountiful gourd harvest.
Choosing Your Gourd Varieties
First things first, let’s talk about variety. Gourds come in all shapes and sizes, each with its unique purpose. Here’s a quick rundown of some popular choices:
* Birdhouse Gourds (Lagenaria siceraria): These are the classic choice for, well, birdhouses! They grow large and round, providing ample space for feathered friends.
* Bottle Gourds (Lagenaria siceraria): Similar to birdhouse gourds, but often with a more elongated “bottle” shape. Great for crafting dippers, bowls, and other decorative items.
* Ornamental Gourds (Cucurbita pepo): These are the colorful, often warty, gourds you see in fall decorations. They come in a wide range of shapes, sizes, and colors.
* Loofah Gourds (Luffa aegyptiaca): Yes, the same loofah you use in the shower! These gourds have a fibrous interior that, when dried, makes an excellent exfoliating sponge.
Consider what you want to create with your gourds before choosing your seeds. I personally love growing a mix of birdhouse and ornamental gourds for variety.
Getting Started: Planting Your Gourd Seeds
Gourds need a long growing season (typically 100-180 days), so starting them indoors is often the best approach, especially if you live in a cooler climate.
1. Soaking the Seeds: To improve germination, soak your gourd seeds in warm water for 24-48 hours before planting. This softens the hard outer shell and helps the seedlings emerge more easily. I usually use a small bowl and change the water once or twice.
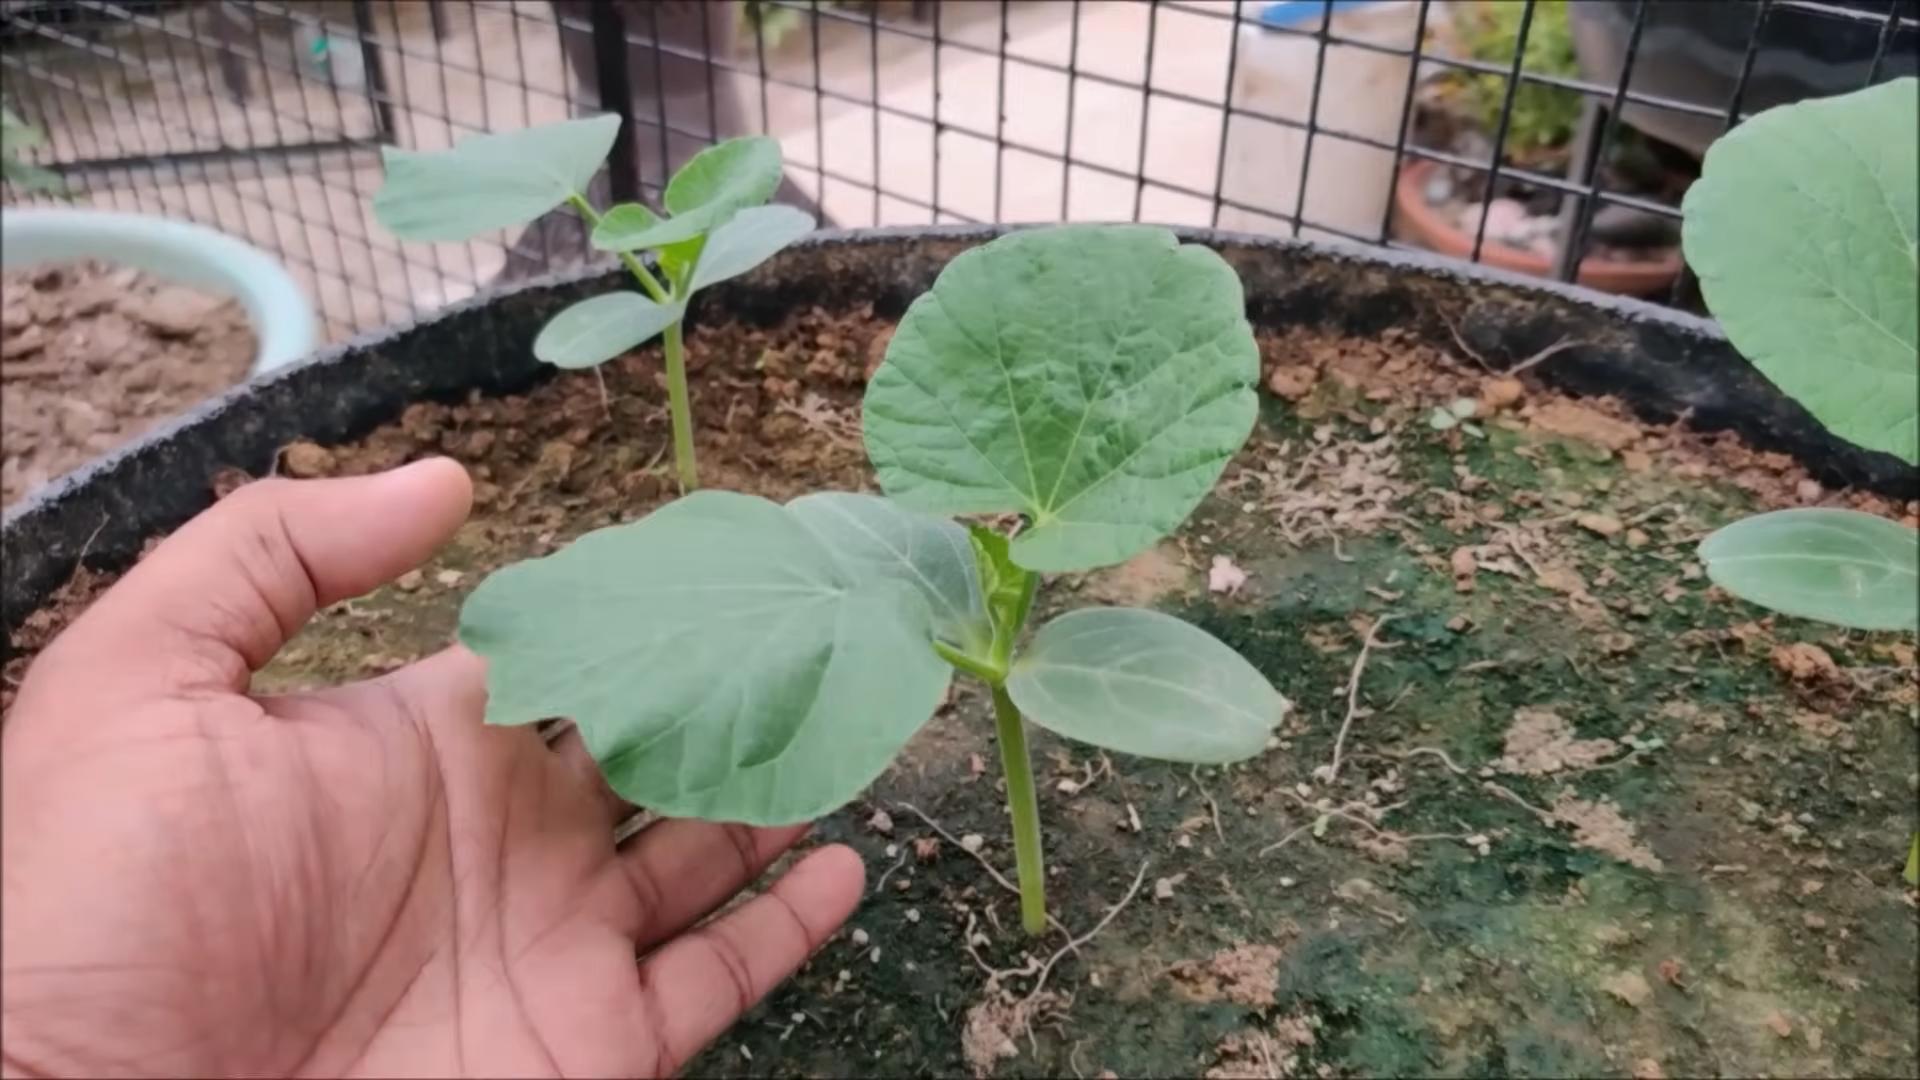
2. Starting Seeds Indoors: About 4-6 weeks before the last expected frost, sow your seeds in individual peat pots or biodegradable containers. This minimizes root disturbance when transplanting.
* Fill the pots with a good-quality seed-starting mix.
* Plant the seeds about 1 inch deep.
* Water gently and keep the soil consistently moist but not soggy.
* Place the pots in a warm, sunny location or under grow lights. Gourds need plenty of light to thrive.
3. Direct Sowing (Warmer Climates): If you live in a warmer climate with a long growing season, you can direct sow your gourd seeds directly into the garden after the last frost.
* Choose a sunny location with well-drained soil.
* Prepare the soil by amending it with compost or well-rotted manure.
* Sow the seeds about 1 inch deep, spacing them according to the variety (check the seed packet for recommendations).
* Water gently and keep the soil consistently moist.
Creating the Perfect Growing Environment
Gourds are vigorous growers and need plenty of space, sunlight, and nutrients to thrive.
1. Choosing the Right Location: Select a location that receives at least 6-8 hours of direct sunlight per day. Gourds love the sun!
2. Preparing the Soil: Gourds prefer well-drained soil that is rich in organic matter. Amend the soil with compost, well-rotted manure, or other organic amendments before planting. I usually add a generous amount of compost to my gourd patch.
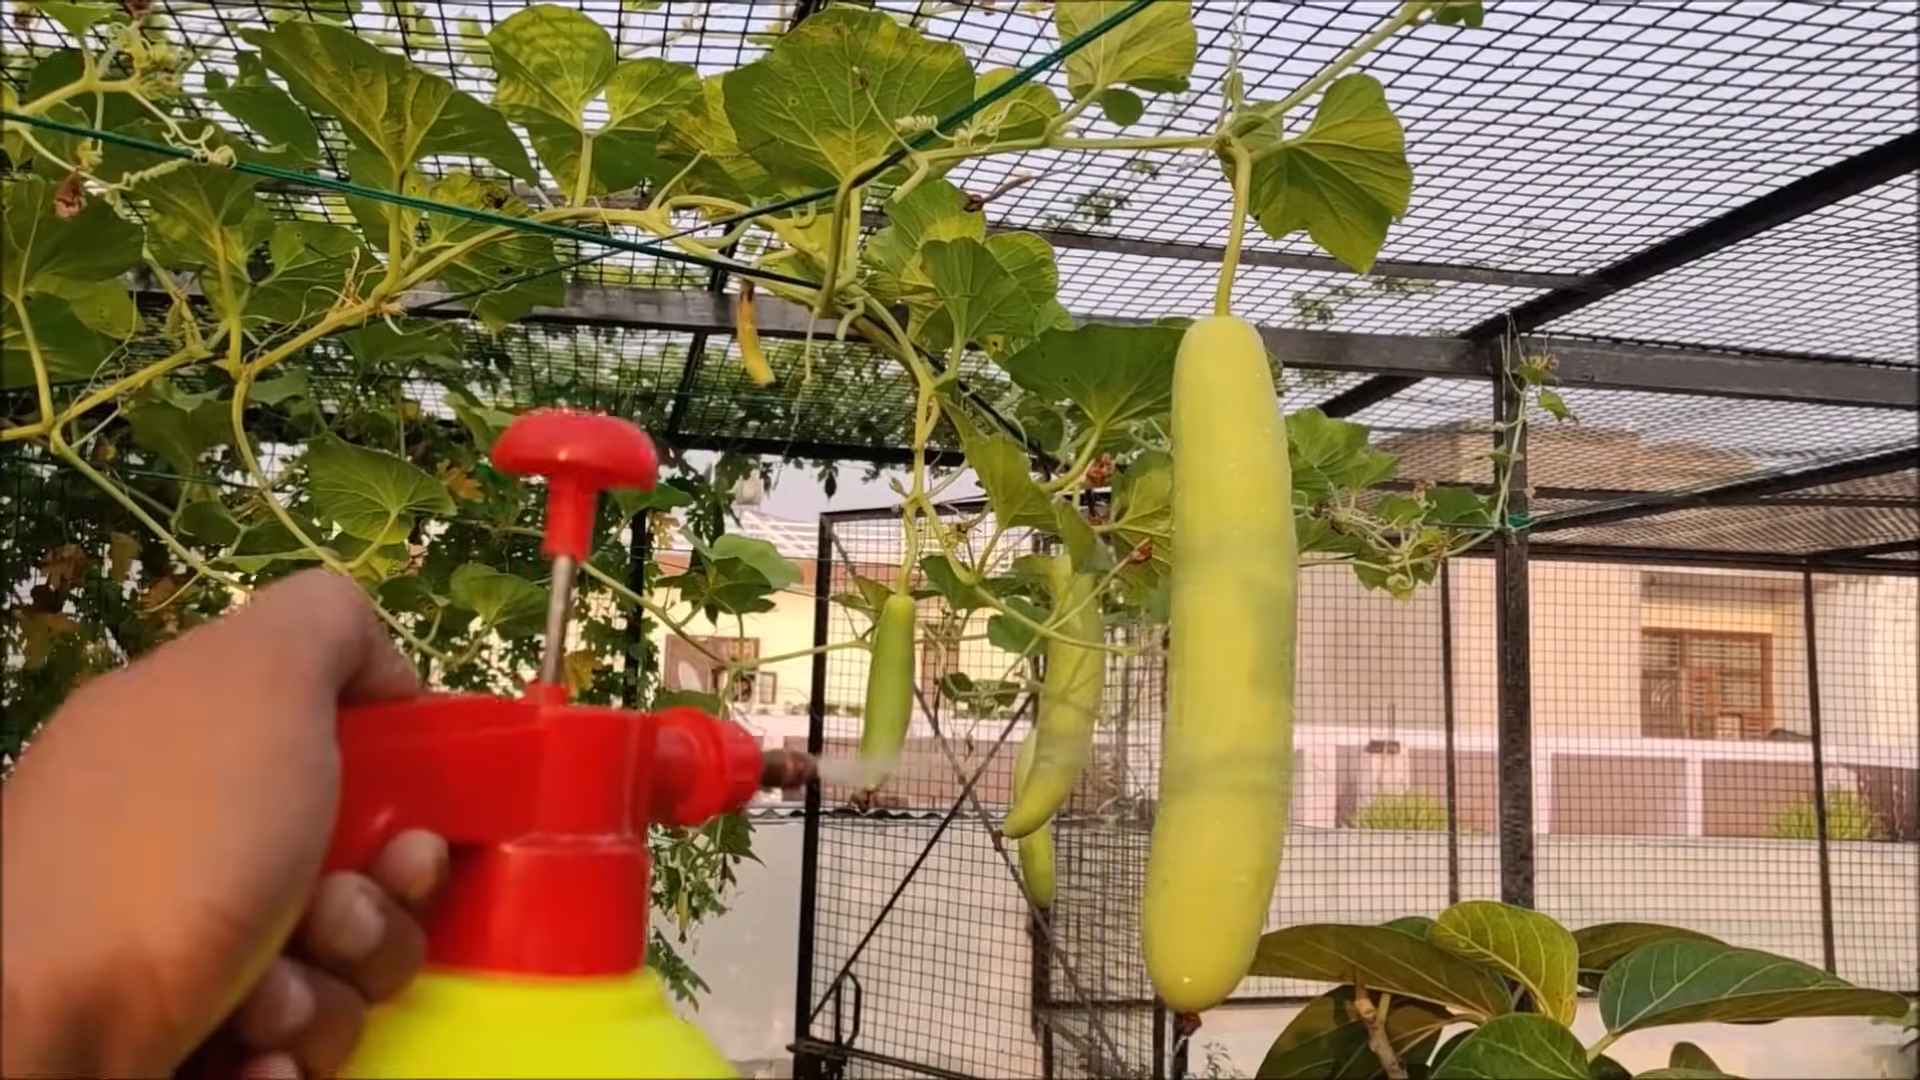
3. Providing Support: Gourds are vining plants and need support to climb. You can use a trellis, fence, or even a sturdy pergola. The support should be strong enough to hold the weight of the mature gourds. I’ve found that a strong trellis works best for birdhouse gourds.
4. Spacing: Give your gourds plenty of space to grow. Birdhouse gourds, for example, can easily spread 10-15 feet. Check the seed packet for specific spacing recommendations for your chosen variety.
Caring for Your Growing Gourds
Once your gourds are planted, it’s important to provide them with the care they need to flourish.
1. Watering: Water your gourds regularly, especially during dry periods. Aim to keep the soil consistently moist but not waterlogged. Water deeply at the base of the plants to avoid wetting the foliage, which can lead to fungal diseases.
2. Fertilizing: Feed your gourds with a balanced fertilizer every few weeks during the growing season. You can also side-dress them with compost or well-rotted manure. I like to use a fertilizer that’s high in phosphorus to encourage fruit production.
3. Pruning: Pruning can help improve air circulation and encourage larger gourds. Remove any dead or yellowing leaves. You can also prune the vines to control their growth and direct their energy towards fruit production.
4. Pest and Disease Control: Keep an eye out for common gourd pests like squash bugs, squash vine borers, and cucumber beetles. Handpick pests whenever possible. You can also use insecticidal soap or neem oil to control infestations. Powdery mildew is a common fungal disease that can affect gourds. Improve air circulation by pruning and avoid overhead watering. You can also use a fungicide if necessary.
Harvesting Your Gourds
Knowing when to harvest your gourds is crucial for successful curing.
1. Determining Maturity: Gourds are typically ready to harvest when the stems begin to dry and turn brown. The gourd itself should feel hard and lightweight. You can also gently tap the gourd; a mature gourd will sound hollow.
2. Harvesting Technique: Use a sharp knife or pruning shears to cut the gourd from the vine, leaving a few inches of stem attached. This helps prevent rot during the curing process.
3. Handling with Care: Handle your gourds carefully to avoid bruising or damaging the skin. Bruises can lead to rot during curing.
The Curing Process: The Key to Long-Lasting Gourds
Curing is essential for drying out the gourds and preventing them from rotting. This process can take several weeks or even months, depending on the size and variety of the gourd.
1. Cleaning the Gourds: Gently wash the gourds with mild soap and water to remove any dirt or debris.
2. Drying Location: Choose a well-ventilated, dry, and dark location for curing. A shed, garage, or attic works well. Avoid direct sunlight, which can cause the gourds to crack.
3. Arranging the Gourds: Place the gourds on a wire rack or pallets to allow for good air circulation. Make sure the gourds are not touching each other.
4. Monitoring the Gourds: Check the gourds regularly for signs of rot or mold. If you find any, remove the affected gourd immediately to prevent the spread of disease.
5. Patience is Key: The curing process can take several weeks or even months. Be patient and allow the gourds to dry completely. You’ll know they’re ready when they feel lightweight and the seeds rattle inside.
Cleaning and Preparing Cured Gourds
Once your gourds are fully cured, it’s time to clean them and prepare them for crafting.
1. Removing the Outer Skin: The outer skin of the gourd will likely be covered in mold and dirt. You can remove this by scrubbing the gourd with a stiff brush and soapy water. You can also use a scouring pad or steel wool for stubborn areas.
2. Bleaching (Optional): To further clean and disinfect the gourd, you can soak it in a diluted bleach solution (1 part bleach to 10 parts water) for a few hours. Rinse thoroughly with clean water after soaking.
3. Drying Again: Allow the cleaned gourds to dry completely before crafting.
4. Cutting and Shaping: Now you can cut and shape your gourds according to your desired project. Use a saw, drill, or other appropriate tools.
5. Sealing (Optional): To protect your finished gourd crafts, you can seal them with a varnish, polyurethane, or other sealant. This will help prevent moisture damage and prolong their lifespan.
Troubleshooting Common Gourd-Growing Problems
Even with the best care, you may encounter some challenges when growing gourds. Here are some common problems and how to address them:
* Poor Germination: Make sure your seeds are fresh and viable. Soak them in warm water before planting to improve germination rates.
* Slow Growth: Gourds need plenty of sunlight, water, and nutrients to thrive. Make sure they are getting enough of each.
* Pest Infestations: Regularly inspect your plants for pests and take action
Conclusion
So, there you have it! Growing gourds at home isn’t just a fun gardening project; it’s a gateway to creativity, sustainability, and a deeper connection with nature. From the satisfaction of nurturing a tiny seed into a sprawling vine laden with unique shapes and sizes, to the joy of transforming those gourds into beautiful, functional art, the entire process is incredibly rewarding.
But why is this DIY trick a must-try? Because it empowers you to control every aspect of the process, from seed selection to the final decorative touches. You’re not limited to what you can find in stores; you can cultivate specific varieties for specific purposes, ensuring you have the perfect gourd for that birdhouse, bowl, or whimsical sculpture you’ve been dreaming of. Plus, you’re reducing your environmental impact by growing your own materials and avoiding mass-produced alternatives.
Beyond the basic techniques we’ve covered, there’s a whole world of gourd-growing variations to explore. Consider experimenting with different training methods to shape your gourds as they grow. You can use trellises, fences, or even strategically placed weights to influence their form. Try growing gourds of different shapes and sizes together to create a diverse harvest.
Another exciting variation is to explore different curing and decorating techniques. While we’ve focused on the traditional drying method, you can also experiment with kiln drying for faster results. When it comes to decorating, the possibilities are endless. From painting and carving to wood burning and decoupage, let your imagination run wild. You can even incorporate natural elements like leaves, twigs, and seeds into your designs.
Don’t be afraid to experiment with different soil amendments and fertilizers to see what works best for your gourds. Some gardeners swear by adding compost tea or bone meal to boost growth and fruit production. Others prefer to use organic fertilizers specifically formulated for fruiting vegetables.
Ultimately, the best way to learn is by doing. So, grab some seeds, prepare your garden, and embark on your own gourd-growing adventure. We’re confident that you’ll be amazed by the results.
We encourage you to dive in and experience the magic of growing gourds at home. It’s a project that offers something for everyone, regardless of your gardening experience. And most importantly, don’t forget to share your experiences with us! We’d love to see your photos, hear your tips, and learn from your successes (and even your failures). Post your gourd-growing journey on social media using #HomeGrownGourds or leave a comment below. Let’s build a community of gourd enthusiasts and inspire others to discover the joy of this unique and rewarding hobby. Happy growing!
Frequently Asked Questions (FAQ)
What is the best time of year to plant gourd seeds?
Gourds are warm-weather crops, so it’s crucial to wait until the danger of frost has passed and the soil has warmed up to at least 65°F (18°C). In most regions, this means planting in late spring or early summer, typically from May to June. Check your local planting calendar for specific dates based on your climate. Starting seeds indoors 4-6 weeks before the last expected frost can give you a head start.
How much space do gourds need to grow?
Gourds are vigorous vines that require ample space to spread. Allow at least 6-8 feet between plants in rows that are 8-10 feet apart. If you’re growing gourds on a trellis, you can space them closer together, but make sure the trellis is sturdy enough to support the weight of the mature vines and gourds. Consider the mature size of the specific gourd variety you’re growing, as some can be significantly larger than others.
What kind of soil is best for growing gourds?
Gourds thrive in well-drained, fertile soil that is rich in organic matter. Amend your soil with compost, aged manure, or other organic materials before planting to improve drainage, fertility, and water retention. A slightly acidic to neutral soil pH (6.0-7.0) is ideal. Conduct a soil test to determine your soil’s pH and nutrient levels, and adjust accordingly.
How often should I water my gourd plants?
Gourds need consistent moisture, especially during hot, dry weather. Water deeply and regularly, aiming to keep the soil consistently moist but not waterlogged. Avoid overhead watering, as this can promote fungal diseases. Drip irrigation or soaker hoses are excellent options for delivering water directly to the roots. Mulching around the plants can help retain moisture and suppress weeds.
How do I prevent pests and diseases from affecting my gourds?
Regularly inspect your gourd plants for signs of pests and diseases. Common pests include squash bugs, squash vine borers, and aphids. Use organic pest control methods such as handpicking, insecticidal soap, or neem oil to manage infestations. To prevent diseases, ensure good air circulation, avoid overhead watering, and practice crop rotation. Consider using disease-resistant gourd varieties.
When are gourds ready to harvest?
Gourds are typically ready to harvest in the fall, after the vines have died back and the gourds have fully matured. The skin of the gourd should be hard and dry to the touch, and the stem should be brown and dry. Leave a few inches of stem attached when harvesting to prevent rot. Gently handle the gourds to avoid bruising or damaging the skin.
How do I cure gourds after harvesting?
Curing is essential for preserving gourds and preventing them from rotting. Clean the gourds with a mild soap and water solution, and then dry them thoroughly. Place the gourds in a well-ventilated, dry, and dark location, such as a shed or garage. Avoid stacking the gourds on top of each other, as this can restrict airflow. Turn the gourds regularly to ensure even drying. The curing process can take several weeks to several months, depending on the size and thickness of the gourds. You’ll know the gourds are fully cured when they are lightweight and the seeds rattle inside.
Can I eat gourds?
While some gourds are edible when young and tender, most ornamental gourds are not suitable for consumption. Edible gourds, such as spaghetti squash and butternut squash, are typically harvested before they fully mature. Ornamental gourds, on the other hand, are often bitter and can contain toxins. It’s important to identify the specific type of gourd you’re growing before attempting to eat it. When in doubt, it’s best to err on the side of caution and avoid consuming ornamental gourds.
How can I decorate my gourds?
The possibilities for decorating gourds are endless! Once your gourds are fully cured, you can paint them with acrylic paints, carve them with wood carving tools, burn designs into them with a wood burning tool, or decoupage them with paper or fabric. You can also add natural elements like leaves, twigs, and seeds to your designs. Seal your finished gourds with a clear varnish or sealant to protect them from moisture and UV damage.
Where can I find gourd seeds?
Gourd seeds are widely available online and at garden centers. Look for reputable seed suppliers that offer a wide variety of gourd types. You can also save seeds from your own gourds to plant the following year. To save seeds, allow the gourds to fully mature and dry on the vine. Then, carefully remove the seeds and dry them thoroughly before storing them in an airtight container in a cool, dry place.

Leave a Comment