
Growing green onions from bottles? Yes, you read that right! Forget those expensive grocery store runs for a handful of scallions that wilt before you can even use them. I’m about to share a super simple, incredibly rewarding DIY trick that will have you harvesting fresh green onions right from your kitchen windowsill.
For centuries, resourceful gardeners have sought ways to maximize their yields and minimize waste. While the exact origins of regrowing vegetables are hard to pinpoint, the practice speaks to a deep-seated human desire for self-sufficiency and connection to nature. Think about it – our grandparents and great-grandparents often relied on these kinds of clever techniques to stretch their resources, especially during times of scarcity. Now, we can tap into that same ingenuity!
In today’s world, where sustainability and reducing our carbon footprint are more important than ever, this DIY hack is a game-changer. Not only will you save money, but you’ll also reduce food waste by regrowing those green onion scraps that would normally end up in the compost bin. Plus, let’s be honest, there’s something incredibly satisfying about nurturing new life from something you thought was destined for the trash. So, are you ready to learn how easy it is to start growing green onions from bottles and enjoy a constant supply of fresh, flavorful scallions? Let’s get started!
Grow Green Onions Indoors From Plastic Bottles: A Simple DIY Guide
Hey there, fellow plant enthusiasts! Are you tired of running to the grocery store every time you need a few green onions? Well, I’ve got a super easy and rewarding DIY project for you: growing green onions indoors from recycled plastic bottles! It’s a fantastic way to reduce waste, have fresh herbs on hand, and add a touch of green to your kitchen. Trust me, it’s so simple, even I can do it!
What You’ll Need
Before we dive in, let’s gather our supplies. This is a pretty low-cost project, which is always a win in my book!
* Plastic Bottles: Any size will do, but I prefer using 2-liter soda bottles or larger water bottles. The more, the merrier – you can create a whole green onion garden!
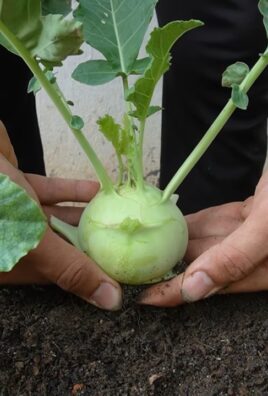
* Green Onions: The stars of the show! You’ll need green onions with the roots still attached. You can buy a bunch from the store or use the leftover ends from your cooking.
* Potting Mix: A good quality potting mix is essential for healthy growth.
* Scissors or a Utility Knife: For cutting the plastic bottles. Be careful!
* Water: To keep your green onions hydrated.
* Optional:
* Drill or nail for drainage holes.
* Spray paint or decorative materials to personalize your planters.
* Small pebbles or gravel for drainage.
Preparing the Plastic Bottle Planters
Okay, let’s get our hands dirty (well, not yet, but soon!). This part involves transforming those plastic bottles into cozy homes for our green onions.
1. Clean the Bottles: First things first, give those plastic bottles a good wash with soap and water. Remove any labels and sticky residue. A clean bottle is a happy bottle!
2. Cut the Bottles: Now comes the cutting part. There are a few ways you can do this, depending on the look you’re going for:
* Option 1: Single Planter: Cut the bottle in half horizontally. You’ll be using the bottom half as your planter. The top half can be discarded or used for another project.
* Option 2: Stacked Planter: Cut several bottles in half. Then, cut a hole in the cap of each bottle (except the bottom one). This allows you to stack the bottles on top of each other, creating a vertical garden. This is a great space-saving option!
* Option 3: Side-by-Side Planter: Cut rectangular openings on the side of the bottle, leaving the top and bottom intact. This creates a trough-like planter where you can plant multiple green onions side by side.
Important Safety Tip: Always be careful when using scissors or a utility knife. Use a cutting board or a stable surface, and cut away from yourself.
3. Add Drainage Holes (Optional but Recommended): This is crucial for preventing waterlogging, which can lead to root rot. If you’re using the bottom half of the bottle as a planter, drill or poke a few small holes in the bottom. If you’re using the stacked planter method, make sure each bottle (except the bottom one) has drainage holes.
4. Decorate (Optional): This is where you can get creative! You can spray paint the bottles in your favorite colors, add decorative tape, or even draw designs on them with permanent markers. Make them your own! I personally love using chalkboard paint so I can label each planter.
Planting the Green Onions
Alright, our planters are ready, and it’s time to plant those green onions! This is the fun part!
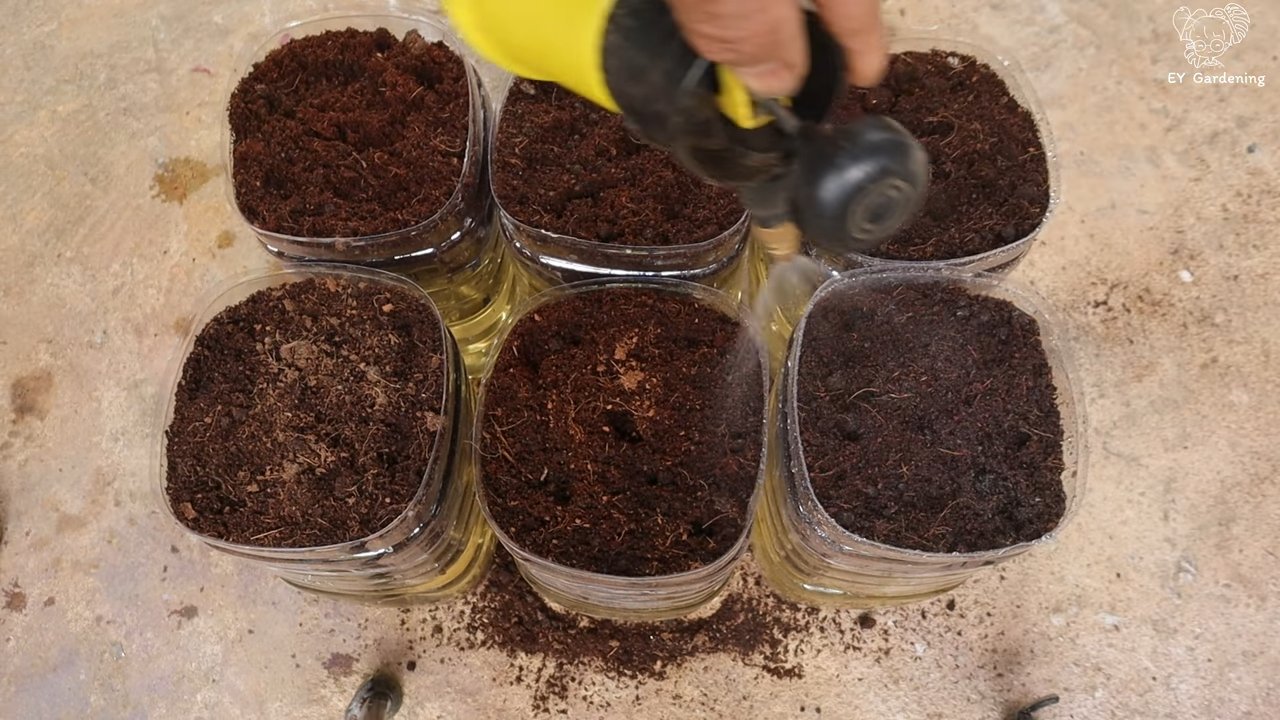
1. Add Drainage Layer (Optional): If you want to be extra cautious about drainage, add a layer of small pebbles or gravel to the bottom of the planter. This will help prevent the potting mix from clogging the drainage holes.
2. Fill with Potting Mix: Now, fill the planter with potting mix, leaving about an inch of space at the top. Gently pat the soil down to remove any air pockets.
3. Plant the Green Onion Ends: Take your green onion ends (the part with the roots) and plant them about an inch deep in the potting mix. Make sure the roots are facing down. If you’re planting multiple green onions in the same planter, space them about an inch apart.
4. Water Thoroughly: After planting, water the green onions thoroughly until the water drains out of the drainage holes. This will help settle the soil and encourage root growth.
Caring for Your Green Onions
Now that your green onions are planted, it’s time to give them some TLC! Don’t worry, they’re pretty low-maintenance.
1. Location: Place your green onion planters in a sunny location, such as a windowsill or under a grow light. Green onions need at least 6 hours of sunlight per day to thrive.
2. Watering: Keep the potting mix consistently moist, but not soggy. Water when the top inch of soil feels dry to the touch. Be careful not to overwater, as this can lead to root rot.
3. Fertilizing (Optional): You can fertilize your green onions every few weeks with a diluted liquid fertilizer. This will help them grow faster and produce more flavorful leaves. I usually use a balanced fertilizer diluted to half strength.
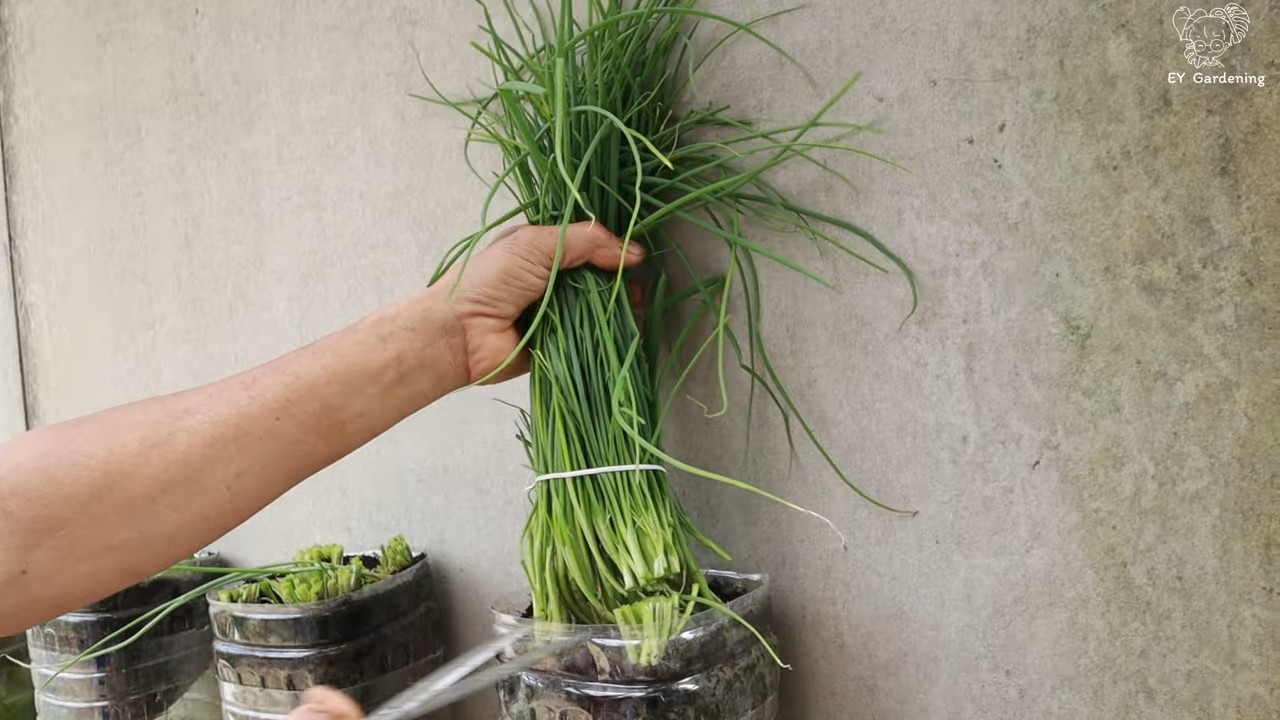
4. Harvesting: The best part! You can start harvesting your green onions when they are about 6-8 inches tall. Simply snip off the green leaves with scissors, leaving about an inch of the white base intact. The green onions will continue to grow, so you can harvest them multiple times.
5. Replanting: After a few harvests, the green onions may start to lose their vigor. When this happens, you can simply replant them with fresh potting mix. Or, you can start with new green onion ends.
Troubleshooting
Even with the best care, you might encounter a few problems along the way. Here are some common issues and how to fix them:
* Yellowing Leaves: This could be a sign of overwatering, underwatering, or nutrient deficiency. Check the soil moisture and adjust your watering accordingly. If the soil is dry, water more frequently. If the soil is soggy, water less frequently. You can also try fertilizing with a diluted liquid fertilizer.
* Slow Growth: This could be due to insufficient sunlight or nutrient deficiency. Make sure your green onions are getting enough sunlight and fertilize them regularly.
* Root Rot: This is caused by overwatering and poor drainage. Make sure your planters have drainage holes and avoid overwatering. If you suspect root rot, you can try transplanting the green onions into fresh potting mix.
* Pests: Green onions are generally pest-resistant, but they can occasionally be attacked by aphids or other small insects. If you notice any pests, you can try spraying them with insecticidal soap or neem oil.
Tips and Tricks for Success
Here are a few extra tips to help you grow the best green onions ever:
* Rotate Your Planters: To ensure even growth, rotate your planters regularly so that all sides get equal sunlight.
* Use Filtered Water: Tap water can sometimes contain chlorine or other chemicals that can harm your plants. Use filtered water or let tap water sit out for 24 hours before using it to water your green onions.
* Experiment with Different Varieties: There are many different varieties of green onions, each with its own unique flavor and texture. Try experimenting with different varieties to find your favorites.
* Get the Kids Involved: This is a great project to do with kids! They’ll love planting and caring for their own green onions.
Why I Love This DIY Project
I absolutely love this DIY project because it’s:
* Eco-Friendly: It’s a great way to recycle plastic bottles and reduce waste.
* Budget-Friendly: It’s a very inexpensive project, especially if you already have some of the supplies on hand.
* Easy: It’s so simple, anyone can do it!
* Rewarding: It’s so satisfying to harvest your own fresh green onions.
* Space-Saving: It’s perfect for small spaces, like apartments or condos.
So, what are you waiting for? Gather your supplies and start growing your own green onions today! You’ll be amazed at how easy and rewarding it is. Happy gardening!
Conclusion
So, there you have it! Transforming humble green onion scraps into a thriving, continuous supply of fresh flavor is not only incredibly easy but also deeply satisfying. This simple DIY trick, growing green onions from bottles, is a game-changer for any home cook, urban gardener, or anyone looking to reduce food waste and save money. Forget constantly buying bunches of green onions that wilt away in your refrigerator. With this method, you’ll have a readily available source of vibrant, flavorful green onions right at your fingertips.
Why is this a must-try? Because it’s sustainable, cost-effective, and ridiculously simple. You’re essentially recycling food scraps, minimizing trips to the grocery store, and enjoying the freshest possible ingredients. Plus, it’s a fantastic project for kids, teaching them about plant growth and the importance of reducing waste.
But the fun doesn’t stop there! Feel free to experiment with different types of containers. While plastic bottles are readily available and work perfectly, you could also use glass jars, repurposed yogurt containers, or even decorative planters for a more aesthetically pleasing display. Consider using different types of water – rainwater, filtered water, or even water from your aquarium (a natural fertilizer boost!) can all be tested to see which yields the best results.
Another variation to explore is the growing medium. While water alone works wonders, you can add a small amount of diluted liquid fertilizer to the water every few weeks to provide extra nutrients and encourage even faster growth. Just be careful not to over-fertilize, as this can harm the green onions. You can also try adding a thin layer of pebbles or gravel to the bottom of your container to help anchor the roots and prevent them from becoming waterlogged.
Don’t be afraid to get creative with your setup! You can group several bottles together to create a mini green onion garden, or even hang them from a sunny window for a vertical display. The possibilities are endless!
We wholeheartedly encourage you to give this DIY trick a try. It’s a small change that can make a big difference in your kitchen and your wallet. Once you experience the joy of harvesting your own fresh green onions, you’ll never look at those leftover scraps the same way again.
And most importantly, we want to hear about your experience! Share your photos, tips, and variations in the comments below. Let us know what worked for you, what challenges you faced, and any creative solutions you came up with. Together, we can build a community of green onion growers and inspire others to embrace this simple and sustainable practice. Happy growing!
Frequently Asked Questions (FAQ)
How long does it take for green onions to regrow using this method?
Typically, you’ll start to see noticeable regrowth within a few days. Within a week or two, you should have enough green onions to harvest. The speed of growth depends on factors like sunlight, water quality, and temperature. Warmer temperatures and plenty of sunlight will generally result in faster growth.
What part of the green onion do I need to start the regrowth process?
You need the bottom portion of the green onion, including the roots (or the very bottom where the roots used to be). Cut off the green tops, leaving about 2-3 inches of the white base intact. This base contains the dormant buds that will sprout new growth.
What kind of water is best for regrowing green onions?
Tap water is generally fine, but filtered water or rainwater is even better. Avoid using water that is heavily chlorinated or contains a lot of minerals, as this can inhibit growth. Change the water every few days to prevent it from becoming cloudy or stagnant.
How much sunlight do green onions need to regrow?
Green onions thrive in bright, indirect sunlight. A spot near a sunny window is ideal. Avoid placing them in direct sunlight, especially during the hottest part of the day, as this can scorch the leaves. If you don’t have a sunny window, you can use a grow light to supplement the natural light.
Can I use any type of container to regrow green onions?
Yes, you can use a variety of containers, including plastic bottles, glass jars, yogurt containers, or even decorative planters. The key is to choose a container that is clean and has a wide enough opening to accommodate the green onion base. Make sure the container is stable and won’t tip over easily.
How often should I change the water?
Change the water every 1-2 days to prevent bacterial growth and keep the water fresh. This will also help to provide the green onions with a clean source of nutrients.
Do I need to add fertilizer to the water?
While not essential, adding a small amount of diluted liquid fertilizer every few weeks can help to boost growth. Use a balanced fertilizer diluted to half strength. Be careful not to over-fertilize, as this can damage the green onions.
How long can I keep regrowing green onions from the same base?
You can typically regrow green onions from the same base for several harvests. However, the growth will eventually slow down, and the green onions may become less flavorful. When this happens, it’s time to start with a new green onion base.
Can I plant the regrown green onions in soil?
Yes, you can definitely plant the regrown green onions in soil. Once the roots have grown a few inches long, you can transplant them to a pot or garden bed. Choose a well-draining soil and water regularly. Planting in soil will allow the green onions to grow larger and produce more flavorful greens.
What if my green onions start to turn yellow or brown?
Yellowing or browning leaves can be a sign of several issues, including overwatering, underwatering, lack of sunlight, or nutrient deficiency. Check the water level and make sure the green onions are getting enough sunlight. If the problem persists, try adding a small amount of diluted fertilizer to the water. If the base of the green onion is mushy or rotten, it’s likely that it’s been overwatered and you’ll need to start with a new base.
Is it safe to eat the regrown green onions?
Yes, it is perfectly safe to eat the regrown green onions, as long as they are healthy and free from mold or rot. Wash them thoroughly before using them in your cooking.
Can I grow other vegetables using this method?
While this method is particularly well-suited for green onions, you can also try it with other vegetables like celery, lettuce, and bok choy. The success rate may vary depending on the vegetable, but it’s worth experimenting to see what works for you.
What are some creative ways to use my regrown green onions?
The possibilities are endless! Use them as a garnish for soups, salads, and stir-fries. Add them to omelets, tacos, and dips. Use them to flavor sauces, marinades, and dressings. You can even use them to make green onion pancakes or scallion oil.
How does growing green onions from bottles help the environment?
This method promotes sustainability by reducing food waste, minimizing trips to the grocery store, and conserving resources. By regrowing green onions from scraps, you’re preventing them from ending up in landfills, where they decompose and release harmful greenhouse gases. You’re also reducing the demand for commercially grown green onions, which often require pesticides, fertilizers, and long-distance transportation.
Leave a Comment