
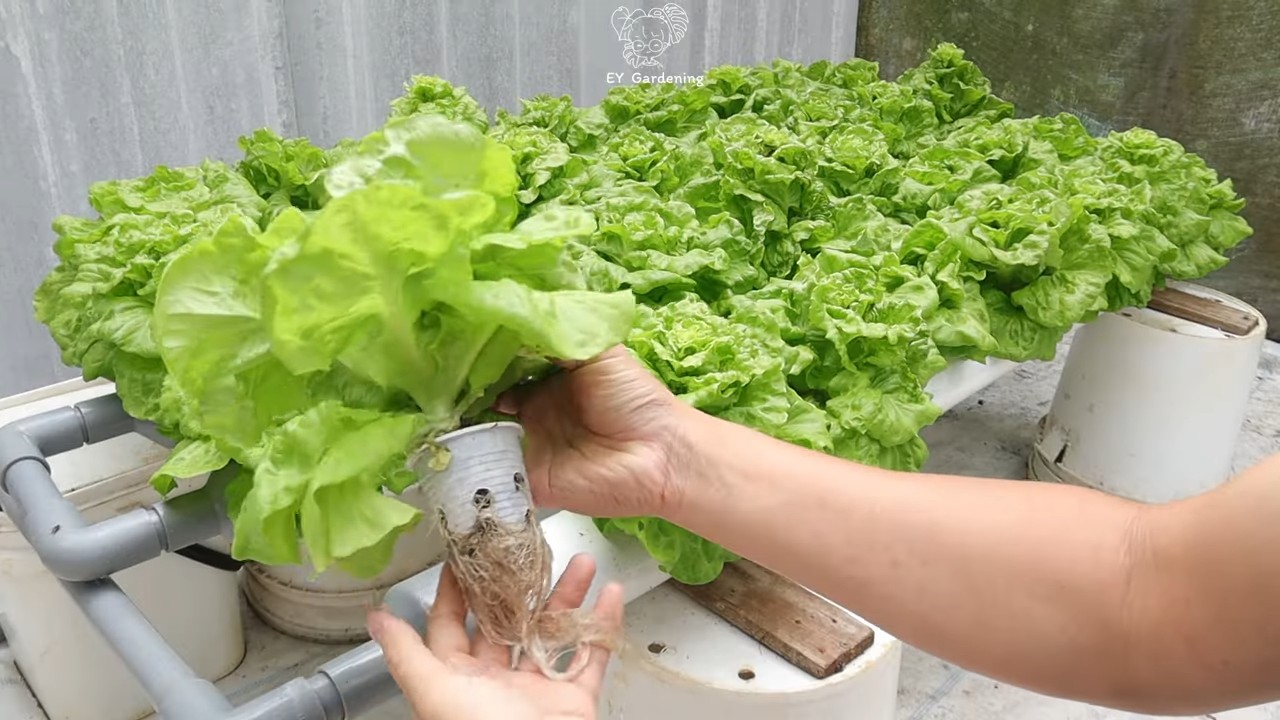
Growing lettuce in water? Sounds crazy, right? But trust me, it’s not only possible, it’s surprisingly easy and incredibly rewarding! Forget battling soil-borne pests and constant weeding; this simple DIY trick will have you enjoying fresh, crisp lettuce leaves right from your kitchen counter.
Hydroponics, the art of growing plants without soil, has been around for centuries. From the legendary Hanging Gardens of Babylon to ancient Aztec floating gardens, humans have long sought innovative ways to cultivate food. While those ancient methods were complex, this modern twist on hydroponics makes it accessible to everyone, regardless of gardening experience or space limitations.
In today’s busy world, finding time for traditional gardening can be a challenge. But who doesn’t love the idea of having fresh, organic produce readily available? That’s where growing lettuce in water comes in. This DIY hack is perfect for apartment dwellers, busy professionals, or anyone who wants to enjoy the taste of homegrown lettuce without the hassle of a full-fledged garden. I’m excited to share this simple method with you, so you can experience the joy of harvesting your own delicious lettuce, right from your kitchen!
Salat in Wasser ziehen: Ein DIY-Guide für Faule Gärtner wie mich!
Hey Leute! Habt ihr auch manchmal keine Lust, euch groß um einen Garten zu kümmern, wollt aber trotzdem frischen Salat? Dann habe ich hier den perfekten DIY-Hack für euch: Salat in Wasser ziehen! Ja, richtig gelesen. Kein Umtopfen, keine Erde, fast keine Arbeit. Klingt gut, oder? Ich zeige euch, wie es geht!
Was ihr braucht:
* Einen Salatstrunk (Romana, Eisbergsalat, Kopfsalat – eigentlich geht fast alles!)
* Ein Glas oder eine Schüssel
* Wasser (am besten gefiltert oder abgestanden)
* Einen sonnigen Platz (Fensterbank ist ideal)
* Geduld (aber nicht viel!)
Warum Salat in Wasser ziehen?
* Super einfach: Ehrlich, es ist wirklich kinderleicht.
* Platzsparend: Perfekt für kleine Wohnungen oder Balkone.
* Nachhaltig: Ihr rettet einen Salatstrunk vor dem Müll und bekommt frische Blätter.
* Schnell: Ihr seht schon nach wenigen Tagen erste Ergebnisse.
* Befriedigend: Es macht einfach Spaß, zu sehen, wie etwas Neues wächst!
Schritt-für-Schritt-Anleitung: So geht’s!
1. Salat vorbereiten: Nachdem ihr den Salat gegessen habt (oder auch, wenn er schon etwas welk ist – kein Problem!), schneidet den Strunk etwa 5-7 cm über der Wurzel ab. Achtet darauf, dass der Schnitt sauber ist. Entfernt die äußeren, welken Blätter, damit nur noch der feste Kern übrig bleibt.
2. Glas vorbereiten: Sucht euch ein passendes Glas oder eine Schüssel. Es sollte so groß sein, dass der Salatstrunk gut hineinpasst und nicht umkippt.
3. Wasser einfüllen: Füllt das Glas mit Wasser. Wichtig: Das Wasser sollte den Strunk nur etwa 2-3 cm bedecken. Wenn zu viel Wasser da ist, fault er leicht.
4. Salat einsetzen: Setzt den Salatstrunk mit der Schnittfläche nach unten in das Wasser. Achtet darauf, dass er stabil steht.
5. Platzieren: Stellt das Glas an einen hellen, sonnigen Platz. Eine Fensterbank ist ideal, aber auch ein anderer heller Ort im Zimmer funktioniert. Direkte Mittagssonne kann aber zu stark sein, also achtet darauf.
6. Wasser wechseln: Wechselt das Wasser alle 1-2 Tage. Das ist wichtig, damit sich keine Bakterien bilden und der Salat gesund bleibt. Achtet darauf, dass der Wasserstand immer gleich bleibt.
7. Beobachten und freuen: Jetzt heißt es warten und beobachten! Schon nach wenigen Tagen solltet ihr sehen, wie kleine, neue Blätter aus dem Strunk sprießen.
Pflege-Tipps für glückliche Salatstrünke
* Licht: Salat liebt Licht! Je mehr Licht er bekommt, desto schneller wächst er.
* Wasserqualität: Ich verwende am liebsten gefiltertes Wasser oder abgestandenes Leitungswasser. Das ist schonender für den Salat.
* Temperatur: Zimmertemperatur ist ideal. Vermeidet extreme Hitze oder Kälte.
* Schimmel: Achtet auf Schimmelbildung am Strunk. Wenn ihr Schimmel entdeckt, entfernt ihn vorsichtig und wechselt das Wasser sofort.
* Dünger: Normalerweise braucht der Salat keinen Dünger, da er sich aus den Reserven im Strunk ernährt. Wenn ihr aber das Gefühl habt, dass er nicht so gut wächst, könnt ihr ein paar Tropfen Flüssigdünger ins Wasser geben. Aber Vorsicht: Weniger ist mehr!
Ernten und Genießen
Nach etwa 1-2 Wochen könnt ihr die ersten Blätter ernten. Schneidet sie einfach mit einer Schere ab. Lasst aber immer ein paar Blätter am Strunk, damit er weiterwachsen kann. Ihr könnt den Salatstrunk so lange ernten, bis er keine neuen Blätter mehr produziert. Dann ist er erschöpft und kann kompostiert werden.
Häufige Probleme und Lösungen
* Der Strunk fault: Das passiert meistens, wenn zu viel Wasser im Glas ist oder das Wasser nicht regelmäßig gewechselt wird. Schneidet die faulen Stellen ab, wechselt das Wasser und achtet darauf, dass der Strunk nicht zu tief im Wasser steht.
* Der Salat wächst nicht: Das kann verschiedene Ursachen haben. Vielleicht bekommt er nicht genug Licht, das Wasser ist nicht sauber genug oder der Strunk ist einfach schon zu alt. Probiert es mit einem frischen Strunk und achtet auf die oben genannten Tipps.
* Die Blätter sind gelb: Das deutet meistens auf einen Nährstoffmangel hin. Gebt ein paar Tropfen Flüssigdünger ins Wasser.
Noch ein paar Extra-Tipps von mir:
* Verschiedene Salatsorten: Probiert verschiedene Salatsorten aus! Ich habe gute Erfahrungen mit Romana, Eisbergsalat und Kopfsalat gemacht.
* Kreative Gefäße: Ihr könnt auch andere Gefäße als Gläser oder Schüsseln verwenden. Alte Marmeladengläser, Tassen oder sogar kleine Vasen sehen toll aus!
* Mehrere Salate gleichzeitig: Wenn ihr genug Platz habt, könnt ihr auch mehrere Salatstrünke gleichzeitig in Wasser ziehen. So habt ihr immer frischen Salat zur Hand.
* Kinder mit einbeziehen: Das ist eine tolle Aktivität für Kinder! Sie können den Salat beim Wachsen beobachten und lernen, wo ihr Essen herkommt.
Salat aus Samen ziehen (Optional, für die Ungeduldigen)
Okay, ich weiß, manchmal will man einfach *sofort* Salat haben. Wenn ihr also nicht auf einen Salatstrunk warten wollt, könnt ihr auch versuchen, Salat aus Samen in Wasser zu ziehen. Das ist etwas aufwendiger, aber es geht!
1. Samen vorbereiten: Ihr braucht Salatsamen eurer Lieblingssorte. Weicht die Samen für etwa 24 Stunden in Wasser ein. Das hilft ihnen, schneller zu keimen.
2. Keimschale vorbereiten: Ihr könnt eine spezielle Keimschale kaufen oder einfach eine flache Schale mit Küchenpapier auslegen. Befeuchtet das Küchenpapier gut.
3. Samen aussäen: Verteilt die eingeweichten Samen gleichmäßig auf dem feuchten Küchenpapier. Achtet darauf, dass sie nicht zu dicht liegen.
4. Abdecken: Deckt die Schale mit Frischhaltefolie oder einem Deckel ab. Das sorgt für ein feuchtes Klima, das die Keimung fördert.
5. Platzieren: Stellt die Schale an einen warmen, hellen Ort, aber nicht in die direkte Sonne.
6. Feuchtigkeit kontrollieren: Kontrolliert regelmäßig die Feuchtigkeit des Küchenpapiers. Es sollte immer feucht, aber nicht nass sein.
7. Warten: Nach ein paar Tagen sollten die Samen keimen. Sobald die Keimlinge kleine Wurzeln und Blätter haben, könnt ihr sie vorsichtig in Wasser umsetzen.
8. Umsetzen in Wasser: Füllt ein Glas oder eine Schüssel mit Wasser (wie oben beschrieben) und setzt die Keimlinge vorsichtig hinein. Achtet darauf, dass die Wurzeln im Wasser sind, aber die Blätter nicht.
9. Pflegen: Pflegt die Keimlinge wie oben beschrieben. Wechselt das Wasser regelmäßig und stellt sie an einen hellen Ort.
Salat in Hydrokultur (Für die Profis)
Wenn ihr das Salatziehen in Wasser richtig professionell betreiben wollt, könnt ihr euch mit dem Thema Hydrokultur beschäftigen. Das ist eine Methode, bei der Pflanzen ohne Erde in einer Nährlösung gezogen werden.
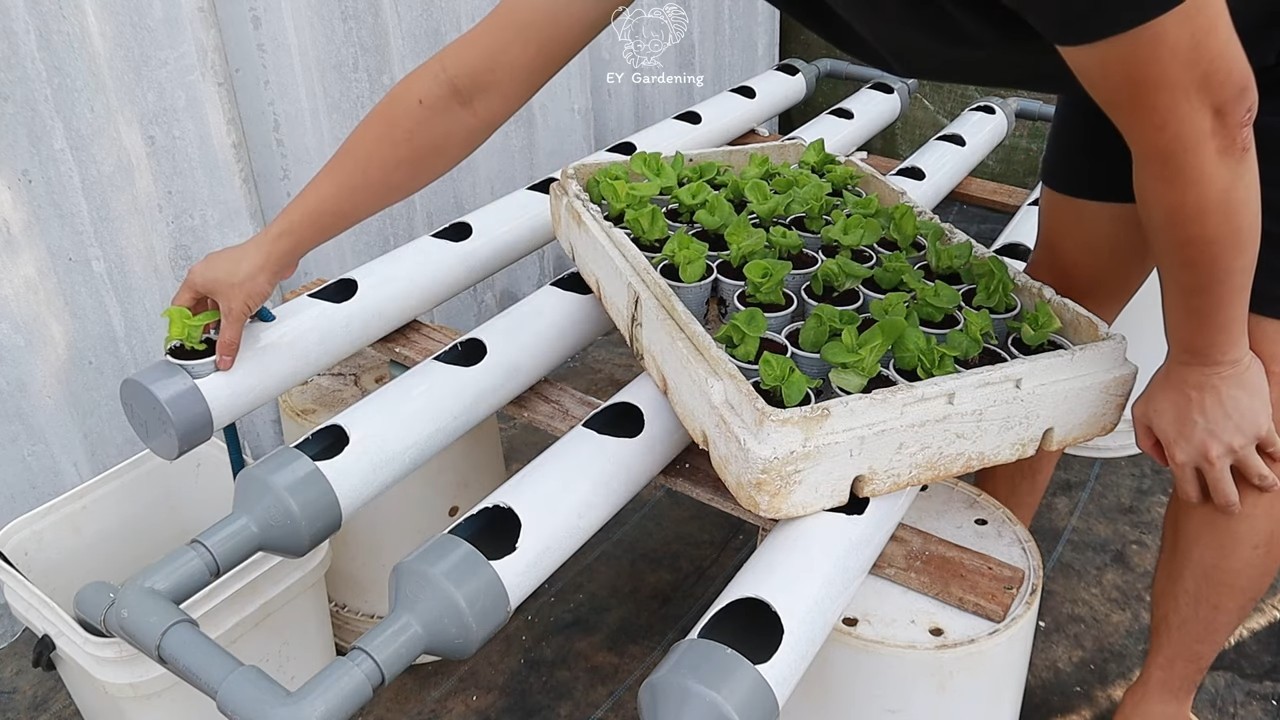
1. Hydrokultur-System: Es gibt verschiedene Hydrokultur-Systeme, die ihr kaufen oder selber bauen könnt. Ein einfaches System besteht aus einem Behälter mit einer Nährlösung und einem Netztopf, in dem die Pflanze sitzt.
2. Nährlösung: Ihr braucht eine spezielle Nährlösung für Hydrokultur. Diese enthält alle wichtigen Nährstoffe, die die Pflanze zum Wachsen braucht.
3. Pflanzen: Ihr könnt Salat aus Samen oder Stecklingen in Hydrokultur ziehen.
4. Pflege: Die Pflege ist ähnlich wie beim Salatziehen in Wasser. Ihr müsst die Nährlösung regelmäßig wechseln und den pH-Wert kontrollieren.
Hydrokultur ist etwas aufwendiger, aber ihr könnt damit noch bessere Ergebnisse erzielen und größere Mengen Salat produzieren.
So, das war’s
Conclusion
So, there you have it! Growing lettuce in water isn’t just a quirky experiment; it’s a genuinely effective way to extend the life of your lettuce, reduce food waste, and even enjoy a continuous supply of fresh greens right from your kitchen counter. We’ve explored the simple steps, the necessary supplies, and the potential pitfalls, equipping you with everything you need to embark on this surprisingly rewarding journey.
Why is this DIY trick a must-try? Because it’s incredibly easy, cost-effective, and environmentally friendly. Think about it: no more slimy, wilted lettuce languishing in the crisper drawer. No more last-minute grocery runs for a handful of greens. Instead, you’ll have a vibrant, living salad bar right at your fingertips. Plus, it’s a fantastic conversation starter! Imagine the look on your friends’ faces when you tell them you’re growing lettuce in water.
But the benefits don’t stop there. This method is perfect for small spaces, making it ideal for apartment dwellers or anyone with limited gardening space. It’s also a great way to get kids involved in gardening and teach them about where their food comes from. They’ll love watching the lettuce regrow and helping to change the water.
Variations and Suggestions
Feeling adventurous? Try experimenting with different types of lettuce. Romaine, butter lettuce, and even some leafy green mixes can be successfully regrown in water. You can also add a diluted liquid fertilizer to the water every couple of weeks to give your lettuce a boost. Just be sure to use a fertilizer specifically designed for leafy greens and follow the instructions carefully.
Another fun variation is to use different containers. While a simple glass jar works perfectly well, you can also use repurposed plastic containers, ceramic bowls, or even decorative vases. Just make sure the container is clean and opaque to prevent algae growth.
Consider the lighting conditions in your home. While lettuce doesn’t need direct sunlight, it does need adequate light to thrive. If you don’t have a sunny windowsill, you can supplement with a grow light. This is especially helpful during the winter months when natural light is limited.
Ultimately, the key to success with growing lettuce in water is experimentation. Don’t be afraid to try different things and see what works best for you. Observe your lettuce closely and adjust your approach as needed.
We are confident that you’ll find this DIY trick to be a game-changer in your kitchen. It’s a simple, sustainable, and satisfying way to enjoy fresh lettuce whenever you want it. So, grab a head of lettuce, a jar of water, and get ready to experience the joy of regrowing your own greens.
We wholeheartedly encourage you to try this DIY trick and share your experience with us! Post photos of your regrowing lettuce on social media using [Your Hashtag Here] and let us know how it’s going. We can’t wait to see your success stories and learn from your experiences. Together, we can reduce food waste and enjoy a more sustainable way of eating. Let’s all start **growing lettuce in water** today!
Frequently Asked Questions (FAQ)
1. What kind of lettuce works best for regrowing in water?
While you can experiment with various types, romaine lettuce and butter lettuce tend to be the most successful for regrowing in water. These varieties have a tighter core that holds together well and readily sprouts new leaves. Leaf lettuce can also work, but the results may be less consistent. Avoid iceberg lettuce, as it doesn’t typically regrow well using this method. The key is to choose lettuce with a firm, intact base.
2. How much of the lettuce should I leave when I cut it?
Leave about 2-3 inches of the lettuce base intact when you cut off the leaves for consumption. This provides enough of a base for the lettuce to regrow. Make sure the cut is clean and even to prevent rotting. You want to see the cut end of the core, not just the outer leaves.
3. What kind of water should I use?
Tap water is generally fine, but it’s best to let it sit out for a few hours to allow any chlorine to dissipate. Filtered water is also a good option. Avoid using distilled water, as it lacks the minerals that the lettuce needs to grow. Change the water every 1-2 days to prevent bacterial growth and keep the lettuce healthy.
4. How much light does the lettuce need?
Lettuce needs bright, indirect sunlight to thrive. A windowsill that receives morning sun is ideal. Avoid placing the lettuce in direct sunlight, as this can scorch the leaves. If you don’t have a sunny windowsill, you can use a grow light to supplement the natural light. Position the grow light a few inches above the lettuce and keep it on for 12-14 hours per day.
5. How long does it take for the lettuce to regrow?
You should start to see new leaves sprouting within a few days to a week. The rate of growth will depend on the type of lettuce, the amount of light it receives, and the temperature. With proper care, you can harvest new leaves every few days.
6. Can I use fertilizer to help the lettuce grow?
Yes, you can add a diluted liquid fertilizer to the water every couple of weeks to give your lettuce a boost. Use a fertilizer specifically designed for leafy greens and follow the instructions carefully. Over-fertilizing can damage the lettuce, so it’s best to err on the side of caution. A balanced fertilizer with a ratio of 10-10-10 or similar is a good choice.
7. How long can I keep regrowing the lettuce?
You can typically regrow lettuce in water for several weeks, harvesting leaves as needed. However, the lettuce will eventually lose its vigor and stop producing new leaves. When this happens, it’s time to start with a new head of lettuce.
8. What if the lettuce starts to rot?
If you notice any signs of rotting, such as brown or slimy spots, remove the affected leaves immediately. Change the water more frequently and make sure the lettuce is not sitting in stagnant water. If the rotting persists, it’s best to discard the lettuce and start with a fresh one.
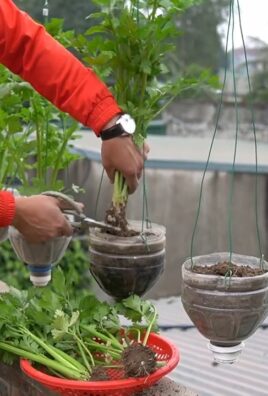
9. Can I transplant the regrown lettuce into soil?
Yes, you can transplant the regrown lettuce into soil if you want to continue growing it. Once the lettuce has developed a good root system, carefully remove it from the water and plant it in a pot or garden bed. Water it well and provide it with plenty of sunlight.
10. Is it safe to eat the regrown lettuce?
Yes, the regrown lettuce is safe to eat as long as you follow proper hygiene practices. Wash the lettuce thoroughly before eating it to remove any dirt or bacteria. If you have any concerns about the safety of the lettuce, it’s best to err on the side of caution and discard it. Always use clean water and containers to prevent contamination.

Leave a Comment