
Growing onions can feel like a real challenge, right? I know I’ve definitely had my fair share of onion-growing fails! But what if I told you there’s a unique method that could revolutionize your home garden and guarantee a bountiful harvest? Forget those tiny, sad-looking onions you’ve struggled with in the past. This DIY trick is about to change everything!
Onions have been cultivated for thousands of years, dating back to ancient Egypt, where they were even revered as symbols of eternity. From humble peasant fare to culinary masterpieces, onions have always held a vital place in our diets and cultures. But let’s be honest, buying them from the store can be expensive, and the flavor just isn’t the same as a homegrown onion bursting with freshness.
That’s where this DIY article comes in. We all want to save money, eat healthier, and enjoy the satisfaction of growing our own food. This unique method for growing onions is designed to be simple, effective, and accessible to everyone, regardless of their gardening experience. I’m going to share a step-by-step guide that will empower you to cultivate plump, flavorful onions right in your own backyard (or even on your balcony!). Get ready to impress your friends and family with your gardening prowess – let’s get started!
Growing Onions Upside Down: A Fun and Productive DIY Hack!
Hey there, fellow gardening enthusiasts! I’m so excited to share this quirky and surprisingly effective method for growing onions – upside down! Yes, you read that right. This technique not only saves space but can also lead to a healthier and more abundant onion harvest. I stumbled upon this method a while back, and after some experimentation, I’m ready to walk you through the process step-by-step. Get ready to turn your gardening world upside down (pun intended!).
What You’ll Need:
Before we dive in, let’s gather all the necessary materials. This will make the process smoother and more enjoyable.
* Onion Sets: These are small, immature onions that are perfect for starting this project. Choose a variety you love! I personally prefer yellow onions for their versatility.
* Large Buckets or Containers: You’ll need containers with drainage holes. Five-gallon buckets work great, but any large container will do.
* Potting Mix: A well-draining potting mix is crucial. Avoid using garden soil, as it can compact and hinder root growth.
* Drill with a Hole Saw Attachment: This is essential for creating the holes in the bottom of the buckets. The size of the hole saw should be slightly smaller than the diameter of your onion sets.
* Gloves: Protect your hands from the soil.
* Watering Can or Hose: For watering your onions.
* Optional: Slow-Release Fertilizer: This can give your onions an extra boost.
Preparing Your Buckets: The Foundation for Success
This is a crucial step, so pay close attention to ensure your onions have a comfortable home.
1. Drill the Holes: This is where the “upside down” magic happens! Using your drill and hole saw attachment, carefully drill holes in the bottom of your buckets. The number of holes depends on the size of your bucket. For a five-gallon bucket, I recommend drilling 4-6 holes, spaced evenly apart. Make sure the holes are large enough for the onion sets to fit snugly, but not so large that they fall through.
Safety First! Always wear safety glasses when using power tools.
2. Add Drainage: Even though the buckets already have drainage holes, I like to add an extra layer of drainage material at the bottom. This helps prevent the soil from becoming waterlogged. You can use gravel, small rocks, or even broken pieces of terracotta pots. A layer of about 2-3 inches is sufficient.
3. Initial Soil Layer: Add a layer of potting mix on top of the drainage material. This layer should be about 4-6 inches deep. This will provide a base for the onion roots to grow into.
Planting Your Onions: The Upside-Down Technique
Now for the fun part – planting the onions! This is where the magic truly begins.
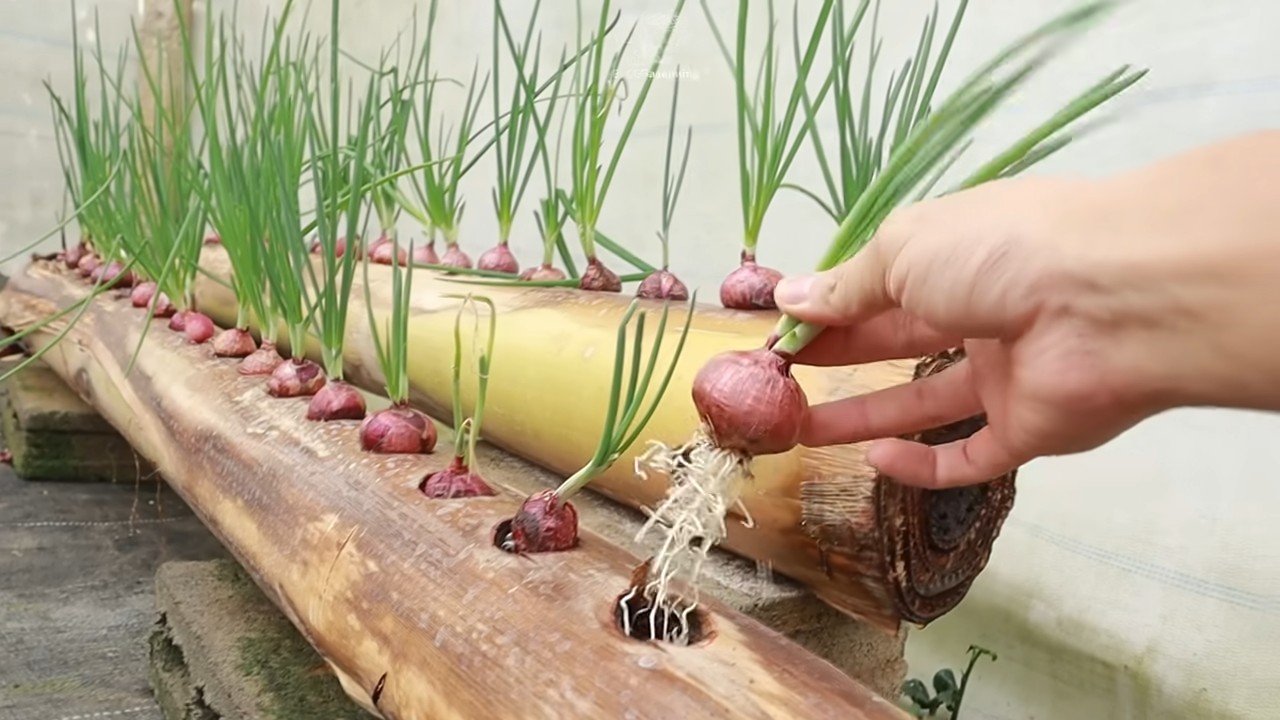
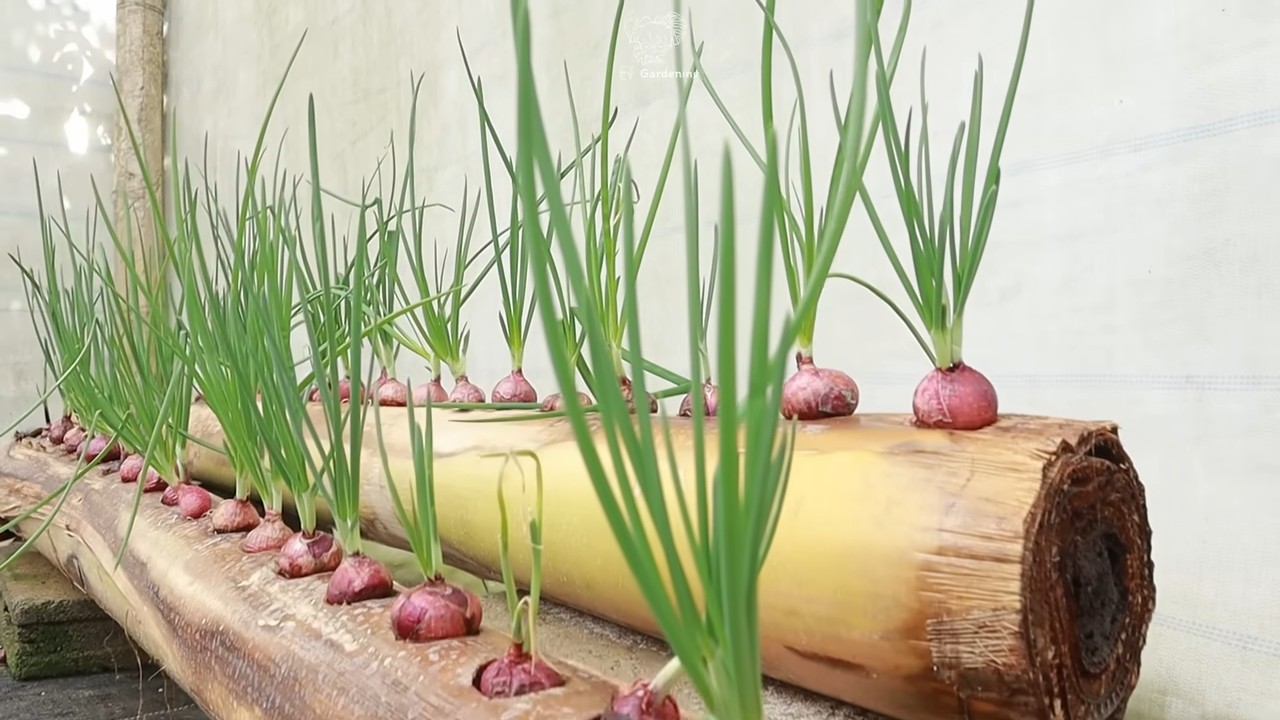
1. Insert the Onion Sets: Gently push the onion sets through the holes in the bottom of the bucket. Make sure the root end (the end with the little wisps) is facing outwards, and the pointy end (where the green shoots will emerge) is facing inwards, towards the inside of the bucket. The onion set should be snug in the hole, but not forced.
Gentle Handling is Key! Be careful not to damage the onion sets during this process.
2. Secure the Onions: To prevent the onion sets from falling out, you can use a small piece of cloth or paper towel to wrap around the base of the onion set inside the bucket. This will act as a temporary barrier until the roots start to grow and anchor the onion in place.
3. Fill with Soil: Carefully fill the rest of the bucket with potting mix, gently packing it around the onion sets. Leave about an inch or two of space at the top of the bucket.
4. Water Thoroughly: Once the bucket is filled with soil, water it thoroughly until water drains out of the holes. This will help settle the soil and encourage the onion sets to start rooting.
Caring for Your Upside-Down Onions: Nurturing Your Crop
Proper care is essential for a successful harvest. Here’s what you need to do to keep your onions happy and healthy.
1. Sunlight: Onions need plenty of sunlight, so place your buckets in a location that receives at least 6-8 hours of direct sunlight per day.
2. Watering: Water your onions regularly, especially during dry periods. The soil should be consistently moist, but not waterlogged. Check the soil moisture by sticking your finger into the soil. If the top inch feels dry, it’s time to water.
3. Fertilizing: Onions are heavy feeders, so fertilizing them regularly will help them grow strong and produce large bulbs. You can use a balanced fertilizer or a fertilizer specifically formulated for onions. Follow the instructions on the fertilizer package. I like to use a slow-release fertilizer at planting time, and then supplement with a liquid fertilizer every few weeks.
4. Weeding: Keep the area around your onions free of weeds. Weeds compete with onions for nutrients and water.
5. Pest and Disease Control: Keep an eye out for pests and diseases. Common onion pests include onion maggots and thrips. Common onion diseases include downy mildew and onion rot. If you notice any signs of pests or diseases, take action immediately. There are many organic and non-organic options available for pest and disease control. I prefer to use organic methods whenever possible.
Harvesting Your Onions: The Sweet Reward
After all your hard work, it’s time to reap the rewards! Knowing when to harvest is key to getting the best flavor and storage life from your onions.
1. When to Harvest: Onions are typically ready to harvest when the tops start to fall over and turn brown. This usually happens about 90-120 days after planting.
2. How to Harvest: Gently pull the onions out of the holes in the bottom of the bucket. If the soil is dry, you may need to loosen it first.
3. Curing: After harvesting, cure your onions by laying them out in a single layer in a warm, dry, and well-ventilated place for about 2-3 weeks. This will help them dry out and prevent them from rotting.
4. Storing: Once the onions are cured, store them in a cool, dry, and dark place. They should last for several months.
Troubleshooting: Addressing Common Issues
Even with the best planning, things can sometimes go wrong. Here are some common issues you might encounter and how to address them.
* Onion Sets Falling Out: If your onion sets are falling out of the holes, try using a larger piece of cloth or paper towel to secure them. You can also use small pieces of foam or even toothpicks to hold them in place.
* Slow Growth: If your onions are growing slowly, make sure they are getting enough sunlight, water, and fertilizer. You may also need to check the soil pH. Onions prefer a slightly acidic soil pH of around 6.0-6.8.
* Yellowing Leaves: Yellowing leaves can be a sign of nutrient deficiency, overwatering, or disease. Check the soil moisture and fertilize if necessary. If you suspect disease, take action immediately.
* Pest Infestation: If you notice pests on your onions, take action immediately. There are many organic and non-organic options available for pest control.
Why I Love This Method: The Benefits of Upside-Down Onions
I’ve found this method to be incredibly rewarding, and here’s why:
* Space Saving: This method is perfect for small gardens or balconies. You can grow a lot of onions in a small space.
* Pest Control: Growing onions upside down can help deter some pests, as they have a harder time reaching the bulbs.
* Improved Air Circulation: The upside-down orientation allows for better air circulation around the bulbs, which can help prevent diseases.
* Fun and Unique: It’s a fun and unique way to grow onions that will definitely spark conversation!
So there you have it! My comprehensive guide to growing onions upside down. I hope you give this method a try. It’s a fun, rewarding, and space-saving way to grow your own delicious onions. Happy gardening!
Conclusion
So, there you have it! This unique method for growing onions isn’t just a gardening hack; it’s a game-changer. We’ve explored how starting your onions from scraps, specifically those often discarded onion bottoms, can lead to a bountiful harvest while minimizing waste and saving you money. Forget buying expensive seedlings or struggling with tiny onion sets. This DIY approach offers a sustainable and surprisingly effective way to cultivate delicious, homegrown onions right in your backyard or even in containers on your balcony.
The beauty of this method lies in its simplicity and adaptability. You’re not confined to a specific onion variety. Experiment with different types of onions – red, yellow, white, or even shallots – to discover which thrive best in your local climate and suit your culinary preferences. Consider the soil composition, ensuring it’s well-draining and rich in organic matter. Adding compost or aged manure can significantly boost your onion’s growth and flavor.
Beyond the basic technique, there are several variations you can explore. For instance, if you live in a colder climate, you might want to start the onion bottoms indoors in small pots before transplanting them outdoors once the threat of frost has passed. This gives them a head start and protects them from harsh weather conditions. Alternatively, if you’re short on space, you can successfully grow onions in containers. Just make sure to choose a pot that’s at least 12 inches deep and wide to accommodate the onion’s root system.
Don’t be afraid to get creative with your onion growing. Try companion planting by interspersing your onions with other vegetables or herbs that deter pests, such as carrots, marigolds, or chamomile. This can help create a healthier and more productive garden ecosystem.
But the real magic happens when you take the plunge and try this method yourself. Imagine the satisfaction of harvesting plump, flavorful onions that you grew from what would have otherwise been kitchen scraps. Think of the money you’ll save on groceries and the reduced environmental impact of not buying commercially grown onions.
We wholeheartedly encourage you to give this DIY trick a try. It’s a rewarding experience that connects you with nature and provides you with fresh, delicious produce. And most importantly, we want to hear about your journey! Share your experiences, tips, and photos with us in the comments section below. Let’s build a community of onion-growing enthusiasts who are passionate about sustainable gardening and resourceful living. Your insights could inspire others to embrace this unique method and reap the rewards of homegrown onions. So, grab those onion bottoms, get your hands dirty, and let’s grow some onions together! This method of growing onions is truly a must-try for any gardener, beginner or experienced.
Frequently Asked Questions (FAQ)
What kind of onions can I grow using this method?
You can grow almost any type of onion from the bottom scraps! Red onions, yellow onions, white onions, sweet onions, and even shallots can be propagated using this method. The key is to ensure the onion bottom has a healthy root base and a small portion of the onion flesh still attached. Experiment with different varieties to see which ones thrive best in your specific climate and soil conditions. Keep in mind that some varieties may be more successful than others, so don’t be discouraged if your first attempt doesn’t yield perfect results.
How long does it take to grow onions from scraps?
The time it takes to grow onions from scraps can vary depending on several factors, including the onion variety, climate, soil conditions, and the amount of sunlight the plants receive. Generally, you can expect to harvest mature onions within 90 to 120 days from the time you plant the onion bottoms. However, you can start harvesting the green onion tops much earlier, as soon as they reach a usable size. This allows you to enjoy fresh onion flavor while the bulbs are still developing.
What kind of soil is best for growing onions?
Onions prefer well-draining soil that is rich in organic matter. The ideal soil pH for onions is between 6.0 and 7.0. Before planting, amend the soil with compost, aged manure, or other organic materials to improve its fertility and drainage. Avoid heavy clay soils, as they can retain too much moisture and lead to root rot. If you have clay soil, consider growing your onions in raised beds or containers with a well-draining potting mix.
How often should I water my onions?
Onions need consistent moisture to thrive, especially during the early stages of growth. Water your onions deeply whenever the top inch of soil feels dry to the touch. Avoid overwatering, as this can lead to root rot. During hot, dry weather, you may need to water your onions more frequently. Mulching around the plants can help retain moisture in the soil and reduce the need for frequent watering.
Do onions need full sun?
Yes, onions need at least 6-8 hours of direct sunlight per day to grow properly. Choose a planting location that receives plenty of sunlight throughout the day. If you’re growing onions indoors, place them near a sunny window or use grow lights to supplement the natural light. Insufficient sunlight can result in stunted growth and smaller bulbs.
How do I fertilize my onions?
Onions are heavy feeders and benefit from regular fertilization. Apply a balanced fertilizer (e.g., 10-10-10) at planting time and then every 2-3 weeks during the growing season. You can also use organic fertilizers, such as compost tea or fish emulsion. Avoid over-fertilizing, as this can lead to excessive foliage growth at the expense of bulb development.
What are some common pests and diseases that affect onions?
Some common pests that affect onions include onion maggots, thrips, and aphids. Diseases that can affect onions include downy mildew, white rot, and pink root. To prevent pest and disease problems, practice good garden hygiene, such as removing weeds and debris from around the plants. You can also use organic pest control methods, such as insecticidal soap or neem oil, to control pests. If you suspect your onions have a disease, consult with your local agricultural extension office for advice on treatment options.
Can I grow onions in containers?
Yes, you can successfully grow onions in containers. Choose a pot that is at least 12 inches deep and wide to accommodate the onion’s root system. Use a well-draining potting mix and ensure the container has drainage holes. Water and fertilize your container-grown onions regularly.
How do I know when my onions are ready to harvest?
Onions are typically ready to harvest when the tops begin to fall over and turn yellow or brown. You can also check the size of the bulbs by gently digging around the base of the plant. If the bulbs are the size you desire, you can harvest them. To harvest onions, gently pull them from the ground and allow them to dry in the sun for a few days before storing them.
How do I store my harvested onions?
Store your harvested onions in a cool, dry, and well-ventilated place. You can braid the onion tops together and hang them in a cool, dark area, or you can store them in mesh bags or crates. Avoid storing onions near potatoes, as they can cause each other to spoil more quickly. Properly stored onions can last for several months.
Leave a Comment