
Growing peas indoors might sound like a whimsical dream, especially if you’re picturing sprawling vines taking over your living room! But trust me, it’s a surprisingly achievable and rewarding project, even if you don’t have a sprawling garden. For centuries, people have cultivated peas, not just for their delicious taste, but also for their ability to enrich the soil. From ancient civilizations to modern-day homesteaders, the humble pea has been a staple crop.
Have you ever craved the sweet, fresh taste of homegrown peas in the middle of winter? Or perhaps you’re limited on outdoor space but still yearn for the satisfaction of nurturing your own food? That’s where growing peas indoors comes in! This DIY guide will unlock the secrets to successfully cultivating these delightful legumes within the comfort of your home. I’ll walk you through everything from choosing the right varieties to providing the perfect growing conditions, ensuring you’ll be harvesting your own delicious peas in no time. Get ready to ditch the store-bought frozen peas and embrace the joy of fresh, homegrown goodness, all thanks to this simple and effective indoor gardening trick!
Growing Peas Indoors: A Complete DIY Guide
Hey there, fellow gardening enthusiasts! Ever dreamt of enjoying fresh, sweet peas even when the weather outside is frightful? Well, dream no more! I’m going to walk you through the surprisingly simple process of growing peas indoors. It’s a rewarding experience, and trust me, nothing beats the taste of homegrown peas, especially when you’ve nurtured them from tiny seeds to delicious pods right in your own home.
Choosing the Right Pea Variety
Not all pea varieties are created equal when it comes to indoor growing. We need to pick ones that are compact and don’t require a ton of space to sprawl. Here are a few of my favorites:
* Dwarf Varieties: These are your best bet! Look for names like ‘Little Marvel,’ ‘Tom Thumb,’ or ‘Sugar Ann.’ They stay relatively small and are perfect for containers.
* Bush Varieties: While not as compact as dwarf varieties, bush peas are still manageable indoors. ‘Oregon Sugar Pod II’ is a good option.
* Avoid Vining Varieties: These guys are space hogs! Vining peas like ‘Sugar Snap’ or ‘Telephone’ need extensive trellising and are better suited for outdoor gardens.
Gathering Your Supplies
Before we get our hands dirty, let’s make sure we have everything we need. Here’s a checklist:
* Pea Seeds: Obviously! Choose your preferred variety from the list above.
* Containers: You’ll need pots that are at least 6 inches deep and wide. I prefer using containers that are 8-12 inches deep to give the roots plenty of room to grow. Make sure they have drainage holes!
* Potting Mix: Use a high-quality, well-draining potting mix. Avoid using garden soil, as it can compact and not drain properly in containers.
* Grow Lights (Optional but Recommended): While peas can grow near a sunny window, grow lights will significantly improve your yields, especially during the darker months.
* Trellis or Support (Optional): Even dwarf varieties can benefit from some support. Small trellises, bamboo stakes, or even twigs stuck into the soil will do the trick.
* Watering Can or Spray Bottle: For gentle watering.
* Seed Starting Tray (Optional): If you prefer to start your seeds indoors before transplanting.
Step-by-Step Planting Guide
Now for the fun part! Let’s get those pea seeds in the soil.
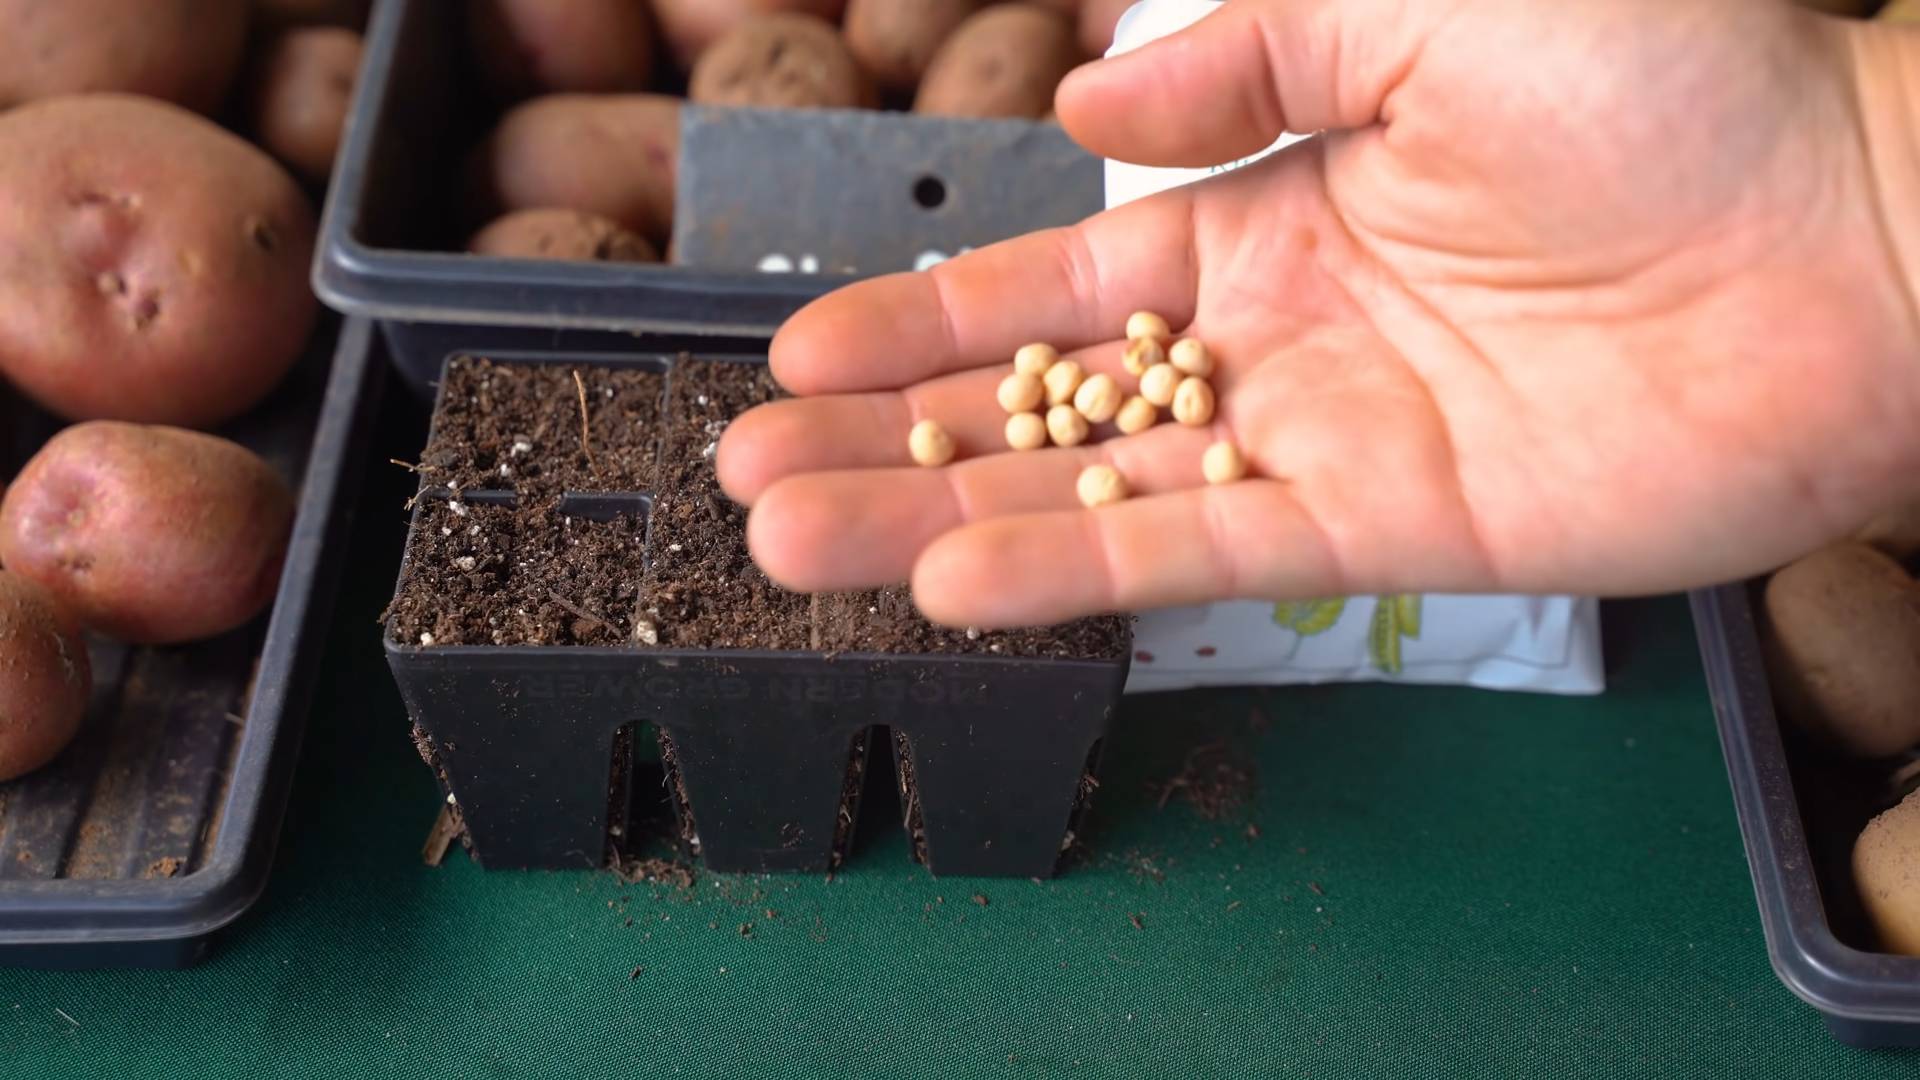
1. Soaking the Seeds (Optional but Recommended): Soaking your pea seeds in water for 24 hours before planting can significantly improve germination rates. Just place them in a bowl of water and let them sit overnight.
2. Preparing the Containers: Fill your containers with potting mix, leaving about an inch of space at the top. Gently pat down the soil.
3. Planting the Seeds: Make small holes about 1 inch deep and 2 inches apart. Place one or two seeds in each hole. Planting two seeds per hole increases your chances of germination; you can always thin them out later if both sprout.
4. Covering the Seeds: Gently cover the seeds with potting mix and lightly pat it down.
5. Watering: Water the soil thoroughly until water drains out of the drainage holes. This ensures the soil is evenly moist.
6. Placement: Place your containers in a location that receives at least 6 hours of direct sunlight per day. If you’re using grow lights, position them a few inches above the soil surface.
7. Germination: Keep the soil consistently moist but not soggy. Pea seeds typically germinate in 7-14 days.
Caring for Your Indoor Pea Plants
Once your pea seeds have sprouted, it’s time to provide them with the care they need to thrive.
1. Watering: Water your pea plants regularly, keeping the soil consistently moist. Avoid overwatering, as this can lead to root rot. Check the soil moisture by sticking your finger about an inch into the soil. If it feels dry, it’s time to water.
2. Lighting: Ensure your pea plants receive adequate light. If you’re using grow lights, adjust their height as the plants grow.
3. Fertilizing: Feed your pea plants with a balanced liquid fertilizer every two weeks. Follow the instructions on the fertilizer packaging. I like to use a fertilizer that’s specifically formulated for vegetables.
4. Support: As your pea plants grow, they may need some support. Install a small trellis, bamboo stakes, or even twigs in the soil to provide support. Gently tie the pea plants to the support as they grow.
5. Pest Control: Keep an eye out for pests such as aphids or spider mites. If you notice any pests, you can try spraying your plants with insecticidal soap or neem oil.
6. Air Circulation: Good air circulation is important for preventing fungal diseases. Make sure your pea plants have enough space between them and that there’s good airflow in the room. A small fan can help with this.
7. Pollination: Peas are self-pollinating, so you don’t need to worry about hand-pollinating them. However, you can gently shake the plants to help with pollination.
Harvesting Your Indoor Peas
The moment we’ve all been waiting for! Harvesting your homegrown peas is the most rewarding part of the process.
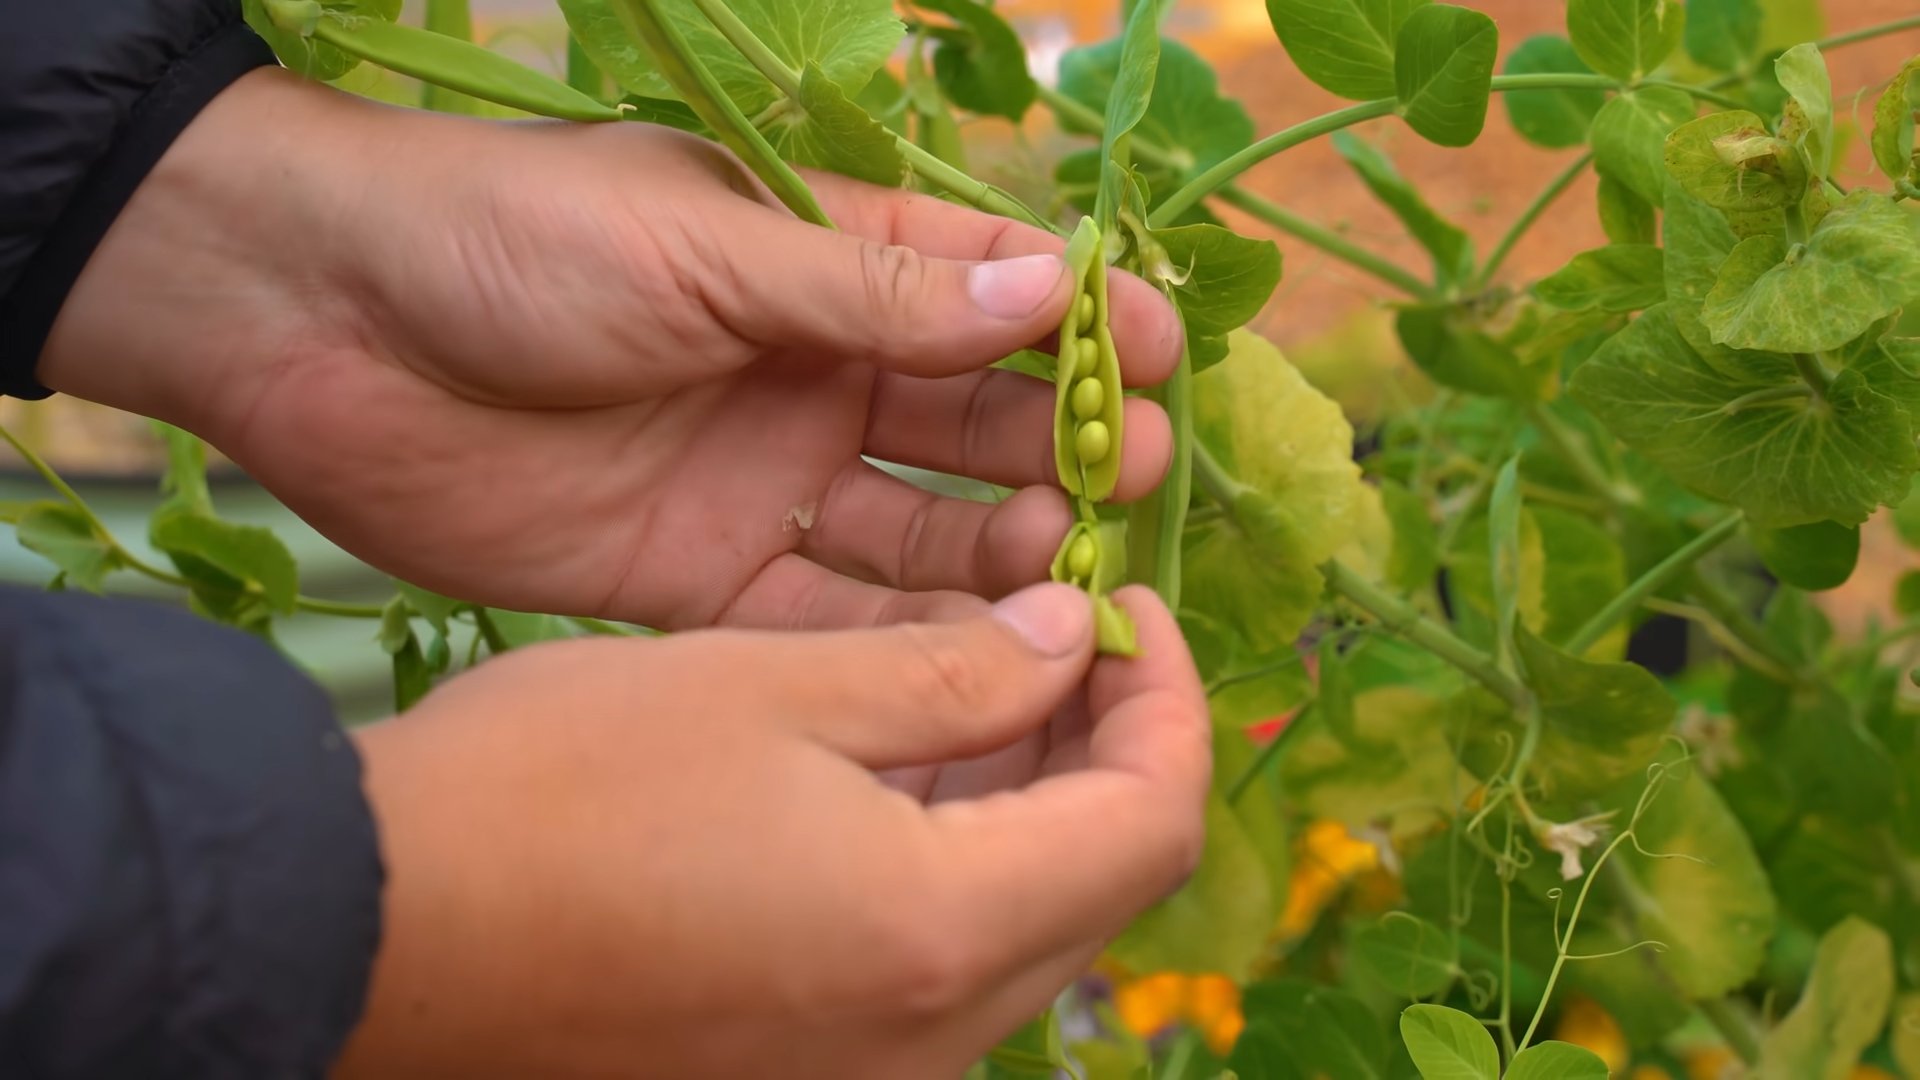
1. Timing: Peas are typically ready to harvest about 60-70 days after planting. The pods should be plump and filled with peas.
2. Harvesting: Gently pick the pea pods from the plant. Use scissors or pruning shears to avoid damaging the plant.
3. Enjoying: Enjoy your fresh, homegrown peas! You can eat them raw, steamed, or added to your favorite dishes.
Troubleshooting Common Problems
Even with the best care, you might encounter some problems while growing peas indoors. Here are a few common issues and how to address them:
* Poor Germination: If your pea seeds aren’t germinating, it could be due to several factors:
* Old Seeds: Pea seeds have a relatively short shelf life. Make sure you’re using fresh seeds.
* Cold Soil: Pea seeds germinate best in soil that’s at least 60°F (15°C).
* Overwatering: Soggy soil can cause the seeds to rot.
* Underwatering: Dry soil can prevent the seeds from germinating.
* Yellowing Leaves: Yellowing leaves can be a sign of several problems:
* Overwatering: Too much water can cause the roots to rot, leading to yellowing leaves.
* Nutrient Deficiency: A lack of nutrients can also cause yellowing leaves. Try fertilizing your plants with a balanced liquid fertilizer.
* Pest Infestation: Pests can suck the sap from the leaves, causing them to turn yellow.
* Leggy Growth: Leggy growth (tall, spindly plants) is usually caused by insufficient light. Make sure your pea plants are receiving enough light, either from a sunny window or grow lights.
* Lack of Pods: If your pea plants are growing but not producing pods, it could be due to:
* Insufficient Light: Peas need plenty of light to produce pods.
* High Temperatures: High temperatures can inhibit pod production.
* Poor Pollination: Although peas are self-pollinating, gently shaking the plants can help with pollination.
Extending Your Harvest
Want to keep those fresh peas coming? Here’s how to extend your harvest:
* Succession Planting: Plant a new batch of pea seeds every two weeks to ensure a continuous harvest.
* Harvest Regularly: Harvesting the pods regularly encourages the plant to produce more.
* Proper Care: Providing your pea plants with proper care, including adequate watering, lighting, and fertilization, will help them produce more pods.
Growing peas indoors is a fun and rewarding experience. With a little bit of care and attention, you can enjoy fresh, homegrown peas all year round! Happy gardening!
Conclusion
So, there you have it! Growing peas indoors is not only possible, but it’s also a remarkably rewarding experience, especially when you consider the fresh, sweet taste of homegrown peas gracing your table long before the outdoor season even begins. This DIY trick is a must-try for anyone who loves fresh produce, enjoys a bit of gardening, or simply wants to add a touch of green to their indoor space. Forget relying solely on store-bought options; with a little effort and these simple steps, you can cultivate your own supply of delicious, tender peas right in your home.
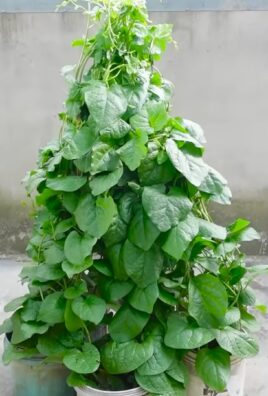
The beauty of this method lies in its adaptability. Feel free to experiment with different pea varieties. Snow peas, snap peas, and shelling peas all thrive indoors, each offering a unique flavor and texture. Consider using different types of containers, from repurposed plastic tubs to aesthetically pleasing terracotta pots, to match your home décor. You can even explore vertical gardening techniques to maximize space and create a stunning green wall of pea vines.
Don’t be afraid to tweak the growing medium to suit your specific needs. While a standard potting mix works well, you can enhance drainage and aeration by adding perlite or vermiculite. If you’re concerned about nutrient deficiencies, supplement with a balanced liquid fertilizer every few weeks. Remember, observation is key. Pay close attention to your pea plants, noting their growth patterns, leaf color, and overall health. Adjust your watering, lighting, and fertilization accordingly to ensure optimal growth.
Growing peas indoors offers a fantastic opportunity to connect with nature, even when the weather outside is less than ideal. It’s a chance to learn about the life cycle of plants, to appreciate the effort that goes into producing food, and to enjoy the satisfaction of harvesting your own homegrown bounty. Plus, it’s a great way to reduce your carbon footprint by minimizing your reliance on commercially grown produce that has to be transported long distances.
We wholeheartedly encourage you to give this DIY trick a try. It’s a simple, affordable, and incredibly satisfying way to enjoy fresh peas year-round. Once you’ve experienced the joy of harvesting your own homegrown peas, you’ll never look at store-bought peas the same way again.
But don’t just take our word for it! We want to hear about your experiences. Share your tips, tricks, and photos of your indoor pea gardens in the comments below. Let’s create a community of indoor pea growers and learn from each other. What varieties did you try? What challenges did you face? What successes did you celebrate? Your insights can help others embark on their own indoor pea-growing adventures. So, grab your seeds, gather your supplies, and get ready to enjoy the sweet taste of homegrown peas, no matter the season!
Frequently Asked Questions (FAQ)
Q: What kind of peas are best for growing indoors?
A: While most pea varieties can be grown indoors, bush varieties like ‘Little Marvel’ or ‘Sugar Ann’ are generally preferred because they are more compact and don’t require as much support as vining varieties. However, if you have the space and are willing to provide adequate support (trellises, stakes, or netting), you can certainly grow vining varieties like ‘Sugar Snap’ or ‘Oregon Sugar Pod II’. Snow peas, snap peas, and shelling peas all perform well indoors, offering a variety of flavors and textures to choose from. Consider the size of your growing space and the amount of support you’re willing to provide when selecting your pea variety.
Q: How much light do indoor peas need?
A: Peas need at least 6-8 hours of direct sunlight per day to thrive. If you don’t have a south-facing window that provides sufficient sunlight, you’ll need to supplement with artificial lighting. Grow lights, either fluorescent or LED, are an excellent option. Position the lights about 6-12 inches above the plants and keep them on for 12-16 hours per day. Monitor your plants closely and adjust the lighting as needed. Signs of insufficient light include leggy growth (long, spindly stems) and pale leaves.
Q: What kind of soil should I use for growing peas indoors?
A: A well-draining potting mix is essential for growing peas indoors. Avoid using garden soil, as it can be too heavy and may contain pests or diseases. A good potting mix will provide adequate drainage and aeration, which are crucial for healthy root development. You can also amend your potting mix with perlite or vermiculite to further improve drainage. Consider using a potting mix specifically formulated for vegetables, as it will typically contain added nutrients to support healthy growth.
Q: How often should I water my indoor pea plants?
A: Water your pea plants regularly, keeping the soil consistently moist but not waterlogged. Check the soil moisture level daily by sticking your finger about an inch into the soil. If the soil feels dry, it’s time to water. Water deeply, allowing the excess water to drain out of the bottom of the container. Avoid overwatering, as this can lead to root rot. The frequency of watering will depend on factors such as the size of your container, the type of potting mix you’re using, and the ambient temperature and humidity.
Q: Do I need to fertilize my indoor pea plants?
A: Peas are relatively light feeders, but they will benefit from occasional fertilization. Use a balanced liquid fertilizer, diluted to half strength, every 2-3 weeks. Avoid over-fertilizing, as this can lead to excessive foliage growth at the expense of flower and pod production. Look for a fertilizer that is specifically formulated for vegetables or flowering plants. You can also amend your potting mix with compost or other organic matter to provide a slow-release source of nutrients.
Q: How do I support my indoor pea plants?
A: Vining pea varieties will need support to climb. You can use a variety of structures, such as trellises, stakes, or netting. Install the support structure when the plants are young, so they can easily attach themselves. Gently guide the vines onto the support structure as they grow. Bush varieties may not require support, but they may benefit from being staked to prevent them from falling over.
Q: How long does it take for peas to mature indoors?
A: The time it takes for peas to mature indoors will depend on the variety and growing conditions. Generally, it takes about 60-70 days from planting to harvest. You can start harvesting peas when the pods are plump and filled with peas. Pick the pods regularly to encourage continued production.
Q: What are some common problems when growing peas indoors?
A: Some common problems when growing peas indoors include aphids, powdery mildew, and root rot. Aphids can be controlled with insecticidal soap or neem oil. Powdery mildew can be prevented by providing good air circulation and avoiding overhead watering. Root rot can be prevented by using a well-draining potting mix and avoiding overwatering. Regularly inspect your plants for signs of pests or diseases and take action promptly to prevent them from spreading.
Q: Can I grow peas indoors year-round?
A: Yes, you can grow peas indoors year-round, provided you have adequate light and temperature control. Peas prefer cooler temperatures, so avoid placing them near heat sources. With proper care and attention, you can enjoy a continuous supply of fresh peas, regardless of the season.
Leave a Comment