
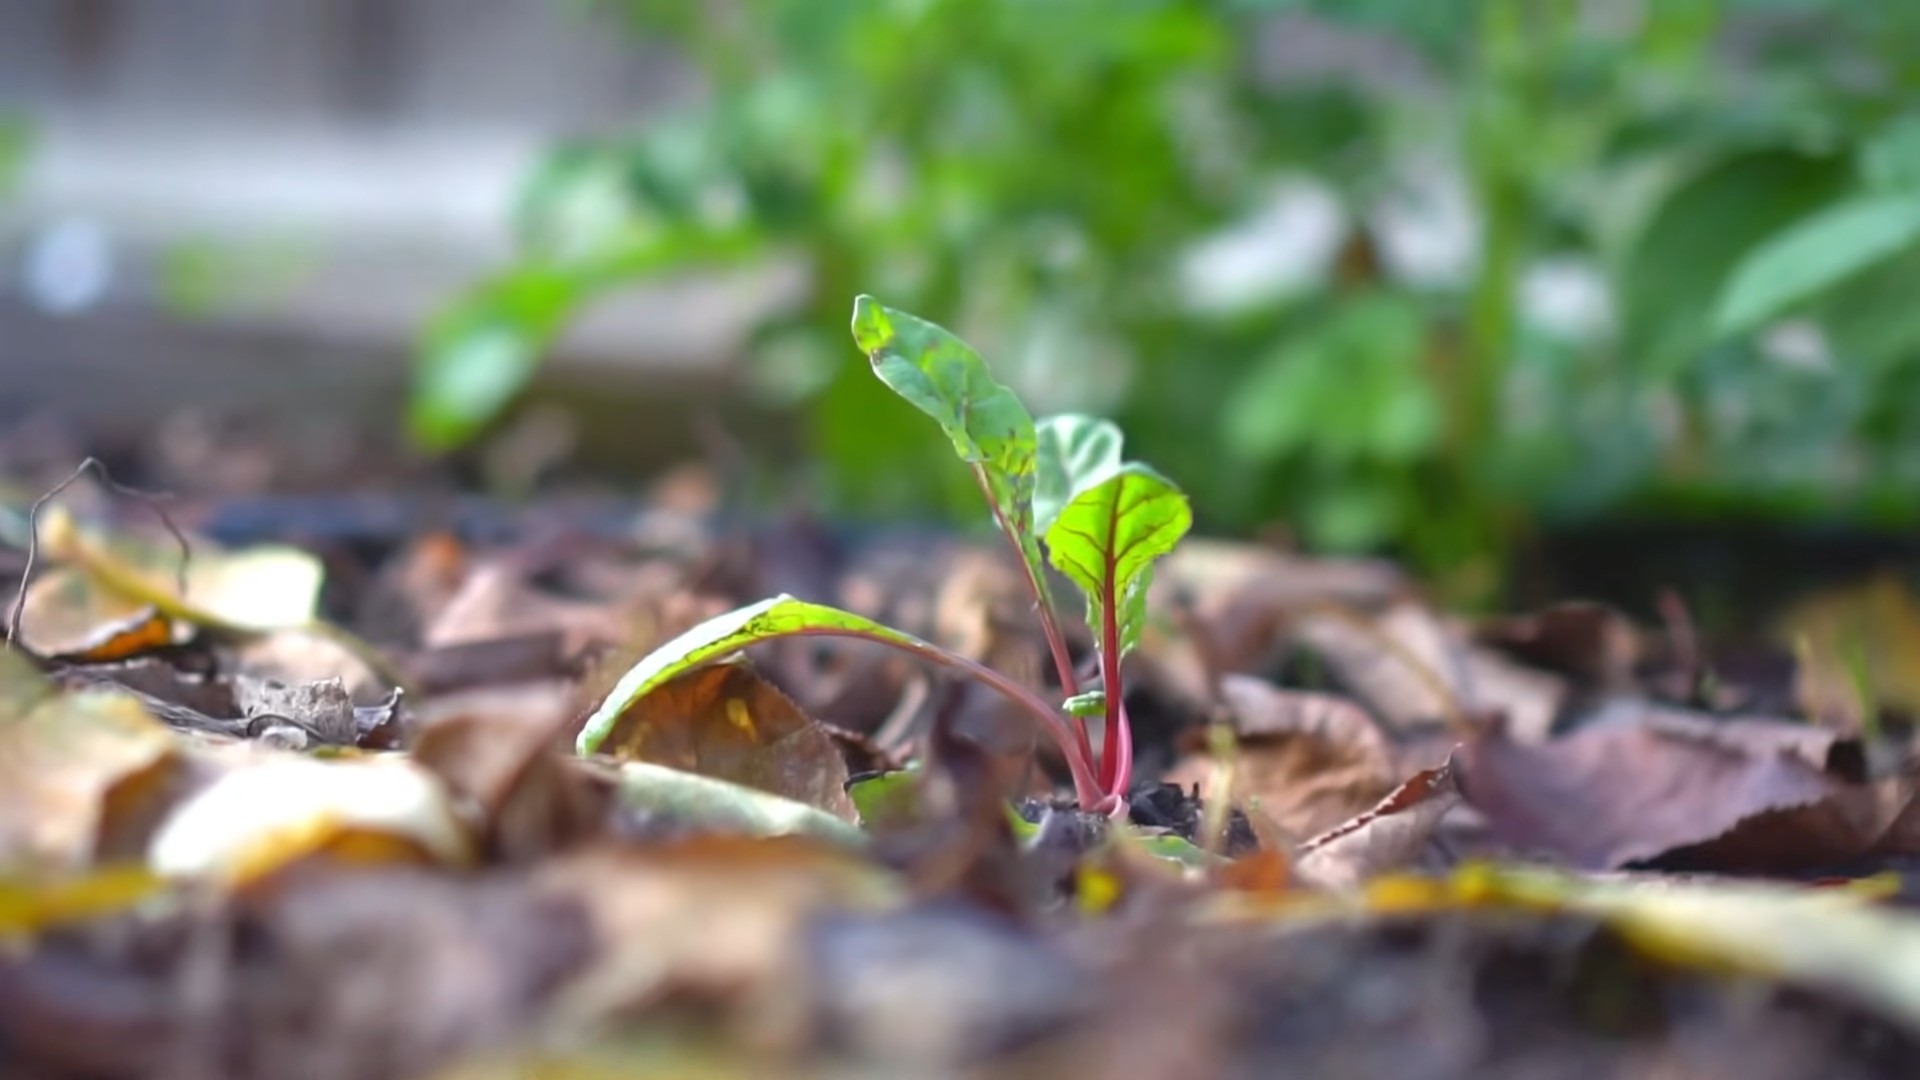
Growing Swiss Chard for Beginners can seem daunting, but trust me, it’s easier than you think! Have you ever dreamed of stepping outside your back door and harvesting vibrant, nutritious greens for your dinner? Imagine the satisfaction of knowing exactly where your food comes from and that it’s packed with goodness. That’s the magic of home gardening, and Swiss chard is the perfect place to start.
Swiss chard, with its colorful stalks and crinkled leaves, has a rich history, dating back to ancient Greece and Rome. It wasn’t just a food source; it was also valued for its medicinal properties. Today, it’s a staple in many cuisines around the world, prized for its versatility and health benefits. But beyond its historical significance, growing Swiss Chard for Beginners offers a practical solution for anyone looking to eat healthier, save money, and connect with nature.
In today’s world, where processed foods dominate and grocery bills keep climbing, learning to grow your own food is more important than ever. Swiss chard is incredibly easy to grow, even if you have limited space or gardening experience. It’s packed with vitamins and minerals, and it’s incredibly versatile in the kitchen. Plus, it’s a beautiful addition to any garden! So, let’s dive in and discover some simple DIY tricks and hacks that will have you harvesting your own delicious Swiss chard in no time. I’m excited to share my tips and help you get started on your gardening journey!

Growing Swiss Chard: A Beginner’s Guide to Colorful Harvests
Okay, so you want to grow Swiss chard? Awesome! It’s one of the easiest and most rewarding vegetables to cultivate, plus it adds a vibrant splash of color to your garden. I’m going to walk you through everything you need to know, from seed to table, so you can enjoy a bountiful harvest of this nutritious leafy green.
Choosing Your Swiss Chard Variety
First things first, let’s talk about varieties. Swiss chard isn’t just one thing; there are several types, each with its own unique characteristics. Choosing the right one depends on your personal preferences and growing conditions. Here are a few popular options:
- Bright Lights: This is probably the most well-known variety, and for good reason! It boasts a stunning array of stem colors – red, orange, yellow, pink, and white. It’s not only beautiful but also incredibly productive.
- Ruby Red: As the name suggests, this variety features vibrant red stems and deep green leaves. It’s a classic choice and adds a bold pop of color to any dish.
- Fordhook Giant: If you’re looking for large, robust plants, Fordhook Giant is the way to go. It produces dark green, heavily crumpled leaves and thick, white stems. It’s known for its excellent flavor and heat tolerance.
- Lucullus: This variety is prized for its tender, slightly savoyed leaves and mild flavor. It’s a great choice for salads or light cooking.
I personally love growing Bright Lights because of the visual appeal, but honestly, you can’t go wrong with any of these. Pick one that appeals to you and give it a try!
Preparing Your Garden Bed
Swiss chard thrives in well-drained soil that’s rich in organic matter. Before planting, it’s important to prepare your garden bed properly. Here’s what I recommend:
- Choose a sunny location: Swiss chard needs at least 6 hours of sunlight per day.
- Test your soil: A soil test will tell you the pH level and nutrient content of your soil. Swiss chard prefers a slightly acidic to neutral pH (6.0-7.0). You can purchase a soil test kit at most garden centers.
- Amend the soil: Based on your soil test results, amend the soil with compost, aged manure, or other organic matter. This will improve drainage, fertility, and water retention. I usually add a generous layer of compost to my garden beds before planting anything.
- Loosen the soil: Use a garden fork or tiller to loosen the soil to a depth of at least 12 inches. This will allow the roots to penetrate easily.
- Remove rocks and debris: Clear the area of any rocks, weeds, or other debris that could hinder growth.
Planting Swiss Chard
You can start Swiss chard from seed either indoors or directly in the garden. I usually prefer direct sowing because it’s less work and the plants tend to be stronger.
Direct Sowing
1. Timing is key: Sow seeds directly in the garden 2-4 weeks before the last expected frost in spring, or in late summer for a fall harvest. Swiss chard can tolerate light frost, so don’t worry too much about a late cold snap.
2. Prepare the planting area: Create shallow furrows about 1/2 inch deep and 12-18 inches apart.
3. Sow the seeds: Sprinkle the seeds evenly in the furrows, spacing them about 1 inch apart.
4. Cover the seeds: Gently cover the seeds with soil and pat it down lightly.
5. Water thoroughly: Water the area gently but thoroughly to moisten the soil.
6. Keep the soil moist: Keep the soil consistently moist until the seeds germinate, which usually takes 5-10 days.
Starting Seeds Indoors
If you want to get a head start on the growing season, you can start Swiss chard seeds indoors 4-6 weeks before the last expected frost.
1. Choose your containers: Use seed trays or small pots filled with seed-starting mix.
2. Sow the seeds: Sow the seeds about 1/2 inch deep in the seed-starting mix.
3. Water gently: Water the soil gently to moisten it.
4. Provide warmth and light: Place the seed trays in a warm location (around 70°F) and provide plenty of light. A grow light is ideal, but a sunny windowsill can also work.
5. Keep the soil moist: Keep the soil consistently moist until the seeds germinate.
6. Harden off the seedlings: Once the seedlings have developed a few sets of true leaves, gradually acclimate them to outdoor conditions by exposing them to increasing amounts of sunlight and fresh air over a period of 7-10 days.
7. Transplant the seedlings: Transplant the seedlings into the garden, spacing them 12-18 inches apart.
Caring for Your Swiss Chard
Once your Swiss chard plants are established, they’re relatively low-maintenance. Here are a few tips to keep them happy and healthy:
- Water regularly: Water deeply and regularly, especially during dry periods. Swiss chard needs consistent moisture to thrive. Aim for about 1 inch of water per week.
- Fertilize occasionally: Fertilize every 4-6 weeks with a balanced fertilizer or compost tea. This will provide the plants with the nutrients they need to grow strong and produce abundant leaves.
- Weed regularly: Keep the garden bed free of weeds, which can compete with the Swiss chard for nutrients and water. Hand-pull weeds carefully to avoid disturbing the roots of the Swiss chard plants.
- Mulch: Apply a layer of mulch around the plants to help retain moisture, suppress weeds, and regulate soil temperature. Straw, wood chips, or shredded leaves are all good options.
- Pest control: Swiss chard is generally pest-resistant, but it can occasionally be affected by aphids, slugs, or leaf miners. Inspect your plants regularly and take action if you notice any signs of infestation. You can usually control these pests with organic methods, such as insecticidal soap or hand-picking.
Harvesting Swiss Chard
One of the best things about Swiss chard is that you can start harvesting it as soon as the leaves are large enough to eat.
1. When to harvest: You can begin harvesting Swiss chard when the outer leaves are about 6-8 inches long.
2. How to harvest: Use a sharp knife or scissors to cut the outer leaves near the base of the plant. Leave the inner leaves intact so they can continue to grow.
3. Harvest regularly: Harvest regularly to encourage continued production. The more you harvest, the more the plants will produce.
4. Enjoy your harvest: Swiss chard can be eaten raw in salads, sautéed, steamed, or added to soups and stews. It’s a versatile and nutritious vegetable that can be enjoyed in many different ways.
Troubleshooting Common Problems
Even with the best care, you might encounter a few problems while growing Swiss chard. Here are some common issues and how to address them:
- Yellowing leaves: This can be caused by a variety of factors, including nutrient deficiencies, overwatering, or pests. Check the soil pH and nutrient levels, ensure proper drainage, and inspect the plants for pests.
- Holes in leaves: This is often caused by slugs or leaf miners. Control slugs with beer traps or diatomaceous earth. Control leaf miners by removing and destroying infested leaves.
- Bolting: Bolting is when the plant prematurely flowers and goes to seed. This can be caused by hot weather or stress. To prevent bolting, provide shade during the hottest part of the day and ensure consistent watering.
Extending Your Harvest
Want to enjoy Swiss chard for as long as possible? Here are a few tips for extending your harvest:
- Succession planting: Sow seeds every 2-3 weeks to ensure a continuous supply of Swiss chard throughout the growing season.
- Cold frames or row covers: Use cold frames or row covers to protect your plants from frost and extend the growing season into the fall and winter.
- Overwintering: In mild climates, you can overwinter Swiss chard plants by mulching them heavily and protecting them from the coldest temperatures.
Growing Swiss chard is a rewarding experience that anyone can enjoy. With a little bit of planning and care, you can have a bountiful harvest of this colorful and nutritious vegetable. Happy gardening!
Conclusion
So, there you have it! Growing Swiss chard, even for complete beginners, is not only achievable but also incredibly rewarding. We’ve walked through the simple steps, from selecting the right seeds to harvesting your vibrant, nutritious leaves. But why should you dedicate a little space in your garden or even a pot on your balcony to this leafy green?
The answer is multifaceted. First and foremost, Swiss chard is a nutritional powerhouse. Packed with vitamins A, C, and K, as well as essential minerals like magnesium and iron, it’s a fantastic addition to any healthy diet. Forget those bland, boring greens – Swiss chard offers a slightly earthy, subtly sweet flavor that elevates everything from salads and stir-fries to soups and omelets.
Beyond its nutritional benefits, growing your own Swiss chard offers a level of freshness and control you simply can’t get from store-bought produce. You know exactly what’s gone into your plants – no pesticides, no questionable fertilizers, just pure, homegrown goodness. Plus, the vibrant colors of Swiss chard, especially the rainbow varieties, add a beautiful aesthetic touch to your garden.
But the real magic lies in the simplicity of this DIY project. Unlike some finicky vegetables, Swiss chard is remarkably resilient and adaptable. It tolerates a wide range of conditions and requires minimal maintenance. This makes it the perfect choice for beginner gardeners who want to experience the joy of growing their own food without the stress of constant monitoring and intervention.
Ready to take your Swiss chard game to the next level? Consider these variations:
* **Experiment with different varieties:** Rainbow chard, with its brightly colored stems, is a visual delight, while varieties like Fordhook Giant offer larger, more robust leaves.
* **Succession planting:** Sow seeds every few weeks to ensure a continuous harvest throughout the growing season.
* **Companion planting:** Plant Swiss chard alongside other vegetables like onions, garlic, and carrots to deter pests and improve growth.
* **Container gardening:** If you’re short on space, Swiss chard thrives in containers. Just make sure to choose a pot that’s at least 12 inches deep and wide.
Don’t be afraid to get your hands dirty and experiment! Gardening is all about learning and adapting. And remember, even if you encounter a few bumps along the way, the satisfaction of harvesting your own fresh, delicious Swiss chard will make it all worthwhile.
We wholeheartedly encourage you to give this DIY trick a try. It’s a simple, rewarding, and healthy way to connect with nature and enjoy the fruits (or rather, vegetables) of your labor.
So, grab some seeds, find a sunny spot, and get ready to experience the joy of growing your own Swiss chard. And most importantly, we want to hear about your experience! Share your tips, tricks, and photos in the comments below. Let’s build a community of Swiss chard enthusiasts and inspire others to embrace the joys of homegrown goodness. Happy gardening!
Frequently Asked Questions (FAQ)
What is the best time of year to plant Swiss chard?
The ideal time to plant Swiss chard depends on your climate. In cooler regions, you can start seeds indoors 4-6 weeks before the last expected frost and transplant them outdoors once the soil has warmed up. In warmer climates, you can sow seeds directly into the garden in early spring or late summer for a fall harvest. Swiss chard is relatively tolerant of cool weather, so you can often get away with planting it a bit earlier than other vegetables.
How much sunlight does Swiss chard need?
Swiss chard thrives in full sun, which means at least 6 hours of direct sunlight per day. However, it can also tolerate partial shade, especially in hotter climates. If you’re growing Swiss chard in a container, make sure to place it in a location that receives plenty of sunlight. If you notice that your plants are leggy or have pale leaves, it could be a sign that they’re not getting enough sunlight.
What kind of soil is best for growing Swiss chard?
Swiss chard prefers well-drained soil that is rich in organic matter. Before planting, amend your soil with compost or other organic materials to improve its fertility and drainage. The ideal soil pH for Swiss chard is between 6.0 and 7.0. You can test your soil pH using a soil testing kit and adjust it accordingly.
How often should I water my Swiss chard plants?
Water your Swiss chard plants regularly, especially during dry periods. Aim to keep the soil consistently moist but not waterlogged. Water deeply at the base of the plants to encourage strong root growth. Avoid overhead watering, as this can increase the risk of fungal diseases. A good rule of thumb is to water when the top inch of soil feels dry to the touch.
How do I fertilize my Swiss chard plants?
Swiss chard is a heavy feeder, so it benefits from regular fertilization. You can use a balanced fertilizer or a fertilizer that is specifically formulated for leafy greens. Apply fertilizer according to the package directions. You can also side-dress your plants with compost or other organic materials throughout the growing season. Avoid over-fertilizing, as this can lead to excessive leaf growth and reduced flavor.
What are some common pests and diseases that affect Swiss chard?
Swiss chard is generally resistant to pests and diseases, but it can be susceptible to certain problems, such as aphids, flea beetles, and leaf miners. You can control these pests by handpicking them off the plants, using insecticidal soap, or introducing beneficial insects like ladybugs. Swiss chard can also be affected by fungal diseases like powdery mildew and leaf spot. To prevent these diseases, ensure good air circulation around your plants and avoid overhead watering.
How do I harvest Swiss chard?
You can begin harvesting Swiss chard leaves when they are about 6-8 inches long. Harvest the outer leaves first, leaving the inner leaves to continue growing. You can harvest Swiss chard continuously throughout the growing season. To harvest, simply cut the leaves off at the base of the plant using a sharp knife or scissors.
Can I eat the stems of Swiss chard?
Yes, the stems of Swiss chard are edible and delicious! They have a slightly different texture and flavor than the leaves, but they are equally nutritious. You can cook the stems in the same way that you would cook the leaves, or you can sauté them separately. The stems of rainbow chard are particularly colorful and add a beautiful touch to any dish.
How do I store Swiss chard?
Store Swiss chard in the refrigerator in a plastic bag or container. It will keep for several days. To prolong its shelf life, you can wrap the leaves in a damp paper towel before storing them. You can also freeze Swiss chard for longer storage. To freeze, blanch the leaves in boiling water for 2 minutes, then plunge them into ice water. Drain well and store in freezer bags.
Can I grow Swiss chard in containers?
Yes, Swiss chard grows well in containers. Choose a pot that is at least 12 inches deep and wide. Fill the pot with well-draining potting mix and plant your Swiss chard seeds or seedlings. Water regularly and fertilize as needed. Place the container in a location that receives plenty of sunlight.
Is Swiss chard a cut-and-come-again vegetable?
Yes, Swiss chard is a cut-and-come-again vegetable, meaning you can harvest leaves repeatedly throughout the growing season without killing the plant. This makes it a very productive and rewarding vegetable to grow. Simply harvest the outer leaves as needed, and the plant will continue to produce new leaves from the center.
What are some ways to use Swiss chard in cooking?
Swiss chard is a versatile vegetable that can be used in a variety of dishes. You can sauté it with garlic and olive oil, add it to soups and stews, use it in salads, or even bake it into quiches and pies. The leaves can be used as a substitute for spinach in many recipes. The stems can be cooked separately and used in stir-fries or as a side dish.

Leave a Comment