
Growing Garlic in Bottles might sound a little unconventional, but trust me, it’s a game-changer for any home gardener, especially those of us with limited space! Have you ever dreamt of having a constant supply of fresh, flavorful garlic right at your fingertips, without needing a sprawling garden? Well, that dream can become a reality with this simple and rewarding DIY project.
Garlic, with its pungent aroma and incredible health benefits, has been cultivated for thousands of years, dating back to ancient civilizations in Asia and the Mediterranean. It’s been used not only as a culinary staple but also for its medicinal properties. Now, you can continue this rich tradition in your own home, regardless of whether you have a backyard or just a sunny windowsill.
Let’s face it, buying garlic from the store can be hit or miss. Sometimes it’s old, sometimes it’s bland, and sometimes you just need a clove or two and hate wasting the rest. That’s where growing garlic in bottles comes in! This DIY trick allows you to grow exactly what you need, when you need it, ensuring you always have fresh, flavorful garlic on hand. Plus, it’s a fantastic way to recycle those empty plastic bottles and add a touch of green to your indoor space. I’m excited to show you how easy and fun it is!
Growing Garlic in Bottles: A Fun and Space-Saving DIY Project
Hey there, fellow gardening enthusiasts! Are you short on garden space but still dreaming of fresh, pungent garlic? Well, I’ve got just the project for you! We’re going to learn how to grow garlic in bottles – yes, you read that right! It’s a fantastic way to recycle, save space, and enjoy homegrown garlic, even if you only have a balcony or a sunny windowsill. Let’s dive in!
What You’ll Need
Before we get started, let’s gather our supplies. This is a pretty low-cost project, which is always a win in my book!
* Plastic Bottles: We’re talking about those large soda or water bottles (2-liter or bigger work best). The more, the merrier, depending on how much garlic you want to grow. Make sure they’re clean!
* Garlic Cloves: Choose organic garlic from a local farmer’s market or garden center. Avoid supermarket garlic, as it may have been treated to prevent sprouting. Look for firm, healthy cloves.
* Potting Mix: A good quality potting mix is essential. It needs to be well-draining to prevent the garlic from rotting.
* Gravel or Pebbles: For drainage at the bottom of the bottles.
* Scissors or a Utility Knife: For cutting the bottles. Be careful!
* Water: For watering, of course!
* Optional: Liquid fertilizer for feeding your garlic later on.
Preparing the Bottles
This is where we transform those empty bottles into mini garlic gardens!
1. Clean the Bottles: First things first, give those bottles a good rinse with soap and water. Make sure to remove any labels or sticky residue.
2. Cut the Bottles: Now, carefully cut the bottles in half horizontally. You’ll be using the bottom half as your planting container. You can discard the top half or save it for another project (like a mini greenhouse cover!).
3. Create Drainage Holes: This is crucial! Use your scissors or utility knife to poke several drainage holes in the bottom of each bottle. We don’t want soggy garlic!
4. Add Gravel: Place a layer of gravel or pebbles (about an inch or two) at the bottom of each bottle. This will help with drainage and prevent the potting mix from becoming waterlogged.
Planting the Garlic
Alright, now for the fun part – planting our garlic cloves!
1. Fill with Potting Mix: Fill each bottle with potting mix, leaving about an inch or two of space at the top.
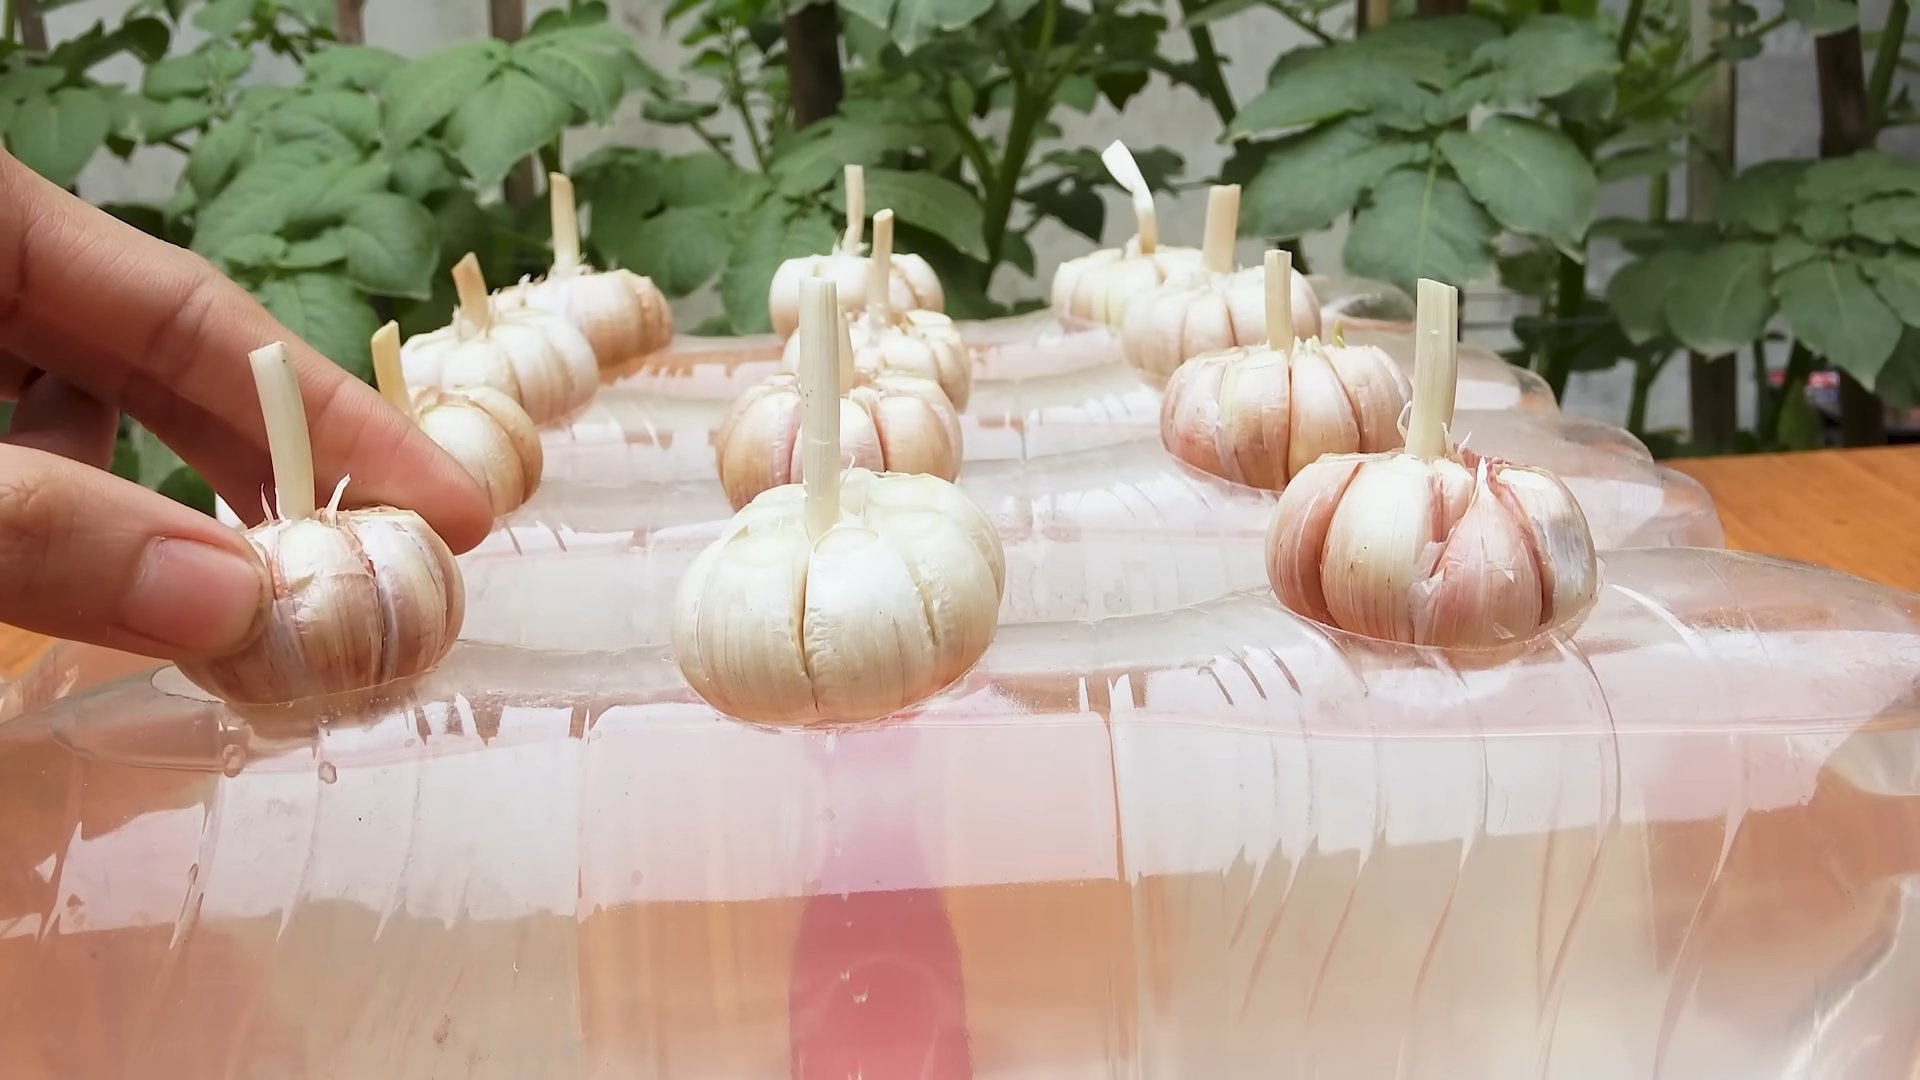
2. Prepare the Cloves: Gently separate the cloves from the garlic bulb. Leave the papery skin on each clove.
3. Plant the Cloves: Plant each clove pointy-side up, about 2-3 inches deep in the potting mix. Space the cloves about 3-4 inches apart. If you’re using a larger bottle, you can plant more cloves.
4. Water Gently: Water the soil gently until it’s moist but not soggy.
Caring for Your Garlic
Now that our garlic is planted, it’s time to nurture it and watch it grow!
1. Location, Location, Location: Place your bottles in a sunny location. Garlic needs at least 6 hours of sunlight per day. A south-facing window or a sunny balcony is ideal.
2. Watering: Water regularly, but don’t overwater! The soil should be moist, but not waterlogged. Check the soil moisture by sticking your finger into the soil. If it feels dry, it’s time to water.
3. Fertilizing (Optional): After a few weeks, you can start feeding your garlic with a liquid fertilizer. Follow the instructions on the fertilizer package. I like to use a balanced fertilizer diluted to half strength.
4. Monitor for Pests and Diseases: Keep an eye out for any pests or diseases. Garlic is generally pretty hardy, but it can be susceptible to things like aphids or fungal diseases. If you spot any problems, address them promptly with an appropriate organic solution.
Troubleshooting
Sometimes things don’t go exactly as planned. Here are a few common issues you might encounter and how to deal with them:
* Yellowing Leaves: This could be a sign of overwatering, underwatering, or nutrient deficiency. Check the soil moisture and adjust your watering accordingly. If the soil is consistently moist, you might be overwatering. If the soil is dry, you need to water more often. If the leaves are yellowing all over, it could be a nutrient deficiency. Try fertilizing with a balanced liquid fertilizer.
* Rotting Cloves: This is usually caused by overwatering or poor drainage. Make sure your bottles have adequate drainage holes and that you’re not overwatering. If you suspect rotting, gently remove the affected cloves and replace the soil.
* Slow Growth: This could be due to insufficient sunlight, poor soil, or nutrient deficiency. Make sure your garlic is getting enough sunlight and that you’re using a good quality potting mix. You can also try fertilizing with a liquid fertilizer.
Harvesting Your Garlic
The moment we’ve all been waiting for – harvesting our homegrown garlic!
1. When to Harvest: Garlic is typically ready to harvest in late spring or early summer, about 8-9 months after planting. The leaves will start to turn yellow and brown, and the bulbs will be plump.
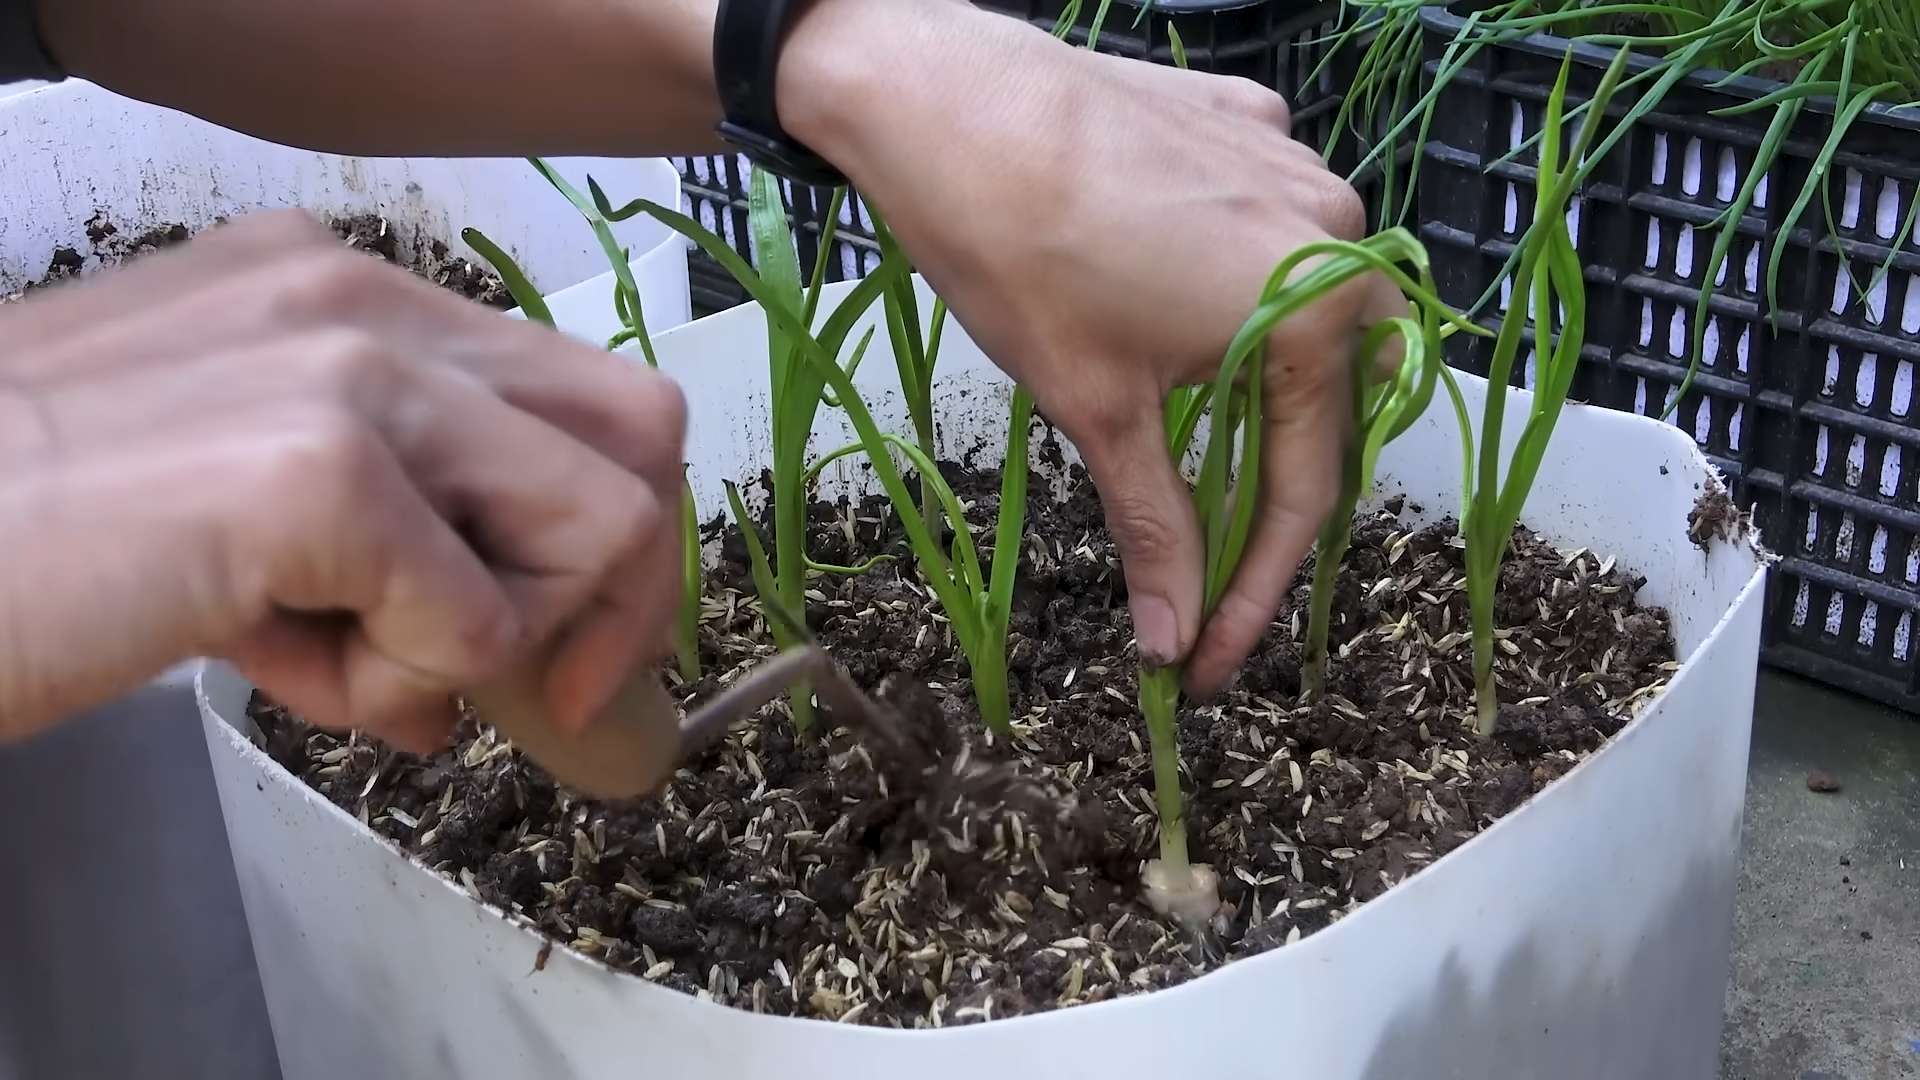
2. How to Harvest: Gently loosen the soil around the garlic bulb with your fingers or a small trowel. Carefully pull the bulb out of the soil.
3. Curing the Garlic: After harvesting, you’ll need to cure the garlic to help it store longer. Brush off any excess soil and leave the bulbs to dry in a well-ventilated area for a few weeks. You can hang them in bunches or spread them out on a screen.
4. Storing the Garlic: Once the garlic is cured, you can store it in a cool, dry, and dark place. Braiding the garlic is a traditional way to store it, but you can also store it in a mesh bag or a basket.
Extra Tips and Tricks
* Choose the Right Garlic: Softneck garlic varieties are generally better suited for warmer climates, while hardneck varieties are more cold-hardy.
* Plant in the Fall: While you can plant garlic in the spring, planting in the fall generally results in larger bulbs. The garlic needs a period of cold dormancy to develop properly.
* Use a Good Quality Potting Mix: Don’t skimp on the potting mix! A good quality potting mix will provide the nutrients and drainage that your garlic needs to thrive.
* Don’t Overwater: Overwatering is one of the most common mistakes people make when growing garlic. Make sure the soil is well-draining and that you’re not watering too often.
* Fertilize Regularly: Garlic is a heavy feeder, so it needs regular fertilization. Use a balanced liquid fertilizer diluted to half strength.
* Remove Scapes: If you’re growing hardneck garlic, you’ll need to remove the scapes (the flower stalks) to encourage bulb growth. You can eat the scapes – they have a mild garlic flavor.
* Rotate Your Crops: Don’t plant garlic in the same spot year after year. Rotate your crops to prevent soilborne diseases.
* Enjoy Your Harvest!: Use your homegrown garlic in all your favorite recipes! It’s so much more flavorful than store-bought garlic.
Why Grow Garlic in Bottles?
You might be wondering, why go through all this trouble to grow garlic in bottles? Well, there are several advantages:
* Space-Saving: This is the biggest benefit! If you have limited garden space, growing garlic in bottles is a great way to enjoy homegrown garlic.
* Recycling: You’re giving those plastic bottles a new life, which is always a good thing.
* Easy to Move: You can easily move the bottles around to follow the sun or protect them from frost.
* Control Over Soil: You have complete control over the soil and nutrients your garlic receives.
* Fun and Educational: It’s a fun and educational project for kids and adults alike.
So there you have it! Growing garlic in bottles is a simple, rewarding, and space-saving way to enjoy fresh, homegrown garlic. Give it a try, and I think you’ll be surprised at how easy and fun it is! Happy gardening!
Conclusion
So, there you have it! Growing garlic in bottles is not just a quirky gardening experiment; it’s a genuinely effective and space-saving method that can bring the joy of fresh, homegrown garlic right to your windowsill or balcony. We’ve walked through the simple steps, highlighting how easy it is to transform discarded plastic bottles into miniature garlic farms.
Why is this DIY trick a must-try? Because it democratizes gardening! You don’t need acres of land or a green thumb passed down through generations. All you need are some empty bottles, soil, water, and a few garlic cloves. It’s an incredibly accessible way to connect with nature, reduce waste by repurposing plastic, and enjoy the unparalleled flavor of freshly grown garlic. Plus, it’s a fantastic educational activity for kids, teaching them about plant life cycles and sustainable practices.
But the beauty of this method lies in its adaptability. Feel free to experiment with different types of garlic. Softneck varieties, known for their braiding capabilities and milder flavor, might be particularly well-suited for bottle growing. You can also try different soil mixes. While a standard potting mix works well, consider adding compost or worm castings for extra nutrients.
Variations and Suggestions:
* Vertical Garden Wall: Attach multiple bottles to a wall or fence to create a stunning vertical garlic garden. This maximizes space and adds a unique aesthetic element to your outdoor area.
* Companion Planting: Consider planting herbs like parsley or chives alongside your garlic in the same bottle. These companion plants can help deter pests and improve the overall health of your garlic.
* Watering System: If you’re prone to forgetting to water your plants, create a simple self-watering system by placing a wick made of cotton or nylon through the drainage holes and into a reservoir of water below.
* Lighting: While garlic thrives in sunlight, if you’re growing indoors, supplement with a grow light, especially during the shorter days of winter. This will ensure your garlic receives adequate light for optimal growth.
* Garlic Scapes: Don’t forget to harvest the garlic scapes! These curly flower stalks are a delicious delicacy that can be used in stir-fries, pesto, or as a flavorful addition to salads. Harvesting the scapes also encourages bulb development.
We wholeheartedly encourage you to give this DIY garlic growing method a try. It’s a rewarding experience that will not only provide you with fresh garlic but also connect you with the natural world in a meaningful way. Remember, even if you’ve never gardened before, this is a great place to start. The process is forgiving, and the results are incredibly satisfying.
Once you’ve tried growing garlic in bottles, we’d love to hear about your experience! Share your photos, tips, and any variations you’ve tried in the comments below. Let’s create a community of bottle-growing garlic enthusiasts and learn from each other’s successes and challenges. Your insights could inspire others to embark on their own garlic-growing journey. Happy gardening!
Frequently Asked Questions (FAQ)
1. What kind of garlic should I use for growing in bottles?
You can use either softneck or hardneck garlic varieties. Softneck garlic tends to be more adaptable to different climates and is often easier to grow in containers. Hardneck garlic, on the other hand, produces scapes (the curly flower stalks) which are a culinary delicacy. Experiment with both to see which you prefer! Just make sure the garlic cloves you use are healthy and plump, free from any signs of mold or disease. Supermarket garlic can work, but locally sourced garlic from a farmer’s market or garden center is often a better choice as it’s more likely to be adapted to your local climate.
2. What type of soil is best for growing garlic in bottles?
A well-draining potting mix is ideal. You can use a standard potting mix from your local garden center. However, amending the soil with compost or worm castings will provide extra nutrients and improve drainage. Avoid using garden soil directly, as it can be too heavy and may contain pests or diseases. A good mix would be equal parts potting mix, compost, and perlite or vermiculite for added drainage.
3. How much sunlight does garlic need when grown in bottles?
Garlic needs at least 6-8 hours of direct sunlight per day. Place your bottles in a sunny location, such as a south-facing windowsill or balcony. If you don’t have enough natural sunlight, consider supplementing with a grow light. This is especially important during the fall and winter months when daylight hours are shorter.
4. How often should I water my garlic plants in bottles?
Water your garlic plants when the top inch of soil feels dry to the touch. Avoid overwatering, as this can lead to root rot. Ensure that your bottles have drainage holes to allow excess water to escape. The frequency of watering will depend on the weather and the type of soil you’re using. In general, you’ll need to water more frequently during hot, dry weather and less frequently during cool, wet weather.
5. How long does it take to grow garlic in bottles?
It typically takes about 6-9 months to grow garlic from cloves to mature bulbs. You’ll plant the cloves in the fall, and they’ll sprout and grow throughout the winter and spring. Harvest time is usually in late spring or early summer when the leaves start to turn yellow and brown.
6. How do I know when my garlic is ready to harvest?
The best time to harvest garlic is when the lower leaves start to turn yellow and brown, but the top leaves are still green. This usually happens in late spring or early summer. You can also gently dig around the base of the plant to check the size of the bulb. If the bulb is large and well-formed, it’s ready to harvest.
7. Can I grow garlic indoors in bottles?
Yes, you can grow garlic indoors in bottles, but it’s important to provide adequate sunlight or supplemental lighting. A south-facing window is ideal, but you may still need to use a grow light to ensure your garlic receives enough light. Also, make sure to provide good ventilation to prevent fungal diseases.
8. What are garlic scapes, and how do I use them?
Garlic scapes are the curly flower stalks that grow from hardneck garlic varieties. They are a delicious culinary delicacy with a mild garlic flavor. You can harvest them when they are still young and tender, usually in late spring or early summer. Use them in stir-fries, pesto, soups, or as a flavorful addition to salads. Harvesting the scapes also encourages the plant to put more energy into bulb development.
9. How do I store my harvested garlic?
After harvesting, cure your garlic by laying the bulbs out in a well-ventilated, dry place for 2-3 weeks. This allows the outer layers to dry and helps prevent spoilage. Once cured, you can store your garlic in a cool, dark, and dry place for several months. Braiding the garlic is a traditional method of storage that also looks beautiful.
10. What if my garlic plants develop pests or diseases?
Inspect your garlic plants regularly for signs of pests or diseases. Common pests include aphids and thrips. Diseases can include fungal infections like rust or mildew. If you notice any problems, treat them promptly with organic pest control methods or fungicides. Good air circulation and proper watering can help prevent many problems. Neem oil is a good organic option for pest and disease control.

Leave a Comment