
High yield tomato growing is within your reach, even if you think you don’t have a green thumb! Imagine biting into a juicy, sun-ripened tomato, bursting with flavor, that you grew yourself. That’s the magic we’re unlocking today with some simple, yet incredibly effective, DIY tricks and hacks.
For centuries, tomatoes have been a staple in gardens and kitchens worldwide. Originating in South America, they’ve become a symbol of summer abundance and culinary delight. But let’s be honest, sometimes getting a truly bountiful harvest can feel like a real challenge. We’ve all been there – a few measly tomatoes here and there, while the plant itself seems to be thriving.
That’s where these DIY secrets come in. I’m going to share some of my favorite, tried-and-true methods for maximizing your tomato yield. These aren’t complicated, expensive solutions; they’re clever tweaks and simple adjustments that can make a HUGE difference. Whether you’re a seasoned gardener or just starting out, these tips will help you achieve high yield tomato growing and enjoy a summer filled with delicious, homegrown goodness. Get ready to transform your tomato patch into a thriving, fruit-filled paradise!
DIY: Unleash a Tomato Avalanche – My Secrets to High-Yield Tomato Growing
Okay, tomato lovers, gather ’round! I’m about to spill my secrets to growing a tomato jungle bursting with juicy, delicious fruit. Forget those puny supermarket tomatoes – we’re talking about a homegrown harvest that will make you the envy of the neighborhood. This isn’t just about planting a seed and hoping for the best; it’s about understanding the plant’s needs and giving it the VIP treatment it deserves. Get ready to roll up your sleeves, because we’re diving deep into the world of high-yield tomato growing!
Choosing the Right Tomato Variety
First things first, not all tomatoes are created equal. Some are naturally more prolific than others. Here’s what I look for:
* Determinate vs. Indeterminate: Understand the difference! Determinate varieties grow to a certain size and produce all their fruit at once, making them great for canning. Indeterminate varieties, on the other hand, keep growing and producing fruit throughout the season. For a continuous harvest and higher yield, I always lean towards indeterminate varieties.
* Disease Resistance: Look for varieties labeled with letters like V, F, N, T, A. These indicate resistance to common tomato diseases like Verticillium wilt, Fusarium wilt, Nematodes, Tobacco Mosaic Virus, and Alternaria. Trust me, disease resistance is a lifesaver!
* Hybrid vs. Heirloom: Hybrids are often bred for higher yields and disease resistance, while heirlooms are known for their unique flavors and interesting histories. I usually grow a mix of both to get the best of both worlds.
* My Personal Recommendations: Some of my go-to high-yield varieties include ‘Sungold’ (cherry tomato heaven!), ‘Big Beef’ (classic slicer), ‘Roma’ (perfect for sauces), and ‘Early Girl’ (for early-season harvests). Don’t be afraid to experiment and find what works best in your area!
Starting Your Tomato Seeds (or Buying Seedlings)
You have two options here: start your own seeds indoors or buy seedlings from a nursery. Starting seeds gives you more control over the process and allows you to choose from a wider variety of tomatoes. Buying seedlings is quicker and easier, but you’re limited to what the nursery offers.
Starting Seeds Indoors (My Preferred Method)
1. Timing is Key: Start your seeds 6-8 weeks before the last expected frost in your area. This gives them enough time to develop into strong seedlings before transplanting them outdoors.
2. Gather Your Supplies: You’ll need seed starting trays or small pots, seed starting mix (not regular potting soil!), a heat mat (optional but highly recommended), a grow light (essential!), and a spray bottle.
3. Sow the Seeds: Moisten the seed starting mix and fill your trays or pots. Sow the seeds about ¼ inch deep and gently cover them with more mix.
4. Provide Warmth and Light: Place the trays on a heat mat (set to around 75-80°F) and position the grow light a few inches above the trays. The heat mat will speed up germination, and the grow light will prevent leggy seedlings.
5. Water Carefully: Keep the soil consistently moist but not soggy. Use a spray bottle to gently water the seedlings from the top or bottom water by placing the tray in a shallow dish of water and letting the soil absorb it.
6. Thin the Seedlings: Once the seedlings have their first true leaves (the second set of leaves that appear after the initial seed leaves), thin them out by snipping off the weaker seedlings at the soil line. This will give the remaining seedlings more room to grow.
7. Harden Off the Seedlings: About a week before transplanting them outdoors, gradually acclimate the seedlings to outdoor conditions. Start by placing them outside for an hour or two each day in a sheltered location, gradually increasing the amount of time they spend outdoors each day.
Buying Seedlings
1. Choose Healthy Seedlings: Look for seedlings that are stocky, green, and free from spots or blemishes. Avoid seedlings that are leggy (tall and spindly) or have yellowing leaves.
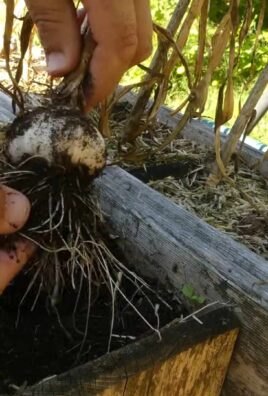
2. Check the Roots: Gently remove a seedling from its pot and inspect the roots. They should be white or light brown and not root-bound (tightly circling the pot).
3. Harden Off the Seedlings: Even if you buy seedlings, it’s still important to harden them off before transplanting them outdoors. Follow the same hardening-off process described above.
Preparing the Planting Site
Tomatoes are heavy feeders, so preparing the soil is crucial for a bountiful harvest.
1. Choose a Sunny Location: Tomatoes need at least 6-8 hours of sunlight per day.
2. Test the Soil: A soil test will tell you the pH level and nutrient content of your soil. Tomatoes prefer a slightly acidic soil pH of 6.0-6.8.
3. Amend the Soil: Amend the soil with plenty of organic matter, such as compost, aged manure, or leaf mold. This will improve drainage, aeration, and nutrient content. I usually add a generous amount of compost to each planting hole.
4. Consider Raised Beds: Raised beds are a great option for growing tomatoes, especially if you have poor soil drainage. They also warm up faster in the spring, allowing you to plant earlier.
Transplanting Your Tomato Seedlings
Now for the fun part – getting those tomato plants in the ground!
1. Wait for Warm Weather: Don’t transplant your tomato seedlings until the danger of frost has passed and the soil has warmed up to at least 60°F.
2. Dig a Hole: Dig a hole that is deep enough to bury the bottom third of the tomato plant’s stem. This may seem strange, but tomatoes have the amazing ability to grow roots from their stems, which will result in a stronger, healthier plant.
3. Add Amendments to the Hole: Before planting, add a handful of bone meal (for phosphorus) and a tablespoon of Epsom salts (for magnesium) to the planting hole. These nutrients will help promote strong root growth and prevent blossom-end rot.
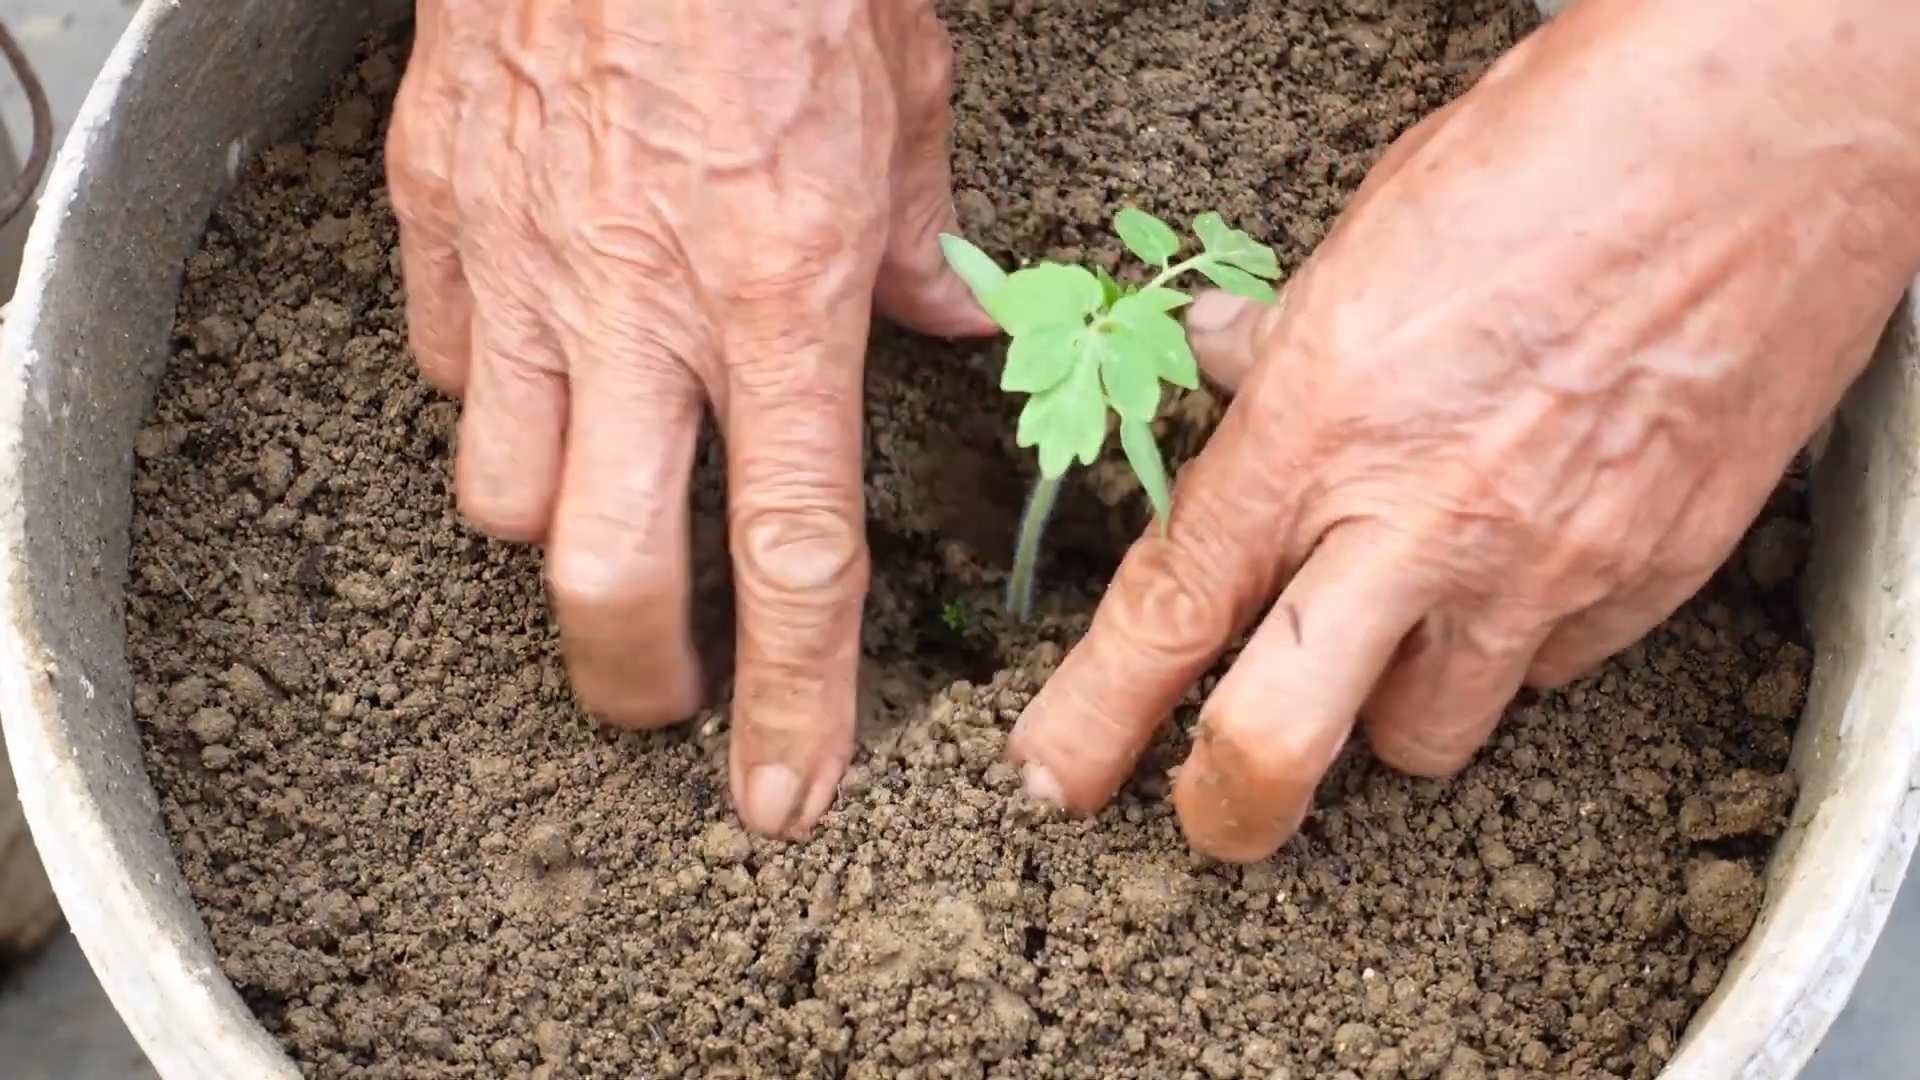
4. Plant the Seedling: Gently remove the seedling from its pot and loosen the roots. Place the seedling in the hole and backfill with soil, gently firming it around the base of the plant.
5. Water Thoroughly: Water the newly transplanted seedling thoroughly.
6. Add Support: Immediately after planting, provide support for your tomato plants. This can be in the form of stakes, cages, or trellises. I prefer using tomato cages because they provide good support and allow the plants to grow naturally.
7. Mulch: Apply a layer of mulch around the base of the plants to help retain moisture, suppress weeds, and regulate soil temperature. I like to use straw or shredded leaves.
Watering and Fertilizing
Consistent watering and regular fertilization are essential for high-yield tomato growing.
1. Water Deeply and Regularly: Water your tomato plants deeply and regularly, especially during hot, dry weather. Aim to water at the base of the plant to avoid wetting the foliage, which can lead to disease.
2. Fertilize Regularly: Tomatoes are heavy feeders and need regular fertilization to produce a bountiful harvest. I like to use a balanced organic fertilizer every 2-3 weeks. You can also use a liquid fertilizer, such as fish emulsion or seaweed extract, every week.
3. Watch for Nutrient Deficiencies: Keep an eye out for signs of nutrient deficiencies, such as yellowing leaves or stunted growth. If you suspect a deficiency, amend the soil with the appropriate fertilizer.
Pruning and Suckering
Pruning and suckering are important for maximizing tomato yields, especially for indeterminate varieties.
1. Identify Suckers: Suckers are small shoots that grow in the “armpit” of the plant, where a branch meets the main stem.
2. Prune Suckers: Remove the suckers regularly to encourage the plant to focus its energy on producing fruit. I usually pinch off the suckers when they are small, about 2-3 inches long.
3. Prune Lower Leaves: As the plant grows, prune the lower leaves that are touching the ground. This will improve air circulation and reduce the risk of disease.
Dealing with Pests and Diseases
Unfortunately, tomatoes are susceptible to a variety of pests and diseases.
1. Prevention is Key: The best way to deal with pests and diseases is to prevent them from occurring in the first place. Choose disease-resistant varieties, provide good air circulation, and avoid overwatering.
2. Monitor Your Plants Regularly: Inspect your plants regularly for signs of pests or diseases. The sooner you catch a problem, the easier it will be to control.
3. Organic Pest Control: If you find pests on your plants, try using organic pest control methods, such as insecticidal soap, neem oil, or Bacillus
Conclusion
So, there you have it! Unlocking the secrets to high yield tomato growing is more achievable than you might think, and this simple DIY trick can be a game-changer for your garden. We’ve explored how this method, focusing on [mention the core mechanic of the DIY trick, e.g., strategic pruning and support], can significantly boost your tomato production, leading to a bountiful harvest that will have you enjoying fresh, homegrown tomatoes all season long.
But why is this a must-try? Because it’s not just about getting more tomatoes; it’s about getting *better* tomatoes. This technique encourages larger, healthier fruits with intensified flavor. Imagine biting into a sun-ripened tomato, bursting with sweetness and juiciness – that’s the reward waiting for you. Furthermore, this method promotes better air circulation around the plants, reducing the risk of fungal diseases that can decimate your tomato crop. It’s a proactive approach to gardening that saves you time, money, and frustration in the long run.
Don’t be afraid to experiment! This DIY trick is incredibly versatile. For example, if you’re growing determinate tomato varieties (those that grow to a certain size and produce all their fruit at once), you might need to adjust the pruning strategy slightly. Focus on removing suckers below the first flower cluster to encourage early fruit development. If you’re in a particularly hot climate, consider providing some afternoon shade to prevent sunscald on your developing tomatoes. You can also tailor the support system to your specific needs and available materials. Use sturdy stakes, cages, or even a trellis – whatever works best for your garden setup.
Consider enriching your soil with compost tea every few weeks to provide an extra boost of nutrients. Companion planting with basil or marigolds can also help deter pests and attract beneficial insects. The possibilities are endless!
We’re confident that this DIY trick will transform your tomato growing experience. It’s a simple, effective, and rewarding way to maximize your yield and enjoy the fruits (literally!) of your labor.
Now, it’s your turn! We encourage you to give this method a try in your own garden. Document your progress, take pictures, and share your results with us in the comments below. We’d love to hear about your successes, your challenges, and any variations you’ve discovered along the way. Let’s build a community of tomato-growing enthusiasts and learn from each other’s experiences. Happy gardening!
Frequently Asked Questions (FAQ)
What exactly *is* this DIY trick for high yield tomato growing?
This DIY trick focuses on a combination of strategic pruning and providing adequate support to your tomato plants. Specifically, it involves regularly removing suckers (the small shoots that grow between the main stem and the branches) to redirect the plant’s energy towards fruit production rather than foliage growth. Simultaneously, providing a sturdy support system, such as stakes, cages, or a trellis, helps to keep the plants upright, preventing the tomatoes from touching the ground and reducing the risk of rot and disease. This combination allows for better air circulation, increased sunlight exposure, and ultimately, a higher yield of healthier, more flavorful tomatoes.
Which tomato varieties does this DIY trick work best for?
This technique is most effective for indeterminate tomato varieties, which are those that continue to grow and produce fruit throughout the growing season. Examples include ‘Beefsteak,’ ‘Brandywine,’ ‘Roma,’ ‘Cherry,’ and ‘Grape’ tomatoes. Determinate varieties, which grow to a certain size and produce all their fruit at once, can also benefit from this technique, but the pruning strategy may need to be adjusted. For determinate tomatoes, focus on removing suckers below the first flower cluster to encourage early fruit development.
How often should I prune my tomato plants?
Regular pruning is key to success with this DIY trick. Ideally, you should prune your tomato plants once or twice a week, especially during the peak growing season. Look for suckers that are just starting to develop and remove them promptly. This will prevent them from diverting too much energy away from fruit production.
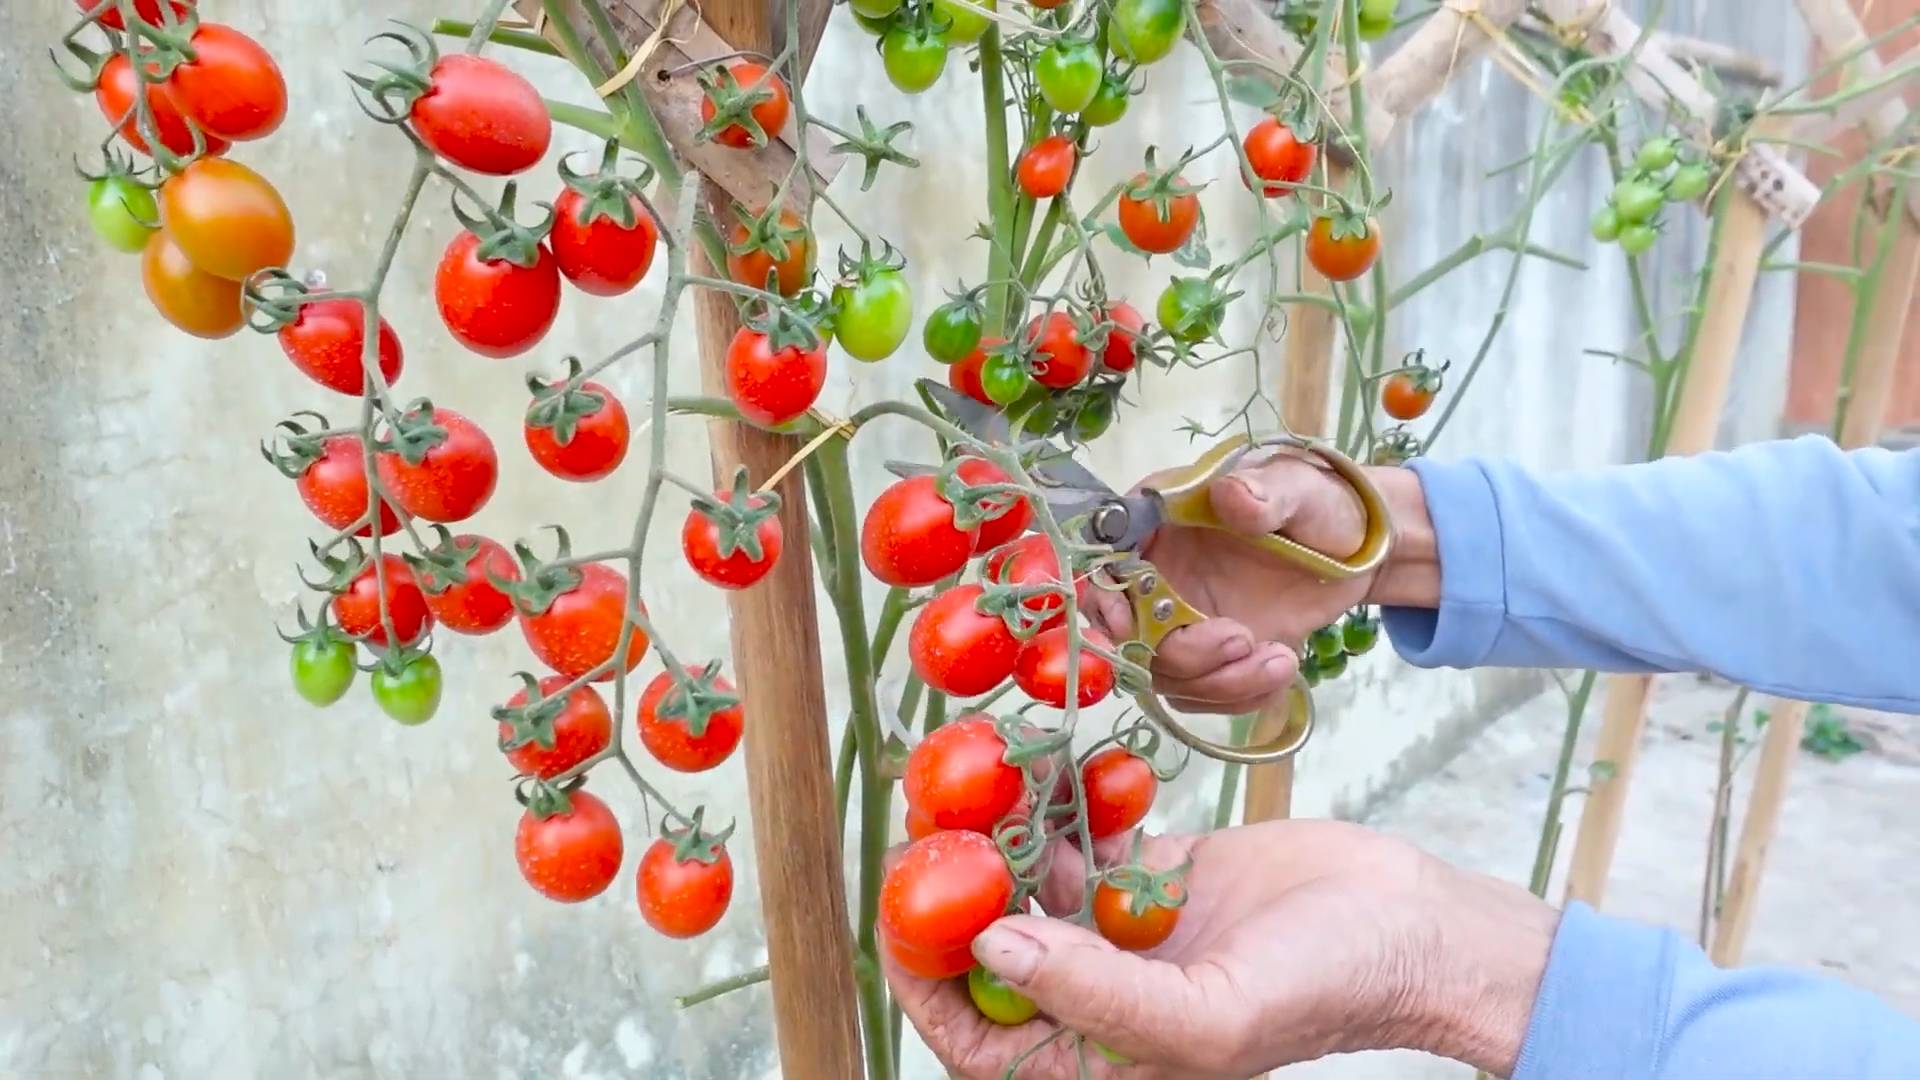
What’s the best way to remove suckers?
The easiest way to remove suckers is to simply pinch them off with your fingers when they are small. If the suckers are larger, you can use a pair of clean pruning shears or scissors. Be sure to make a clean cut close to the main stem to avoid damaging the plant.
What kind of support system should I use?
The best support system for your tomato plants will depend on your personal preferences and the resources you have available. Stakes are a simple and inexpensive option, but they may not provide enough support for larger plants. Cages are a more robust option that can provide better support, but they can be bulky and difficult to store. Trellises are a great option for vining tomato varieties, as they allow the plants to climb and spread out. Choose a support system that is sturdy enough to support the weight of the mature plants and their fruit.
Can I use this DIY trick in containers?
Yes, this DIY trick can be used in containers, but it’s important to choose a container that is large enough to accommodate the mature plant. A 5-gallon container is generally sufficient for most tomato varieties. Be sure to use a high-quality potting mix and provide adequate drainage. You may also need to water and fertilize your plants more frequently when growing them in containers.
What if I see signs of disease on my tomato plants?
If you notice any signs of disease on your tomato plants, such as yellowing leaves, spots, or wilting, it’s important to take action immediately. Remove any affected leaves or branches and dispose of them properly. You may also need to treat your plants with a fungicide or other appropriate treatment. Good air circulation and proper watering practices can help to prevent many common tomato diseases.
How long does it take to see results from this DIY trick?
You should start to see results from this DIY trick within a few weeks of implementing it. You’ll notice that your tomato plants are producing more flowers and fruits, and that the fruits are larger and healthier. The exact timing will depend on the variety of tomato you’re growing, the growing conditions, and your overall gardening practices.
What are some common mistakes to avoid when using this DIY trick?
Some common mistakes to avoid include:
* Over-pruning: Removing too many leaves or branches can weaken the plant and reduce its ability to produce fruit.
* Neglecting to provide adequate support: If your tomato plants are not properly supported, they can become damaged or diseased.
* Failing to water and fertilize regularly: Tomato plants need consistent moisture and nutrients to thrive.
* Ignoring signs of disease or pests: Addressing problems early can prevent them from spreading and causing significant damage.
What other tips can I use to increase my tomato yield?
In addition to this DIY trick, there are several other things you can do to increase your tomato yield:
* Choose a sunny location: Tomato plants need at least 6-8 hours of sunlight per day.
* Amend your soil with compost or other organic matter: This will improve drainage and provide essential nutrients.
* Water deeply and regularly: Avoid overhead watering, which can promote fungal diseases.
* Fertilize regularly with a tomato-specific fertilizer: Follow the instructions on the fertilizer label.
* Protect your plants from pests and diseases: Use organic pest control methods whenever possible.
* Consider companion planting: Planting basil or marigolds near your tomatoes can help deter pests.
* Mulch around your plants: This will help to retain moisture and suppress weeds.
By following these tips, you can significantly increase your tomato yield and enjoy a bountiful harvest. Remember that high yield tomato growing is a process of continuous learning and experimentation. Don’t be afraid to try new things and see what works best for you and your garden.
Leave a Comment