
Indoor Sponge Gourd Growing might sound like a challenge reserved for seasoned gardeners, but trust me, it’s more achievable than you think! Have you ever dreamt of harvesting your own fresh, homegrown sponge gourds right from the comfort of your home? Imagine the satisfaction of using your own produce in delicious stir-fries or even crafting natural loofah sponges. This isn’t just a gardening project; it’s a journey into self-sufficiency and sustainable living.
The sponge gourd, also known as luffa, has a rich history, deeply rooted in Asian cultures where it’s been cultivated for centuries, not only for its culinary uses but also for its incredible versatility. From traditional medicine to household cleaning, this remarkable plant has served many purposes. But why should you bother with indoor sponge gourd growing? Well, for many of us, space is a premium. Maybe you live in an apartment with a small balcony, or perhaps your outdoor garden is limited. This DIY guide opens up the possibility of enjoying fresh, homegrown produce regardless of your living situation. Plus, controlling the growing environment indoors allows you to extend the growing season and protect your precious gourds from pests and unpredictable weather.
I’m here to share some simple yet effective DIY tricks and hacks that will empower you to successfully grow sponge gourds indoors. Get ready to roll up your sleeves and transform your living space into a thriving indoor garden!
Growing Sponge Gourds Indoors: A Comprehensive DIY Guide
Hey there, fellow gardening enthusiasts! Ever thought about growing your own sponge gourds? Not just any gourds, but the kind you can actually use for scrubbing! It’s a rewarding experience, and while they typically thrive outdoors, I’m going to show you how to cultivate these fascinating plants right inside your home. Get ready to roll up your sleeves and dive into the world of indoor sponge gourd cultivation!
Choosing the Right Variety and Preparing Your Seeds
Before we get our hands dirty, let’s talk about selecting the right sponge gourd variety and prepping those seeds for a successful start.
* Variety Selection: Opt for smaller varieties of sponge gourds that are more manageable for indoor growing. Some good options include ‘Smooth Luffa’ or ‘Angled Luffa’ (also known as Chinese okra). These tend to be less aggressive growers compared to some of the larger varieties.
* Seed Scarification: Sponge gourd seeds have a tough outer shell, so scarification helps them germinate faster. Gently rub the seeds with sandpaper or nick them with a knife. Be careful not to damage the inner seed!
* Seed Soaking: Soak the scarified seeds in lukewarm water for 24-48 hours. This softens the seed coat further and encourages germination. You’ll likely see some seeds start to sprout during this time.
Step-by-Step Planting Instructions
Now for the fun part: planting! Follow these steps carefully to give your sponge gourd seeds the best possible start.
1. Prepare Your Containers: Choose large containers, at least 10-15 gallons in size. Sponge gourds have extensive root systems, so they need plenty of room to grow. Make sure the containers have drainage holes to prevent waterlogging.
2. Select Your Soil: Use a well-draining potting mix rich in organic matter. A mix of compost, peat moss, and perlite works well. Avoid using garden soil, as it can compact and hinder drainage.
3. Planting the Seeds: Fill your containers with the potting mix, leaving about an inch of space at the top. Plant the soaked seeds about 1 inch deep, spacing them a few inches apart if you’re planting multiple seeds in the same container.
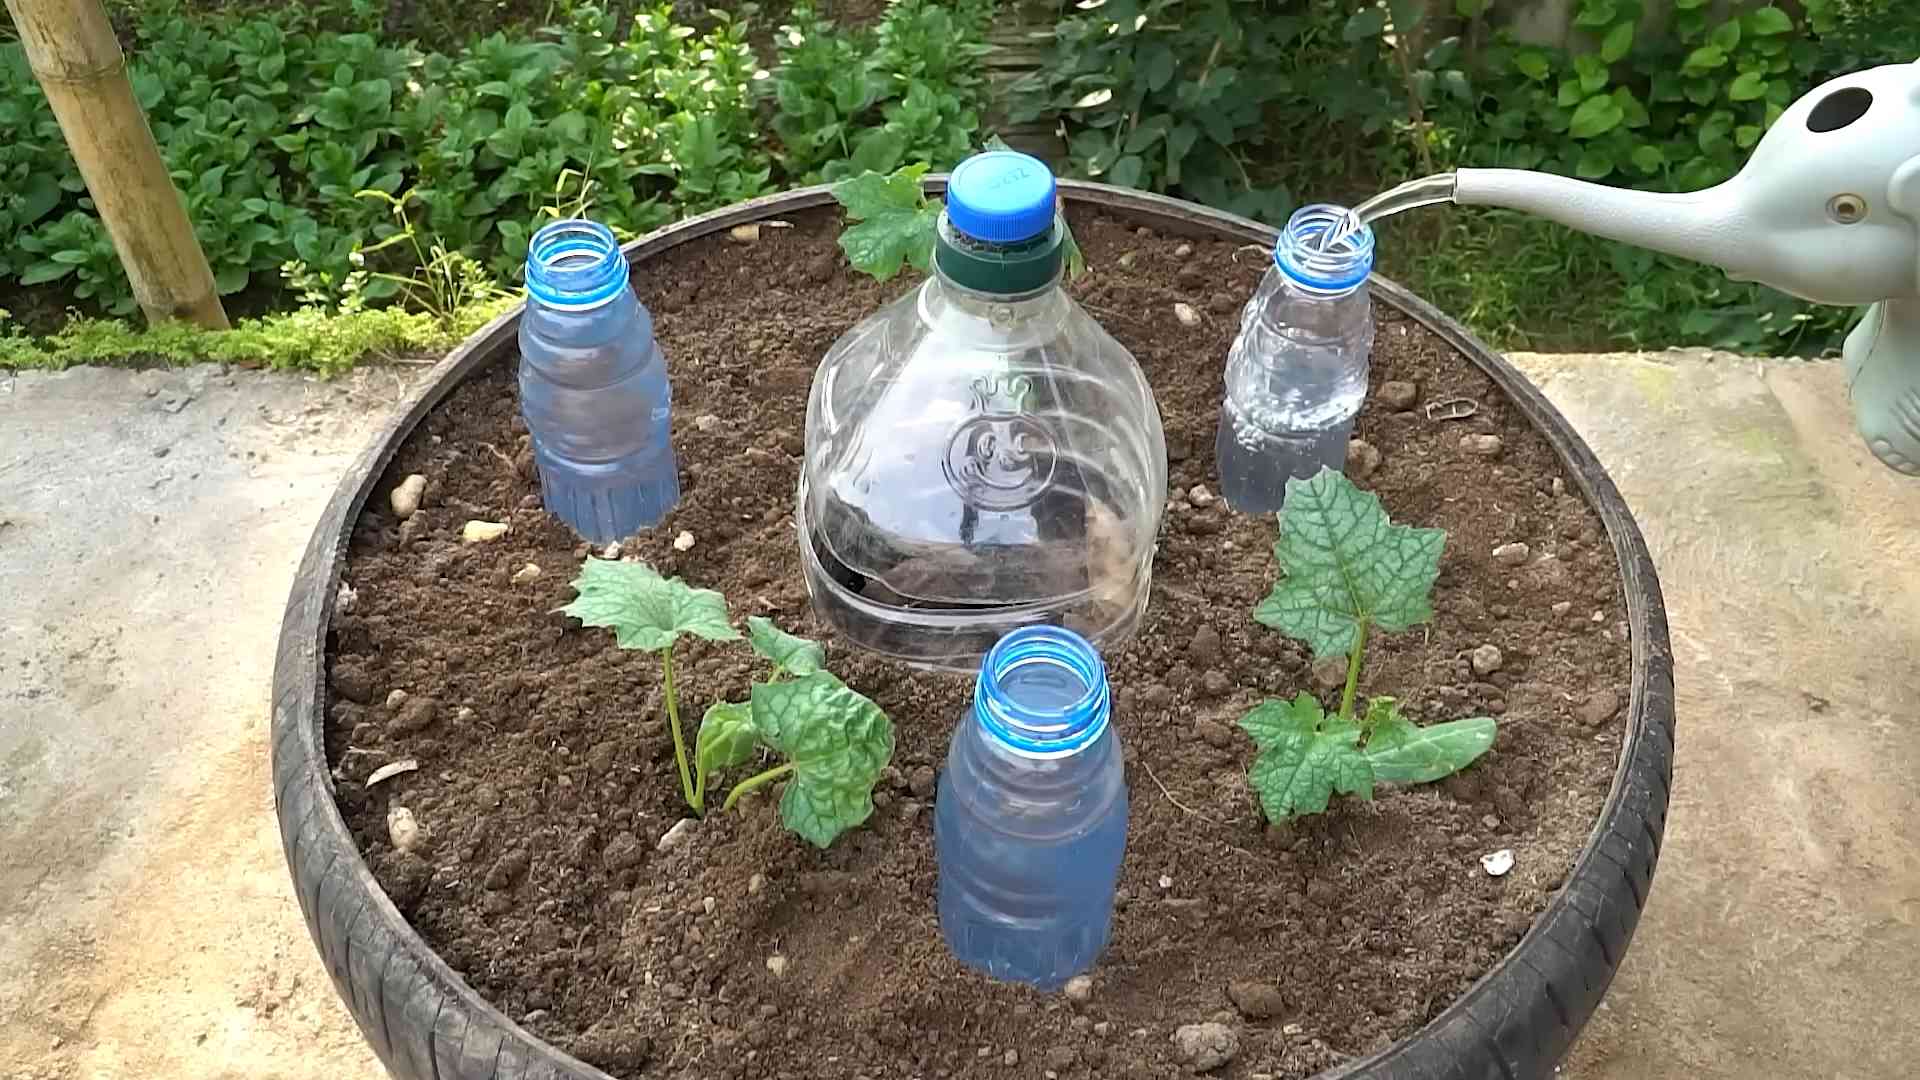
4. Watering: Gently water the soil until it’s evenly moist but not soggy. Avoid overwatering, as this can lead to root rot.
5. Creating a Mini Greenhouse: Cover the containers with plastic wrap or a clear plastic bag to create a mini greenhouse effect. This helps retain moisture and warmth, which are essential for germination.
6. Finding the Right Spot: Place the containers in a warm location with plenty of indirect sunlight. A south-facing window is ideal.
7. Germination Time: Be patient! Sponge gourd seeds can take anywhere from 7 to 21 days to germinate, depending on the temperature and humidity.
8. Removing the Cover: Once the seedlings emerge, remove the plastic wrap or bag.
Providing Support and Training Your Vines
Sponge gourds are vines, so they need support to climb. This is crucial for indoor growing, as they can quickly become unruly.
* Choosing a Support System: Install a sturdy trellis, bamboo stakes, or a netting system in your containers. The support should be tall enough to accommodate the mature size of the vine.
* Training the Vines: Gently guide the vines up the support system as they grow. Use plant ties or clips to secure them in place. Regularly prune any side shoots or tendrils that are not needed to maintain a manageable shape.
* Air Circulation: Ensure good air circulation around the plants to prevent fungal diseases. A small fan can help with this.
Watering, Fertilizing, and Pollinating
Proper watering, fertilization, and pollination are essential for healthy growth and fruit production.
* Watering Schedule: Water the plants regularly, keeping the soil consistently moist but not waterlogged. Check the soil moisture level daily and water when the top inch feels dry.
* Fertilizing: Feed the plants with a balanced liquid fertilizer every two weeks during the growing season. Look for a fertilizer with a ratio of 10-10-10 or similar. You can also use compost tea or other organic fertilizers.
* Pollination: Sponge gourds have separate male and female flowers. In an outdoor setting, bees and other insects typically handle pollination. Indoors, you’ll need to hand-pollinate the flowers.
* Identifying Male and Female Flowers: Male flowers have a long, slender stem, while female flowers have a small, immature gourd at the base of the flower.
* Hand-Pollination Process: Use a small paintbrush or cotton swab to collect pollen from the male flower and transfer it to the stigma of the female flower. Do this in the morning when the flowers are open.
* Pollination Success: If pollination is successful, the small gourd at the base of the female flower will start to swell and grow.
Dealing with Pests and Diseases
Even indoors, your sponge gourds can be susceptible to pests and diseases. Here’s how to deal with them:
* Common Pests: Watch out for aphids, spider mites, and whiteflies. These pests can suck the sap from the leaves and weaken the plants.
* Pest Control: Treat infestations with insecticidal soap, neem oil, or horticultural oil. You can also try introducing beneficial insects like ladybugs to control the pests naturally.
* Common Diseases: Powdery mildew and fungal leaf spots are common diseases that can affect sponge gourds.
* Disease Prevention: Ensure good air circulation, avoid overwatering, and remove any infected leaves promptly. Treat fungal diseases with a fungicide if necessary.
Harvesting and Processing Your Sponge Gourds
The moment you’ve been waiting for: harvesting your homegrown sponges!
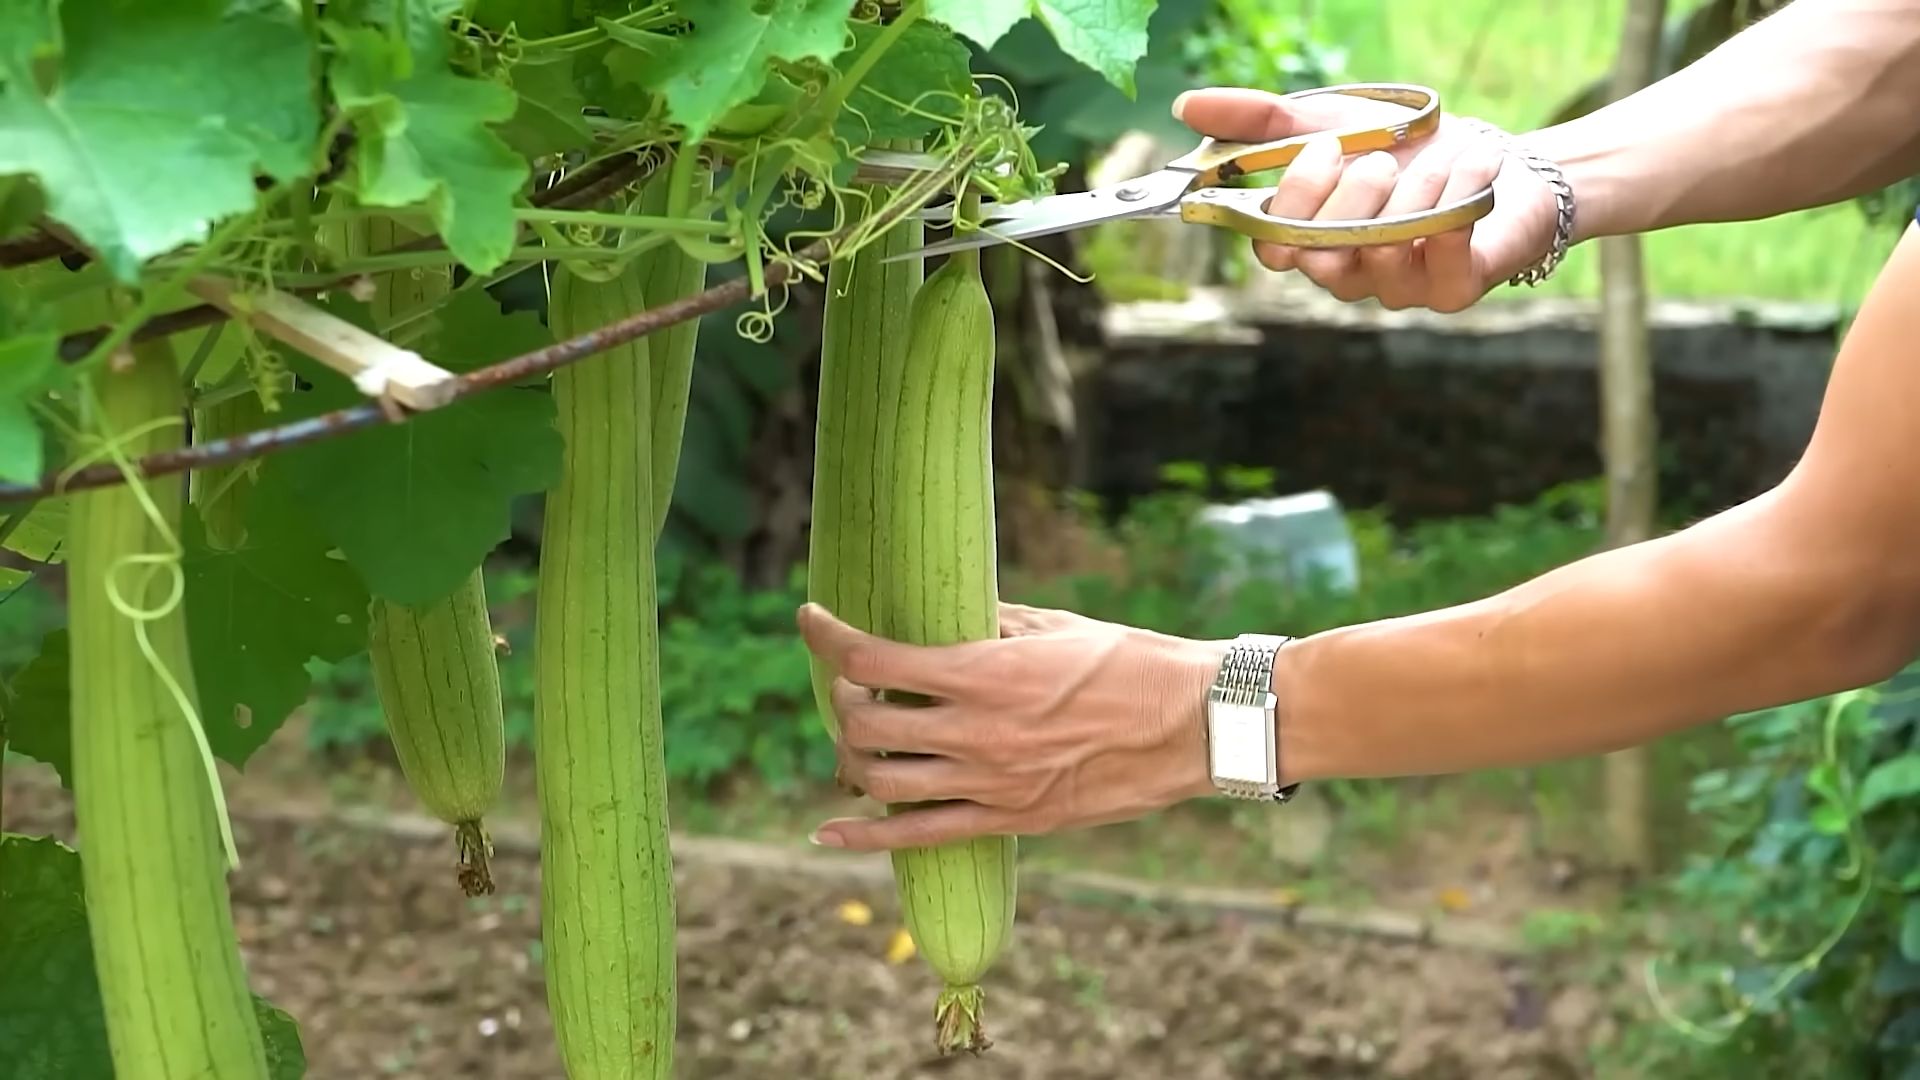
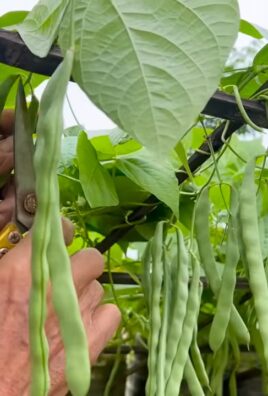
* Harvesting Time: Harvest the sponge gourds when they are mature but still green. The skin should be firm and the gourd should feel relatively light.
* Harvesting Technique: Use a sharp knife or pruning shears to cut the gourd from the vine, leaving a short stem attached.
* Processing the Gourds:
1. Soaking: Soak the harvested gourds in water for several days to soften the skin.
2. Removing the Skin: Peel off the skin using your hands or a vegetable peeler.
3. Removing the Seeds: Shake out the seeds and rinse the gourd thoroughly. You can save the seeds for planting next year.
4. Drying: Dry the gourds in a well-ventilated area for several weeks until they are completely dry and stiff.
5. Bleaching (Optional): If you want a whiter sponge, you can soak the dried gourds in a diluted bleach solution for a few hours. Rinse them thoroughly and dry them again.
* Using Your Sponges: Once the gourds are dry, they are ready to use as natural sponges for scrubbing dishes, cleaning your body, or exfoliating your skin.
Troubleshooting Common Issues
Even with the best care, you might encounter some challenges along the way. Here are some common issues and how to address them:
* Poor Germination: If your seeds don’t germinate, make sure they are fresh and properly scarified and soaked. Check the temperature and humidity levels, and ensure the soil is not too wet or too dry.
* Yellowing Leaves: Yellowing leaves can be a sign of overwatering, nutrient deficiency, or pest infestation. Adjust your watering schedule, fertilize the plants, and inspect them for pests.
* Lack of Fruit Production: If your plants are not producing fruit, it could be due to insufficient pollination, lack of sunlight, or nutrient deficiency. Hand-pollinate the flowers, move the plants to a sunnier location, and fertilize them regularly.
* Slow Growth: Slow growth can be caused by inadequate sunlight, poor soil, or pest infestation. Provide more sunlight, improve the soil quality, and control pests.
Final Thoughts
Growing sponge gourds indoors can be a bit challenging, but it’s definitely doable with the right knowledge and care. Don’t be afraid to experiment and learn from your mistakes. With a little patience and dedication, you’ll be rewarded with a bountiful harvest of natural sponges that you can use for years to come. Happy gardening!
Conclusion
So, there you have it! Growing sponge gourd indoors might seem like a challenge, but with a little planning and these simple DIY tricks, you can absolutely enjoy fresh, homegrown loofahs right from the comfort of your home. This isn’t just about saving money; it’s about experiencing the satisfaction of nurturing a plant from seed to harvest, knowing exactly where your loofah comes from, and reducing your reliance on commercially produced sponges that often contribute to environmental waste.
The beauty of this indoor sponge gourd growing method lies in its adaptability. Feel free to experiment with different container sizes to see what works best for your space. If you have a particularly sunny window, try positioning your plant there for even more robust growth. Consider adding a diluted seaweed extract to your watering routine every couple of weeks to give your gourd an extra boost of nutrients.
Don’t be afraid to get creative with your trellis system! While we suggested a simple bamboo structure, you could use repurposed materials like old ladders, metal shelving, or even sturdy branches to create a unique and visually appealing support for your growing vine. Think vertically and maximize your space!
Beyond the standard sponge gourd, why not explore different varieties? There are several cultivars that offer variations in size, shape, and even texture. Some are known for their particularly soft and pliable fibers, while others are more robust and durable. Experimenting with different varieties can add an exciting dimension to your indoor gardening adventure.
Remember, patience is key. Growing sponge gourd, especially indoors, requires a bit of time and attention. Don’t be discouraged if your first attempt isn’t perfect. Learn from your experiences, adjust your approach, and keep experimenting. The reward of harvesting your own homegrown loofah is well worth the effort.
We truly believe that this DIY trick is a game-changer for anyone looking to embrace a more sustainable and self-sufficient lifestyle. It’s a fun, rewarding, and ultimately practical way to bring a touch of nature indoors and enjoy the benefits of fresh, homegrown produce.
So, what are you waiting for? Grab some seeds, gather your supplies, and embark on your indoor sponge gourd growing journey today! We’re confident that you’ll be amazed by the results.
And most importantly, we want to hear about your experiences! Share your tips, tricks, and photos with us in the comments below. Let’s create a community of indoor sponge gourd enthusiasts and learn from each other. Your insights could help others succeed and inspire even more people to give this amazing DIY project a try. Let us know what kind of fertilizer you use, what kind of soil works best, and any other tips you might have. Together, we can unlock the full potential of indoor sponge gourd growing!
Frequently Asked Questions (FAQ)
What is the best time of year to start growing sponge gourd indoors?
The ideal time to start your sponge gourd seeds indoors is typically 6-8 weeks before the last expected frost in your region. This allows the seedlings to develop a strong root system before being transplanted into a larger container. If you live in a warmer climate with a longer growing season, you can adjust the timing accordingly. However, since you are growing indoors, you can technically start at any time of year, but providing adequate light and warmth will be crucial during the colder months. Consider using grow lights to supplement natural sunlight, especially during winter.
How much sunlight does my indoor sponge gourd plant need?
Sponge gourds are sun-loving plants and require at least 6-8 hours of direct sunlight per day to thrive. If you don’t have a south-facing window that provides sufficient sunlight, you’ll need to supplement with artificial grow lights. LED grow lights are a great option as they are energy-efficient and provide the full spectrum of light that plants need for photosynthesis. Position the grow lights a few inches above the plant and adjust as it grows. Monitor your plant closely for signs of insufficient light, such as leggy growth or pale leaves.
What type of soil is best for growing sponge gourd indoors?
Sponge gourds prefer well-draining, nutrient-rich soil. A good potting mix for indoor sponge gourd growing would be a combination of equal parts:
* Compost: Provides essential nutrients and improves soil structure.
* Peat moss or coco coir: Helps retain moisture and improves drainage.
* Perlite or vermiculite: Enhances drainage and aeration.
Avoid using garden soil, as it can be too heavy and may contain pests or diseases. You can also add a slow-release fertilizer to the potting mix to provide a steady supply of nutrients throughout the growing season.
How often should I water my indoor sponge gourd plant?
Water your sponge gourd plant regularly, keeping the soil consistently moist but not waterlogged. Check the soil moisture level by sticking your finger about an inch deep into the soil. If it feels dry, it’s time to water. Water deeply, allowing the excess water to drain out of the bottom of the container. Avoid overwatering, as this can lead to root rot. During hot weather, you may need to water more frequently. Also, consider the size of your container; larger containers will retain moisture longer than smaller ones.
How do I pollinate my indoor sponge gourd flowers?
Sponge gourds have separate male and female flowers. In an outdoor setting, bees and other insects typically handle pollination. However, indoors, you’ll need to hand-pollinate the flowers to ensure fruit production. To hand-pollinate, use a small paintbrush or cotton swab to collect pollen from the male flower (the one with a long, thin stem) and transfer it to the female flower (the one with a small, immature gourd at the base). The best time to pollinate is in the morning when the flowers are fully open. Repeat the process for several days to increase the chances of successful pollination.
How long does it take for a sponge gourd to mature?
Sponge gourds typically take about 90-120 days to mature from seed to harvest. The exact time will depend on the variety, growing conditions, and climate. You’ll know the gourd is ready to harvest when it feels lightweight and the skin begins to dry and turn brown. You can also gently press on the gourd; if it feels hollow, it’s likely ready.
How do I harvest and process my sponge gourd?
To harvest, cut the gourd from the vine, leaving a few inches of stem attached. Allow the gourd to dry completely for several weeks until the skin is hard and brittle. Once dry, soak the gourd in water for several hours to soften the skin. Then, peel off the skin and remove the seeds. Rinse the loofah thoroughly and allow it to dry completely before using. You can also bleach the loofah to lighten its color, but this is optional.
What are some common problems I might encounter when growing sponge gourd indoors?
Some common problems include:
* Pests: Aphids, spider mites, and whiteflies can infest indoor plants. Inspect your plants regularly and treat any infestations promptly with insecticidal soap or neem oil.
* Diseases: Powdery mildew and fungal diseases can occur in humid conditions. Ensure good air circulation and avoid overwatering.
* Lack of pollination: As mentioned earlier, hand-pollination is crucial for indoor sponge gourd growing.
* Insufficient light: Provide adequate sunlight or supplement with grow lights.
* Nutrient deficiencies: Fertilize regularly with a balanced fertilizer.
Can I save seeds from my indoor-grown sponge gourd for future planting?
Yes, you can save seeds from your indoor-grown sponge gourd. Allow the gourd to fully mature and dry on the vine. Once dry, remove the seeds and store them in a cool, dry place until you’re ready to plant them. Keep in mind that seeds from hybrid varieties may not produce plants that are true to type.
What size container should I use for growing sponge gourd indoors?
A minimum of a 10-gallon container is recommended, but a larger container (15-20 gallons) is even better. Sponge gourds have extensive root systems and need ample space to grow. Choose a container with good drainage holes to prevent waterlogging. The larger the container, the more room the roots have to spread, resulting in a healthier and more productive plant.
Leave a Comment