
Melon planting for high yield doesn’t have to be a gamble! Are you dreaming of juicy, sweet melons bursting with flavor, straight from your own backyard? I know I am! But the thought of tiny seedlings turning into sprawling, fruit-laden vines can feel a little daunting, right? Don’t worry, I’m here to tell you that with a few clever tricks and DIY hacks, you can absolutely achieve a bountiful melon harvest, even if you’re a beginner gardener.
Melons have a rich history, dating back thousands of years to Africa and Asia. They were prized by ancient civilizations for their refreshing taste and nutritional value. Think about it – these fruits have nourished people for generations! Today, we can tap into that legacy and cultivate our own delicious melons at home.
Why is mastering melon planting for high yield so important? Well, store-bought melons often lack the intense flavor and sweetness of homegrown varieties. Plus, you have complete control over what goes into your garden, ensuring you’re enjoying healthy, organic produce. This DIY guide will equip you with the knowledge and simple techniques to maximize your melon production, from seed starting to harvesting. Get ready to impress your friends and family with your amazing melon-growing skills!
Wassermelonen-Anbau für eine reiche Ernte: Dein DIY-Leitfaden
Hallo liebe Gartenfreunde! Ich freue mich, euch heute in die Welt des Wassermelonen-Anbaus einzuführen. Es gibt kaum etwas Befriedigenderes, als eine saftige, selbst angebaute Wassermelone an einem heißen Sommertag zu genießen. Und keine Sorge, auch wenn du kein Profi-Gärtner bist, mit dieser Anleitung gelingt dir der Anbau garantiert! Wir werden uns gemeinsam Schritt für Schritt durch den Prozess arbeiten, von der Vorbereitung bis zur Ernte. Los geht’s!
Die Grundlagen: Was Wassermelonen lieben
Bevor wir ins Detail gehen, lass uns kurz die wichtigsten Bedürfnisse unserer Wassermelonen-Pflanzen besprechen. Sie sind nämlich kleine Diven, wenn es um ihre Vorlieben geht:
* Sonne, Sonne, Sonne: Wassermelonen brauchen mindestens 6-8 Stunden direkte Sonneneinstrahlung pro Tag. Je mehr, desto besser!
* Warme Temperaturen: Sie sind Frostempfindlich und lieben Wärme. Die Bodentemperatur sollte idealerweise zwischen 21°C und 32°C liegen.
* Gut durchlässiger Boden: Staunässe ist ihr Feind. Der Boden sollte locker, humusreich und gut durchlässig sein.
* Ausreichend Platz: Wassermelonen brauchen viel Platz, da ihre Ranken sich weit ausbreiten. Plane genügend Raum ein!
* Regelmäßige Bewässerung: Besonders während der Fruchtbildung ist eine gleichmäßige Wasserversorgung wichtig.
* Nährstoffe: Wassermelonen sind Starkzehrer und benötigen ausreichend Nährstoffe, besonders Kalium und Phosphor.
Phase 1: Die Vorbereitung – Der Grundstein für den Erfolg
Eine gute Vorbereitung ist das A und O für eine erfolgreiche Wassermelonen-Ernte. Hier sind die Schritte, die du beachten solltest:
1. Den richtigen Zeitpunkt wählen:
* In kälteren Regionen solltest du die Samen im Haus vorziehen (ca. 4-6 Wochen vor dem letzten Frost).
* In wärmeren Regionen kannst du die Samen direkt ins Freiland säen, sobald die Bodentemperatur konstant über 21°C liegt.
* Ich persönlich starte meistens im April mit der Vorzucht, um sicherzugehen, dass die Pflanzen einen guten Start haben.
2. Die Samen vorbereiten (optional, aber empfehlenswert):
* Um die Keimung zu beschleunigen, kannst du die Samen vor dem Aussäen für 24 Stunden in lauwarmem Wasser einweichen.
* Manche schwören auch darauf, die Samen leicht anzurauen (z.B. mit feinem Schleifpapier), um die Keimung zu erleichtern. Ich habe damit gute Erfahrungen gemacht, aber es ist kein Muss.
3. Den Boden vorbereiten:
* Wähle einen sonnigen Standort mit gut durchlässigem Boden.
* Lockere den Boden gründlich auf und entferne Steine und Unkraut.
* Verbessere den Boden mit Kompost oder gut verrottetem Mist. Wassermelonen lieben nährstoffreichen Boden!
* Ich grabe immer großzügig Kompost unter, das gibt den Pflanzen einen richtigen Boost.
4. Ein Hügelbeet anlegen (optional, aber sehr vorteilhaft):
* Wassermelonen lieben warme Füße. Ein Hügelbeet erwärmt sich schneller und sorgt für eine bessere Drainage.
* Häufe den Boden zu einem Hügel auf (ca. 30 cm hoch und 60 cm breit).
* Ich habe mit Hügelbeeten wirklich tolle Ergebnisse erzielt, besonders in Regionen mit kühleren Sommern.
Phase 2: Aussaat und Anzucht – Der Start ins Leben
Jetzt geht es ans Eingemachte! Hier zeige ich dir, wie du deine Wassermelonen-Samen erfolgreich aussäst und die kleinen Pflänzchen großziehst:
1. Aussaat im Haus (Vorzucht):
* Fülle kleine Töpfe (ca. 8-10 cm Durchmesser) mit Anzuchterde.
* Lege 2-3 Samen pro Topf ca. 2 cm tief in die Erde.
* Gieße die Erde vorsichtig an und stelle die Töpfe an einen warmen, hellen Ort (z.B. Fensterbank oder Gewächshaus).
* Halte die Erde feucht, aber nicht nass.
* Sobald die Keimlinge aufgegangen sind (nach ca. 7-14 Tagen), entferne den schwächsten Keimling pro Topf.
* Ich stelle die Töpfe immer auf eine Heizmatte, um die Keimung zu beschleunigen.
2. Direktsaat im Freiland:
* Sobald die Bodentemperatur konstant über 21°C liegt, kannst du die Samen direkt ins Freiland säen.
* Lege 2-3 Samen pro Pflanzstelle ca. 2 cm tief in die Erde.
* Halte einen Abstand von ca. 90-120 cm zwischen den Pflanzstellen ein.
* Gieße die Erde vorsichtig an und halte sie feucht.
* Sobald die Keimlinge aufgegangen sind, entferne den schwächsten Keimling pro Pflanzstelle.
* Achte darauf, die jungen Pflanzen vor Schnecken zu schützen!
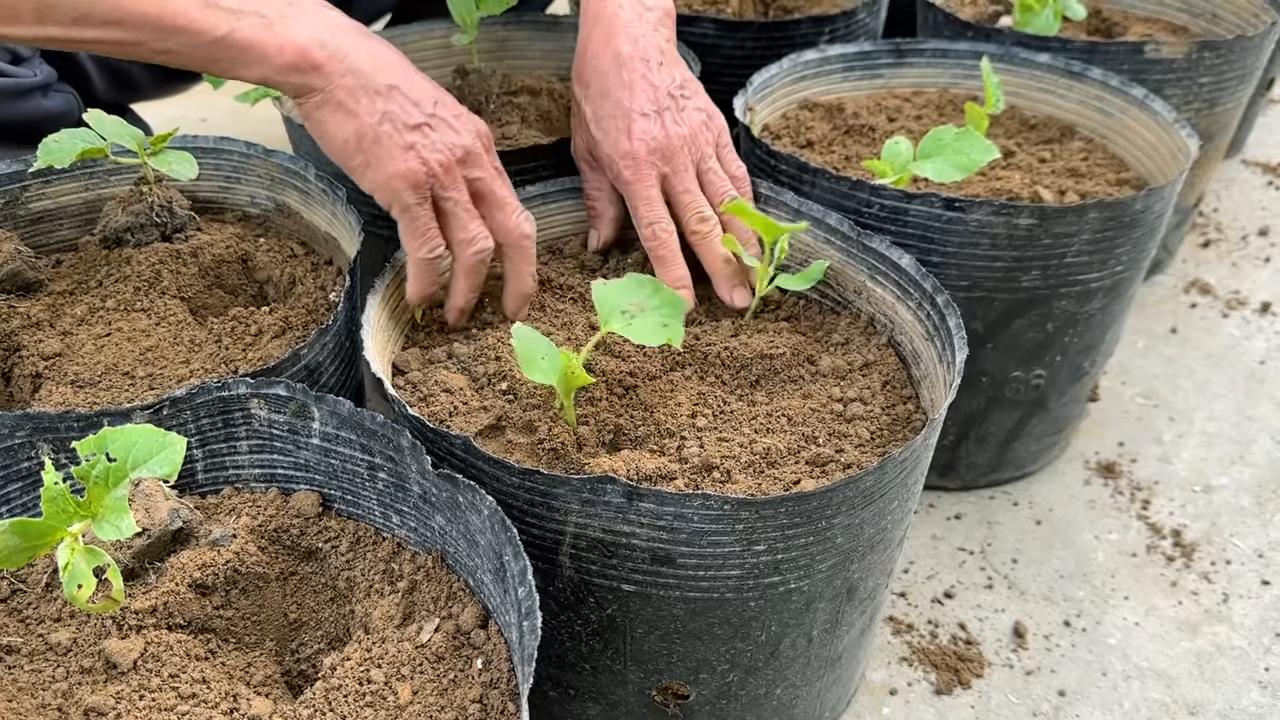
3. Die jungen Pflanzen pflegen:
* Sobald die Pflanzen 2-3 echte Blätter haben, kannst du sie pikieren (wenn du sie im Haus vorgezogen hast).
* Pikiere die Pflanzen vorsichtig in größere Töpfe (ca. 12-15 cm Durchmesser).
* Verwende eine gute Blumenerde und dünge die Pflanzen regelmäßig mit einem organischen Dünger.
* Ich dünge meine Jungpflanzen immer mit verdünnter Brennnesseljauche, das stärkt sie ungemein.
* Härte die Pflanzen vor dem Auspflanzen ins Freiland ab (stelle sie tagsüber ins Freie und hole sie nachts wieder rein).
Phase 3: Auspflanzen und Pflege – Die Pflanzen verwöhnen
Jetzt sind deine kleinen Wassermelonen-Pflänzchen bereit für ihr neues Zuhause im Freien! Hier sind die Schritte, die du beim Auspflanzen und der weiteren Pflege beachten solltest:
1. Der richtige Zeitpunkt zum Auspflanzen:
* Warte, bis keine Frostgefahr mehr besteht und die Bodentemperatur konstant über 21°C liegt.
* Ich pflanze meine Wassermelonen meistens Mitte Mai aus, wenn das Wetter stabil ist.
2. Das Auspflanzen:
* Grabe ein Loch, das etwas größer ist als der Wurzelballen der Pflanze.
* Setze die Pflanze vorsichtig in das Loch und fülle es mit Erde auf.
* Gieße die Pflanze gründlich an.
* Achte darauf, die Pflanzen nicht zu tief zu setzen. Der Wurzelhals sollte knapp über der Erdoberfläche liegen.
3. Die richtige Pflege:
* Bewässerung: Gieße die Pflanzen regelmäßig, besonders während der Fruchtbildung. Vermeide Staunässe!
* Düngung: Dünge die Pflanzen regelmäßig mit einem kalium- und phosphatreichen Dünger. Ich verwende gerne organischen Tomatendünger.
* Unkrautbekämpfung: Halte den Bereich um die Pflanzen unkrautfrei. Unkraut konkurriert mit den Wassermelonen um Nährstoffe und Wasser.
* Mulchen: Mulche den Boden um die Pflanzen mit Stroh oder Holzhackschnitzeln. Das hält den Boden feucht und unterdrückt Unkraut.
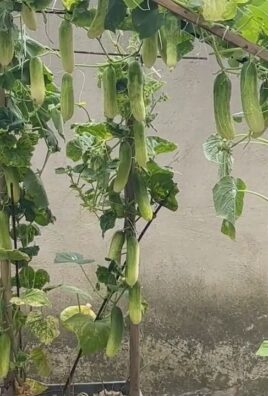
* Rankhilfe (optional): Wenn du wenig Platz hast, kannst du die Ranken der Wassermelonen an einer Rankhilfe hochleiten.
* Schutz vor Schädlingen: Achte auf Schädlinge wie Schnecken, Blattläuse und Kürbisfliegen. Bekämpfe sie bei Bedarf mit geeigneten Mitteln. Ich verwende am liebsten natürliche Mittel wie Brennnesseljauche oder Neemöl.
4. Die Blüten bestäuben (wenn nötig):
* Wassermelonen haben männliche und weibliche Blüten. Die weiblichen Blüten erkennst du an dem kleinen Fruchtansatz unterhalb der Blüte.
* Wenn du wenig Bienen oder andere Bestäuber in deinem Garten hast, kannst du die Blüten von Hand
Conclusion
So, there you have it! Transforming your melon planting strategy with this simple yet incredibly effective DIY trick is more than just a gardening experiment; it’s an investment in a bountiful harvest and a testament to the power of resourceful gardening. We’ve shown you how to optimize your melon patch for maximum yield, and the results speak for themselves. Imagine sinking your teeth into a perfectly ripe, juicy melon, knowing you played a direct role in its exceptional quality and size. That satisfaction is truly unmatched.
This isn’t just about growing melons; it’s about understanding the needs of your plants and providing them with the optimal environment to thrive. By implementing this DIY technique, you’re essentially giving your melon plants a head start, ensuring they receive the nutrients and support they need to develop strong roots, healthy vines, and ultimately, delicious, high-yielding fruit.
But don’t just take our word for it. The real magic happens when you try it yourself. We encourage you to experiment with different variations to suit your specific climate, soil type, and melon variety. For instance, if you live in a particularly hot climate, consider using a lighter-colored mulch to reflect sunlight and prevent the soil from overheating. Alternatively, if your soil is naturally poor in nutrients, you might want to supplement with a slow-release fertilizer specifically formulated for melons.
Consider these variations to further enhance your melon planting success:
* Vertical Growing: Train your melon vines to grow vertically on a trellis or fence. This improves air circulation, reduces the risk of fungal diseases, and saves valuable garden space. This is especially helpful for smaller melon varieties.
* Companion Planting: Plant beneficial companion plants alongside your melons. Marigolds deter nematodes, while nasturtiums attract aphids away from your melon plants. Basil can also help repel certain pests.
* Watering Techniques: Implement a consistent watering schedule, focusing on deep watering rather than frequent shallow watering. This encourages deep root growth and makes your plants more drought-tolerant. Drip irrigation is an excellent option for delivering water directly to the roots.
* Pollination Assistance: While melons are typically pollinated by bees, you can hand-pollinate your plants to ensure a higher fruit set, especially if you live in an area with limited bee activity. Use a small paintbrush to transfer pollen from the male flowers to the female flowers.
We’re confident that this DIY trick will revolutionize your melon planting efforts. It’s a simple, cost-effective way to boost your yield and enjoy the fruits (literally!) of your labor.
So, grab your gardening gloves, gather your supplies, and get ready to experience the joy of growing your own delicious, high-yielding melons. We can’t wait to hear about your success stories! Share your experiences, tips, and photos with us in the comments below. Let’s create a community of melon-growing enthusiasts and learn from each other’s successes and challenges. Happy melon planting!
Frequently Asked Questions (FAQ)
What exactly is the DIY trick you’re referring to?
The DIY trick we’ve been discussing involves creating a raised planting mound enriched with compost and other organic matter, and then using a dark-colored mulch to warm the soil and retain moisture. This combination provides melon plants with the ideal conditions for rapid growth and high yields. The raised mound improves drainage, the compost provides essential nutrients, and the mulch helps regulate soil temperature and moisture levels. This holistic approach to melon planting sets the stage for a successful harvest.
Why is a raised planting mound so important for melon planting?
Raised planting mounds offer several key advantages for melon plants. First and foremost, they improve drainage. Melons are susceptible to root rot if their roots are constantly sitting in waterlogged soil. The raised mound allows excess water to drain away quickly, preventing this problem. Secondly, the mound warms up faster in the spring, giving your melon plants a head start on the growing season. Finally, the mound provides a concentrated area of nutrient-rich soil, allowing the roots to access the resources they need to thrive.
What kind of compost should I use for enriching the soil?
The best type of compost for melon planting is well-rotted compost made from a variety of organic materials. This could include kitchen scraps, yard waste, leaves, and manure. The key is to ensure that the compost is fully decomposed and free of any harmful pathogens or weed seeds. You can either make your own compost or purchase it from a reputable garden center. If you’re making your own compost, be sure to turn it regularly to ensure proper aeration and decomposition.
Is the dark-colored mulch really necessary? Can I use a different type of mulch?
While a dark-colored mulch is highly recommended for its ability to warm the soil, you can use other types of mulch if necessary. However, keep in mind that lighter-colored mulches will not warm the soil as effectively. If you live in a warmer climate, a lighter-colored mulch might be preferable to prevent the soil from overheating. Organic mulches like straw, hay, or shredded leaves are also good options, as they will decompose over time and add nutrients to the soil. Just be sure to avoid using mulches that are treated with chemicals or herbicides.
How often should I water my melon plants after planting?
Watering frequency will depend on your climate, soil type, and the age of your plants. In general, you should aim to keep the soil consistently moist but not waterlogged. Water deeply and less frequently, rather than shallowly and more often. This encourages deep root growth and makes your plants more drought-tolerant. Check the soil moisture regularly by sticking your finger into the soil a few inches deep. If the soil feels dry, it’s time to water. During hot, dry weather, you may need to water your plants daily.
What kind of fertilizer should I use for my melon plants?
Melons are heavy feeders, so they benefit from regular fertilization. Use a balanced fertilizer that is specifically formulated for fruits and vegetables. Look for a fertilizer with a higher phosphorus content, as this nutrient is essential for fruit development. You can either use a granular fertilizer that is applied to the soil or a liquid fertilizer that is applied directly to the leaves. Follow the instructions on the fertilizer packaging carefully to avoid over-fertilizing, which can damage your plants.
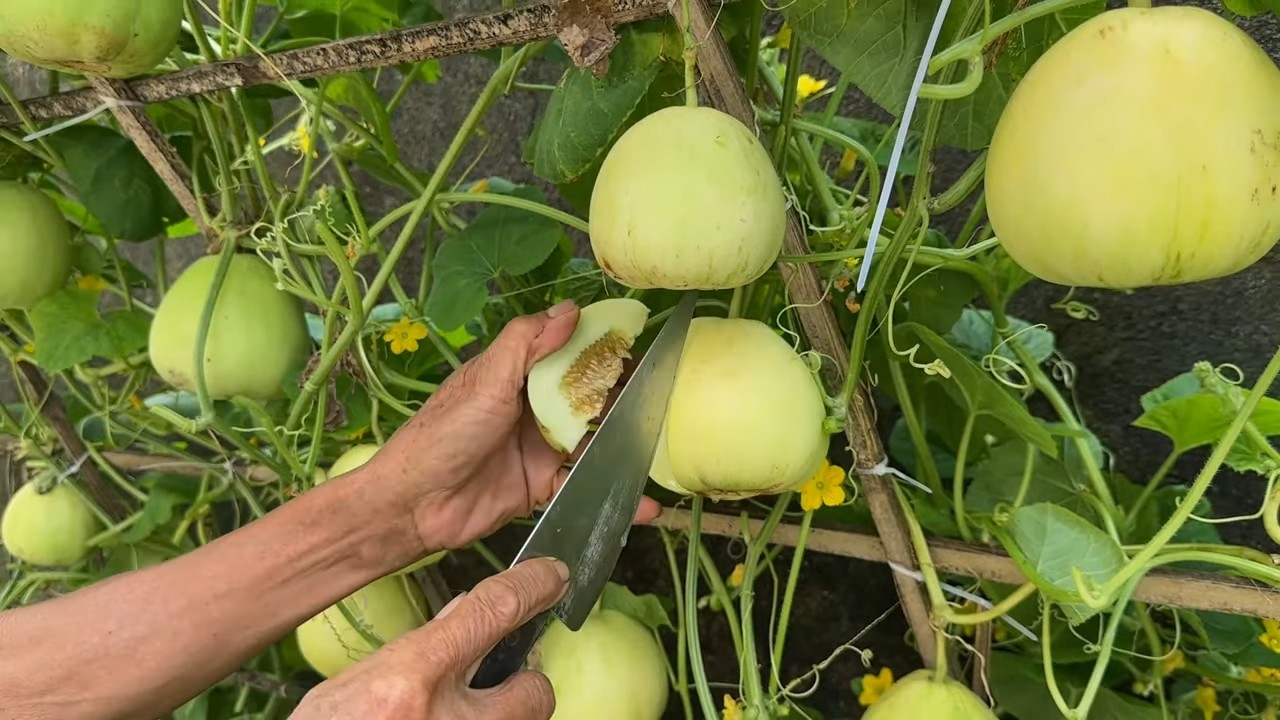
How do I know when my melons are ripe and ready to harvest?
Determining when a melon is ripe can be tricky, but there are a few telltale signs to look for. First, check the color of the melon’s skin. It should be a deep, rich color that is characteristic of the variety. Second, check the stem where the melon is attached to the vine. The stem should be dry and starting to crack. Finally, give the melon a gentle thump. A ripe melon will sound hollow. With practice, you’ll develop a feel for when your melons are perfectly ripe and ready to enjoy.
What if I don’t have a lot of space for melon planting?
Even if you have limited space, you can still grow melons successfully. Consider growing smaller melon varieties, such as cantaloupes or personal-sized watermelons. You can also train your melon vines to grow vertically on a trellis or fence, which will save valuable garden space. Container gardening is another option for growing melons in small spaces. Just be sure to choose a large container and provide your plants with plenty of sunlight and water.
Can I use this DIY trick for other types of plants besides melons?
While this DIY trick is specifically tailored for melon planting, the principles behind it can be applied to other types of plants as well. The idea of creating a raised planting mound with enriched soil and using mulch to regulate soil temperature and moisture levels is beneficial for many different fruits and vegetables. Experiment with adapting this technique to other plants in your garden and see what results you achieve.
What if I encounter problems with pests or diseases while growing my melons?
Pests and diseases can be a challenge for any gardener, but there are steps you can take to prevent and manage them. Start by choosing disease-resistant melon varieties. Practice good sanitation in your garden by removing any dead or diseased plant material. Use organic pest control methods, such as insecticidal soap or neem oil, to control common pests like aphids and squash bugs. If you encounter a serious disease outbreak, consult with your local extension office for advice on appropriate treatment options.


Leave a Comment