
Neglected bean plants results can be disheartening, I know! You envision a bountiful harvest, plump pods bursting with fresh beans, ready for delicious meals. But instead, you’re faced with yellowing leaves, stunted growth, and a general sense of gardening disappointment. Don’t despair! This DIY guide is your lifeline to reviving those struggling bean plants and turning your bean-growing dreams back into reality.
For centuries, beans have been a staple crop in cultures worldwide, from the ancient civilizations of the Americas to the bustling farms of Europe and Asia. They’re not just nutritious; they’re also relatively easy to grow, making them a popular choice for home gardeners. However, even the hardiest bean plant can suffer from neglect, whether it’s due to inconsistent watering, nutrient deficiencies, or pest infestations.
That’s where these simple yet effective DIY tricks come in. I’m going to share some of my favorite hacks for addressing common problems that lead to neglected bean plants results. These aren’t complicated solutions requiring expensive equipment or specialized knowledge. Instead, they’re practical, hands-on techniques you can implement right now to give your bean plants the boost they need to thrive. Think of it as a bean plant rescue mission, and I’m here to guide you every step of the way. Let’s get those beans back on track!
DIY-Rettung für vernachlässigte Bohnenpflanzen: So bringst du sie wieder zum Leben!
Hey Pflanzenfreunde! Habt ihr eure Bohnenpflanzen ein bisschen vernachlässigt? Keine Sorge, das passiert den Besten von uns! Bevor ihr sie ganz aufgebt, zeige ich euch, wie ihr sie mit ein paar einfachen Tricks wieder aufpäppeln könnt. Wir werden uns um die häufigsten Probleme kümmern und euren Bohnen wieder zu einem gesunden Wachstum verhelfen. Los geht’s!
Die Ursachenforschung: Was ist schiefgelaufen?
Bevor wir mit der eigentlichen Rettungsaktion beginnen, müssen wir herausfinden, warum eure Bohnenpflanzen überhaupt in Not geraten sind. Hier sind die häufigsten Übeltäter:
* Wassermangel: Bohnen brauchen regelmäßige Bewässerung, besonders während der Wachstums- und Blütezeit. Trockene Erde ist ein absolutes No-Go!
* Überwässerung: Ja, das Gegenteil kann auch schaden! Staunässe führt zu Wurzelfäule und lässt die Blätter gelb werden.
* Nährstoffmangel: Bohnen sind hungrige Pflanzen und brauchen ausreichend Nährstoffe, besonders Stickstoff, Phosphor und Kalium.
* Schädlinge: Blattläuse, Spinnmilben und andere Schädlinge können eure Bohnenpflanzen aussaugen und schwächen.
* Krankheiten: Pilzkrankheiten wie Mehltau oder Bohnenrost können die Blätter befallen und das Wachstum beeinträchtigen.
* Falscher Standort: Bohnen brauchen viel Sonne! Ein schattiger Standort führt zu schwachem Wachstum und geringer Ernte.
* Bodenprobleme: Ein verdichteter oder saurer Boden kann die Nährstoffaufnahme behindern.
Die Diagnose: So erkennst du die Probleme
Schaut euch eure Bohnenpflanzen genau an! Welche Symptome zeigen sie?
* Welke Blätter: Deuten meist auf Wassermangel oder Wurzelfäule hin.
* Gelbe Blätter: Können auf Wassermangel, Überwässerung, Nährstoffmangel oder Krankheiten hindeuten.
* Braune Flecken auf den Blättern: Können auf Pilzkrankheiten oder Schädlingsbefall hindeuten.
* Klebrige Blätter: Deuten auf Blattläuse hin.
* Feine Netze auf den Blättern: Deuten auf Spinnmilben hin.
* Langsames Wachstum: Kann auf Nährstoffmangel, falscher Standort oder Bodenprobleme hindeuten.
* Keine Blüten oder Früchte: Kann auf Nährstoffmangel, falscher Standort oder Stress hindeuten.
Die Rettungsaktion: Schritt für Schritt zu gesunden Bohnen
Jetzt, wo wir die Probleme identifiziert haben, können wir mit der Rettungsaktion beginnen!
1. Bewässerung optimieren
* Prüfe die Bodenfeuchtigkeit: Stecke deinen Finger etwa 2-3 cm tief in die Erde. Fühlt sie sich trocken an, ist es Zeit zu gießen.
* Richtig gießen: Gieße gründlich, bis das Wasser aus den Abzugslöchern des Topfes läuft. Vermeide Staunässe!
* Gießzeitpunkt: Gieße am besten früh morgens, damit die Blätter tagsüber abtrocknen können.
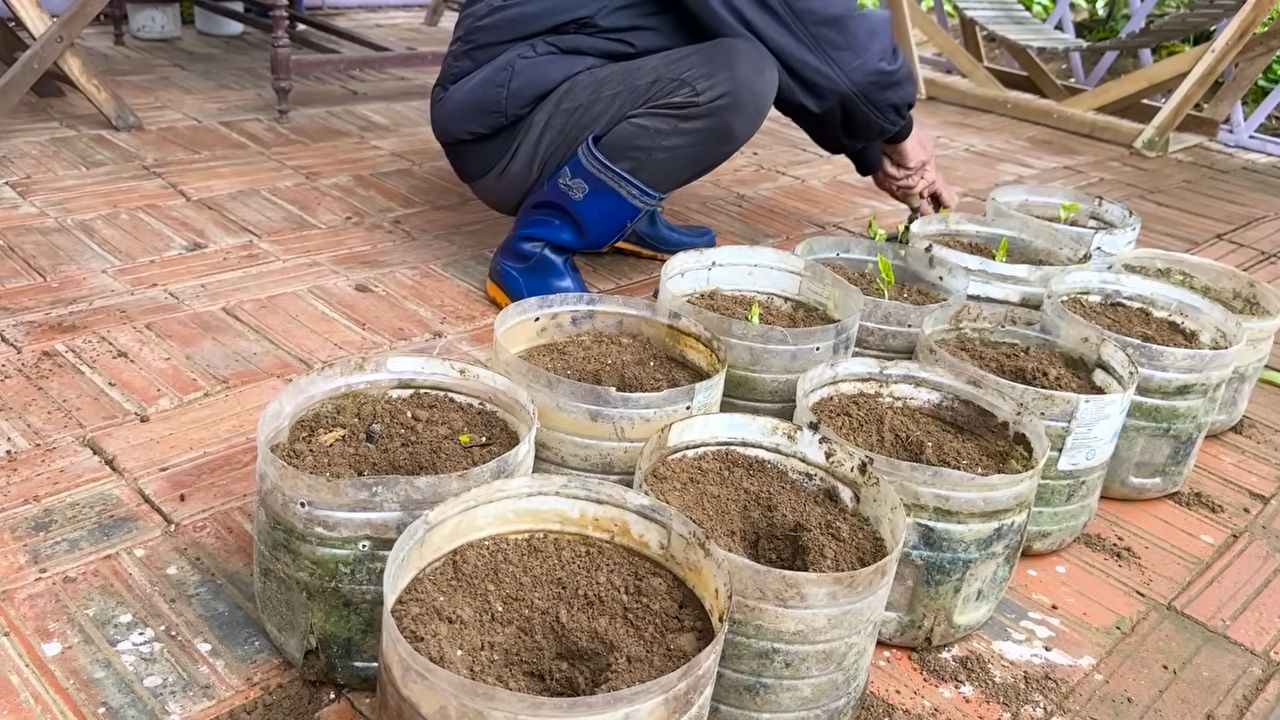
* Bei Überwässerung: Lasse die Erde gut abtrocknen, bevor du wieder gießt. Lockere die Erde vorsichtig auf, um die Belüftung zu verbessern. In schweren Fällen kann es nötig sein, die Pflanze in frische Erde umzutopfen.
2. Nährstoffmangel beheben
* Dünge regelmäßig: Verwende einen Flüssigdünger für Gemüse oder einen speziellen Bohnendünger. Achte auf die Dosierungsanleitung!
* Organische Düngung: Kompost, Hornspäne oder Brennnesseljauche sind tolle organische Dünger, die deine Bohnen mit wichtigen Nährstoffen versorgen.
* Bodenverbesserung: Mische Kompost oder Humus unter die Erde, um die Nährstoffspeicherung und die Bodenstruktur zu verbessern.
3. Schädlinge bekämpfen
* Blattläuse:
* Abspritzen: Spüle die Blattläuse mit einem kräftigen Wasserstrahl ab.
* Schmierseifenlösung: Sprühe die Pflanzen mit einer Lösung aus Schmierseife und Wasser (1 Esslöffel Schmierseife auf 1 Liter Wasser) ein.
* Nützlinge: Setze Marienkäfer oder Florfliegenlarven ein, die Blattläuse fressen.
* Spinnmilben:
* Luftfeuchtigkeit erhöhen: Spinnmilben lieben trockene Luft. Besprühe die Pflanzen regelmäßig mit Wasser.
* Raubmilben: Setze Raubmilben ein, die Spinnmilben fressen.
* Neemöl: Sprühe die Pflanzen mit Neemöl ein.
* Andere Schädlinge: Informiere dich über die spezifischen Schädlinge und wähle die passende Bekämpfungsmethode.
4. Krankheiten behandeln
* Mehltau:
* Befallene Blätter entfernen: Entferne alle befallenen Blätter, um die Ausbreitung zu verhindern.
* Fungizid: Sprühe die Pflanzen mit einem Fungizid ein.
* Gute Belüftung: Sorge für eine gute Belüftung der Pflanzen, um die Ausbreitung von Mehltau zu verhindern.
* Bohnenrost:
* Befallene Blätter entfernen: Entferne alle befallenen Blätter, um die Ausbreitung zu verhindern.
* Fungizid: Sprühe die Pflanzen mit einem Fungizid ein.
* Resistente Sorten: Wähle beim nächsten Mal resistente Bohnensorten.
* Vorbeugung: Achte auf eine gute Belüftung, vermeide Staunässe und dünge regelmäßig, um die Pflanzen widerstandsfähiger zu machen.
5. Standort optimieren
* Sonniger Standort: Stelle die Bohnenpflanzen an einen sonnigen Standort, an dem sie mindestens 6 Stunden Sonne pro Tag bekommen.
* Windschutz: Schütze die Pflanzen vor starkem Wind, der sie austrocknen kann.
6. Boden verbessern
* Lockere den Boden auf: Lockere den Boden regelmäßig auf, um die Belüftung zu verbessern.
* Kompost oder Humus: Mische Kompost oder Humus unter die Erde, um die Nährstoffspeicherung und die Bodenstruktur zu verbessern.
* pH-Wert prüfen: Bohnen bevorzugen einen leicht sauren bis neutralen pH-Wert (6,0-7,0). Prüfe den pH-Wert des Bodens und passe ihn gegebenenfalls an.
Zusätzliche Tipps für gesunde Bohnen
* Rankhilfe: Bohnen sind Kletterpflanzen und brauchen eine Rankhilfe, an der sie sich festhalten können.
* Mulchen: Mulche den Boden um die Bohnenpflanzen mit Stroh oder Rasenschnitt, um die Feuchtigkeit zu halten und Unkraut zu unterdrücken.
* Regelmäßige Kontrolle: Kontrolliere die Pflanzen regelmäßig auf Schädlinge und Krankheiten, um frühzeitig eingreifen zu können.
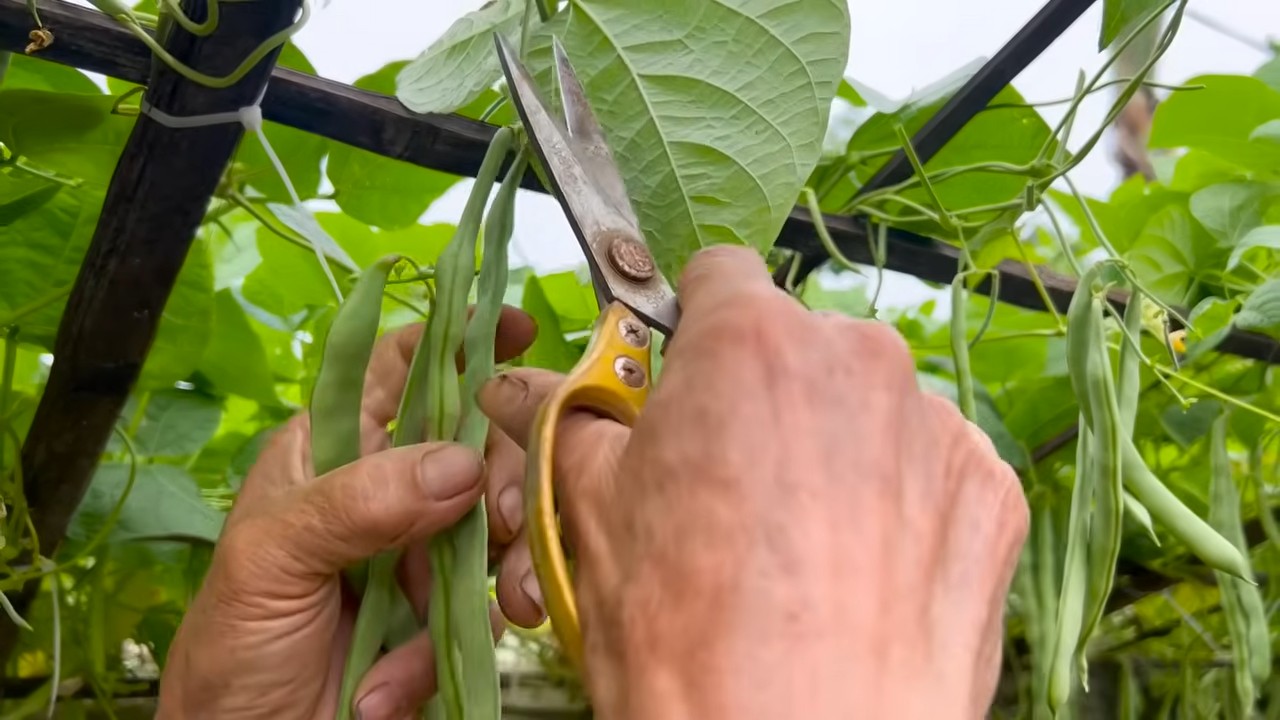
* Ernte: Ernte die Bohnen regelmäßig, um die Produktion neuer Hülsen anzuregen.
Geduld ist gefragt!
Die Rettung vernachlässigter Bohnenpflanzen braucht Zeit und Geduld. Gib nicht auf, wenn du nicht sofort Ergebnisse siehst. Mit der richtigen Pflege und Aufmerksamkeit werden deine Bohnen bald wieder gesund und kräftig wachsen und dich mit einer reichen Ernte belohnen! Ich drücke euch die Daumen!
Conclusion
So, there you have it! Transforming those sad, neglected bean plants into thriving, productive vines is not only possible, but surprisingly rewarding. This DIY trick, born out of necessity and a touch of desperation, has proven to be a game-changer for countless gardeners struggling with similar issues. It’s more than just a quick fix; it’s a method that addresses the root causes of bean plant decline, providing them with the essential support, nutrients, and environmental conditions they need to flourish.
Why is this a must-try? Because it’s effective, affordable, and environmentally friendly. You’re likely already have most of the materials needed lying around your home or garden shed. Instead of resorting to harsh chemicals or expensive store-bought solutions, you’re harnessing the power of simple techniques to revitalize your plants. Plus, the satisfaction of seeing your bean plants bounce back to life is an unparalleled feeling for any gardener.
But don’t just take our word for it. We encourage you to experiment with variations and find what works best for your specific bean variety and growing conditions. Perhaps you’ll discover that adding a small amount of Epsom salts to the watering solution provides an extra boost of magnesium, promoting even greener and more vigorous growth. Or maybe you’ll find that using a different type of organic mulch, like shredded leaves or straw, helps to retain moisture and suppress weeds more effectively.
Consider adding companion plants like marigolds or nasturtiums near your bean plants. These flowers not only add beauty to your garden but also act as natural pest repellents, protecting your beans from common garden invaders. Another variation could involve creating a simple trellis system using bamboo stakes or repurposed branches to provide additional support for your growing vines. This will not only keep your plants off the ground but also improve air circulation, reducing the risk of fungal diseases.
Remember, gardening is all about learning and adapting. Don’t be afraid to try new things and see what works best for you. The key is to observe your plants closely, pay attention to their needs, and adjust your approach accordingly.
We’re confident that this DIY trick will help you rescue your neglected bean plants and enjoy a bountiful harvest. But we also want to hear about your experiences! Share your success stories, your challenges, and any variations you’ve tried in the comments below. Let’s create a community of bean-loving gardeners who are passionate about sharing their knowledge and helping each other grow. Your insights could be invaluable to someone else who’s struggling with their bean plants.
So, grab your gardening gloves, gather your supplies, and get ready to transform those sad bean plants into a thriving garden oasis. We can’t wait to see what you create! Remember, even the most neglected bean plants can be brought back to life with a little bit of care, attention, and the right DIY trick. Happy gardening!
Frequently Asked Questions (FAQ)
What are the most common signs of neglected bean plants?
The most common signs include yellowing or browning leaves, stunted growth, wilting even when the soil is moist, a lack of flowers or pods, and evidence of pests or diseases. The leaves might also appear dry and brittle, and the stems may be weak and easily broken. In severe cases, the plant may even start to die back from the tips.
How often should I water my bean plants?
Bean plants need consistent moisture, especially during flowering and pod development. Water deeply whenever the top inch of soil feels dry to the touch. Avoid overwatering, as this can lead to root rot. A good rule of thumb is to water every 2-3 days, depending on the weather and soil conditions. Mulching around the base of the plants can help retain moisture and reduce the need for frequent watering.
What type of fertilizer is best for bean plants?
Bean plants are legumes, which means they can fix nitrogen from the air. Therefore, they don’t require a lot of nitrogen fertilizer. A fertilizer with a low nitrogen content (e.g., 5-10-10) is ideal. You can also use organic fertilizers like compost or well-rotted manure. Avoid over-fertilizing, as this can lead to excessive foliage growth at the expense of flower and pod production.
How can I protect my bean plants from pests and diseases?
Regularly inspect your plants for signs of pests or diseases. Common pests include aphids, bean beetles, and spider mites. You can control these pests with insecticidal soap, neem oil, or by hand-picking them off the plants. To prevent diseases, ensure good air circulation around your plants, avoid overhead watering, and remove any infected leaves or stems promptly. Crop rotation can also help prevent soilborne diseases.
My bean plants are flowering, but no pods are forming. What could be the problem?
There are several reasons why bean plants might flower but not produce pods. One common cause is lack of pollination. Ensure that bees and other pollinators have access to your plants. You can also try hand-pollinating the flowers by gently transferring pollen from one flower to another using a small brush. Other possible causes include high temperatures, insufficient watering, and nutrient deficiencies.
Can I use this DIY trick on other types of plants besides beans?
While this DIY trick is specifically tailored for bean plants, the underlying principles can be applied to other vining plants that are struggling with similar issues. The key is to adapt the techniques to the specific needs of the plant. For example, you might need to adjust the type of support system or the nutrient solution depending on the plant’s requirements.
How long does it take to see results after implementing this DIY trick?
The time it takes to see results will vary depending on the severity of the neglect and the overall health of the plants. In general, you should start to see some improvement within a week or two. The leaves may start to regain their color, and the plants may start to show signs of new growth. However, it may take several weeks for the plants to fully recover and start producing pods.
What if my bean plants are already severely damaged? Is it still worth trying this DIY trick?
Even if your bean plants are severely damaged, it’s still worth trying this DIY trick. While there’s no guarantee of success, you might be surprised at how resilient plants can be. The key is to be patient and persistent. Provide the plants with the best possible conditions and give them time to recover. Even if you can’t save all of your plants, you might be able to salvage some of them and learn valuable lessons for future gardening endeavors.
Is it better to start over with new bean plants instead of trying to revive neglected ones?
This depends on the severity of the neglect and your personal preferences. If your bean plants are severely damaged and you’re short on time, starting over with new plants might be the best option. However, if you’re willing to invest the time and effort, reviving neglected plants can be a rewarding experience. You’ll learn a lot about plant care and gain a deeper appreciation for the resilience of nature. Plus, you’ll be saving money and reducing waste by not having to buy new plants.
How can I prevent my bean plants from becoming neglected in the first place?
Prevention is always better than cure. To prevent your bean plants from becoming neglected, establish a regular watering and fertilizing schedule. Monitor your plants regularly for signs of pests or diseases. Provide them with adequate support and sunlight. And most importantly, pay attention to their needs and adjust your care accordingly. By taking these simple steps, you can ensure that your bean plants thrive and produce a bountiful harvest.
Leave a Comment