
Nonstop tomato fruiting terrace gardens are the dream of every home gardener, aren’t they? Imagine stepping onto your terrace and being greeted by a vibrant tapestry of red, juicy tomatoes, ready to be plucked and savored. No more relying solely on grocery store produce – you can have a constant supply of fresh, flavorful tomatoes right at your fingertips! But let’s be honest, achieving this bountiful harvest can feel like a daunting task. That’s where this DIY guide comes in!
For centuries, cultivating tomatoes has been a cherished tradition across various cultures. From the sun-drenched fields of Italy to the vibrant gardens of Mexico, the tomato has held a special place in culinary history. The Aztecs, who first cultivated tomatoes, called them “xitomatl,” and they were initially grown for ornamental purposes before their culinary potential was fully realized. Today, growing your own tomatoes, especially on a terrace, is a way to connect with this rich history and enjoy the unparalleled taste of homegrown goodness.
Why do you need these DIY tricks and hacks for a nonstop tomato fruiting terrace? Because maximizing your tomato yield in a limited space requires a bit of know-how! I’m going to share some simple yet effective techniques that will help you overcome common challenges like limited sunlight, soil deficiencies, and pest control. With these tips, you’ll be well on your way to creating a thriving tomato oasis on your terrace, ensuring a continuous supply of delicious tomatoes throughout the growing season. Let’s get started!
DIY: My Secret to Non-Stop Tomato Fruiting on My Terrace!
Hey fellow gardening enthusiasts! I’m so excited to share my tried-and-true method for achieving a continuous harvest of delicious tomatoes right on my terrace. Forget those frustrating periods of feast or famine – with this technique, you’ll be enjoying fresh, homegrown tomatoes all season long! This isn’t just about planting; it’s about strategic planning and a little bit of clever manipulation to keep those plants producing.
Understanding the Tomato Life Cycle (and How to Extend It!)
Before we dive into the nitty-gritty, it’s important to understand that tomato plants, like all living things, have a natural life cycle. They grow, they flower, they fruit, and eventually, their production slows down. Our goal is to trick them into thinking the season is *always* perfect for fruiting! We’ll do this through a combination of succession planting, strategic pruning, and providing the optimal growing conditions.
The Core Strategy: Succession Planting and Variety Selection
The key to non-stop tomatoes is to have plants at different stages of development. This means planting new seedlings every few weeks, ensuring a continuous supply of flowers and fruits.
* Succession Planting: Plant new tomato seedlings every 2-3 weeks. This ensures a staggered harvest.
* Variety Selection: Choose tomato varieties with different maturity dates (early, mid, and late-season). This extends the harvest window.
* Container Size Matters: Use large containers (at least 15 gallons) to provide ample space for root growth.
* Sunlight is Crucial: Tomatoes need at least 6-8 hours of direct sunlight per day.
* Soil Quality: Use a well-draining potting mix rich in organic matter.
* Regular Feeding: Fertilize regularly with a balanced tomato fertilizer.
* Pruning for Production: Prune suckers to encourage fruit production.
* Support System: Provide adequate support (stakes, cages, or trellises) for your plants.
* Pest and Disease Control: Monitor your plants regularly for pests and diseases and take action promptly.
Step-by-Step Guide to Non-Stop Tomato Fruiting
Here’s the detailed breakdown of how I achieve a continuous tomato harvest on my terrace:
Phase 1: Getting Started (4-6 Weeks Before Last Frost)
1. Seed Starting (or Seedling Purchase): I usually start my tomato seeds indoors about 6-8 weeks before the last expected frost. This gives them a head start. You can also purchase healthy seedlings from a local nursery if you prefer. I like to start with a mix of early, mid, and late-season varieties. For example, I might choose ‘Early Girl’ (early), ‘Roma’ (mid), and ‘Beefsteak’ (late).
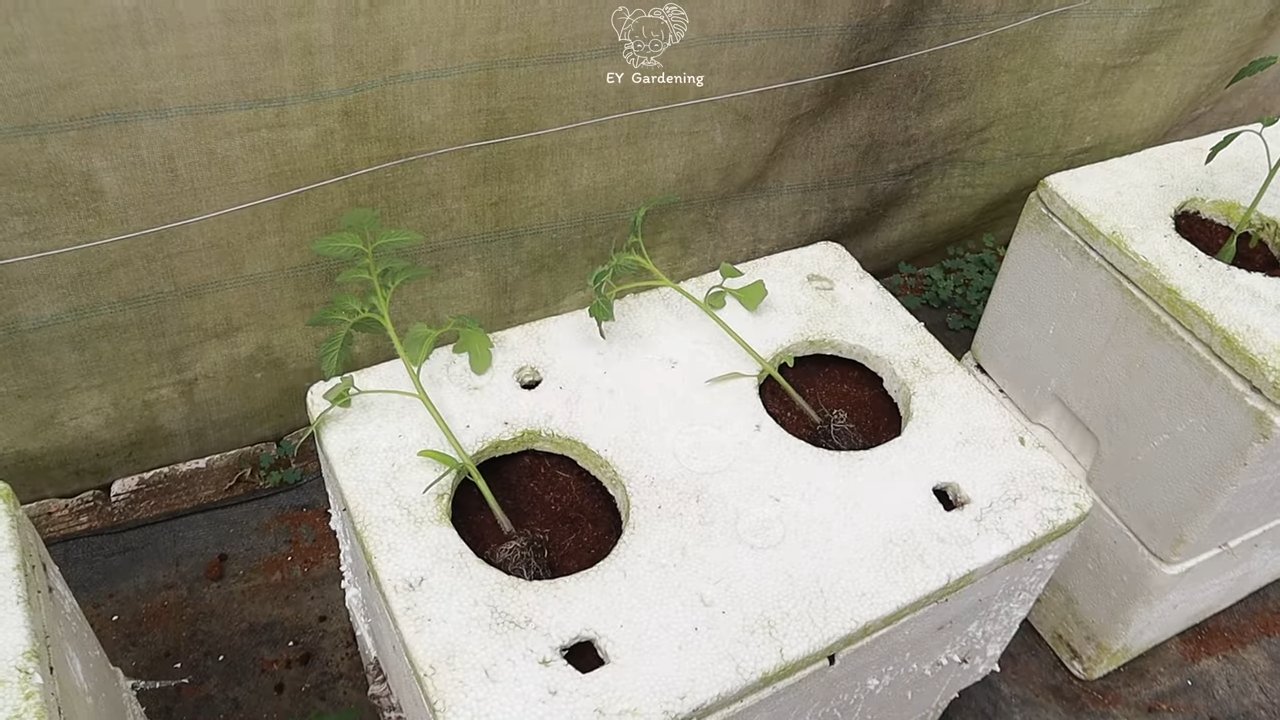
2. Choosing Your Containers: Select large containers (at least 15 gallons) with drainage holes. The bigger the container, the more room the roots have to grow, and the happier your plants will be. I prefer using fabric pots because they allow for better aeration and drainage.
3. Preparing Your Potting Mix: Use a high-quality potting mix specifically formulated for vegetables. I like to amend mine with compost and a slow-release fertilizer to give my seedlings a boost. A good mix should be well-draining but also retain moisture.
4. Planting Your Seedlings (or Seeds): If you’re starting from seeds, follow the instructions on the seed packet. If you’re using seedlings, gently remove them from their containers and plant them in your prepared pots. Bury the stem up to the first set of leaves – this encourages more root growth.
Phase 2: Transplanting and Initial Care (After Last Frost)
1. Hardening Off: Before transplanting your seedlings outdoors, you need to “harden them off.” This means gradually exposing them to outdoor conditions over a period of 7-10 days. Start by placing them in a sheltered spot for a few hours each day, gradually increasing the amount of time they spend outdoors. This helps them acclimate to the sun, wind, and temperature changes.
2. Transplanting into Containers: Once the danger of frost has passed and your seedlings are hardened off, it’s time to transplant them into their final containers. Choose a sunny spot on your terrace that receives at least 6-8 hours of direct sunlight per day.
3. Providing Support: Tomato plants need support to prevent them from sprawling and breaking under the weight of the fruit. I use a combination of stakes and cages, depending on the variety. For determinate varieties (bush tomatoes), cages are usually sufficient. For indeterminate varieties (vining tomatoes), I prefer using stakes and tying the plants to them as they grow.
4. Watering: Water your tomato plants deeply and regularly, especially during hot weather. Aim to keep the soil consistently moist but not waterlogged. I usually water in the morning to allow the foliage to dry before nightfall, which helps prevent fungal diseases.
5. Fertilizing: Start fertilizing your tomato plants about 2-3 weeks after transplanting. Use a balanced tomato fertilizer according to the package directions. I prefer using a liquid fertilizer that I can apply with my watering can. I fertilize every 2-3 weeks throughout the growing season.
Phase 3: Ongoing Maintenance and Succession Planting
1. Pruning: Pruning is essential for maximizing fruit production. The main thing to prune are the “suckers” that grow in the crotch between the main stem and the branches. These suckers will steal energy from the plant and reduce fruit production. I remove them regularly, especially on indeterminate varieties.
2. Pest and Disease Control: Monitor your plants regularly for pests and diseases. Common tomato pests include aphids, whiteflies, and tomato hornworms. Common diseases include early blight, late blight, and blossom end rot. I use a combination of organic pest control methods, such as insecticidal soap and neem oil, to keep my plants healthy. For blossom end rot, ensure consistent watering and consider adding calcium to the soil.
3. Succession Planting (Repeat!): This is where the magic happens! Every 2-3 weeks, start new tomato seedlings indoors or purchase new seedlings from a nursery. As your older plants start to slow down their production, these new plants will be ready to take over. This ensures a continuous supply of tomatoes throughout the growing season.
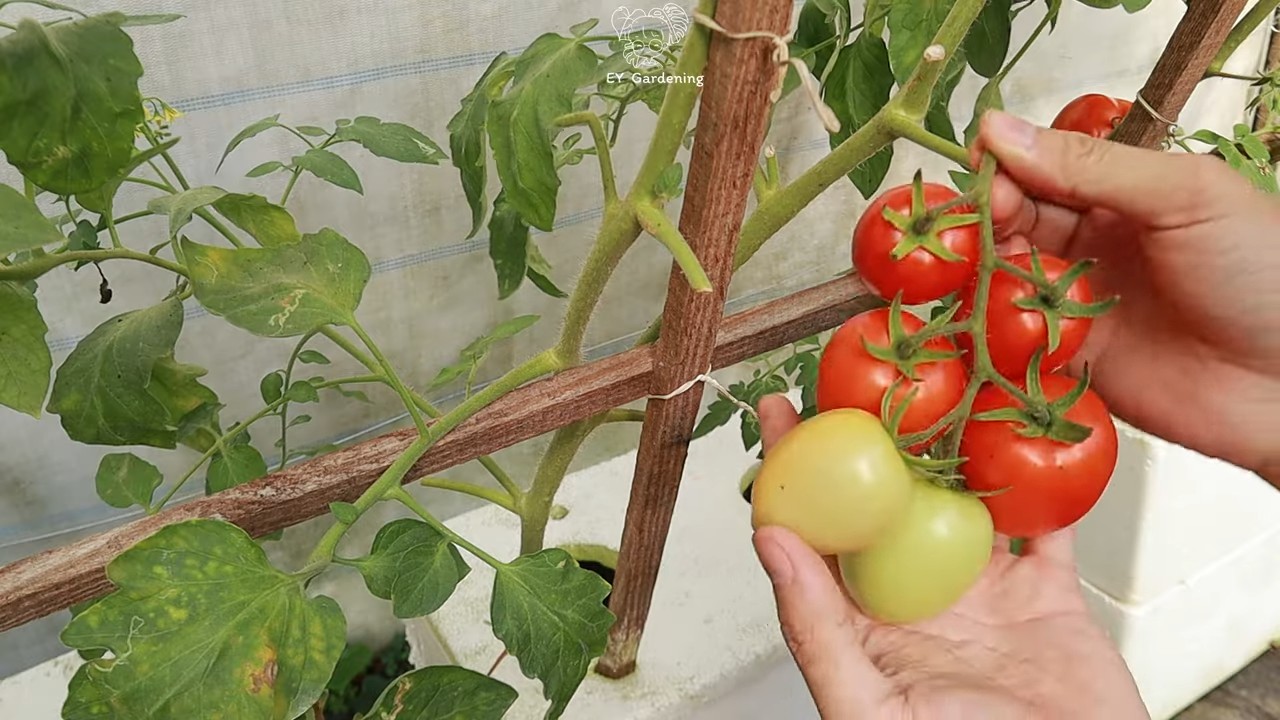
4. Harvesting: Harvest your tomatoes when they are fully ripe and have reached their mature color. Gently twist the fruit off the vine, being careful not to damage the plant.
5. Mulching: Apply a layer of mulch around your tomato plants to help retain moisture, suppress weeds, and regulate soil temperature. I use straw or shredded leaves as mulch.
Phase 4: Extending the Season (When the Weather Cools)
1. Protecting from Frost: As the weather cools down in the fall, be prepared to protect your tomato plants from frost. You can use row covers, blankets, or even bring your plants indoors if you have space.
2. Greenhouse or Cold Frame: If you’re serious about extending your tomato season, consider investing in a small greenhouse or cold frame. This will provide a protected environment for your plants and allow you to continue harvesting tomatoes well into the winter.
3. Indoor Growing: You can also try growing tomatoes indoors under grow lights. This requires a bit more effort, but it’s a great way to enjoy fresh tomatoes year-round.
Choosing the Right Tomato Varieties
As I mentioned earlier, selecting the right tomato varieties is crucial for achieving a continuous harvest. Here are some of my favorite varieties for terrace gardening:
* Early Season: ‘Early Girl’, ‘Sungold’, ‘Stupice’
* Mid-Season: ‘Roma’, ‘Celebrity’, ‘Better Bush’
* Late Season: ‘Beefsteak’, ‘Brandywine’, ‘San Marzano’
* Cherry Tomatoes: ‘Sweet Million’, ‘Black Cherry’, ‘Juliet’
I also like to experiment with different heirloom varieties each year to see what grows well in my terrace garden.
Troubleshooting Common Tomato Problems
Even with the best care, tomato plants can sometimes encounter problems. Here are some common issues and how to address them:
* Blossom End Rot: This is caused by a calcium deficiency. Ensure consistent watering and consider adding calcium to the soil.
* Early Blight: This is a fungal disease that causes dark spots on the leaves. Remove infected leaves and apply a fungicide.
* Late Blight: This is a more serious fungal disease that can quickly kill your plants. Remove infected plants immediately and apply a fungicide.
* Aphids: These small insects suck the sap from plants. Spray with insecticidal soap.
* Tomato Hornworms: These large caterpillars can defoliate your plants. Handpick them off the plants.
My Personal Tips for Tomato Success
* Water deeply and infrequently: This encourages deep root growth.
Conclusion
So, there you have it! Unlocking the secret to a nonstop tomato fruiting terrace is more attainable than you might think. This DIY trick, focusing on strategic pruning, consistent feeding, and optimal sunlight exposure, isn’t just about growing tomatoes; it’s about creating a thriving ecosystem on your terrace that rewards you with a continuous bounty of delicious, homegrown goodness.
Think about it: no more waiting anxiously for that single, fleeting harvest. Instead, imagine stepping onto your terrace week after week, greeted by the vibrant green foliage and the promise of plump, juicy tomatoes ready to be plucked straight from the vine. This isn’t just a gardening project; it’s an investment in fresh, flavorful meals, a connection to nature, and a satisfying sense of accomplishment.
But the beauty of this DIY approach lies in its adaptability. Feel free to experiment with different tomato varieties to find the ones that thrive best in your specific microclimate. Cherry tomatoes, with their prolific fruiting habits, are an excellent choice for beginners. Roma tomatoes, known for their meaty texture and rich flavor, are perfect for sauces and canning. Heirloom varieties, with their unique colors and complex flavors, can add a touch of elegance to your terrace garden.
Consider also exploring different feeding methods. While we’ve highlighted the importance of balanced fertilizer, you can also supplement with organic options like compost tea or worm castings. These natural amendments not only provide essential nutrients but also improve soil health and promote beneficial microbial activity.
Don’t be afraid to get creative with your support systems. While traditional tomato cages work well, you can also use stakes, trellises, or even repurposed materials like old ladders or branches to provide support for your growing plants. The key is to ensure that your tomatoes have adequate support to prevent them from sprawling and becoming susceptible to disease.
This DIY trick for a nonstop tomato fruiting terrace is more than just a set of instructions; it’s an invitation to engage with your plants, learn from your experiences, and create a thriving garden that reflects your unique style and preferences.
We wholeheartedly encourage you to give this a try. Start small, perhaps with just a few tomato plants, and gradually expand your terrace garden as you gain confidence and experience. The rewards are well worth the effort.
And most importantly, we want to hear about your experiences! Share your photos, tips, and challenges in the comments below. Let’s create a community of tomato enthusiasts who are passionate about growing their own food and sharing their knowledge with others. Together, we can unlock the secrets to a nonstop tomato fruiting terrace and enjoy the delicious fruits of our labor all season long. So, grab your gardening gloves, gather your supplies, and get ready to embark on a tomato-growing adventure!
Frequently Asked Questions (FAQ)
What type of tomatoes are best for a nonstop fruiting terrace?
The best type of tomatoes for a nonstop fruiting terrace depends on your personal preferences and growing conditions. However, determinate and indeterminate varieties both have their advantages. Determinate varieties, like Roma or San Marzano, tend to produce a large crop all at once, making them ideal for canning or sauce-making. Indeterminate varieties, like cherry tomatoes, beefsteak tomatoes, or heirloom varieties, produce fruit continuously throughout the growing season, which is perfect for a nonstop fruiting terrace. Cherry tomatoes are particularly well-suited for beginners due to their prolific fruiting habits and relatively easy care. Consider your climate and the amount of space you have available when making your selection. Also, research disease resistance for your area.
How often should I fertilize my tomato plants for nonstop fruiting?
Consistent fertilization is crucial for maintaining a nonstop tomato fruiting terrace. You should fertilize your tomato plants every 2-3 weeks with a balanced fertilizer that is specifically formulated for tomatoes. Look for a fertilizer with an NPK ratio (nitrogen, phosphorus, potassium) that is higher in phosphorus and potassium than nitrogen, as these nutrients are essential for fruit development. You can also supplement with organic fertilizers like compost tea or worm castings to provide additional nutrients and improve soil health. Be sure to follow the instructions on the fertilizer packaging and avoid over-fertilizing, as this can lead to nutrient imbalances and plant damage. Monitor your plants closely for signs of nutrient deficiencies, such as yellowing leaves or stunted growth, and adjust your fertilization schedule accordingly.
How much sunlight do tomato plants need for optimal fruiting?
Tomato plants require at least 6-8 hours of direct sunlight per day for optimal fruiting. If your terrace doesn’t receive enough sunlight, you may need to supplement with grow lights. Position your tomato plants in the sunniest spot on your terrace and ensure that they are not shaded by other plants or structures. If you live in a hot climate, you may need to provide some afternoon shade to protect your plants from scorching.
What are some common pests and diseases that affect tomato plants, and how can I prevent them?
Tomato plants are susceptible to a variety of pests and diseases, including aphids, whiteflies, tomato hornworms, blossom end rot, and early blight. To prevent these problems, start by choosing disease-resistant tomato varieties. Practice good sanitation by removing any dead or diseased leaves and debris from around your plants. Water your plants at the base to avoid wetting the foliage, which can promote fungal diseases. Use organic pest control methods, such as insecticidal soap or neem oil, to control pests. Ensure proper air circulation around your plants by spacing them adequately. Monitor your plants regularly for signs of pests or diseases and take action promptly to prevent them from spreading. Blossom end rot, caused by calcium deficiency, can be prevented by ensuring consistent watering and adding calcium to the soil.
How do I prune my tomato plants for nonstop fruiting?
Pruning is essential for maintaining a nonstop tomato fruiting terrace. For indeterminate varieties, prune suckers (the small shoots that grow between the main stem and the branches) regularly to encourage fruit production. Remove any yellowing or diseased leaves to improve air circulation and prevent the spread of disease. For determinate varieties, pruning is less critical, but you can still remove any suckers below the first flower cluster to improve air circulation. Avoid over-pruning, as this can reduce the plant’s ability to photosynthesize and produce fruit.
Can I grow tomatoes in containers on my terrace?
Yes, you can definitely grow tomatoes in containers on your terrace! Choose large containers (at least 10-15 gallons) with drainage holes to accommodate the root systems of your tomato plants. Use a high-quality potting mix that is well-draining and rich in nutrients. Be sure to provide adequate support for your plants, such as stakes or cages. Water your container-grown tomatoes regularly, as they tend to dry out more quickly than tomatoes grown in the ground. Fertilize your plants every 2-3 weeks with a balanced fertilizer.
How do I know when my tomatoes are ripe?
The color of the tomato is the best indicator of ripeness. Tomatoes should be fully colored and slightly soft to the touch when ripe. Gently twist the tomato from the vine; if it comes off easily, it’s ready to be harvested. The aroma of a ripe tomato is also a good indicator.
What if I don’t have a terrace? Can I still use this DIY trick?
While this article focuses on a terrace garden, the principles of strategic pruning, consistent feeding, and optimal sunlight exposure apply to any tomato garden, whether it’s in a raised bed, a backyard plot, or even containers on a balcony. You may need to adapt the techniques slightly to suit your specific growing environment, but the core concepts remain the same. The key is to provide your tomato plants with the essential resources they need to thrive and produce a continuous bounty of delicious fruit.

Leave a Comment