
Planting Chili Peppers at Home can seem daunting, but trust me, it’s incredibly rewarding! Imagine plucking fiery, homegrown chilies straight from your garden to spice up your favorite dishes. Forget those bland, store-bought peppers – we’re talking about vibrant, flavorful chilies bursting with sunshine and your own personal touch.
Chili peppers have a rich history, dating back over 6,000 years in South America. They weren’t just a food source; they held cultural and medicinal significance for ancient civilizations. From the Aztecs to the Incas, chilies were prized for their heat and healing properties. Now, you can bring that ancient tradition into your own backyard!
Why should you bother with this DIY project? Well, for starters, planting chili peppers at home gives you complete control over the growing process. You can choose organic methods, avoid harmful pesticides, and select varieties that you simply can’t find in supermarkets. Plus, let’s be honest, there’s something incredibly satisfying about nurturing a plant from seed to harvest. I’m going to show you some simple tricks and hacks that will make growing your own chili peppers easier than you ever thought possible. Get ready to add some serious spice to your life!
Planting Chili Peppers at Home: From Seed to Spicy Harvest
Okay, chili pepper lovers, gather ’round! I’m going to walk you through everything you need to know to grow your own fiery peppers right at home. Whether you’re a seasoned gardener or a complete newbie, this guide will help you cultivate a thriving chili pepper patch. Get ready for some serious heat!
Choosing Your Chili Pepper Varieties
First things first, let’s talk peppers! The world of chili peppers is vast and exciting, ranging from mild and sweet to face-meltingly hot. Choosing the right varieties for your garden depends on your taste preferences, your climate, and the space you have available.
Here are a few popular options to get you started:
* **Jalapeño:** A classic choice, known for its moderate heat and versatility. Perfect for salsas, poppers, and adding a kick to your favorite dishes.
* **Serrano:** A bit hotter than jalapeños, serranos offer a bright, fresh flavor. They’re great in Mexican cuisine and Asian stir-fries.
* **Cayenne:** These slender red peppers pack a punch! Use them to make your own chili powder, hot sauce, or add a fiery touch to soups and stews.
* **Habanero:** If you’re looking for serious heat, habaneros are the way to go. They have a fruity, floral flavor that complements their intense spiciness. Handle with care!
* **Ghost Pepper (Bhut Jolokia):** For the truly adventurous! Ghost peppers are among the hottest in the world. Use them sparingly and with caution.
* **Bell Peppers:** Okay, okay, not technically chili peppers, but they’re a great option if you want something mild and sweet. Plus, they come in a variety of colors!
Consider your climate when choosing your varieties. Some peppers thrive in hot, humid conditions, while others prefer cooler temperatures.
Starting Your Chili Pepper Seeds
Starting your chili pepper seeds indoors is a great way to get a head start on the growing season, especially if you live in a cooler climate. I usually start mine about 6-8 weeks before the last expected frost.
Here’s what you’ll need:
* Chili pepper seeds
* Seed starting trays or small pots
* Seed starting mix (a light, well-draining soil)
* Spray bottle
* Heat mat (optional, but helpful)
* Grow light (optional, but recommended)
Now, let’s get planting!
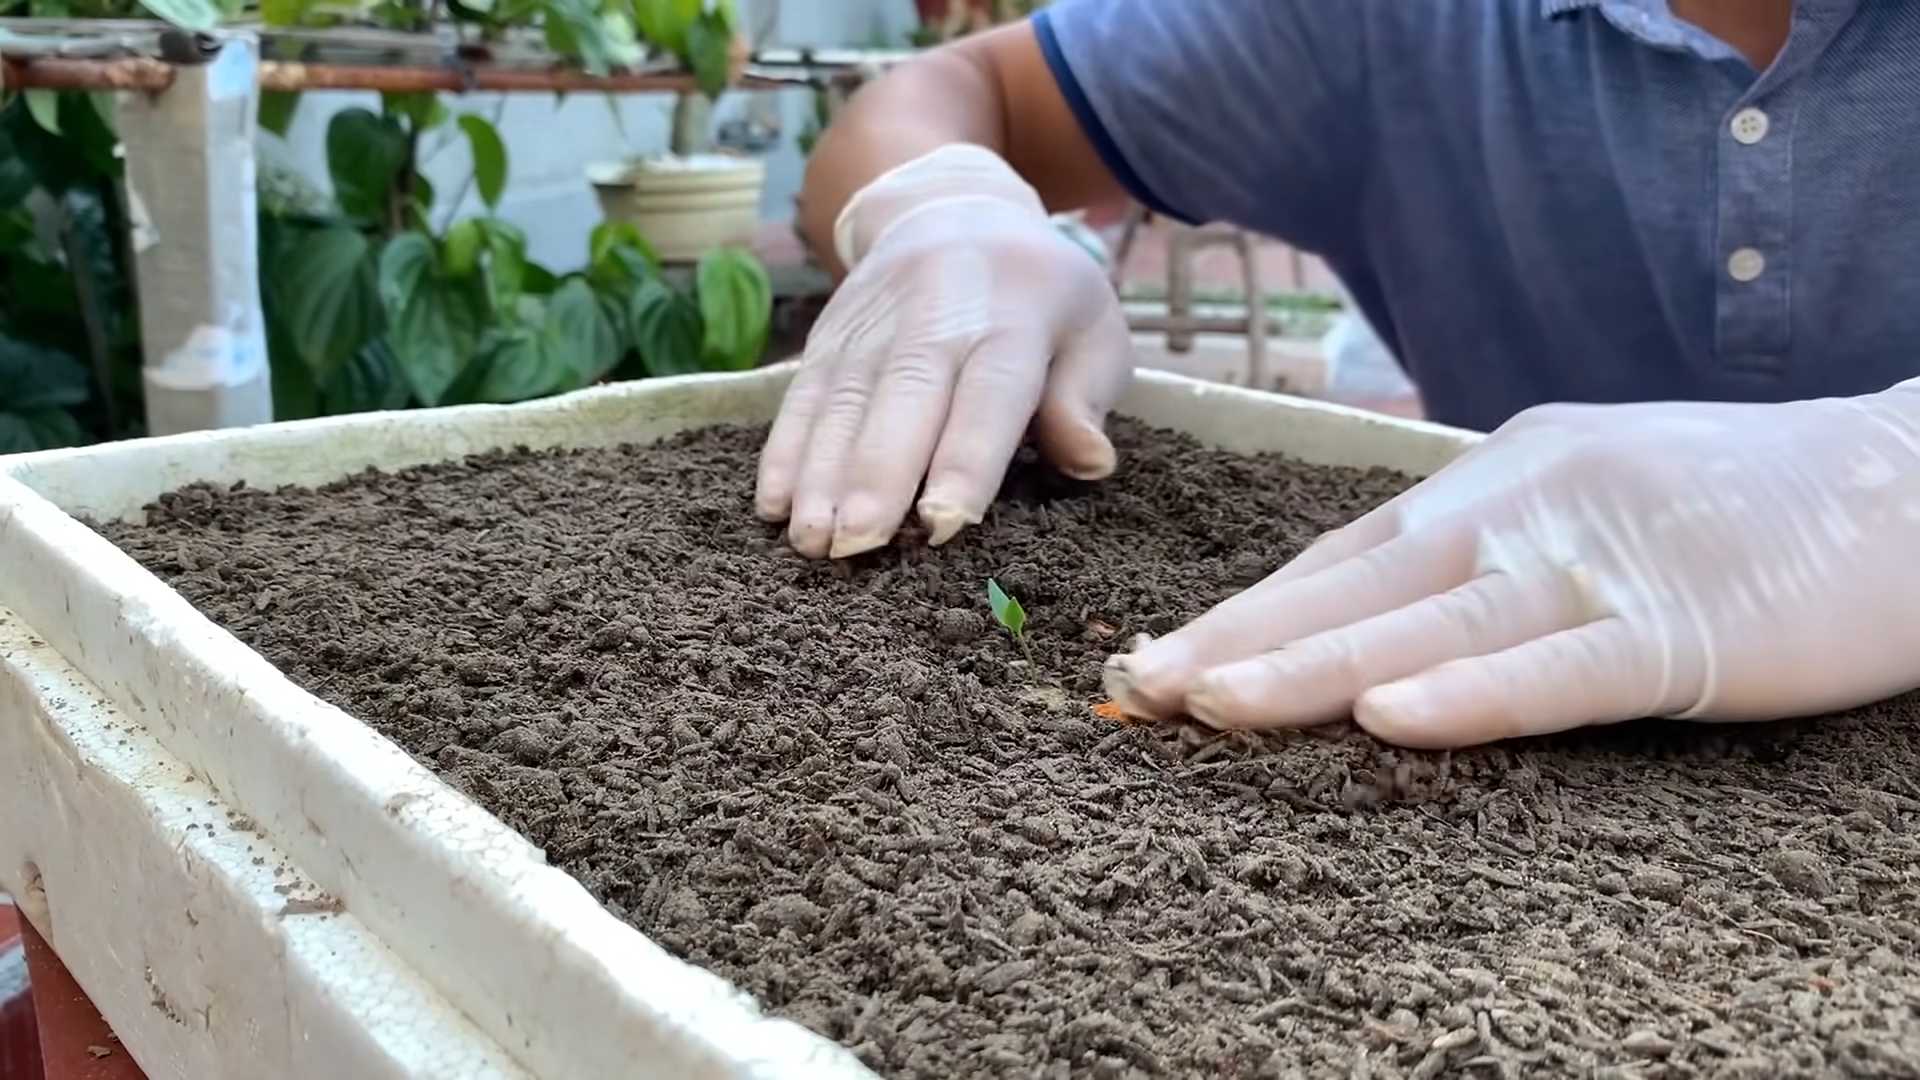
1. **Prepare your seed starting trays or pots:** Fill them with seed starting mix, leaving about half an inch of space at the top.
2. **Moisten the soil:** Gently spray the soil with water until it’s evenly moist but not soggy.
3. **Sow the seeds:** Place 2-3 seeds in each cell or pot, about ¼ inch deep.
4. **Cover the seeds:** Lightly cover the seeds with seed starting mix.
5. **Water gently:** Mist the soil again with the spray bottle.
6. **Provide warmth:** Place the trays or pots on a heat mat, if using. Chili pepper seeds germinate best in warm temperatures (around 80-85°F).
7. **Provide light:** Place the trays or pots under a grow light, or in a sunny window. If using a grow light, keep it a few inches above the soil surface.
8. **Keep the soil moist:** Check the soil daily and mist with water as needed to keep it consistently moist.
9. **Be patient:** Chili pepper seeds can take anywhere from 1-3 weeks to germinate, so don’t give up!
Once the seedlings emerge, remove them from the heat mat and continue to provide them with plenty of light. When the seedlings have their first set of true leaves (the leaves that look like miniature versions of the adult plant’s leaves), you can thin them out, leaving only the strongest seedling in each cell or pot.
Transplanting Your Chili Pepper Seedlings
Once the danger of frost has passed and the soil has warmed up, it’s time to transplant your chili pepper seedlings outdoors.
Here’s what you’ll need:
* Your chili pepper seedlings
* Gardening gloves
* Trowel or shovel
* Well-draining soil
* Compost or other organic matter
* Watering can or hose
* Mulch (optional)
Let’s get those peppers in the ground!
1. **Harden off your seedlings:** Before transplanting, you’ll need to harden off your seedlings to acclimate them to outdoor conditions. This involves gradually exposing them to sunlight and cooler temperatures over a period of 1-2 weeks. Start by placing them outdoors in a sheltered location for a few hours each day, gradually increasing the amount of time they spend outside.
2. **Prepare the planting site:** Choose a sunny location with well-draining soil. Chili peppers need at least 6-8 hours of sunlight per day. Amend the soil with compost or other organic matter to improve drainage and fertility.
3. **Dig the holes:** Dig holes that are slightly larger than the root balls of your seedlings. Space the holes about 18-24 inches apart, depending on the variety of chili pepper you’re growing.
4. **Remove the seedlings from their containers:** Gently remove the seedlings from their containers, being careful not to damage the roots. If the roots are tightly bound, gently loosen them with your fingers.
5. **Plant the seedlings:** Place the seedlings in the holes, making sure the top of the root ball is level with the surrounding soil.
6. **Fill in the holes:** Fill in the holes with soil, gently firming it around the seedlings.
7. **Water thoroughly:** Water the seedlings thoroughly after planting.
8. **Mulch (optional):** Apply a layer of mulch around the plants to help retain moisture, suppress weeds, and regulate soil temperature.
Caring for Your Chili Pepper Plants
Now that your chili pepper plants are in the ground, it’s time to give them the care they need to thrive.
Here are a few tips for success:
* **Watering:** Water your chili pepper plants regularly, especially during hot, dry weather. Aim to keep the soil consistently moist but not soggy. Water deeply and less frequently, rather than shallowly and often.
* **Fertilizing:** Fertilize your chili pepper plants every 2-3 weeks with a balanced fertilizer. You can also use a fertilizer specifically formulated for peppers and tomatoes.
* **Pruning:** Pruning your chili pepper plants can help improve air circulation and encourage bushier growth. Remove any suckers (small shoots that grow from the base of the plant) and any yellowing or diseased leaves.
* **Pest and disease control:** Keep an eye out for pests and diseases, such as aphids, spider mites, and blossom end rot. Treat any problems promptly with appropriate organic or chemical controls.
* **Support:** As your chili pepper plants grow, they may need support to prevent them from falling over. You can use stakes, cages, or trellises to provide support.
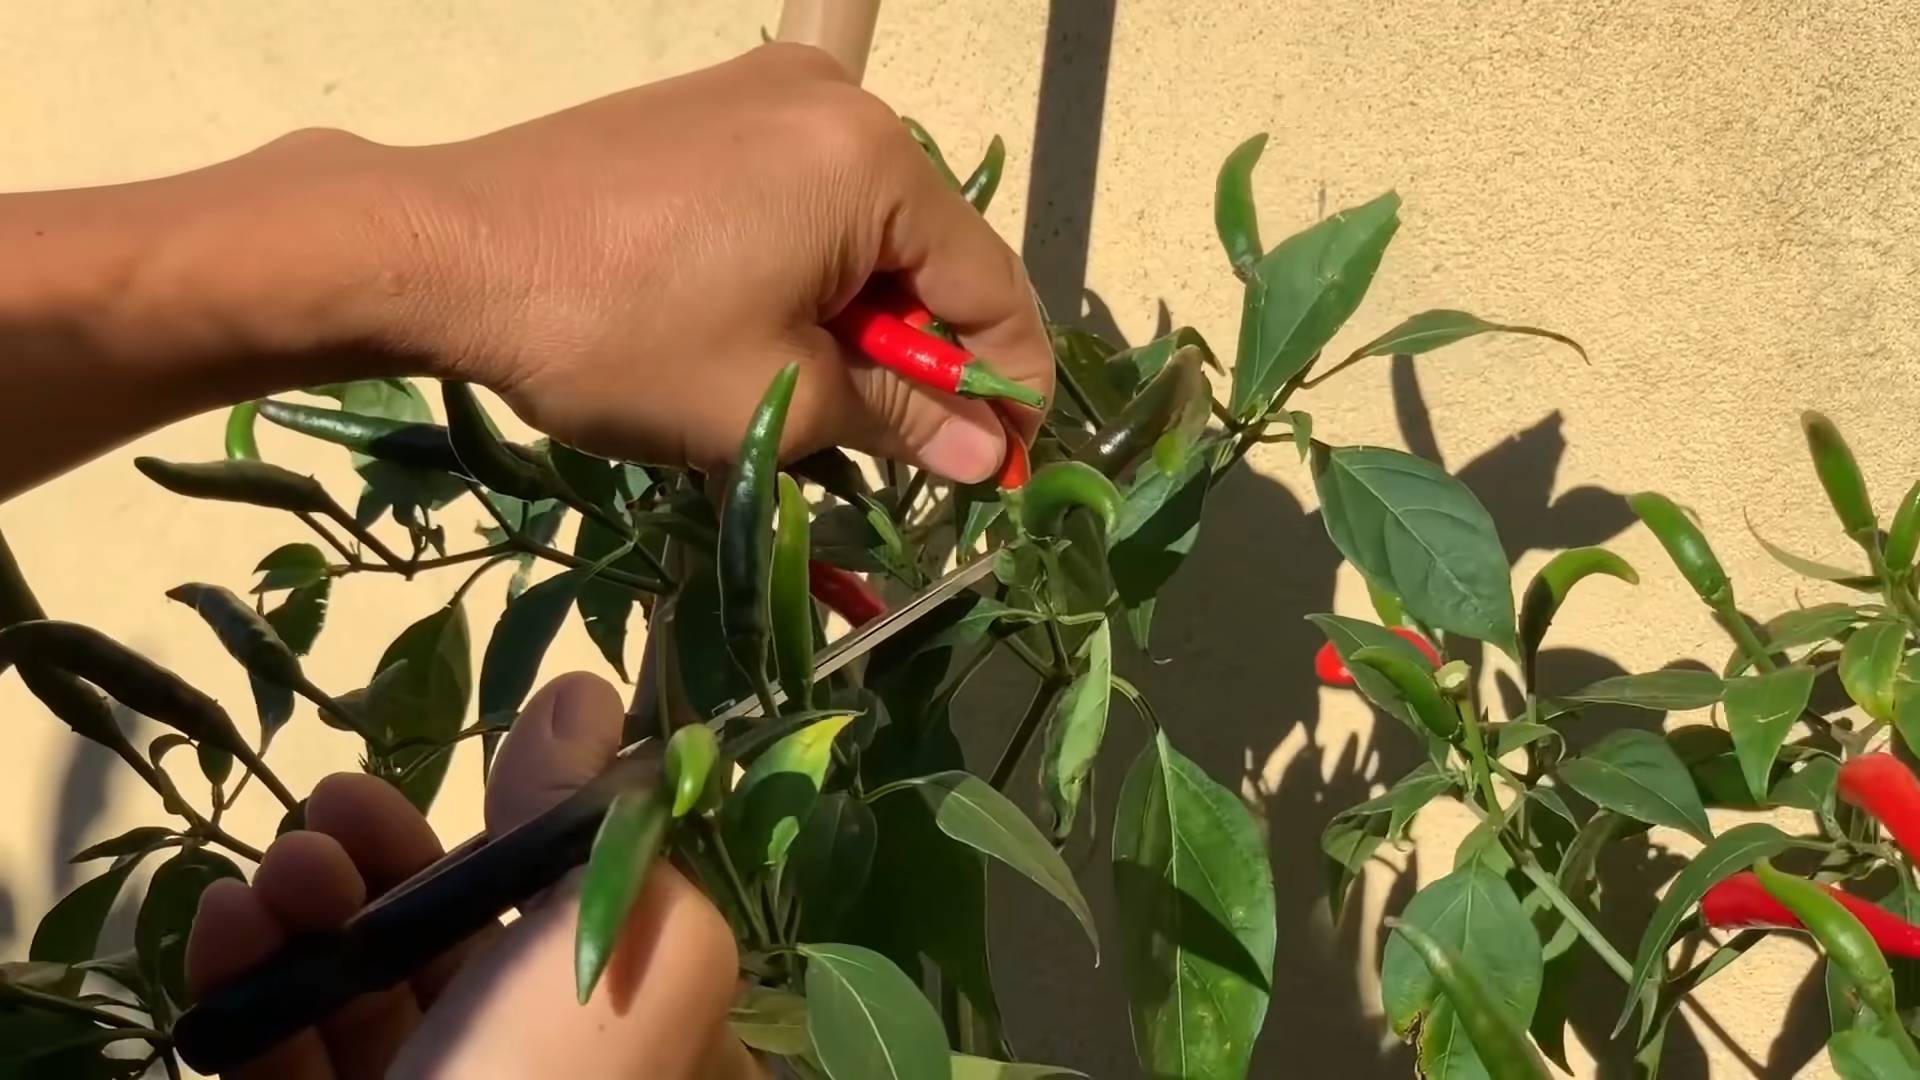
Harvesting Your Chili Peppers
The moment you’ve been waiting for! Harvesting your chili peppers is the most rewarding part of the process.
Here are a few tips for harvesting:
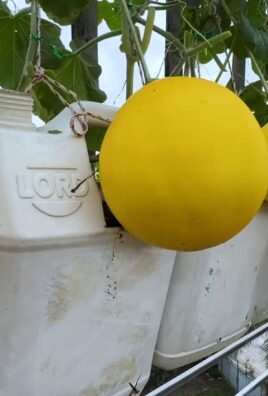
* **Harvest when the peppers are fully ripe:** The color of the peppers will change as they ripen, depending on the variety. For example, jalapeños will turn from green to red, and habaneros will turn from green to orange.
* **Use gloves when harvesting hot peppers:** The oils in hot peppers can irritate your skin, so it’s best to wear gloves when harvesting them.
* **Cut the peppers from the plant:** Use a sharp knife or scissors to cut the peppers from the plant, leaving a small stem attached.
* **Store your peppers properly:** Fresh chili peppers can be stored in the refrigerator for up to a week. You can also dry, freeze, or pickle them for longer storage.
Remember, the heat level of chili peppers can vary depending on growing conditions. Taste a small piece of each pepper before using it in your cooking to gauge its spiciness.
Troubleshooting Common Problems
Even with the best care, you may encounter some problems when growing chili peppers. Here are a few common issues and how to address them:
* **Blossom end rot:** This is a condition that causes the bottom of the peppers to rot. It’s usually caused by a calcium deficiency in the soil. To prevent blossom end rot, amend the soil with calcium-rich materials like bone meal or crushed eggshells. Also, ensure consistent watering.
* **Aphids:** These tiny insects can suck the sap from your chili pepper plants, causing them to weaken and become stunted. Control aphids with insecticidal soap or neem oil.
* **Spider mites:** These tiny pests can also suck the sap from your chili pepper plants, causing the leaves to become speckled and yellow. Control spider mites with insecticidal soap or neem oil.
* **Sunscald:** This is a condition that occurs when the peppers are exposed to too much direct sunlight, causing them to become bleached
Conclusion
So, there you have it! Planting chili peppers at home isn’t just a gardening project; it’s an adventure in flavor, a journey from seed to spice, and a rewarding experience that brings the heat right to your kitchen. We’ve walked through the essential steps, from selecting the perfect seeds to nurturing your seedlings and finally harvesting those fiery fruits. But why is this DIY trick a must-try?
First and foremost, growing your own chili peppers gives you unparalleled control over the quality and freshness of your produce. No more wondering where your peppers came from or how they were treated. You’ll know exactly what went into them – sunshine, water, and a whole lot of love. This translates to a superior flavor profile, often far surpassing anything you can find at the grocery store. Imagine the vibrant, intense taste of a freshly picked habanero, or the smoky sweetness of a homegrown poblano. It’s a culinary game-changer.
Beyond the flavor, planting chili peppers at home is incredibly satisfying. There’s something deeply rewarding about nurturing a plant from a tiny seed to a bountiful harvest. It connects you to nature, provides a relaxing hobby, and gives you a sense of accomplishment that’s hard to beat. Plus, it’s a fantastic way to reduce your carbon footprint by sourcing your food locally – right from your own backyard!
But the benefits don’t stop there. Growing your own chili peppers allows for endless experimentation and customization. Want to try a rare variety you can’t find anywhere else? Go for it! Want to control the heat level by adjusting the growing conditions? You’re in charge!
Here are a few suggestions and variations to get you started:
* Experiment with different varieties: From the mild bell pepper to the scorching ghost pepper, there’s a chili pepper out there for every palate. Don’t be afraid to try something new and exciting.
* Try container gardening: If you don’t have a lot of space, container gardening is a great option. You can grow chili peppers in pots on your balcony, patio, or even indoors with the right lighting.
* Make your own hot sauce: Once you’ve harvested your peppers, why not turn them into a delicious homemade hot sauce? There are countless recipes online, and you can customize them to your exact taste.
* Preserve your harvest: If you have a bumper crop of chili peppers, you can preserve them by drying, pickling, or freezing them. This way, you can enjoy your homegrown peppers all year round.
* Companion Planting: Basil, tomatoes, and carrots are great companion plants for chili peppers. They can help deter pests and improve the overall health of your plants.
Don’t be intimidated by the process. Planting chili peppers at home is easier than you might think. With a little bit of knowledge and effort, you can be enjoying your own homegrown peppers in no time.
So, what are you waiting for? Grab some seeds, get your hands dirty, and start planting! We’re confident that you’ll love the experience and the delicious results. And most importantly, we want to hear about your journey! Share your experiences, tips, and photos with us in the comments below. Let’s create a community of chili pepper enthusiasts and inspire others to discover the joy of growing their own spice. Happy planting!
Frequently Asked Questions (FAQ)
What is the best time to start planting chili peppers at home?
The ideal time to start planting chili peppers depends on your climate. In general, you should start your seeds indoors 6-8 weeks before the last expected frost. This gives the seedlings enough time to develop before being transplanted outdoors. If you live in a warmer climate with a longer growing season, you can start your seeds directly outdoors after the last frost. However, starting indoors provides a head start and allows you to control the growing environment more effectively. Consider using a heat mat to encourage germination and a grow light to provide adequate light for your seedlings.
What kind of soil is best for chili peppers?
Chili peppers thrive in well-draining soil that is rich in organic matter. A slightly acidic to neutral pH (around 6.0 to 7.0) is ideal. You can amend your soil with compost, aged manure, or other organic materials to improve its fertility and drainage. Avoid heavy clay soils, as they can become waterlogged and lead to root rot. If you’re growing in containers, use a high-quality potting mix specifically formulated for vegetables. Adding perlite or vermiculite to the potting mix can further improve drainage.
How much sunlight do chili peppers need?
Chili peppers are sun-loving plants and require at least 6-8 hours of direct sunlight per day. Choose a location in your garden that receives plenty of sunlight throughout the day. If you’re growing indoors, use grow lights to supplement natural sunlight. Rotate your plants regularly to ensure that all sides receive adequate light. Insufficient sunlight can lead to leggy growth, reduced flowering, and smaller peppers.
How often should I water my chili peppers?
Water your chili peppers regularly, especially during hot and dry weather. The soil should be kept consistently moist, but not waterlogged. Water deeply and less frequently, rather than shallowly and more often. This encourages the roots to grow deeper and makes the plants more drought-tolerant. Check the soil moisture regularly by sticking your finger into the soil. If the top inch feels dry, it’s time to water. Avoid overhead watering, as this can promote fungal diseases. Use a soaker hose or drip irrigation to water at the base of the plants.
What are some common pests and diseases that affect chili peppers?
Chili peppers can be susceptible to various pests and diseases, including aphids, spider mites, whiteflies, blossom-end rot, and fungal diseases. Regularly inspect your plants for signs of pests or diseases. Treat infestations promptly with insecticidal soap, neem oil, or other appropriate treatments. To prevent blossom-end rot, ensure that your plants receive consistent watering and that the soil is rich in calcium. Improve air circulation around your plants to reduce the risk of fungal diseases. Consider using organic pest control methods to minimize the use of harmful chemicals.
How do I know when my chili peppers are ripe?
The color of the chili pepper is the best indicator of ripeness. Most chili peppers will turn from green to red, yellow, orange, or brown when they are ripe, depending on the variety. The pepper should also feel firm and slightly glossy. You can also test the ripeness by tasting a small piece of the pepper. If it has the desired level of heat and flavor, it’s ready to harvest. Use pruning shears or scissors to cut the peppers from the plant, leaving a small stem attached.
Can I grow chili peppers indoors?
Yes, you can absolutely grow chili peppers indoors, especially if you live in a climate with cold winters. Choose a sunny location near a window that receives at least 6 hours of direct sunlight per day. Supplement natural sunlight with grow lights if necessary. Use a well-draining potting mix and water regularly. Provide adequate ventilation to prevent fungal diseases. Pollinate the flowers manually by gently shaking the plants or using a small brush to transfer pollen from one flower to another. With proper care, you can enjoy a bountiful harvest of chili peppers indoors.
How can I increase the heat level of my chili peppers?
Several factors can influence the heat level of chili peppers, including genetics, growing conditions, and stress. To increase the heat level, provide your plants with plenty of sunlight, water them sparingly, and avoid over-fertilizing. Stressing the plants slightly can encourage them to produce more capsaicin, the compound that gives chili peppers their heat. However, avoid stressing the plants too much, as this can reduce their overall yield. Some gardeners believe that withholding water for a few days before harvesting can also increase the heat level.
How do I store chili peppers after harvesting?
There are several ways to store chili peppers after harvesting, depending on how long you want to keep them. Fresh chili peppers can be stored in the refrigerator for up to a week. To dry chili peppers, string them together and hang them in a warm, dry place until they are completely dry. Dried chili peppers can be stored in an airtight container for up to a year. You can also pickle chili peppers in vinegar or ferment them to create a delicious and spicy condiment. Freezing chili peppers is another option, but they may lose some of their texture and flavor.
Leave a Comment