
Pot Gardening Spinach: Imagine stepping outside your door and harvesting fresh, vibrant spinach leaves for your salad, all grown in a pot right on your patio! Sounds dreamy, right? Well, it doesn’t have to be just a dream. This DIY guide is your ticket to enjoying homegrown goodness, even if you don’t have a sprawling backyard.
For centuries, cultivating food in containers has been a vital practice. From ancient Egyptians growing herbs in terracotta pots to medieval monks tending medicinal plants in cloistered gardens, the ability to nurture life in limited spaces has always been valued. Today, with increasing urbanization and a growing desire for sustainable living, pot gardening spinach and other edibles is experiencing a major resurgence.
Why should you jump on the pot gardening bandwagon, especially for spinach? Because it’s incredibly rewarding! Store-bought spinach often lacks the freshness and flavor of homegrown varieties. Plus, you have complete control over what goes into your plants – no harsh chemicals or pesticides. More importantly, growing your own food, even in a small pot, connects you to nature and provides a sense of accomplishment. I’m here to show you some simple, effective tricks and hacks that will make growing spinach in pots a breeze. Get ready to enjoy delicious, nutritious spinach straight from your own little garden oasis!
Growing Spinach in Pots: A Beginner’s Guide
Hey there, fellow gardening enthusiasts! I’m so excited to share my experience with growing spinach in pots. It’s surprisingly easy, even if you’re a complete newbie like I was not too long ago. Fresh, homegrown spinach is so much tastier than the store-bought stuff, and it’s incredibly rewarding to harvest your own greens. Let’s dive in!
Choosing the Right Pot and Soil
Before we even think about seeds, we need to get the foundation right. The pot and soil are crucial for happy spinach plants.
* Pot Size: Spinach needs room to grow, but not as much as, say, tomatoes. I’ve found that a pot that’s at least 6-8 inches deep and 6-8 inches in diameter works perfectly for a few plants. You can also use larger containers, like window boxes or rectangular planters, to grow a bigger batch. Just make sure there are drainage holes! Soggy roots are a spinach plant’s worst enemy.
* Pot Material: Plastic, terracotta, ceramic – it doesn’t really matter! Choose whatever you like aesthetically and what fits your budget. I personally prefer terracotta because it’s breathable and helps prevent overwatering, but plastic is lighter and retains moisture better, which can be helpful in hot climates.
* Soil: This is where things get a little more important. Spinach needs well-draining soil that’s rich in organic matter. Don’t just grab any old dirt from your backyard! I highly recommend using a good quality potting mix specifically formulated for vegetables. You can also amend regular potting mix with compost or aged manure to boost its nutrient content. Avoid using garden soil directly in pots, as it tends to compact and doesn’t drain well.
Planting Your Spinach Seeds
Alright, now for the fun part – planting!
1. Prepare the Pot: Fill your chosen pot with the potting mix, leaving about an inch of space at the top. Gently pat down the soil to remove any large air pockets.
2. Sow the Seeds: Spinach seeds are small, so don’t bury them too deep. I usually sow them about ½ inch deep and about 1-2 inches apart. You can sow multiple seeds in the same pot, but be sure to thin them out later if they all sprout to avoid overcrowding.
3. Water Gently: After sowing, water the soil gently with a watering can or a hose with a gentle spray nozzle. You want to moisten the soil without disturbing the seeds.
4. Find the Right Spot: Spinach prefers full sun (6-8 hours of direct sunlight per day), but it can also tolerate partial shade, especially in hot climates. Place your pot in a sunny location, such as a balcony, patio, or windowsill.
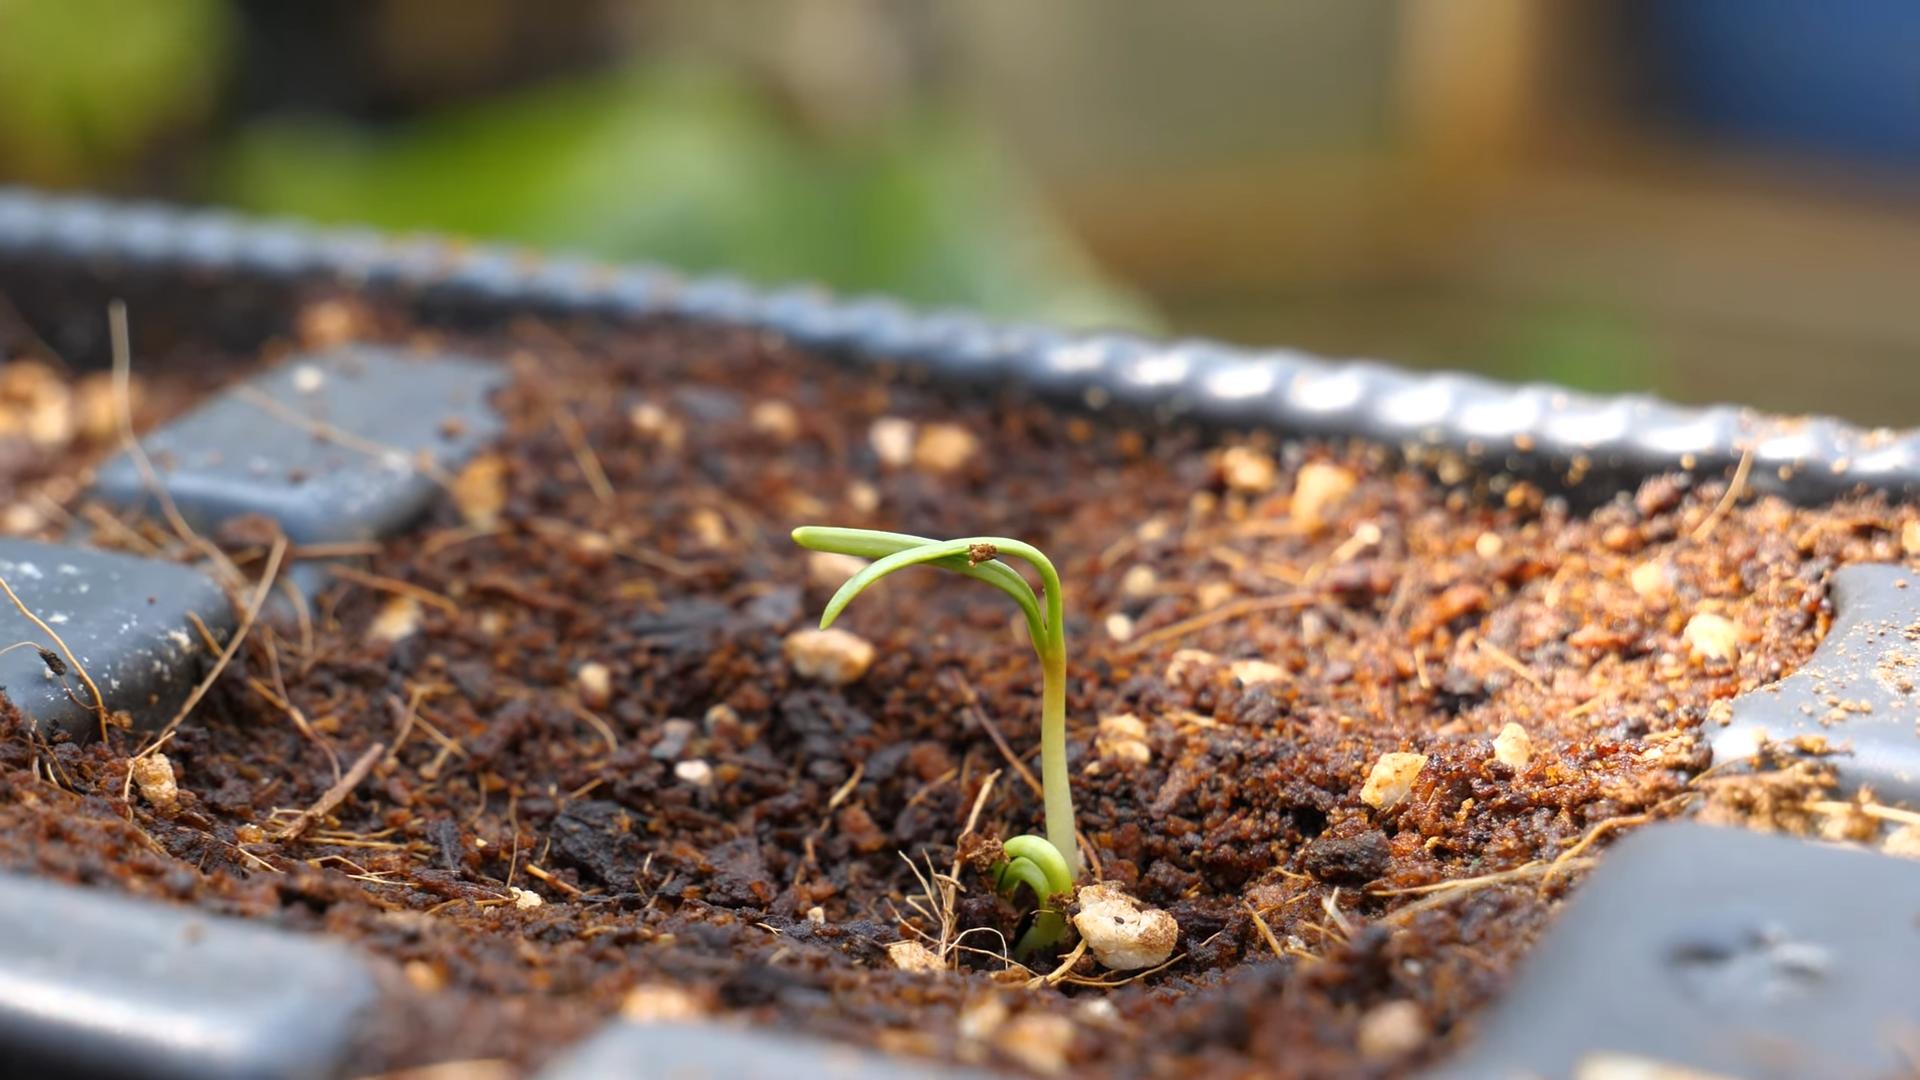
5. Keep it Moist: Keep the soil consistently moist, but not soggy, until the seeds germinate. This usually takes about 5-10 days, depending on the temperature. I like to check the soil moisture every day and water when the top inch feels dry.
Caring for Your Spinach Plants
Once your spinach seedlings emerge, it’s time to provide them with the care they need to thrive.
* Watering: Water your spinach plants regularly, especially during hot and dry weather. Aim to keep the soil consistently moist, but avoid overwatering, which can lead to root rot. I usually water deeply whenever the top inch of soil feels dry.
* Fertilizing: Spinach is a heavy feeder, so it benefits from regular fertilization. I like to use a liquid fertilizer specifically formulated for leafy greens, diluted to half strength. Fertilize every 2-3 weeks, following the instructions on the fertilizer label. You can also use organic fertilizers, such as compost tea or fish emulsion.
* Thinning: If you sowed multiple seeds in the same pot, you’ll need to thin out the seedlings once they have a few true leaves. This means removing some of the weaker seedlings to give the remaining plants more space to grow. Simply snip off the unwanted seedlings at the soil level with scissors.
* Weeding: Keep your pot free of weeds, which can compete with your spinach plants for nutrients and water. Hand-pull any weeds that appear, being careful not to disturb the spinach roots.
* Pest Control: Spinach is generally pest-resistant, but it can sometimes be affected by aphids, slugs, or snails. Inspect your plants regularly for signs of pests and take action if necessary. You can usually control aphids with a strong spray of water or by introducing beneficial insects, such as ladybugs. Slugs and snails can be hand-picked or trapped with beer traps.
* Bolting Prevention: Bolting is when spinach plants prematurely flower and produce seeds, which makes the leaves bitter and unpalatable. Bolting is usually triggered by hot weather or long days. To prevent bolting, try to plant your spinach in early spring or late summer, when the weather is cooler. You can also provide shade for your plants during the hottest part of the day.
Harvesting Your Spinach
The best part! Harvesting your own spinach is so satisfying.
1. When to Har
Hey there, fellow gardening enthusiasts! I’m so excited to share my experience with growing spinach in pots. It’s surprisingly easy, even if you’re a complete newbie like I was not too long ago. Fresh, homegrown spinach is so much tastier than the store-bought stuff, and it’s incredibly rewarding to harvest your own greens. Let’s dive in!
Choosing the Right Pot and Soil
Before we even think about seeds, we need to get the foundation right. The pot and soil are crucial for happy spinach plants.
* Pot Size: Spinach needs room to grow, but not as much as, say, tomatoes. I’ve found that a pot that’s at least 6-8 inches deep and 6-8 inches in diameter works perfectly for a few plants. You can also use larger containers, like window boxes or rectangular planters, to grow a bigger batch. Just make sure there are drainage holes! Soggy roots are a spinach plant’s worst enemy.
* Pot Material: Plastic, terracotta, ceramic – it doesn’t really matter! Choose whatever you like aesthetically and what fits your budget. I personally prefer terracotta because it’s breathable and helps prevent overwatering, but plastic is lighter and retains moisture better, which can be helpful in hot climates.
* Soil: This is where things get a little more important. Spinach needs well-draining soil that’s rich in organic matter. Don’t just grab any old dirt from your backyard! I highly recommend using a good quality potting mix specifically formulated for vegetables. You can also amend regular potting mix with compost or aged manure to boost its nutrient content. Avoid using garden soil directly in pots, as it tends to compact and doesn’t drain well.
Planting Your Spinach Seeds
Alright, now for the fun part – planting!
1. Prepare the Pot: Fill your chosen pot with the potting mix, leaving about an inch of space at the top. Gently pat down the soil to remove any large air pockets.
2. Sow the Seeds: Spinach seeds are small, so don’t bury them too deep. I usually sow them about ½ inch deep and about 1-2 inches apart. You can sow multiple seeds in the same pot, but be sure to thin them out later if they all sprout to avoid overcrowding.
3. Water Gently: After sowing, water the soil gently with a watering can or a hose with a gentle spray nozzle. You want to moisten the soil without disturbing the seeds.
4. Find the Right Spot: Spinach prefers full sun (6-8 hours of direct sunlight per day), but it can also tolerate partial shade, especially in hot climates. Place your pot in a sunny location, such as a balcony, patio, or windowsill.
5. Keep it Moist: Keep the soil consistently moist, but not soggy, until the seeds germinate. This usually takes about 5-10 days, depending on the temperature. I like to check the soil moisture every day and water when the top inch feels dry.
Caring for Your Spinach Plants
Once your spinach seedlings emerge, it’s time to provide them with the care they need to thrive.
* Watering: Water your spinach plants regularly, especially during hot and dry weather. Aim to keep the soil consistently moist, but avoid overwatering, which can lead to root rot. I usually water deeply whenever the top inch of soil feels dry.
* Fertilizing: Spinach is a heavy feeder, so it benefits from regular fertilization. I like to use a liquid fertilizer specifically formulated for leafy greens, diluted to half strength. Fertilize every 2-3 weeks, following the instructions on the fertilizer label. You can also use organic fertilizers, such as compost tea or fish emulsion.
* Thinning: If you sowed multiple seeds in the same pot, you’ll need to thin out the seedlings once they have a few true leaves. This means removing some of the weaker seedlings to give the remaining plants more space to grow. Simply snip off the unwanted seedlings at the soil level with scissors.
* Weeding: Keep your pot free of weeds, which can compete with your spinach plants for nutrients and water. Hand-pull any weeds that appear, being careful not to disturb the spinach roots.
* Pest Control: Spinach is generally pest-resistant, but it can sometimes be affected by aphids, slugs, or snails. Inspect your plants regularly for signs of pests and take action if necessary. You can usually control aphids with a strong spray of water or by introducing beneficial insects, such as ladybugs. Slugs and snails can be hand-picked or trapped with beer traps.
* Bolting Prevention: Bolting is when spinach plants prematurely flower and produce seeds, which makes the leaves bitter and unpalatable. Bolting is usually triggered by hot weather or long days. To prevent bolting, try to plant your spinach in early spring or late summer, when the weather is cooler. You can also provide shade for your plants during the hottest part of the day.
Harvesting Your Spinach
The best part! Harvesting your own spinach is so satisfying.
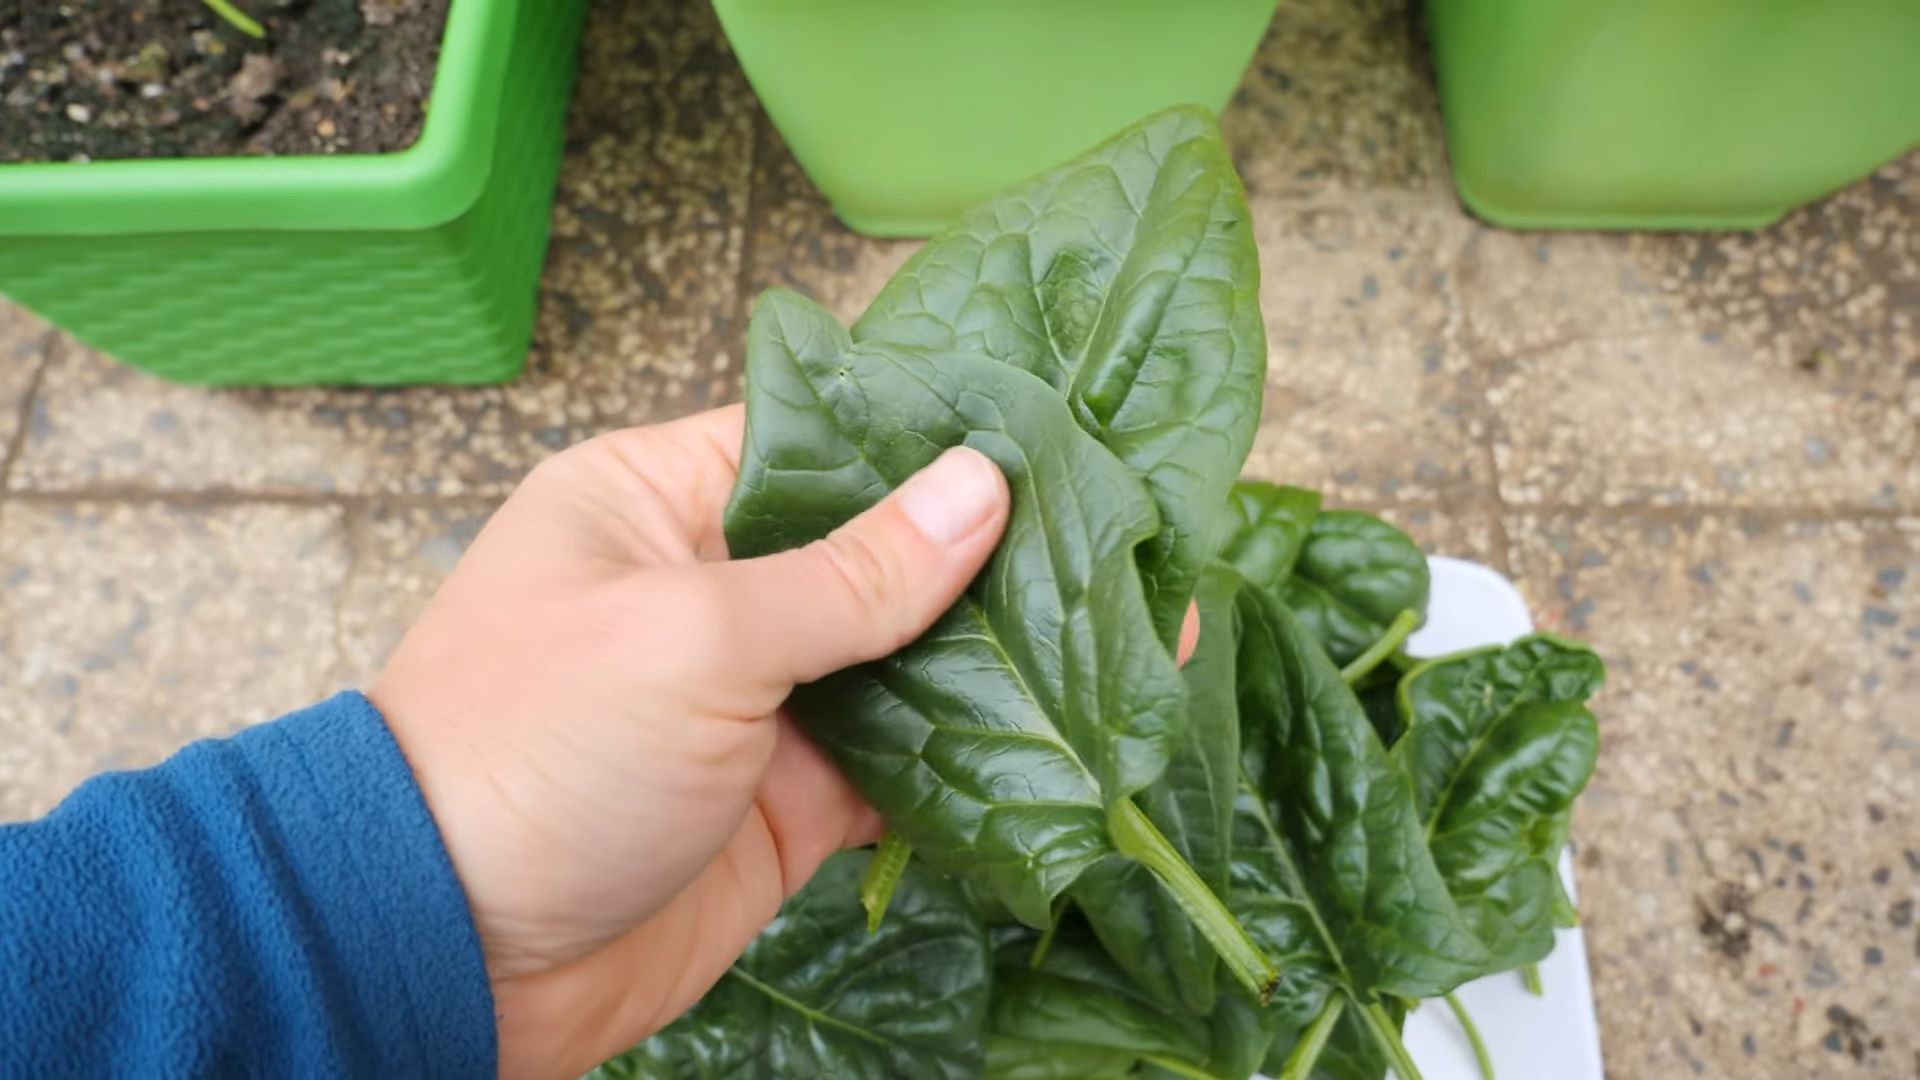
1. When to Harvest: You can start harvesting spinach leaves when they are about 4-6 inches long. I usually harvest the outer leaves first, leaving the inner leaves to continue growing.
2. How to Harvest: Use scissors or a sharp knife to cut the leaves off at the base of the plant. Be careful not to damage the remaining leaves.
3. Succession Planting: To ensure a continuous supply of spinach, sow new seeds every 2-3 weeks. This is called succession planting.
4. Enjoy Your Harvest: Freshly harvested spinach is best enjoyed right away. You can use it in salads, smoothies, soups, or sautéed as a side dish.
Troubleshooting
Even with the best care, you might encounter some problems along the way. Here are a few common issues and how to address them:
* Yellowing Leaves: This can be caused by overwatering, underwatering, nutrient deficiencies, or pests. Check the soil moisture and adjust your watering accordingly. Fertilize your plants with a balanced fertilizer. Inspect your plants for pests and take action if necessary.
* Slow Growth: This can be caused by insufficient sunlight, poor soil, or nutrient deficiencies. Make sure your plants are getting enough sunlight. Amend the soil with compost or aged manure. Fertilize your plants with a balanced fertilizer.
* Bolting: As mentioned earlier, bolting is when spinach plants prematurely flower and produce seeds. To prevent bolting, plant your spinach in early spring or late summer, and provide shade during the hottest part of the day.
Extra Tips for Super Spinach!
Here are a few extra tips I’ve learned along the way that can help you grow even better spinach:
* Choose the Right Variety: Some spinach varieties are more heat-tolerant than others. If you live in a hot climate, choose a heat-tolerant variety, such as ‘Malabar’ or ‘New Zealand’ spinach (though technically not true spinach, they taste similar and thrive in heat).
* Soak Seeds Before Planting: Soaking spinach seeds in water for 24 hours before planting can help improve germination rates.
* Use a Soil Thermometer: Spinach seeds germinate best when the soil temperature is between 50°F and 70°F. Use a soil thermometer to monitor the soil temperature and plant your seeds when it’s within the optimal range.
* Companion Planting: Spinach grows well with other vegetables, such as radishes, lettuce, and carrots. Planting these vegetables together can help deter pests and improve growth.
* Harvest Regularly: Harvesting spinach leaves regularly encourages the plant to produce more leaves. Don’t be afraid to harvest often!
Growing spinach in pots is a simple and rewarding way to enjoy fresh, homegrown greens. With a little bit of care and attention, you can have a bountiful harvest of delicious spinach right at your fingertips. Happy gardening!
Conclusion
So, there you have it! Cultivating your own spinach in pots is not only achievable, but it’s also incredibly rewarding. We’ve walked you through the simple steps, from selecting the right pot and soil to nurturing your leafy greens to a bountiful harvest. Why is this DIY trick a must-try? Because it puts fresh, organic spinach right at your fingertips, regardless of your garden space. Imagine stepping outside your door and snipping off exactly the amount of spinach you need for a salad, smoothie, or side dish. No more wilted bags from the grocery store! No more wondering about pesticides or questionable growing practices!
Beyond the convenience and health benefits, growing spinach in pots offers a unique connection to your food. You’ll witness the entire life cycle of the plant, from tiny seed to vibrant, edible leaves. This process can be incredibly therapeutic and educational, especially for children. It’s a fantastic way to teach them about where their food comes from and the importance of sustainable living.
But the beauty of pot gardening spinach lies in its adaptability. Feel free to experiment with different varieties of spinach. Some, like ‘Baby’s Leaf Hybrid,’ are specifically bred for container gardening and offer a quick harvest. Others, like ‘Bloomsdale Long Standing,’ are more heat-tolerant and can extend your growing season.
Consider companion planting to enhance your spinach’s growth and deter pests. Marigolds, for example, are known to repel nematodes and other harmful insects. Basil can also be a beneficial companion, attracting pollinators and adding a delightful aroma to your garden. You can even interplant your spinach with radishes, which mature quickly and help break up the soil.
For a truly unique twist, try growing your spinach in a vertical garden. This is a great option for those with limited space, and it adds a visually stunning element to your patio or balcony. You can use repurposed pallets, hanging baskets, or even stacked planters to create a vertical spinach oasis.
Don’t be afraid to get creative with your pot selection, too. While terracotta pots are classic and provide good drainage, you can also use plastic containers, fabric pots, or even repurposed buckets. Just make sure your chosen container has adequate drainage holes to prevent waterlogging.
Remember, the key to successful pot gardening spinach is consistent watering, proper fertilization, and protection from extreme temperatures. Keep a close eye on your plants and adjust your care routine as needed. With a little bit of attention, you’ll be enjoying fresh, homegrown spinach in no time.
We are confident that you will find this DIY project to be both enjoyable and fruitful. So, grab your pots, soil, and spinach seeds, and get ready to embark on a rewarding gardening adventure. We encourage you to try this DIY trick and share your experiences with us! Post photos of your spinach-filled pots on social media using #PotGardeningSpinach and let us know what varieties you’re growing and any tips you’ve discovered along the way. We can’t wait to see your green thumbs in action! Let’s cultivate a community of spinach-loving gardeners!
Frequently Asked Questions (FAQ)
What is the best type of pot to use for growing spinach?
The ideal pot for growing spinach should be at least 6-8 inches deep and wide to allow sufficient room for root development. Terracotta pots are a good choice as they provide excellent drainage, but plastic or fabric pots also work well. Ensure the pot has drainage holes to prevent waterlogging, which can lead to root rot. The size of the pot will also dictate how many spinach plants you can grow in each container. A pot that is 12 inches in diameter can comfortably accommodate 3-4 spinach plants.
What kind of soil should I use for pot gardening spinach?
Spinach thrives in well-draining, nutrient-rich soil with a pH between 6.5 and 7.0. A good quality potting mix specifically formulated for vegetables is an excellent choice. You can also create your own mix by combining equal parts of compost, peat moss (or coconut coir), and perlite or vermiculite. Compost provides essential nutrients, peat moss or coconut coir retains moisture, and perlite or vermiculite improves drainage. Avoid using garden soil, as it can be too heavy and may contain pests or diseases.
How often should I water my spinach plants in pots?
Spinach plants in pots require consistent moisture, but avoid overwatering. Water thoroughly when the top inch of soil feels dry to the touch. During hot weather, you may need to water daily, while in cooler weather, watering every other day may suffice. Check the soil moisture regularly and adjust your watering schedul
So, there you have it! Cultivating your own spinach in pots is not only achievable, but it’s also incredibly rewarding. We’ve walked you through the simple steps, from selecting the right pot and soil to nurturing your leafy greens to a bountiful harvest. Why is this DIY trick a must-try? Because it puts fresh, organic spinach right at your fingertips, regardless of your garden space. Imagine stepping outside your door and snipping off exactly the amount of spinach you need for a salad, smoothie, or side dish. No more wilted bags from the grocery store! No more wondering about pesticides or questionable growing practices!
Beyond the convenience and health benefits, growing spinach in pots offers a unique connection to your food. You’ll witness the entire life cycle of the plant, from tiny seed to vibrant, edible leaves. This process can be incredibly therapeutic and educational, especially for children. It’s a fantastic way to teach them about where their food comes from and the importance of sustainable living.
But the beauty of pot gardening spinach lies in its adaptability. Feel free to experiment with different varieties of spinach. Some, like ‘Baby’s Leaf Hybrid,’ are specifically bred for container gardening and offer a quick harvest. Others, like ‘Bloomsdale Long Standing,’ are more heat-tolerant and can extend your growing season.
Consider companion planting to enhance your spinach’s growth and deter pests. Marigolds, for example, are known to repel nematodes and other harmful insects. Basil can also be a beneficial companion, attracting pollinators and adding a delightful aroma to your garden. You can even interplant your spinach with radishes, which mature quickly and help break up the soil.
For a truly unique twist, try growing your spinach in a vertical garden. This is a great option for those with limited space, and it adds a visually stunning element to your patio or balcony. You can use repurposed pallets, hanging baskets, or even stacked planters to create a vertical spinach oasis.
Don’t be afraid to get creative with your pot selection, too. While terracotta pots are classic and provide good drainage, you can also use plastic containers, fabric pots, or even repurposed buckets. Just make sure your chosen container has adequate drainage holes to prevent waterlogging.
Remember, the key to successful pot gardening spinach is consistent watering, proper fertilization, and protection from extreme temperatures. Keep a close eye on your plants and adjust your care routine as needed. With a little bit of attention, you’ll be enjoying fresh, homegrown spinach in no time.
We are confident that you will find this DIY project to be both enjoyable and fruitful. So, grab your pots, soil, and spinach seeds, and get ready to embark on a rewarding gardening adventure. We encourage you to try this DIY trick and share your experiences with us! Post photos of your spinach-filled pots on social media using #PotGardeningSpinach and let us know what varieties you’re growing and any tips you’ve discovered along the way. We can’t wait to see your green thumbs in action! Let’s cultivate a community of spinach-loving gardeners!
Frequently Asked Questions (FAQ)
What is the best type of pot to use for growing spinach?
The ideal pot for growing spinach should be at least 6-8 inches deep and wide to allow sufficient room for root development. Terracotta pots are a good choice as they provide excellent drainage, but plastic or fabric pots also work well. Ensure the pot has drainage holes to prevent waterlogging, which can lead to root rot. The size of the pot will also dictate how many spinach plants you can grow in each container. A pot that is 12 inches in diameter can comfortably accommodate 3-4 spinach plants.
What kind of soil should I use for pot gardening spinach?
Spinach thrives in well-draining, nutrient-rich soil with a pH between 6.5 and 7.0. A good quality potting mix specifically formulated for vegetables is an excellent choice. You can also create your own mix by combining equal parts of compost, peat moss (or coconut coir), and perlite or vermiculite. Compost provides essential nutrients, peat moss or coconut coir retains moisture, and perlite or vermiculite improves drainage. Avoid using garden soil, as it can be too heavy and may contain pests or diseases.
How often should I water my spinach plants in pots?
Spinach plants in pots require consistent moisture, but avoid overwatering. Water thoroughly when the top inch of soil feels dry to the touch. During hot weather, you may need to water daily, while in cooler weather, watering every other day may suffice. Check the soil moisture regularly and adjust your watering schedule accordingly. Ensure that excess water drains freely from the drainage holes to prevent root rot.
How much sunlight does spinach need when grown in pots?
Spinach prefers full sun (6-8 hours of direct sunlight per day), but it can also tolerate partial shade, especially in hot climates. If you live in a region with intense summer heat, provide afternoon shade to prevent the leaves from wilting or bolting (going to seed prematurely). Place your pots in a location that receives ample morning sun and some afternoon shade for optimal growth.
What fertilizer should I use for pot gardening spinach?
Spinach is a heavy feeder and benefits from regular fertilization. Use a balanced, water-soluble fertilizer (e.g., 10-10-10) diluted to half strength every 2-3 weeks. Alternatively, you can use an organic fertilizer such as compost tea or fish emulsion. Avoid over-fertilizing, as this can lead to excessive leaf growth and reduced flavor. Follow the instructions on the fertilizer package carefully.
How do I protect my spinach plants from pests and diseases?
Common pests that affect spinach include aphids, spider mites, and leaf miners. Regularly inspect your plants for signs of infestation and take action promptly. You can control aphids and spider mites with a strong spray of water or by applying insecticidal soap. Leaf miners can be controlled by removing and destroying infested leaves. To prevent fungal diseases, ensure good air circulation around your plants and avoid overwatering. Consider using organic pest control methods such as neem oil or diatomaceous earth.
When is the best time to harvest my pot gardening spinach?
You can begin harvesting spinach leaves when they are about 4-6 inches long. Harvest the outer leaves first, leaving the inner leaves to continue growing. This cut-and-come-again method allows you to enjoy a continuous harvest over several weeks. Avoid harvesting during the hottest part of the day, as the leaves may wilt quickly. Wash the harvested leaves thoroughly before using them.
How do I prevent my spinach from bolting (going to seed)?
Bolting is a common problem with spinach, especially in hot weather. To prevent bolting, choose heat-tolerant varieties, provide afternoon shade, and keep the soil consistently moist. You can also mulch around your plants to help keep the soil cool. If your spinach plants start to bolt, harvest the remaining leaves immediately, as they will become bitter.
Can I grow spinach in pots during the winter?
Yes, you can grow spinach in pots during the winter, especially in mild climates. Choose cold-hardy varieties and provide protection from frost and freezing temperatures. You can move your pots indoors or cover them with a frost blanket. In colder climates, you may need to grow your spinach in a greenhouse or under grow lights.
What are some good companion plants for spinach in pots?
Good companion plants for spinach include radishes, lettuce, onions, garlic, and marigolds. Radishes mature quickly and help break up the soil. Lettuce provides shade for the spinach roots. Onions and garlic deter pests. Marigolds repel nematodes and other harmful insects. Avoid planting spinach near fennel, as it can inhibit its growth.


Leave a Comment