
Pot Grown Bush Beans: Imagine stepping onto your balcony or into your small backyard and harvesting a handful of fresh, crisp bush beans, grown entirely by your own hand. Sounds idyllic, right? Well, it’s more achievable than you might think! For centuries, humans have cultivated beans in various forms, from sprawling vines to compact bushes, adapting their techniques to suit available space. From ancient civilizations to modern urban dwellers, the desire to grow our own food remains a powerful connection to nature.
But let’s face it, not everyone has acres of land for a sprawling garden. That’s where the magic of container gardening comes in! Growing pot grown bush beans is a fantastic solution for apartment dwellers, those with limited yard space, or anyone who simply wants to enjoy the satisfaction of homegrown produce without a massive commitment. This DIY guide will walk you through everything you need to know to successfully cultivate a thriving bean patch in a pot, from choosing the right container and soil to troubleshooting common problems.
Why do you need this DIY trick? Because fresh, homegrown beans taste infinitely better than anything you can buy at the store! Plus, you’ll know exactly what went into growing them – no mystery pesticides or questionable practices. I’m excited to share my tips and tricks for maximizing your yield and enjoying a bountiful harvest of delicious bush beans, right from your own little pot. Let’s get started!
Growing Bush Beans in Pots: A Beginner’s Guide
Hey there, fellow gardening enthusiasts! I’m so excited to share my experience with growing bush beans in pots. It’s a fantastic way to enjoy fresh, homegrown beans even if you don’t have a sprawling garden. Plus, it’s super rewarding to watch those little seeds sprout and transform into a bountiful harvest. Let’s dive in!
Choosing the Right Bush Bean Variety
First things first, you need to pick the right bush bean variety. Unlike pole beans that need a trellis to climb, bush beans stay compact, making them perfect for container gardening. Here are a few of my favorites:
* Blue Lake Bush: These are classic, reliable, and produce tons of delicious green beans.
* Contender: As the name suggests, these beans are tough and can handle cooler temperatures, making them great for early planting.
* Provider: Another early producer, Provider beans are known for their excellent flavor and high yields.
* Roma II: If you love flat, Italian-style beans, Roma II is a fantastic choice. They’re tender and flavorful.
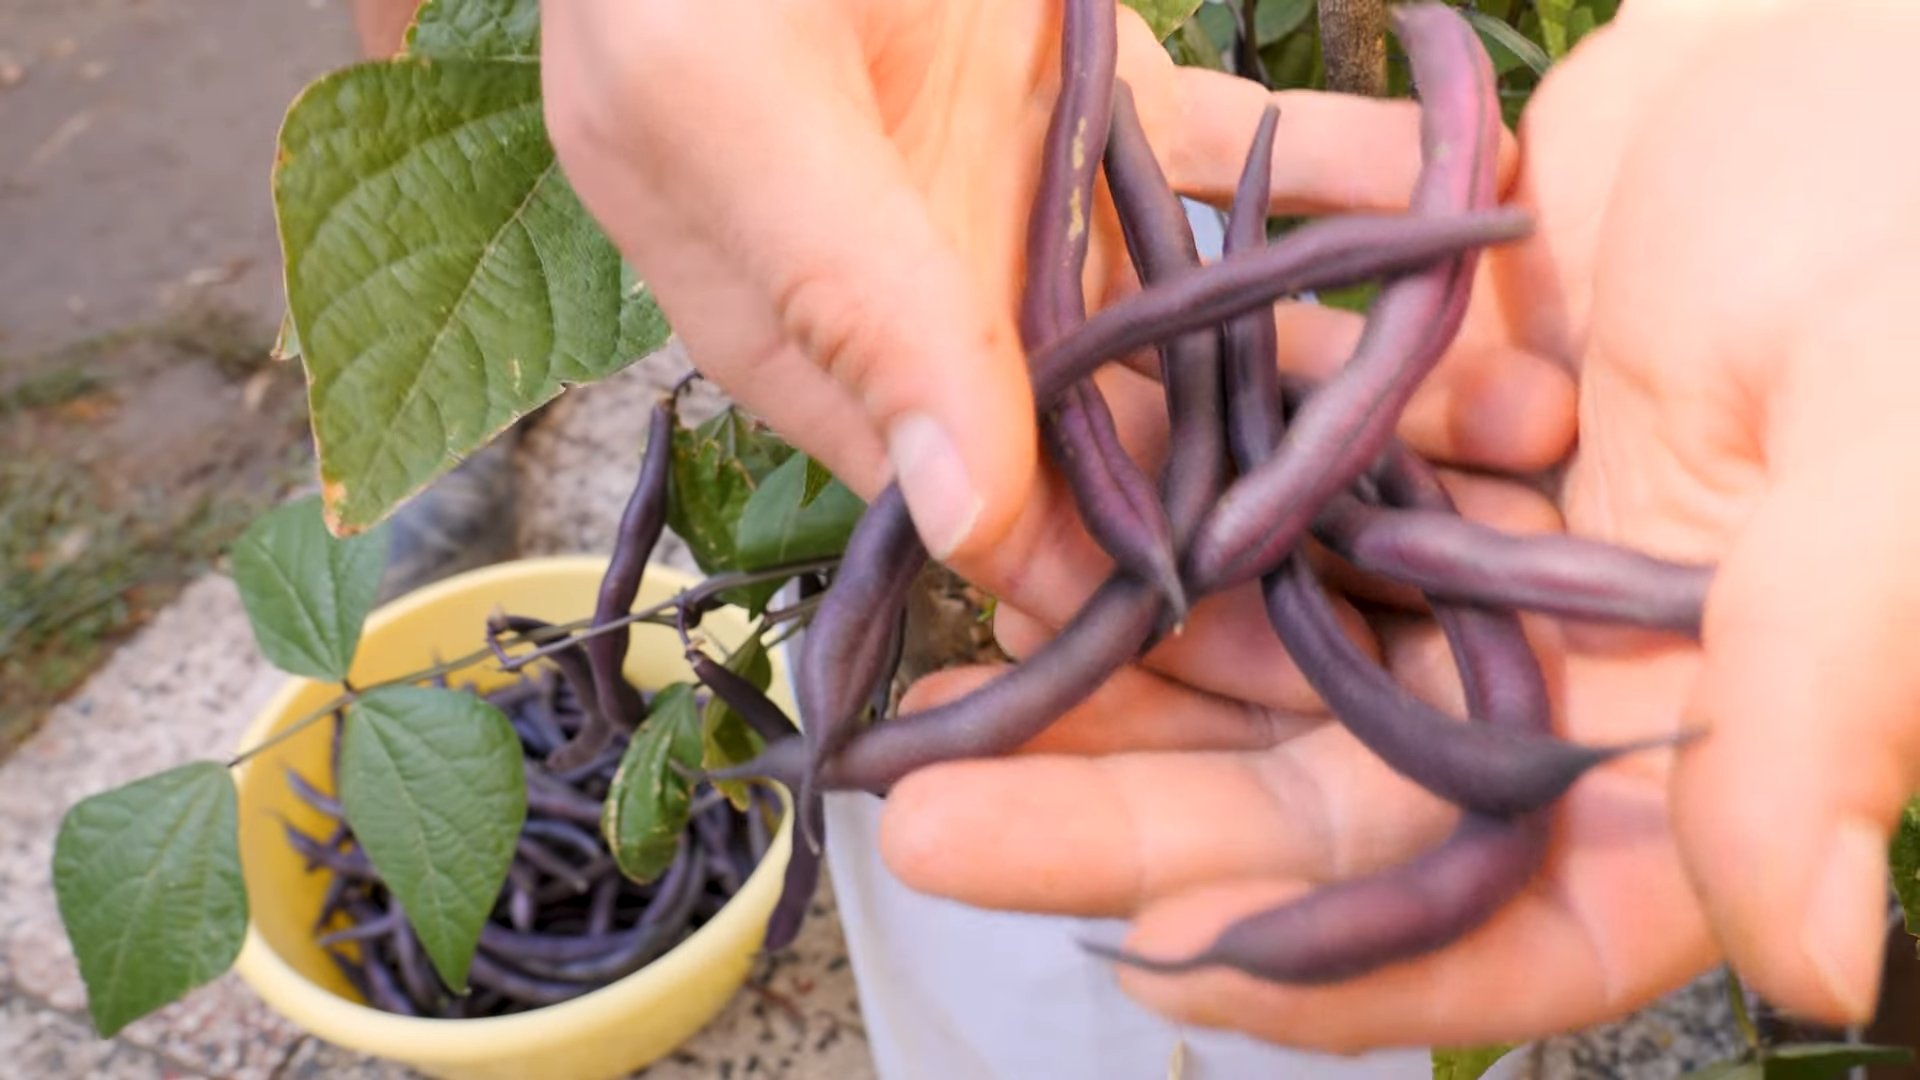
* Royal Burgundy: For a pop of color, try Royal Burgundy. These beans are a beautiful deep purple and turn green when cooked.
Gathering Your Supplies
Before we get our hands dirty, let’s make sure we have everything we need. Here’s a checklist:
* Pots: Choose pots that are at least 12 inches in diameter and 12 inches deep. This gives the bean plants enough room to grow and develop a strong root system. I prefer using fabric pots because they allow for better drainage and aeration.
* Potting Mix: Don’t use garden soil! It’s too heavy and compacts easily in pots. Instead, opt for a high-quality potting mix that’s lightweight and well-draining. I like to use a mix of peat moss, perlite, and vermiculite.
* Bean Seeds: Of course, you’ll need your chosen bean seeds! Make sure they’re fresh for the best germination rate.
* Watering Can or Hose: You’ll need a way to water your plants regularly. A watering can with a gentle rose head is ideal for avoiding soil splash.
* Fertilizer: A balanced, slow-release fertilizer will provide your bean plants with the nutrients they need to thrive. I like to use a 10-10-10 fertilizer.
* Optional:
* Trowel: For digging small holes for planting.
* Gloves: To keep your hands clean.
* Mulch: To help retain moisture and suppress weeds.
Planting Your Bush Beans
Okay, now for the fun part! Let’s get those bean seeds in the soil.
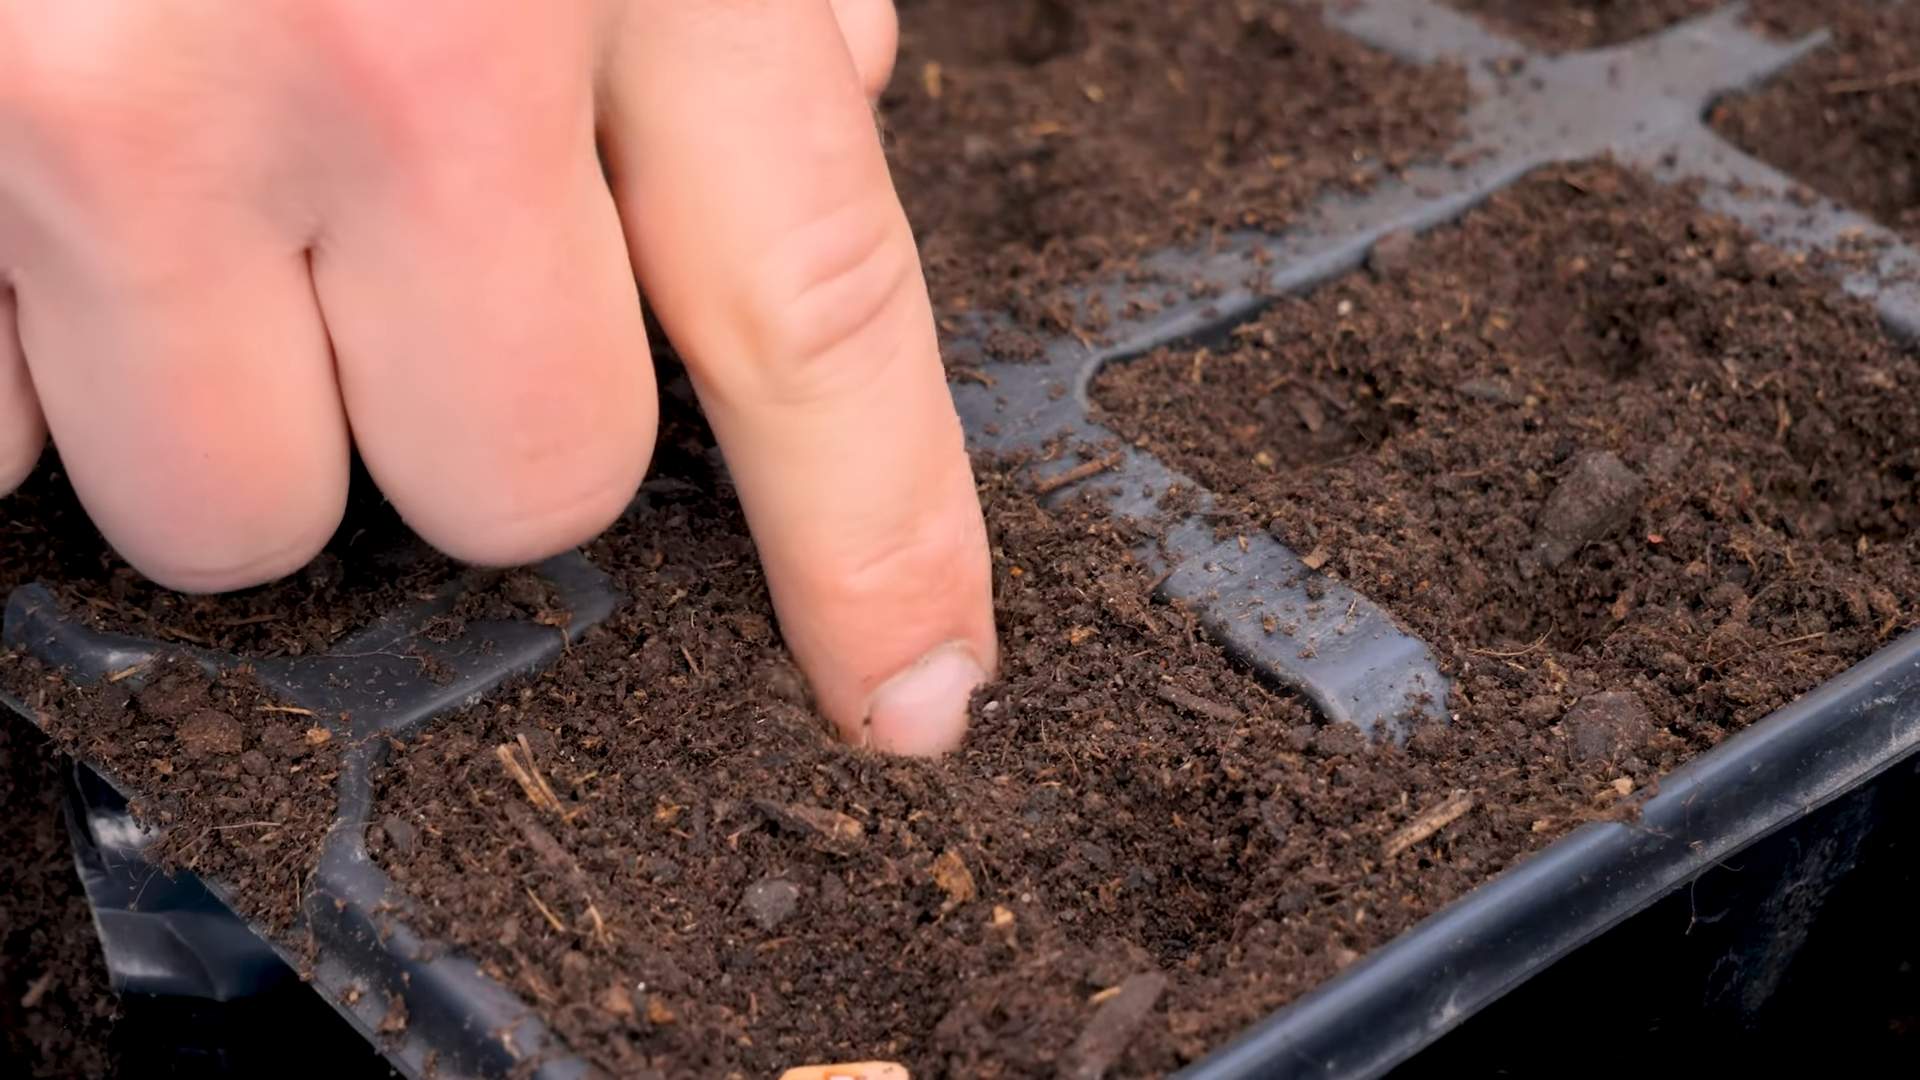
1. Prepare the Pots: Fill your pots with potting mix, leaving about an inch or two of space at the top. Gently pat down the soil to remove any air pockets.
2. Sow the Seeds: Plant the bean seeds about 1 inch deep and 2-3 inches apart. I usually plant 3-4 seeds per pot to ensure good germination.
3. Water Thoroughly: After planting, water the pots thoroughly until water drains out of the bottom. This helps settle the soil and provides the seeds with the moisture they need to germinate.
4. Find a Sunny Spot: Bush beans need at least 6-8 hours of sunlight per day to thrive. Place your pots in a sunny location, such as a patio, balcony, or deck.
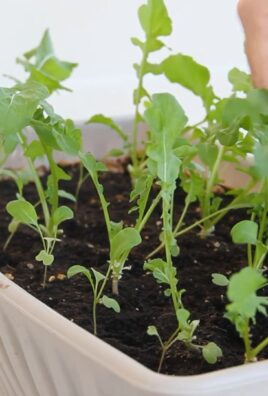
5. Wait Patiently: Bean seeds usually germinate within 7-14 days, depending on the temperature and moisture levels. Keep the soil consistently moist but not waterlogged during this time.
Caring for Your Bush Bean Plants
Once your bean plants have sprouted, it’s important to provide them with the care they need to grow strong and healthy.
1. Watering: Water your bean plants regularly, especially during hot, dry weather. Check the soil moisture by sticking your finger into the soil. If the top inch feels dry, it’s time to water. Avoid overwatering, as this can lead to root rot.
2. Fertilizing: Fertilize your bean plants every 2-3 weeks with a balanced, slow-release fertilizer. Follow the instructions on the fertilizer package for application rates.
3. Weeding: Keep the pots free of weeds, as they can compete with your bean plants for nutrients and water. Gently pull out any weeds that appear.
4. Pest Control: Keep an eye out for common bean pests, such as aphids, bean beetles, and spider mites. If you notice any pests, you can try spraying them with insecticidal soap or neem oil. I prefer organic solutions whenever possible.
5. Support (Optional): While bush beans don’t need a trellis like pole beans, they can sometimes benefit from a little support, especially if they’re loaded with beans. You can use small stakes or tomato cages to help keep the plants upright.
Harvesting Your Bush Beans
The best part of growing bush beans is, of course, harvesting them!
1. Timing: Bush beans are usually ready to harvest about 50-60 days after planting. The beans should be firm, plump, and snap easily when bent.
2. Harvesting Technique: Gently snap the beans off the plant, being careful not to damage the stems or leaves. Harvest regularly to encourage the plant to produce more beans.
3. Enjoy Your Harvest: Freshly harvested bush beans are delicious steamed, sautéed, or added to salads and soups. You can also freeze or can them for later use.
Troubleshooting Common Problems
Even with the best care, you might encounter a few problems while growing bush beans. Here are some common issues and how to address them:
* Yellowing Leaves: This can be caused by overwatering, nutrient deficiencies, or pests. Check the soil moisture and fertilize if necessary. Inspect the plants for pests and treat accordingly.
* Lack of Flowers or Beans: This can be caused by insufficient sunlight, poor pollination, or extreme temperatures. Make sure your plants are getting enough sunlight and consider hand-pollinating the flowers if necessary.
* Bean Beetle Damage: Bean beetles can quickly decimate your bean plants. Handpick the beetles and larvae off the plants or spray them with insecticidal soap or neem oil.
* Powdery Mildew: This fungal disease can cause a white, powdery coating on the leaves. Improve air circulation around the plants and spray them with a fungicide if necessary.
Extending Your Bean Harvest
Want to keep those beans coming? Here are a few tips for extending your harvest:
* Succession Planting: Plant a new batch of bean seeds every 2-3 weeks to ensure a continuous harvest throughout the growing season.
* Deadheading: Remove any spent flowers or beans to encourage the plant to produce more.
* Proper Watering and Fertilizing: Consistent watering and fertilizing will help keep your bean plants healthy and productive.
Choosing the Right Potting Mix: A Deeper Dive
I can’t stress enough how important the right potting mix is! It’s the foundation of your container garden. Here’s a more detailed look at what to look for:
* Good Drainage: This is crucial to prevent root rot. The mix should allow water to drain freely.
* Aeration: Roots need air to breathe! The mix should be light and porous to allow for good air circulation.
* Nutrient Retention: The mix should be able to hold onto nutrients so that your plants can access them.
* pH Level: Beans prefer a slightly acidic to neutral pH (around 6.0-7.0).
You can buy pre-made potting mixes, or you can create your own. A simple DIY mix could include:
* 1 part peat moss or coco coir (for moisture retention)
* 1 part perlite (for drainage and aeration)
* 1 part compost (for nutrients)
Understanding Fertilizer: N-P-K
You’ll see fertilizers labeled with three numbers, like 10-10-10. These represent the percentage of Nitrogen (N), Phosphorus (P), and Potassium (K) in the fertilizer.
* Nitrogen (N): Promotes leafy growth.
* Phosphorus (P): Supports root development and flowering.
* Potassium (K): Enhances overall plant health and disease resistance.
For bush beans, a balanced fertilizer like 10-10-10 is a good choice. However, you can also use a fertilizer with slightly higher phosphorus to encourage flowering and bean production.
Saving Bean Seeds for Next Year
If you want to save seeds from your bush beans to plant next year, here’s how:
1. Choose Healthy Plants: Select beans from your healthiest and most productive
Conclusion
So, there you have it! Growing your own pot-grown bush beans is not just a gardening project; it’s a gateway to fresh, flavorful meals and a deeper connection with the food you eat. We’ve walked you through the simple steps, highlighting the ease and accessibility of this method, even for those with limited space or gardening experience.
Why is this a must-try? Because unlike store-bought beans, which can lack that vibrant, just-picked taste, homegrown bush beans offer an unparalleled burst of flavor. Imagine the satisfaction of harvesting your own beans, knowing exactly where they came from and how they were grown. Plus, it’s an incredibly rewarding experience to nurture a plant from seed to harvest.
But the benefits don’t stop there. Growing bush beans in pots allows for greater control over the growing environment. You can easily move your plants to chase the sun, protect them from harsh weather, or even bring them indoors during unexpected frosts. This flexibility ensures a more consistent and bountiful harvest.
Looking for variations? Absolutely! Consider experimenting with different varieties of bush beans. ‘Blue Lake’ offers classic flavor and reliable yields, while ‘Contender’ is known for its early maturity. For a colorful twist, try ‘Royal Burgundy,’ which boasts beautiful purple pods that turn green when cooked. You can also companion plant with herbs like basil or marigolds to deter pests and enhance the flavor of your beans. Another variation is to use different types of containers. While we’ve focused on standard pots, you can also use grow bags, raised beds, or even repurposed containers like large buckets or tubs. Just ensure that your chosen container has adequate drainage.
We’ve covered everything from choosing the right pot and soil to watering and fertilizing techniques. We’ve also addressed common challenges and offered solutions to help you overcome any obstacles. Now, it’s your turn to put this knowledge into practice.
We wholeheartedly encourage you to give this DIY trick a try. Start small, perhaps with just a few plants, and see for yourself the joy and satisfaction of growing your own pot-grown bush beans. The taste of freshly harvested beans, still warm from the sun, is an experience you won’t soon forget.
Don’t be afraid to experiment and adapt the techniques to suit your specific environment and preferences. Gardening is a journey of learning and discovery, and there’s no one-size-fits-all approach.
Finally, we’d love to hear about your experiences! Share your photos, tips, and challenges in the comments section below. Let’s create a community of pot-grown bush bean enthusiasts and learn from each other. Your insights could inspire others to embark on their own gardening adventures. So, grab your seeds, pots, and soil, and get ready to enjoy the delicious rewards of your own homegrown bush beans! Happy gardening!
Frequently Asked Questions (FAQ)
What is the best time of year to plant bush beans in pots?
The ideal time to plant bush beans is after the last frost in your area, when the soil has warmed to at least 60°F (15°C). Bush beans are sensitive to cold temperatures, so planting too early can stunt their growth or even kill them. In most regions, this is typically in late spring or early summer. You can also start seeds indoors a few weeks before the last frost and transplant them outdoors once the weather warms up. Check your local weather forecast and planting guides for specific recommendations for your region.
How much sunlight do pot-grown bush beans need?
Bush beans require at least 6-8 hours of direct sunlight per day to thrive. Choose a location for your pots that receives ample sunlight throughout the day. If you live in a particularly hot climate, some afternoon shade can be beneficial to prevent the plants from overheating. If you don’t have a sunny spot outdoors, you can supplement with grow lights to ensure your beans receive enough light. Insufficient sunlight can lead to leggy growth, reduced yields, and increased susceptibility to pests and diseases.
What type of soil is best for growing bush beans in pots?
Bush beans prefer well-draining soil that is rich in organic matter. A good potting mix specifically formulated for vegetables is ideal. Avoid using garden soil, as it can be too heavy and compact, hindering drainage and root growth. You can also amend your potting mix with compost or other organic materials to improve its fertility and drainage. The ideal pH for bush beans is between 6.0 and 7.0.
How often should I water my pot-grown bush beans?
Water your bush beans regularly, especially during hot, dry weather. The soil should be kept consistently moist but not waterlogged. Check the soil moisture by sticking your finger about an inch deep into the soil. If it feels dry, it’s time to water. Water deeply, allowing the water to drain out of the bottom of the pot. Avoid overhead watering, as this can promote fungal diseases. Mulching around the base of the plants can help retain moisture and suppress weeds.
What kind of fertilizer should I use for bush beans?
Bush beans benefit from regular fertilization, especially during the flowering and pod-forming stages. Use a balanced fertilizer with an NPK ratio of 5-10-10 or 10-20-20. You can also use a fertilizer specifically formulated for beans or vegetables. Follow the instructions on the fertilizer package for application rates. Avoid over-fertilizing, as this can lead to excessive foliage growth and reduced pod production. You can also supplement with organic fertilizers like compost tea or fish emulsion.
How do I deal with pests and diseases on my bush beans?
Bush beans can be susceptible to various pests and diseases, including aphids, bean beetles, and fungal diseases like powdery mildew. Regularly inspect your plants for signs of pests or diseases. Handpick pests or use insecticidal soap or neem oil to control infestations. Ensure good air circulation around your plants to prevent fungal diseases. Remove any infected leaves or plants promptly to prevent the spread of disease. Companion planting with herbs like basil or marigolds can also help deter pests.
When are bush beans ready to harvest?
Bush beans are typically ready to harvest about 50-60 days after planting. The pods should be firm, plump, and snap easily when bent. Harvest beans regularly to encourage continued production. Overripe beans can become tough and stringy. The best time to harvest is in the morning, when the beans are cool and crisp.
Can I grow bush beans indoors?
While it’s possible to grow bush beans indoors, it can be challenging to provide them with the necessary sunlight and growing conditions. You’ll need a very sunny location or supplemental grow lights to ensure they receive enough light. You’ll also need to provide adequate ventilation and humidity. Indoor-grown beans may not produce as abundantly as those grown outdoors.
What size pot is best for growing bush beans?
A pot that is at least 12 inches in diameter and 12 inches deep is recommended for growing bush beans. This will provide enough space for the roots to grow and develop. You can also use larger pots or containers, especially if you plan to grow multiple plants in the same pot. Ensure that the pot has adequate drainage holes to prevent waterlogging.
Can I save seeds from my pot-grown bush beans?
Yes, you can save seeds from your pot-grown bush beans, but only if they are open-pollinated varieties. Hybrid varieties will not produce true-to-type seeds. Allow some of the pods to dry completely on the plant before harvesting the seeds. Store the seeds in a cool, dry place until you’re ready to plant them.

Leave a Comment