
Potato Growing Bags: Unlock the Secret to Bountiful Harvests, Even in Small Spaces!
Have you ever dreamed of harvesting your own homegrown potatoes, bursting with flavor and freshness? I know I have! But maybe you’re thinking, “I don’t have a big garden!” Well, that’s where the magic of potato growing bags comes in. These ingenious containers are revolutionizing the way we grow potatoes, making it accessible to everyone, regardless of space constraints.
The concept of container gardening, including using bags, isn’t entirely new. Throughout history, people have cultivated plants in pots and other vessels, especially in urban environments or areas with poor soil. But the modern potato growing bag, often made from breathable fabric, offers unique advantages. This fabric allows for excellent drainage and aeration, crucial for healthy potato development.
Why do you need these DIY tricks and hacks for potato growing bags? Because maximizing your yield and avoiding common pitfalls can be tricky! I’m here to guide you through the process, sharing my tried-and-true methods for creating the perfect environment for your spuds to thrive. From choosing the right soil mix to mastering the “add more soil” technique, I’ll equip you with the knowledge to become a potato-growing pro. Get ready to enjoy the satisfaction of digging into your own homegrown potato growing bags and savoring the delicious results!
DIY Potato Growing Bags: A Bountiful Harvest in Small Spaces!
Hey there, fellow gardening enthusiasts! Are you dreaming of fresh, homegrown potatoes but short on garden space? Well, I’ve got the perfect solution for you: DIY potato growing bags! These ingenious containers allow you to grow a surprising amount of potatoes in a small area, whether it’s a balcony, patio, or even a sunny corner of your yard. And the best part? They’re super easy and affordable to make. Let’s dive in!
What You’ll Need
Before we get started, let’s gather our supplies. This is a pretty straightforward project, so you probably have some of these items lying around already.
* Heavy-duty Woven Polypropylene Bags: These are the key! Look for bags that are at least 20 inches in diameter and 24 inches tall. Feed bags, sandbags, or even large reusable shopping bags (the really sturdy kind) can work. Just make sure they’re strong enough to hold a lot of soil and potatoes.
* Potting Soil: A good quality potting mix is essential for healthy potato growth. Avoid using garden soil directly, as it can compact and hinder drainage. I recommend a mix that’s light, airy, and well-draining.
* Seed Potatoes: These are potatoes specifically grown for planting. You can find them at your local garden center or online. Choose varieties that are suited to your climate and taste preferences.
* Sharp Knife or Scissors: For cutting the seed potatoes (if needed) and modifying the bags.
* Drill or Punch (Optional): For adding drainage holes to the bags.
* Watering Can or Hose: For keeping your potato plants well-hydrated.
* Fertilizer (Optional): A balanced fertilizer can give your potatoes an extra boost.
* Gloves: To keep your hands clean and protected.
Preparing Your Seed Potatoes
This step is crucial for maximizing your potato yield.
* Chitting (Sprouting): This process encourages the seed potatoes to sprout before planting, giving them a head start. Place your seed potatoes in a cool, bright location (but not direct sunlight) for a few weeks. You’ll notice small sprouts, called “eyes,” starting to emerge.
* Cutting (If Necessary): If your seed potatoes are large (bigger than an egg), you can cut them into smaller pieces, ensuring that each piece has at least one or two “eyes.” Let the cut pieces dry for a day or two to prevent rotting. This allows the cut surfaces to callous over.
Making the Potato Growing Bags
Now for the fun part! Let’s transform those bags into potato-growing powerhouses.
1. Prepare the Bags: If your bags don’t already have drainage holes, now’s the time to add them. Use a drill or punch to create several holes in the bottom of each bag. This will prevent waterlogging, which can lead to root rot. I usually put about 6-8 holes in each bag.
2. Turn Down the Edges (Optional): This step is purely aesthetic, but it can make your bags look a bit neater. Fold the top edges of the bags down a few inches to create a cuff. This also makes it easier to add soil later on.
3. Add the Initial Soil Layer: Fill the bottom of each bag with about 4-6 inches of potting soil. This will provide a base for your seed potatoes to root into.
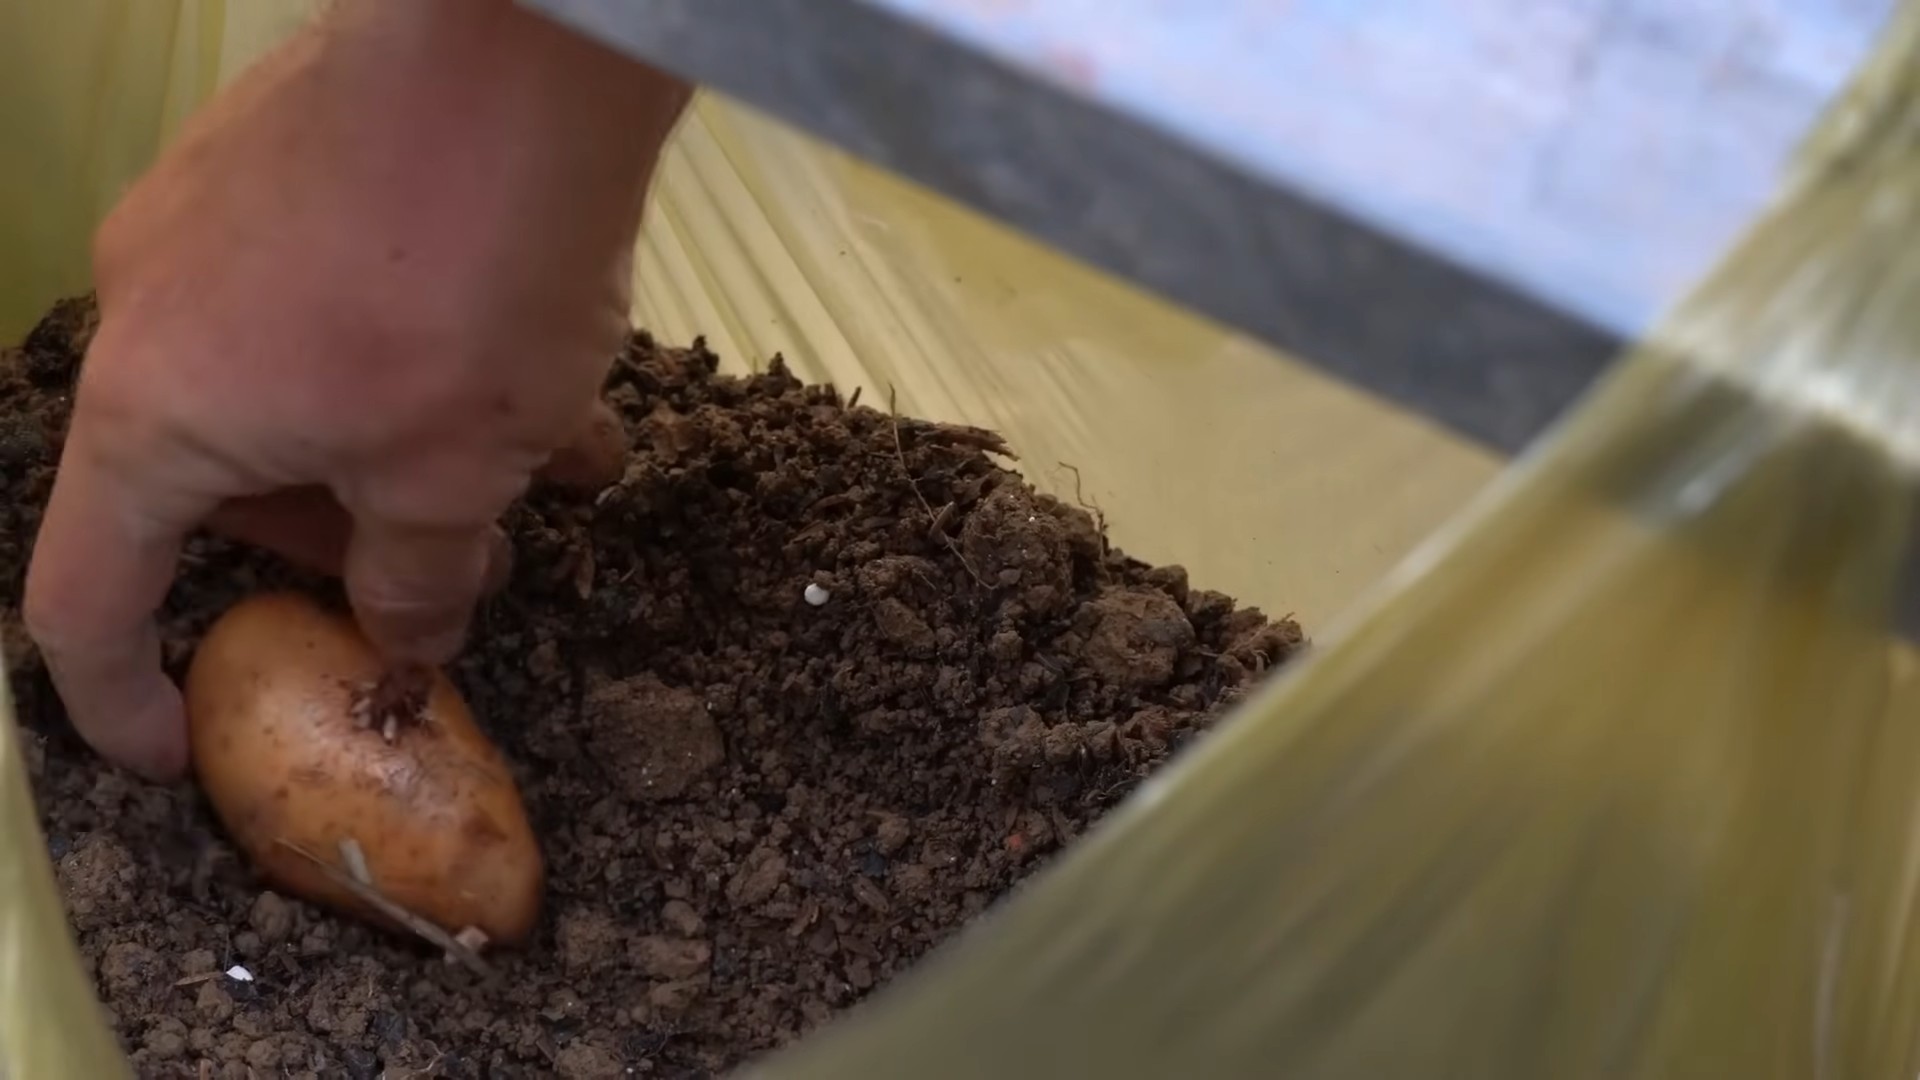
4. Plant the Seed Potatoes: Place the seed potatoes on top of the soil layer, with the “eyes” facing upwards. Space them evenly, about 8-10 inches apart. If you’re using cut seed potatoes, make sure the cut side is facing down.
5. Cover the Seed Potatoes: Add another 4-6 inches of potting soil to cover the seed potatoes completely. Gently water the soil to moisten it.
The “Hilling” Process: The Secret to More Potatoes!
This is where the magic happens! “Hilling” is the process of adding more soil to the bags as the potato plants grow. This encourages the plants to produce more potatoes along the stems.
1. Wait for Growth: As the potato plants grow, they’ll start to emerge from the soil. Wait until the stems are about 6-8 inches tall.
2. Add More Soil: Add another 4-6 inches of potting soil to the bags, covering the stems up to the bottom leaves. This encourages the plants to produce more potatoes along the buried stems.
3. Repeat the Process: Continue adding soil every few weeks as the plants grow taller, always covering the stems up to the bottom leaves. This process is repeated until the bag is almost full.
4. Water Regularly: Keep the soil consistently moist, but not waterlogged. Potatoes need plenty of water, especially during hot weather. Check the soil moisture regularly and water when the top inch feels dry.
Caring for Your Potato Plants
A little TLC goes a long way in ensuring a bountiful harvest.
* Sunlight: Potatoes need at least 6-8 hours of sunlight per day. Place your growing bags in a sunny location.
* Watering: As mentioned earlier, water regularly, especially during dry spells.
* Fertilizing (Optional): If you want to give your potatoes an extra boost, you can fertilize them every few weeks with a balanced fertilizer. Follow the instructions on the fertilizer package.
* Pest Control: Keep an eye out for pests like potato beetles and aphids. If you spot any, you can handpick them off the plants or use an organic insecticide.
* Support (Optional): As the plants grow taller, they may need some support to prevent them from falling over. You can use stakes or a tomato cage to provide support.
Harvesting Your Potatoes
The moment we’ve all been waiting for!
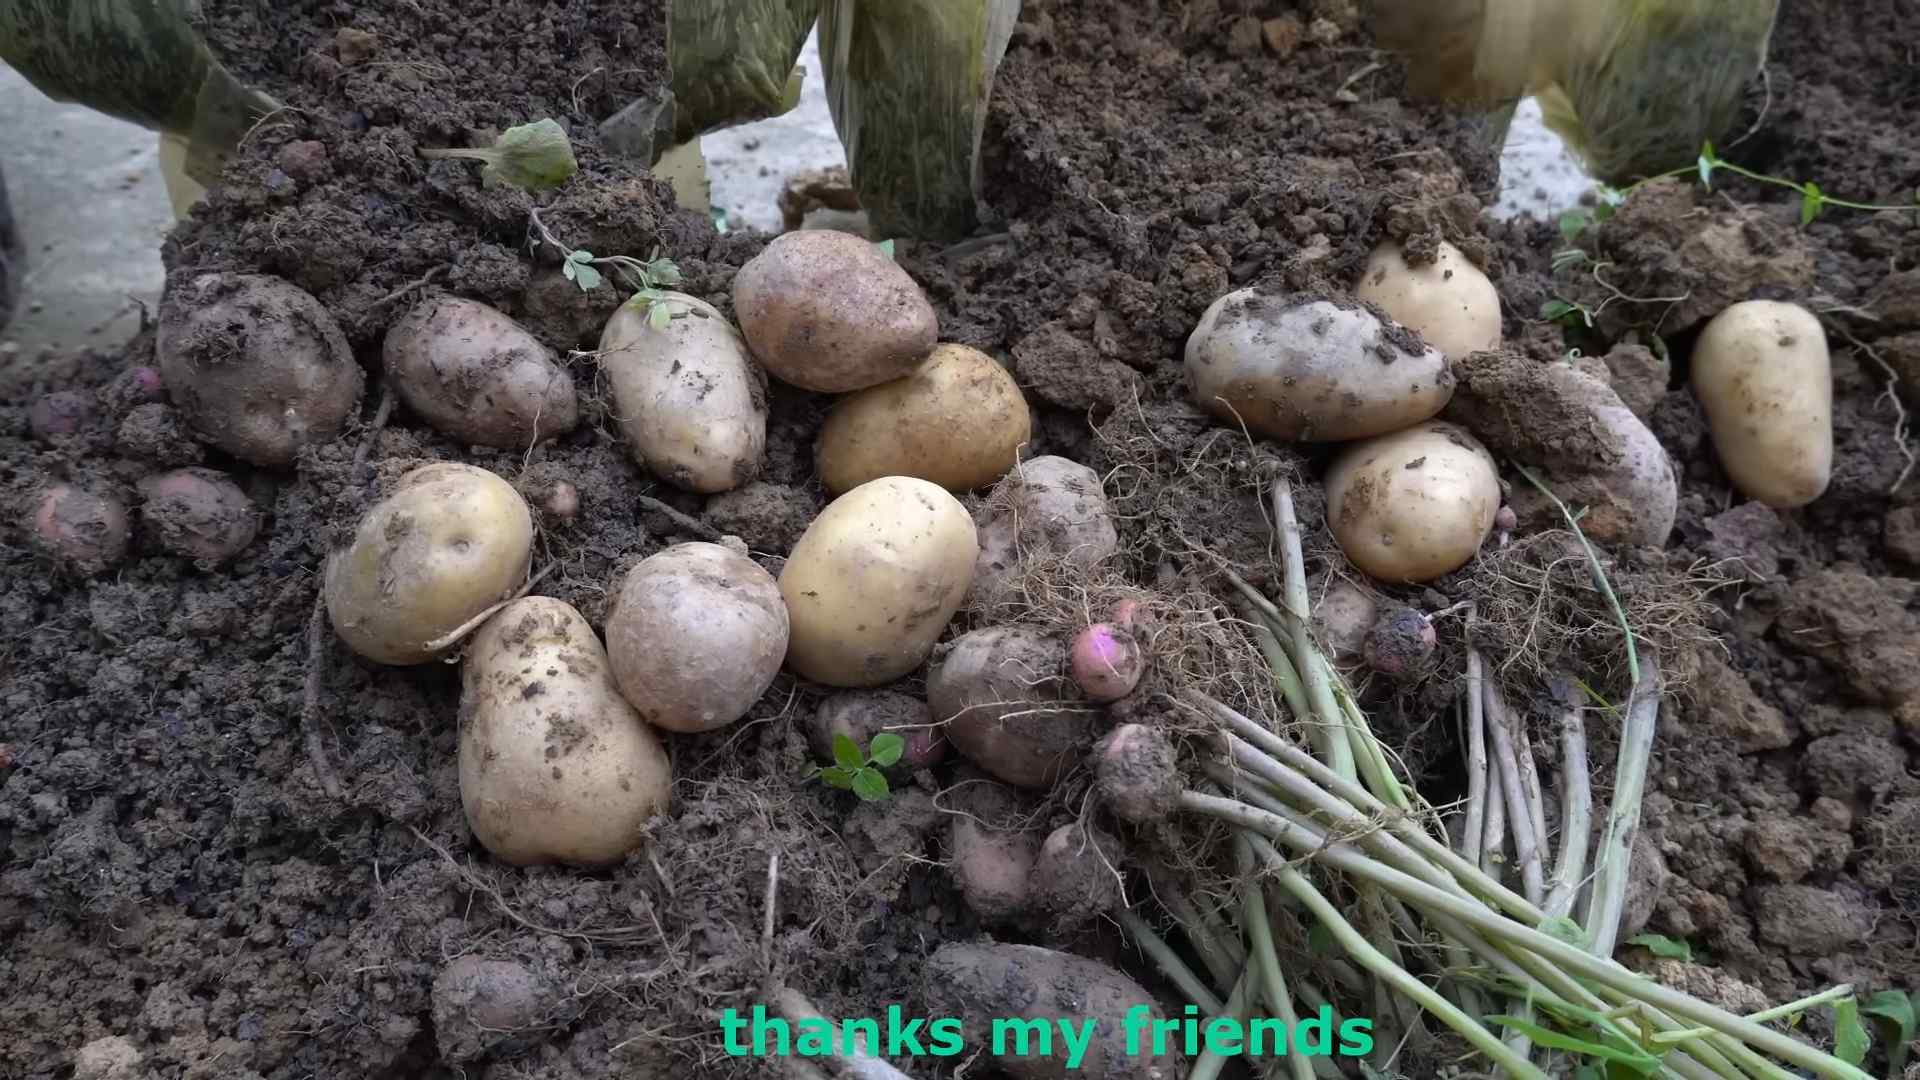
1. When to Harvest: You can start harvesting “new potatoes” (small, tender potatoes) a few weeks after the plants flower. For larger, mature potatoes, wait until the plants start to die back and the foliage turns yellow or brown. This usually takes about 80-100 days.
2. Harvesting: The easiest way to harvest potatoes from growing bags is to simply tip the bag over and dump out the contents. Gently sift through the soil to find your buried treasure!
3. Curing (Optional): If you plan to store your potatoes for a longer period, you can cure them for a week or two in a cool, dark, and well-ventilated place. This will help them develop a thicker skin and prevent rotting.
Troubleshooting
Even with the best planning, things can sometimes go awry. Here are a few common issues and how to address them:
* Yellowing Leaves: This could be a sign of overwatering, underwatering, or nutrient deficiency. Check the soil moisture and adjust your watering accordingly. You may also need to fertilize the plants.
* Potato Blight: This is a fungal disease that can cause brown spots on the leaves and stems. To prevent blight, ensure good air circulation around the plants and avoid overhead watering. If you spot blight, remove the affected leaves and spray the plants with a fungicide.
* Pests: As mentioned earlier, keep an eye out for pests and take action promptly.
Choosing the Right Potato Variety
The type of potato you choose to grow will impact the flavor, texture, and storage capabilities of your harvest. Here are a few popular options:
* Yukon Gold: These are known for their creamy texture and buttery flavor. They’re great for boiling, mashing, and roasting.
* Red Potatoes: These have a waxy texture and hold their shape well when cooked. They’re perfect for potato salads and boiling.
* Russet Potatoes: These are the classic baking potato, with a fluffy texture and mild flavor.
* Fingerling Potatoes: These are long, slender potatoes with a unique flavor and texture. They’re great for roasting and grilling.
Reusing Your Potato Growing Bags
With proper care, your potato growing bags can last for several seasons. After harvesting, empty the bags and remove any remaining plant debris. You can then store the bags in a dry place until next year. Before reusing them, give them a good cleaning with soap and water. You may also want to add some fresh potting soil to replenish the nutrients.
Why I Love Growing Potatoes in Bags
I’ve been growing potatoes in bags for years, and I absolutely love it! It’s such a rewarding experience to harvest your own fresh potatoes, knowing that you grew them yourself. Plus, it’s a great way to save money on groceries and reduce your environmental impact. And honestly, there’s nothing quite like the taste of a homegrown potato!
So, what are you waiting for? Grab some bags, seed potatoes, and potting soil, and get ready to grow your own delicious potatoes! Happy gardening!
Conclusion
So, there you have it! Creating your own potato growing bags is not just a cost-effective alternative to store-bought options; it’s a rewarding and sustainable way to cultivate your own delicious potatoes right at home, regardless of your garden size. We’ve walked you through the simple steps, highlighting the benefits of using readily available materials and tailoring the process to your specific needs.
Think about it: no more lugging heavy, pre-filled bags from the garden center. No more wondering about the quality of the soil. With DIY potato growing bags, you’re in complete control. You choose the soil mix, ensuring it’s perfectly suited for your potato variety. You decide on the size and shape of the bag, optimizing it for your available space, whether it’s a sprawling backyard or a sunny balcony. And you get the immense satisfaction of knowing you built it yourself!
But the advantages extend beyond mere convenience and cost savings. These bags offer excellent drainage, preventing waterlogging and promoting healthy root development. The breathable fabric allows for proper aeration, further contributing to robust plant growth. And because they’re portable, you can easily move your potato plants to chase the sun or shelter them from harsh weather conditions.
Don’t be afraid to experiment! Try different materials for your bags. Burlap sacks offer a rustic charm, while heavy-duty landscape fabric provides exceptional durability. Consider adding drainage holes to the bottom of your bags for extra protection against overwatering. You can even incorporate companion planting by adding herbs like basil or marigolds to your potato growing bags to deter pests and enhance flavor.
For those seeking a more advanced approach, consider creating a tiered potato growing bag. This involves constructing a series of stacked bags, allowing you to plant multiple layers of potatoes and maximize your yield in a limited space. It’s a fantastic project for experienced gardeners looking to push the boundaries of container gardening.
Ultimately, the beauty of this DIY project lies in its adaptability. It’s a blank canvas for your creativity and gardening ingenuity. So, gather your materials, follow our simple instructions, and embark on your potato-growing adventure.
We’re confident that you’ll be amazed by the results. Imagine the taste of freshly dug, homegrown potatoes, bursting with flavor and nutrients. Picture the pride you’ll feel knowing you nurtured them from seed to harvest, all within the confines of your own DIY potato growing bags.
Don’t just take our word for it. Give it a try and see for yourself! We encourage you to share your experiences, tips, and photos with us and the wider gardening community. Let us know what worked well for you, what challenges you encountered, and any innovative variations you came up with. Together, we can unlock the full potential of DIY potato growing bags and inspire others to embrace the joys of homegrown produce. Happy growing!
Frequently Asked Questions (FAQ)
What kind of material is best for making potato growing bags?
The best material depends on your priorities. Burlap is a natural, biodegradable option that looks great but may not last as long as synthetic materials. Heavy-duty landscape fabric is durable, breathable, and readily available. Old feed sacks or even repurposed shopping bags (the thick, woven kind) can also work well, offering a sustainable solution. Consider the durability, breathability, and drainage properties of the material when making your choice. Avoid using plastic bags, as they don’t allow for proper drainage or aeration.
How big should my potato growing bag be?
A good starting size is around 18-24 inches in diameter and 18-24 inches in height. This provides enough space for the potato plants to develop a healthy root system and produce a decent yield. However, you can adjust the size based on the potato variety you’re growing and the space you have available. Smaller bags can work for dwarf varieties, while larger bags may be necessary for more vigorous growers. Remember that larger bags will be heavier to move.
What kind of soil should I use in my potato growing bags?
Potatoes thrive in well-draining, slightly acidic soil. A good mix consists of equal parts compost, peat moss (or coconut coir), and perlite or vermiculite. Compost provides essential nutrients, peat moss (or coir) helps retain moisture, and perlite or vermiculite improves drainage. Avoid using heavy clay soil, as it can become waterlogged and inhibit root growth. You can also add a slow-release fertilizer to the soil mix to provide a steady supply of nutrients throughout the growing season.
How often should I water my potato growing bags?
Water your potato growing bags regularly, especially during hot, dry weather. The soil should be consistently moist but not waterlogged. Check the moisture level by sticking your finger into the soil. If the top inch feels dry, it’s time to water. Overwatering can lead to root rot, so be sure to provide adequate drainage. The frequency of watering will depend on the weather, the size of the bag, and the type of soil you’re using.
How do I “earth up” my potatoes in the growing bags?
“Earthing up” is the process of adding more soil to the growing bag as the potato plants grow. This encourages the plants to produce more potatoes along the buried stem. When the potato shoots reach about 6-8 inches tall, add a few inches of soil to the bag, covering the lower part of the stems. Repeat this process every few weeks until the bag is almost full. This technique maximizes potato production within the limited space of the bag.
How do I know when my potatoes are ready to harvest from the growing bags?
The timing of harvest depends on the potato variety and your personal preference. Generally, potatoes are ready to harvest when the plants begin to flower or when the foliage starts to die back. You can harvest “new potatoes” (small, immature potatoes) a few weeks after flowering. For larger, more mature potatoes, wait until the foliage has completely died back. To harvest, simply tip the bag over and carefully sift through the soil to collect the potatoes.
Can I reuse the soil from my potato growing bags?
Yes, you can reuse the soil, but it’s important to amend it before planting again. Potatoes are heavy feeders, so the soil will likely be depleted of nutrients. Add fresh compost, fertilizer, and other amendments to replenish the soil. You should also remove any remaining potato pieces or roots to prevent disease. Consider rotating crops in your potato growing bags to avoid nutrient depletion and pest buildup.
What are some common problems I might encounter when growing potatoes in bags?
Some common problems include potato blight, pests (such as potato beetles), and nutrient deficiencies. Potato blight is a fungal disease that can quickly destroy potato plants. Prevent blight by choosing disease-resistant varieties, providing good air circulation, and avoiding overhead watering. Potato beetles can be controlled with handpicking, insecticidal soap, or other organic pest control methods. Nutrient deficiencies can be addressed by adding fertilizer or compost to the soil. Regularly inspect your plants for signs of problems and take action promptly to prevent them from spreading.
Can I grow different varieties of potatoes in the same growing bag?
It’s generally not recommended to grow different varieties of potatoes in the same growing bag. Different varieties may have different growth habits, maturity times, and nutrient requirements, which can make it difficult to manage them effectively. Additionally, if one variety is susceptible to a particular disease, it could spread to the other variety. It’s best to keep different varieties separate to ensure optimal growth and prevent disease transmission.
How do I store my harvested potatoes?
Store your harvested potatoes in a cool, dark, and dry place. Ideal storage conditions are around 40-50°F (4-10°C) with high humidity. Avoid storing potatoes in direct sunlight or near apples or bananas, as these can cause them to sprout prematurely. Properly stored potatoes can last for several months. Check them regularly for signs of spoilage and discard any that are soft, wrinkled, or have sprouted.
Leave a Comment