
Potato growing plastic bottle: Ever dreamt of harvesting a bounty of delicious potatoes right from your balcony or patio? Imagine the satisfaction of digging into fresh, homegrown potatoes, knowing you nurtured them from sprout to spud! Well, stop dreaming and start doing! This DIY guide unveils a simple, space-saving, and incredibly rewarding method: growing potatoes in plastic bottles.
While large-scale potato farming has fed civilizations for centuries, the concept of container gardening, including using recycled materials like plastic bottles, is a more recent, eco-conscious trend. It’s a beautiful blend of sustainability and self-sufficiency, allowing even urban dwellers to connect with nature and enjoy the fruits (or rather, vegetables!) of their labor.
Let’s face it, not everyone has access to a sprawling garden. Space constraints, poor soil quality, or simply a busy lifestyle can make traditional gardening seem daunting. But that shouldn’t stop you from enjoying the taste of freshly grown produce! This potato growing plastic bottle trick is perfect for overcoming these challenges. It’s a fantastic way to recycle, save money, and experience the joy of gardening, all while yielding a surprisingly generous harvest. I’m excited to show you how!
Grow Potatoes in a Plastic Bottle: A Fun and Easy DIY Project!
Hey there, fellow gardening enthusiasts! Ever thought about growing potatoes in a plastic bottle? It’s a super fun and surprisingly effective way to cultivate these starchy delights, especially if you’re short on space or just looking for a cool gardening project. I’ve done this myself, and let me tell you, it’s incredibly rewarding to harvest your own potatoes from something you’d normally throw away! So, grab your supplies, and let’s get started!
What You’ll Need:
Before we dive in, let’s gather everything we need. This will make the process smooth and enjoyable.
* A Large Plastic Bottle: Think a 2-liter soda bottle or even a larger water bottle. The taller the bottle, the more potatoes you can potentially grow. Make sure it’s clean!
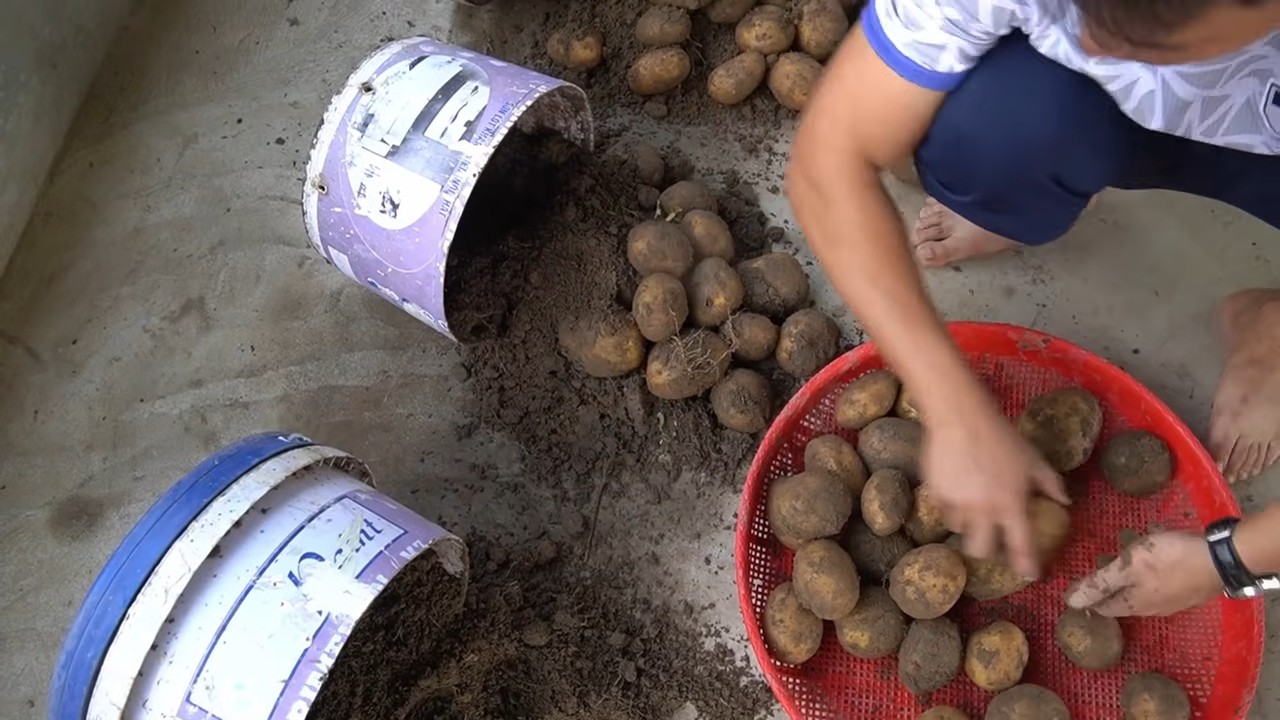
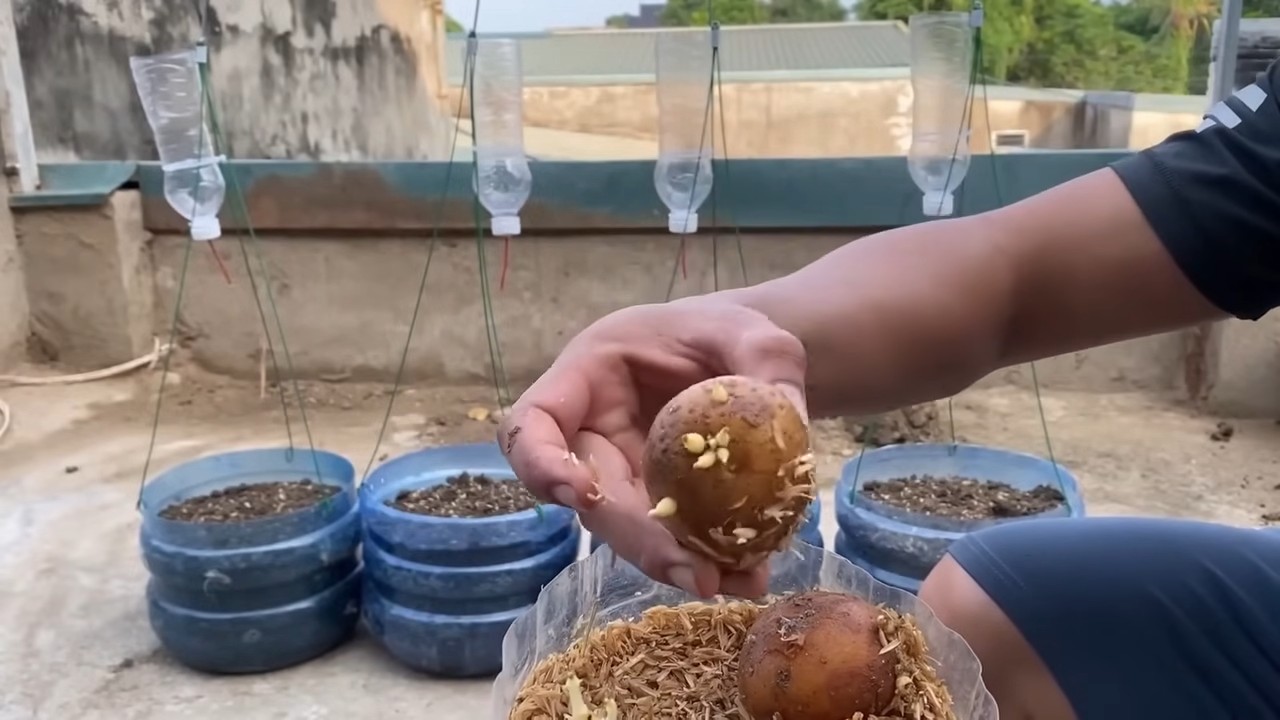
* Seed Potatoes: These are potatoes specifically grown for planting. You can find them at your local garden center. Choose a variety you like! If you can’t find seed potatoes, you can use regular potatoes that have started to sprout “eyes.”
* Potting Soil: Good quality potting soil is essential for healthy potato growth. Avoid using garden soil, as it can be too dense and may contain pests or diseases.
* A Sharp Knife or Scissors: For cutting the plastic bottle. Be careful!
* Water: For watering your potato plant.
* Optional: Drainage Material: Gravel, small rocks, or even broken pottery shards to improve drainage at the bottom of the bottle.
* Optional: Fertilizer: A balanced, slow-release fertilizer can give your potatoes an extra boost.
Preparing the Bottle and Seed Potatoes
This is a crucial step to ensure your potatoes have a good start.
1. Clean the Bottle: Thoroughly wash the plastic bottle with soap and water to remove any residue. Rinse it well and let it dry completely.
2. Cut the Bottle: This is where the knife or scissors come in. You have two options here:
* Option 1: Cut off the top third of the bottle. This creates a wider opening for planting and harvesting. You’ll need to keep the top piece, as we’ll use it later.
* Option 2: Cut a large rectangular window in the side of the bottle, near the bottom. This will allow you to easily harvest potatoes as they grow without disturbing the entire plant. I personally prefer this method because it allows for a more gradual harvest.
Important Safety Tip: Be extremely careful when using a knife or scissors. If you’re a younger gardener, ask an adult for help with this step.
3. Prepare the Seed Potatoes: If you’re using seed potatoes, you can plant them whole if they’re small. If they’re larger, cut them into pieces, making sure each piece has at least one or two “eyes” (those little sprouts). Let the cut pieces air dry for a day or two to callous over. This helps prevent rotting. If you’re using regular potatoes that have sprouted, you can plant them whole or cut them into pieces with sprouts.
Planting Your Potatoes
Now for the fun part – getting those potatoes in the ground (or, in this case, the bottle!).
1. Add Drainage Material (Optional): If you’re using drainage material, place a layer of gravel, rocks, or pottery shards at the bottom of the bottle. This will help prevent the soil from becoming waterlogged.
2. Add Soil: Fill the bottom of the bottle with about 4-6 inches of potting soil.
3. Plant the Potato Pieces: Place the potato pieces on top of the soil, with the “eyes” facing upwards. Space them evenly apart. If you only have one or two pieces, place them in the center of the bottle.
4. Cover with Soil: Cover the potato pieces with another 2-3 inches of potting soil.
5. Water Gently: Water the soil gently until it’s moist but not soggy.
Caring for Your Potato Plant
This is where patience comes in. But trust me, it’s worth the wait!
1. Sunlight: Place the bottle in a sunny location that receives at least 6-8 hours of sunlight per day. A south-facing window or a sunny spot in your garden is ideal.
2. Watering: Water the plant regularly, keeping the soil consistently moist but not waterlogged. Check the soil moisture by sticking your finger into the soil. If it feels dry an inch or two below the surface, it’s time to water.
3. Fertilizing (Optional): If you’re using fertilizer, follow the instructions on the package. A balanced, slow-release fertilizer can be applied every few weeks to promote healthy growth.
4. “Hilling” the Potatoes: This is a crucial step for maximizing your potato harvest. As the potato plant grows, new potatoes will form along the stem. To encourage more potato production, you need to “hill” the plant. This means adding more soil to the bottle as the plant grows taller.
* When the plant reaches about 6-8 inches tall, add more soil to the bottle, covering the stem up to the bottom set of leaves.
* Repeat this process every few weeks as the plant continues to grow. The goal is to keep burying the stem, encouraging more potatoes to form along its length. If you cut the top off the bottle, this is where you will use it. Place it upside down inside the bottle to give you more height.
5. Pest Control: Keep an eye out for pests like aphids or potato beetles. If you spot any pests, you can try removing them by hand or using an organic insecticide.
Harvesting Your Potatoes
The moment you’ve been waiting for!
1. When to Harvest: Potatoes are typically ready to harvest about 70-80 days after planting. You’ll know they’re ready when the plant starts to flower and the leaves begin to turn yellow and die back.
2. Harvesting: If you cut a window in the side of the bottle, you can carefully reach in and harvest the larger potatoes as they grow. This allows you to enjoy a continuous harvest over several weeks. If you cut the top off the bottle, you can simply tip the bottle over and gently remove the soil and potatoes.
3. Enjoy Your Harvest: Wash your freshly harvested potatoes and enjoy them in your favorite potato dishes!
Troubleshooting Tips
Even with the best planning, sometimes things don’t go exactly as expected. Here are a few common issues and how to address them:
* Yellowing Leaves: This could be a sign of overwatering, underwatering, or nutrient deficiency. Check the soil moisture and adjust your watering accordingly. If you suspect a nutrient deficiency, try adding some fertilizer.
* No Potatoes Forming: This could be due to insufficient sunlight, improper hilling, or poor soil quality. Make sure your plant is getting enough sunlight, and continue to hill the plant as it grows. If you suspect poor soil quality, try adding some compost or fertilizer.
* Rotting Potatoes: This is usually caused by overwatering or poor drainage. Make sure the soil is well-draining and avoid overwatering. If you notice any rotting potatoes, remove them immediately to prevent the rot from spreading.
Why This Works: The Science Behind the Spuds
You might be wondering, “Why does this even work?” Well, potatoes are tubers, which are essentially underground stems that store food for the plant. When you plant a seed potato (or a potato with “eyes”), the “eyes” sprout and grow into stems and leaves. As the plant grows, it produces more tubers along the stem, which are the potatoes we eat.
By “hilling” the plant (adding more soil as it grows), we encourage the plant to produce even more tubers along the buried stem. The plastic bottle provides a contained environment for the potatoes to grow, and the potting soil provides the necessary nutrients and moisture.
Beyond the Basics: Experimenting with Your Potato Bottle
Once you’ve mastered the basic potato-in-a-bottle technique, you can start experimenting with different varieties of potatoes, different types of soil, and different fertilizers. You can even try adding companion plants to the bottle, such as herbs or flowers, to attract beneficial insects and deter pests.
The possibilities are endless! The most important thing is to have fun and enjoy the process of growing your own potatoes.
Final Thoughts
Growing potatoes in a plastic bottle is a fantastic way to recycle, learn about gardening, and enjoy fresh, homegrown potatoes. It’s a project that’s suitable for gardeners of all ages and skill levels. So, what are you waiting for? Grab a plastic bottle, some seed potatoes, and get growing! I promise, you’ll be amazed at what you can achieve with a little bit of effort and a whole lot of enthusiasm. Happy gardening!
Conclusion
So, there you have it! Growing potatoes in plastic bottles isn’t just a quirky gardening experiment; it’s a genuinely effective and rewarding way to cultivate your own spuds, even with limited space. We’ve walked you through the simple steps, highlighting how this method maximizes yield, minimizes waste, and offers a fascinating glimpse into the potato’s growth cycle.
Why is this DIY trick a must-try? Because it democratizes gardening. You don’t need acres of land or expensive equipment to enjoy the satisfaction of harvesting your own food. It’s also incredibly educational, especially for children, providing a hands-on lesson in botany and sustainability. Plus, let’s be honest, there’s something undeniably cool about watching potato plants thrive inside a repurposed plastic bottle.
But the benefits extend beyond the practical and educational. Think about the environmental impact. By repurposing plastic bottles, you’re actively reducing waste and contributing to a more sustainable lifestyle. You’re also controlling the growing environment, minimizing the risk of pests and diseases that can plague traditional potato patches. And, perhaps most importantly, you’re getting fresh, homegrown potatoes that taste infinitely better than anything you can buy in the store.
Ready to take your potato growing to the next level? Consider these variations:
* Vertical Stacking: Create a potato tower by stacking multiple bottle halves on top of each other, allowing for even more potato production in a small footprint. Secure the bottles with strong tape or zip ties.
* Different Potato Varieties: Experiment with different potato varieties to discover your favorites. Early-season varieties like Yukon Gold or Red Norland are excellent choices for container gardening.
* Nutrient Boost: Add a slow-release fertilizer to the soil mix to provide your potato plants with a steady supply of nutrients throughout the growing season.
* Companion Planting: Plant herbs like basil or thyme around the base of your potato plants to deter pests and enhance flavor.
This method of potato growing is not just a trend; it’s a sustainable and efficient way to enjoy fresh, homegrown potatoes. It’s a testament to the power of resourcefulness and the joy of connecting with nature.
We wholeheartedly encourage you to give this DIY potato growing trick a try. It’s a fun, educational, and rewarding experience that will leave you with a bounty of delicious potatoes and a newfound appreciation for the wonders of gardening. Don’t be afraid to experiment, adapt the method to your own needs, and most importantly, have fun!
Once you’ve harvested your first crop of bottle-grown potatoes, we’d love to hear about your experience. Share your photos, tips, and stories in the comments below. Let’s build a community of bottle-potato enthusiasts and inspire others to embrace this innovative and sustainable gardening technique. Happy growing!
Frequently Asked Questions (FAQ)
What kind of plastic bottles are best for growing potatoes?
Ideally, you should use opaque or dark-colored plastic bottles. Clear bottles allow too much sunlight to reach the roots, which can inhibit growth and even turn the potatoes green (which makes them unsafe to eat due to the production of solanine). Two-liter soda bottles or larger water bottles work well. Ensure the bottles are clean and free of any residue before using them. Milk jugs can also be used, but make sure to cut them in a way that allows for easy access to the soil.
What type of soil should I use?
A well-draining potting mix is crucial. Avoid using garden soil, as it can become compacted in containers and hinder drainage. A mix of equal parts potting soil, compost, and perlite or vermiculite is ideal. The compost provides nutrients, while the perlite or vermiculite improves drainage and aeration. You can also add a slow-release fertilizer to the mix to provide a steady supply of nutrients throughout the growing season.
How often should I water my potato plants in plastic bottles?
Water regularly, keeping the soil consistently moist but not waterlogged. Check the soil moisture by sticking your finger about an inch into the soil. If it feels dry, it’s time to water. The frequency of watering will depend on the weather conditions and the size of the bottle. In hot, sunny weather, you may need to water daily. Ensure the bottle has drainage holes to prevent water from pooling at the bottom.
How much sunlight do potato plants need?
Potato plants need at least six hours of direct sunlight per day. Choose a sunny location for your bottle-grown potatoes. If you live in a particularly hot climate, provide some afternoon shade to prevent the plants from overheating. If you don’t have a sunny spot, you can supplement with grow lights.
How do I know when my potatoes are ready to harvest?
The potato plants will typically flower, and the foliage will start to turn yellow and die back. This is a sign that the potatoes are maturing. You can carefully reach into the bottle and feel around for potatoes. If they are the size you desire, you can harvest them. Alternatively, you can wait until the foliage has completely died back and then cut open the bottle to harvest all the potatoes at once.
Can I reuse the soil from my potato bottles?
It’s generally not recommended to reuse soil from potato containers, especially if the plants showed any signs of disease. Potato plants can deplete the soil of nutrients, and reusing the soil can increase the risk of disease transmission. However, if the plants were healthy, you can amend the soil with compost and fertilizer before reusing it for other plants (but not potatoes or other members of the nightshade family).
What if my potato plants get pests or diseases?
Monitor your plants regularly for signs of pests or diseases. Common potato pests include aphids, potato beetles, and flea beetles. You can control these pests with insecticidal soap or neem oil. Common potato diseases include early blight and late blight. Prevent these diseases by providing good air circulation and avoiding overhead watering. If you notice signs of disease, remove the affected foliage immediately.
Can I grow potatoes in plastic bottles indoors?
Yes, you can grow potatoes in plastic bottles indoors, but you’ll need to provide them with adequate light. A sunny windowsill may not be enough, so you’ll likely need to supplement with grow lights. Ensure the plants have good air circulation to prevent fungal diseases.
What do I do with the plastic bottle after harvesting?
After harvesting your potatoes, you can clean the plastic bottle and reuse it for another planting season. Alternatively, you can recycle the bottle if it’s no longer needed. Consider using the plastic for other DIY projects around the garden.
Is growing potatoes in plastic bottles organic?
Whether your potato growing is organic depends on the soil and fertilizer you use. To ensure an organic potato crop, use organic potting mix, compost, and fertilizer. Avoid using synthetic pesticides or herbicides.

Leave a Comment