
Grow Turnips in Your Backyard: Imagine stepping outside your back door and harvesting fresh, crisp turnips for your dinner table. Sounds idyllic, right? Well, it’s more achievable than you might think! For centuries, turnips have been a staple crop, feeding families and livestock alike. From ancient Rome, where they were a common food source, to medieval Europe, where they helped sustain populations through harsh winters, turnips have a rich history of providing sustenance and nourishment.
But why should you bother to grow turnips in your backyard today? In a world increasingly concerned with food security and healthy eating, knowing where your food comes from is more important than ever. Plus, store-bought turnips often lack the vibrant flavor and freshness of homegrown varieties. This DIY guide will unlock the secrets to successfully grow turnips in your backyard, even if you’re a complete beginner. I’ll share simple, effective tricks and hacks that will have you harvesting a bountiful crop in no time. Forget complicated gardening techniques; I’m here to show you how to make it easy, fun, and rewarding. Let’s get our hands dirty and cultivate some delicious turnips!
Growing Turnips: A Beginner’s Guide to Bountiful Backyard Harvests
Hey there, fellow gardening enthusiasts! I’m so excited to share my experiences with growing turnips in my backyard. They’re surprisingly easy to cultivate, incredibly versatile in the kitchen, and a fantastic addition to any home garden. Plus, they’re a cool-season crop, meaning you can enjoy fresh produce even when the summer heat fades. Let’s dive in!
Choosing Your Turnip Variety
Before we get our hands dirty, let’s talk about turnip varieties. There are tons to choose from, each with its own unique characteristics. Here are a few of my favorites:
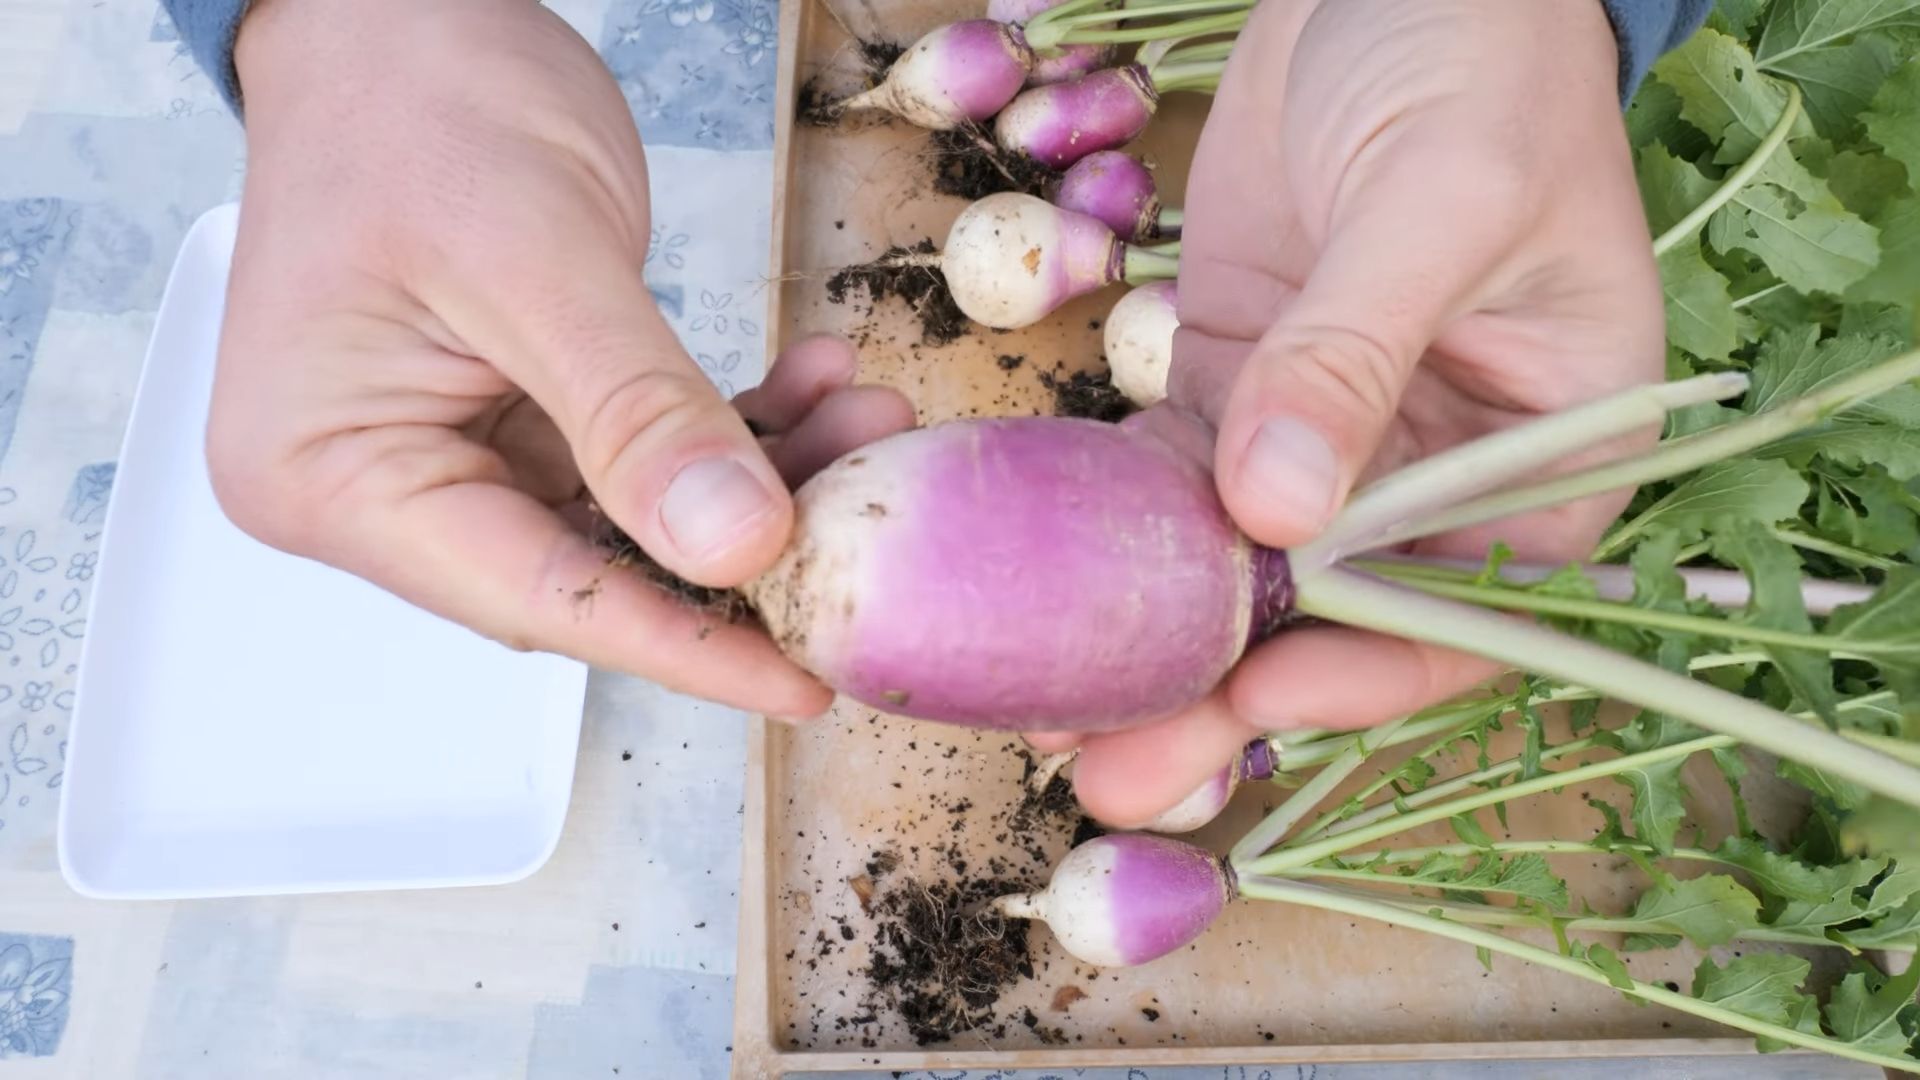
* Purple Top White Globe: This is a classic, reliable variety that produces large, round roots with a beautiful purple top. It’s known for its mild flavor and excellent storage capabilities.
* Tokyo Cross: If you’re looking for a quick harvest, Tokyo Cross is your best bet. These turnips mature incredibly fast, often in just 30 days. They’re small, tender, and perfect for salads.
* Golden Ball: As the name suggests, this variety produces golden-yellow roots with a sweet, delicate flavor. They’re a bit more sensitive to bolting (going to seed prematurely) than other varieties, so be sure to plant them at the right time.
* Hakurei: This Japanese turnip is a personal favorite. It’s incredibly crisp, sweet, and mild, and can be eaten raw or cooked. The greens are also delicious!
Consider your climate, growing season length, and taste preferences when selecting your turnip variety.
Preparing Your Garden Bed
Turnips thrive in well-drained, fertile soil with a pH between 6.0 and 6.8. Here’s how I prepare my garden bed:
1. Choose a Sunny Location: Turnips need at least 6 hours of sunlight per day. Pick a spot in your backyard that gets plenty of sunshine.
2. Clear the Area: Remove any weeds, rocks, or debris from the planting area.
3. Loosen the Soil: Use a garden fork or tiller to loosen the soil to a depth of at least 12 inches. This will allow the turnip roots to grow easily.
4. Amend the Soil: Turnips are heavy feeders, so it’s important to amend the soil with plenty of organic matter. I like to add compost, well-rotted manure, or leaf mold. Work the amendments into the soil thoroughly.
5. Check the Drainage: Turnips don’t like soggy soil, so make sure your garden bed has good drainage. If the soil is heavy clay, consider adding sand or perlite to improve drainage.
6. Smooth the Surface: Rake the soil surface smooth to create a level planting bed.
Planting Your Turnip Seeds
Now for the fun part – planting! Here’s my step-by-step guide:
1. Timing is Key: Turnips are a cool-season crop, so the best time to plant them is in early spring or late summer. In the spring, plant them 4-6 weeks before the last expected frost. In the late summer, plant them 6-8 weeks before the first expected frost. This will give them enough time to mature before the weather gets too hot or too cold.
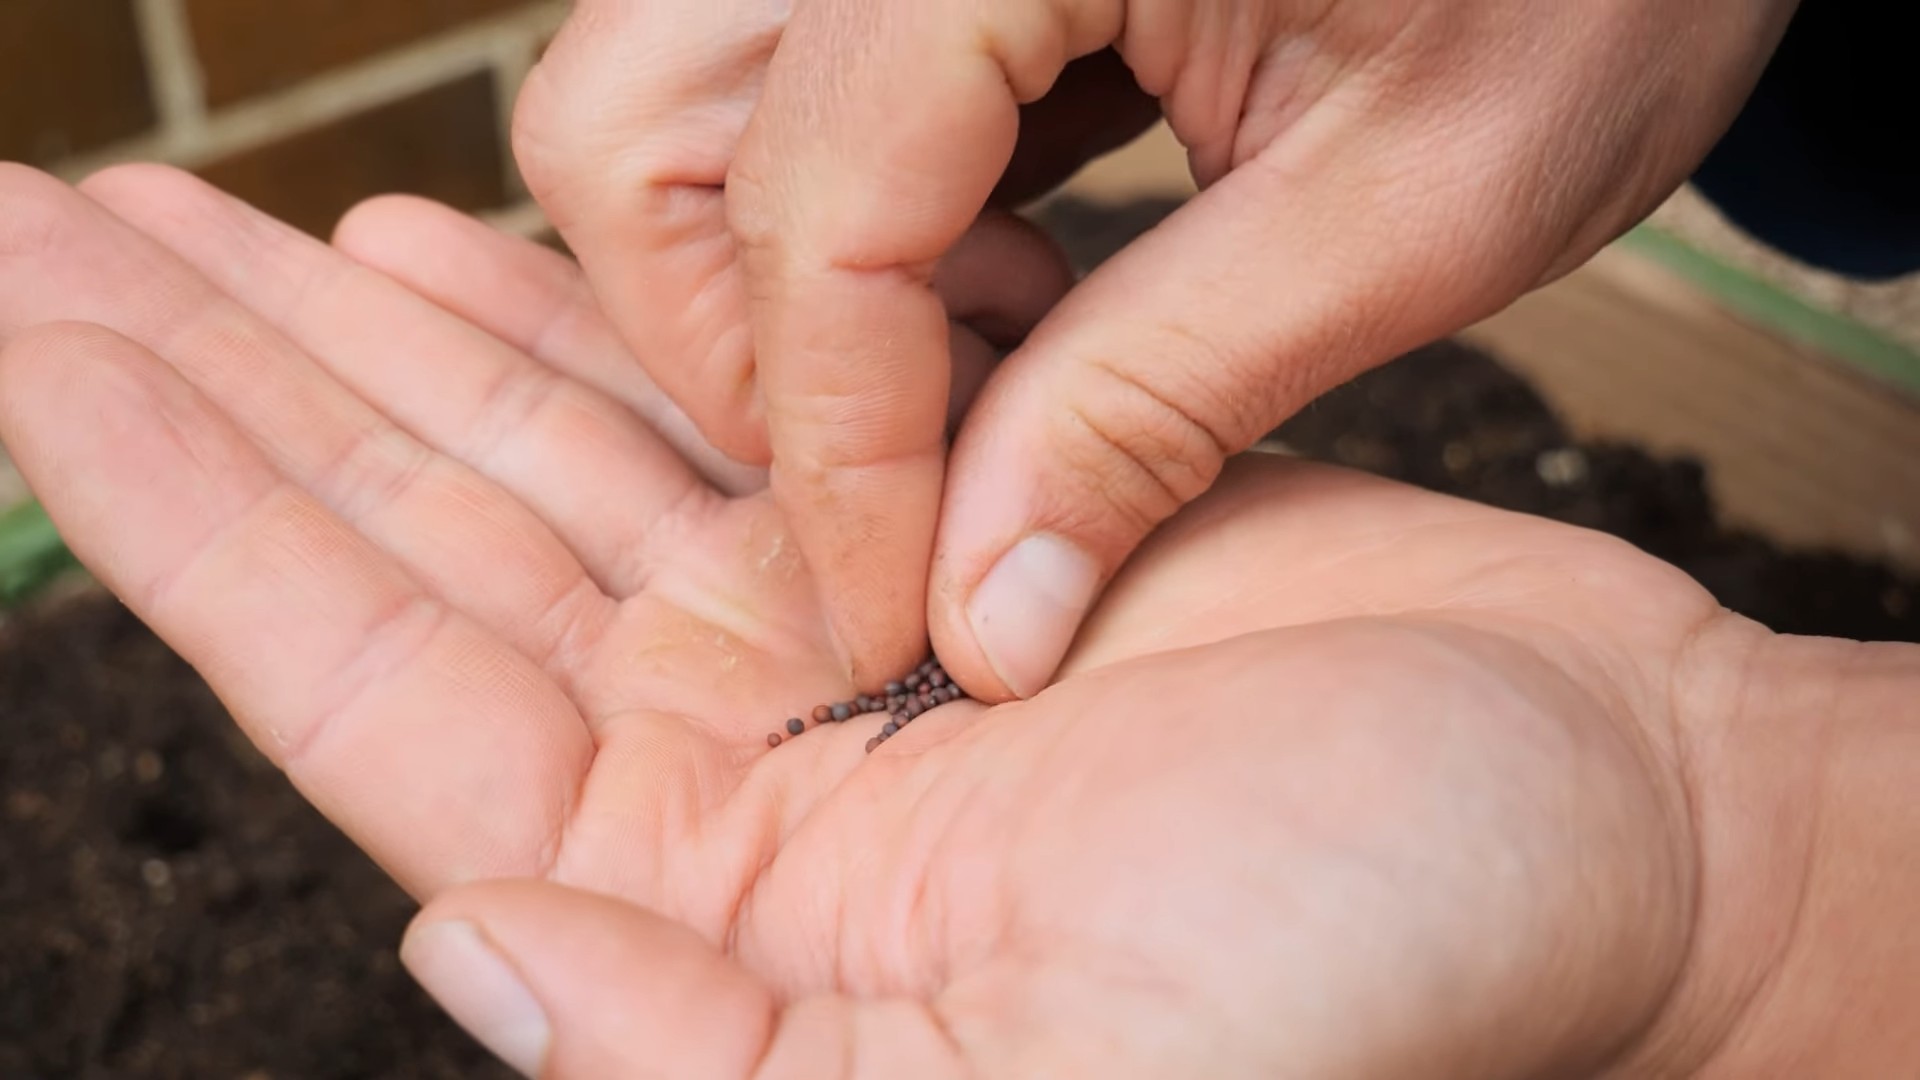
2. Sow the Seeds: Sow the turnip seeds directly into the garden bed. Plant them about ½ inch deep and 1 inch apart in rows that are 12-18 inches apart.
3. Cover the Seeds: Gently cover the seeds with soil and pat it down lightly.
4. Water Thoroughly: Water the planting bed thoroughly after planting. Keep the soil consistently moist until the seeds germinate.
5. Thin the Seedlings: Once the seedlings emerge (usually in 5-7 days), thin them to about 3-4 inches apart. This will give the turnips enough room to grow. You can eat the thinned seedlings as microgreens!
Caring for Your Turnip Plants
Turnips are relatively low-maintenance, but here are a few things you can do to keep them happy and healthy:
1. Water Regularly: Turnips need consistent moisture to thrive. Water them regularly, especially during dry spells. Aim for about 1 inch of water per week.
2. Weed Control: Keep the garden bed free of weeds. Weeds compete with turnips for nutrients and water. Hand-pull weeds carefully to avoid disturbing the turnip roots.
3. Fertilize (Optional): If your soil is poor, you may need to fertilize your turnip plants. Use a balanced fertilizer, such as 10-10-10, according to the package directions. Avoid over-fertilizing, as this can cause the turnips to develop excessive foliage at the expense of root growth.
4. Pest and Disease Control: Turnips are generally resistant to pests and diseases, but they can be susceptible to aphids, flea beetles, and root maggots. Inspect your plants regularly for signs of infestation or disease. If you find any problems, treat them promptly with an appropriate insecticide or fungicide. I prefer using organic options whenever possible.
5. Mulch (Optional): Applying a layer of mulch around your turnip plants can help to conserve moisture, suppress weeds, and regulate soil temperature. I like to use straw, hay, or shredded leaves as mulch.
Harvesting Your Turnips
The moment we’ve all been waiting for – harvest time! Here’s how to know when your turnips are ready:
1. Check the Size: Turnips are typically ready to harvest when the roots are 2-3 inches in diameter. You can check the size by gently digging around the base of the plant.
2. Consider the Variety: Some varieties, like Tokyo Cross, are best harvested when they’re small and tender. Others, like Purple Top White Globe, can be allowed to grow larger.
3. Harvesting the Greens: You can harvest the turnip greens at any time during the growing season. Simply cut off the outer leaves, leaving the inner leaves to continue growing.
4. Pulling the Turnips: To harvest the turnips, gently loosen the soil around the base of the plant with a garden fork. Then, grasp the turnip greens firmly and pull the turnip out of the ground.
5. Cleaning and Storing: After harvesting, wash the turnips thoroughly and trim off the greens, leaving about 1 inch of stem attached. Store the turnips in a cool, dark, and humid place, such as a root cellar or refrigerator. They can last for several months if stored properly. The greens should be used within a few days.
Troubleshooting Common Turnip Problems
Even with the best care, you might encounter a few problems while growing turnips. Here are some common issues and how to address them:
* Bolting (Premature Flowering): Bolting is when the turnip plant sends up a flower stalk prematurely. This can happen if the weather gets too hot or if the plants are stressed. To prevent bolting, plant your turnips at the right time of year and provide them with consistent moisture. If a plant bolts, remove the flower stalk to encourage root growth.
* Root Cracking: Root cracking can occur if the soil is too dry or if the plants are exposed to sudden changes in moisture. To prevent root cracking, water your turnips regularly and mulch around the plants to conserve moisture.
* Pest Infestations: As mentioned earlier, turnips can be susceptible to aphids, flea beetles, and root maggots. Inspect your plants regularly for signs of infestation and treat them promptly with an appropriate insecticide.
* Clubroot: Clubroot is a soilborne disease that can cause the roots of turnips to become swollen and distorted. To prevent clubroot, practice crop rotation and avoid planting turnips in the same spot year after year. Also, make sure your soil is well-drained and has a pH between 6.0 and 6.8.
Turnip Recipes to Try
Now that you’ve harvested your bountiful crop of turnips, it’s time to get cooking! Here are a few of my favorite turnip recipes:
* Roasted Turnips: Toss diced turnips with olive oil, salt, pepper, and your favorite herbs (such as rosemary or thyme). Roast them in a preheated oven at 400°F (200°C) for 20-25 minutes, or until they’re tender and slightly browned.
* Mashed Turnips: Boil peeled and diced turnips until they’re tender. Drain them well and mash them with butter, milk, salt, and pepper. You can also add other vegetables, such as potatoes or carrots, for a more complex flavor.
* Turnip Greens: Sauté turnip greens with garlic, olive oil, and a pinch of red pepper flakes. They’re delicious as a side dish or added to soups and stews.
* Turnip and Apple Salad: Grate raw turnips and
Conclusion
So, there you have it! Growing turnips in your backyard is not only achievable but also incredibly rewarding. From the crisp, peppery greens to the sweet, earthy roots, you’ll be amazed at the versatility and flavor this humble vegetable offers. Forget those bland, store-bought turnips – homegrown is where it’s at!
Why is this DIY trick a must-try? Because it puts you in control. You decide the variety, the growing conditions, and ultimately, the quality of your harvest. You’ll know exactly what’s gone into your turnips, avoiding any unwanted pesticides or chemicals. Plus, there’s nothing quite like the satisfaction of harvesting something you’ve nurtured from seed to table. It’s a connection to nature, a boost to your self-sufficiency, and a delicious addition to your meals.
But the fun doesn’t stop there! Feel free to experiment with different varieties of turnips. Try the ‘Purple Top White Globe’ for a classic flavor, or venture into the world of Japanese turnips like ‘Hakurei’ for a milder, sweeter taste. You can also adjust your planting schedule to enjoy multiple harvests throughout the growing season. Consider companion planting with other vegetables like radishes or carrots to maximize your garden space and deter pests.
And don’t forget about the greens! Turnip greens are a nutritional powerhouse, packed with vitamins and minerals. Sauté them with garlic and olive oil for a simple side dish, add them to soups and stews for extra flavor, or even blend them into smoothies for a healthy boost.
We’re confident that once you try growing turnips in your backyard, you’ll be hooked. It’s a simple, satisfying, and delicious way to connect with nature and enjoy fresh, homegrown produce. So, grab some seeds, prepare your soil, and get ready to experience the joy of growing your own turnips.
We encourage you to give this DIY trick a try and share your experiences with us! Let us know what varieties you planted, what challenges you faced, and what delicious dishes you created with your homegrown turnips. Share your photos and tips in the comments below – we can’t wait to hear from you! Happy gardening!
Frequently Asked Questions (FAQ)
What is the best time to plant turnips?
The best time to plant turnips depends on your climate and the variety you’re growing. Generally, turnips are a cool-season crop, meaning they thrive in cooler temperatures. For a spring harvest, plant turnips 4-6 weeks before the last expected frost. For a fall harvest, plant them 6-8 weeks before the first expected frost. In warmer climates, you can often grow turnips throughout the winter. Check your local frost dates and the specific recommendations for your chosen turnip variety for the most accurate timing.
How much sunlight do turnips need?
Turnips need at least 6 hours of sunlight per day to grow well. While they can tolerate some shade, especially in hotter climates, insufficient sunlight can result in smaller roots and less flavorful greens. Choose a planting location that receives plenty of direct sunlight throughout the day.
What kind of soil is best for growing turnips?
Turnips prefer well-drained, fertile soil with a pH between 6.0 and 6.8. Amend your soil with compost or other organic matter to improve drainage and fertility. Avoid heavy clay soils, as they can become waterlogged and hinder root development. If your soil is compacted, till it to a depth of at least 8 inches before planting.
How often should I water my turnips?
Turnips need consistent moisture to thrive. Water them regularly, especially during dry periods. Aim to keep the soil consistently moist but not waterlogged. A good rule of thumb is to water deeply once or twice a week, depending on the weather conditions. Mulching around your turnip plants can help retain moisture and suppress weeds.
How do I fertilize my turnips?
Turnips benefit from a balanced fertilizer applied at planting time. Choose a fertilizer with equal amounts of nitrogen, phosphorus, and potassium (e.g., 10-10-10). Follow the package instructions for application rates. You can also side-dress your turnips with a nitrogen-rich fertilizer a few weeks after they emerge to promote leafy growth. Avoid over-fertilizing, as this can result in excessive foliage growth at the expense of root development.
When are turnips ready to harvest?
Turnips are typically ready to harvest 50-60 days after planting, depending on the variety. You can harvest the greens at any time, but the roots are best harvested when they reach a diameter of 2-3 inches. To harvest, gently loosen the soil around the turnip and pull it out of the ground.
What are some common pests and diseases that affect turnips?
Common pests that affect turnips include aphids, flea beetles, and root maggots. Diseases that can affect turnips include clubroot and downy mildew. To prevent pest and disease problems, practice good garden hygiene, such as removing plant debris and weeds. You can also use insecticidal soap or neem oil to control pests, and fungicides to control diseases. Crop rotation can also help prevent soilborne diseases.
Can I eat both the turnip roots and the greens?
Yes, both the turnip roots and the greens are edible and nutritious. The roots are typically eaten cooked, while the greens can be eaten raw or cooked. Turnip greens are a good source of vitamins A and C, as well as calcium and iron.
How do I store turnips?
Turnips can be stored in the refrigerator for several weeks. To store them, remove the greens and store them separately. Place the turnip roots in a plastic bag and store them in the crisper drawer of your refrigerator. You can also store turnips in a root cellar or other cool, dark place.
Can I grow turnips in containers?
Yes, you can grow turnips in containers, but you’ll need to choose a large enough container to accommodate the root growth. A container that is at least 12 inches deep and 12 inches wide is recommended. Use a well-draining potting mix and water regularly. Container-grown turnips may need to be fertilized more frequently than those grown in the ground.
What are some creative ways to use turnips in cooking?
Turnips are incredibly versatile! You can roast them with other root vegetables, mash them like potatoes, add them to soups and stews, or even grate them into salads. Turnip greens can be sautéed, steamed, or added to stir-fries. Get creative and experiment with different flavors and spices to find your favorite ways to enjoy this delicious vegetable. Don’t be afraid to try pickling them or fermenting them for a unique twist!
Leave a Comment