
Regrow Enoki Mushrooms at Home: Imagine harvesting a fresh batch of delicate, snow-white Enoki mushrooms right from your kitchen! It sounds like something out of a gourmet chef’s dream, right? Well, it doesn’t have to be! This surprisingly simple DIY project will not only impress your friends but also provide you with a continuous supply of these delicious and nutritious fungi.
Mushrooms, in general, have a rich history, dating back centuries in various cultures. In East Asia, they’ve been prized for both their culinary and medicinal properties. Enoki mushrooms, with their mild flavor and unique texture, are a staple in many Asian dishes. But you don’t need to travel to a specialty market to enjoy them fresh.
Why should you learn to regrow Enoki mushrooms at home? Because it’s sustainable, cost-effective, and incredibly rewarding! Think about it: reducing food waste, saving money on groceries, and gaining a fascinating new hobby all in one go. Plus, in a world increasingly concerned with food security and knowing where our food comes from, this DIY project offers a small but significant step towards self-sufficiency. I’m excited to show you how easy it is to get started!
Regrow Enoki Mushrooms at Home: A Fun and Frugal Project!
Hey there, fellow mushroom enthusiasts! Have you ever bought a package of those delicate, long-stemmed Enoki mushrooms and thought, “Wouldn’t it be cool to grow these myself?” Well, guess what? You absolutely can! It’s a surprisingly simple and rewarding DIY project that lets you enjoy fresh, homegrown Enoki mushrooms without breaking the bank. I’m going to walk you through the whole process, step-by-step, so you can have your own little mushroom farm right in your kitchen.
What You’ll Need
Before we dive in, let’s gather our supplies. This is a pretty low-cost project, which is always a win!
* Enoki Mushrooms: Obviously! You’ll need a package of fresh Enoki mushrooms from the grocery store. Look for ones that are firm, white, and don’t show any signs of spoilage. Organic is always a good choice if it’s available.
* Sawdust Pellets (Hardwood): These are the base for our mushroom substrate. You can find them at most hardware stores or online. Make sure they are hardwood pellets and not softwood, as Enoki mushrooms prefer hardwood.
* Bran (Wheat or Rice): This adds nutrients to the substrate, giving the mushrooms a boost. You can find bran at most grocery stores in the baking or cereal aisle.
* Water: Clean, filtered water is best.
* Heat-Resistant Jars or Bags: Mason jars work great, or you can use autoclavable mushroom grow bags. The size will depend on how many mushrooms you want to grow. I usually use quart-sized jars.
* Pressure Cooker or Autoclave: This is essential for sterilizing the substrate. Sterilization is crucial to prevent contamination from other molds and bacteria.
* Spray Bottle with Isopropyl Alcohol (70%): For sanitizing your work area and tools.
* Gloves: To keep your hands clean and prevent contamination.
* Face Mask: Another layer of protection against contamination.
* Clean Work Area: A clean kitchen counter or table is ideal.
* Optional: Micropore Tape: If using jars, this will allow for gas exchange while keeping contaminants out.
Preparing the Substrate
The substrate is the food source for your Enoki mushrooms, so getting it right is key. This is where we create the perfect environment for them to thrive.
1. Hydrate the Sawdust Pellets: In a large container, add water to the sawdust pellets until they are fully saturated. They should expand and become a loose, crumbly mixture. You want it to be moist but not soaking wet. Think of a wrung-out sponge.
2. Mix in the Bran: Add the bran to the hydrated sawdust pellets. A good ratio is about 10-20% bran by weight. Mix thoroughly to distribute the bran evenly throughout the sawdust. This provides the necessary nutrients for the mushrooms to grow.
3. Jarring the Substrate: Fill your jars or bags with the substrate, leaving about an inch of headspace at the top. Pack it down lightly, but don’t compress it too much. You want to allow for good air circulation.
4. Covering the Jars/Bags: If using jars, cover the lids with micropore tape. This allows for gas exchange while preventing contaminants from entering. If using bags, seal them according to the manufacturer’s instructions.
Sterilizing the Substrate
This is the most important step in preventing contamination. Don’t skip it!
1. Load the Pressure Cooker/Autoclave: Place the jars or bags in your pressure cooker or autoclave. Make sure to follow the manufacturer’s instructions for your specific model.
2. Sterilize: Sterilize the substrate for 90 minutes at 15 PSI. This will kill any unwanted microorganisms that could compete with your Enoki mushrooms.
3. Cool Down: Allow the pressure cooker or autoclave to cool down completely before opening it. This is crucial to prevent the jars or bags from cracking or imploding.
Inoculating with Enoki Mushrooms
Now for the fun part – introducing the Enoki mushrooms to their new home!
1. Clean Your Work Area: Thoroughly clean and sanitize your work area with isopropyl alcohol. This includes your counter, tools, and even your hands.
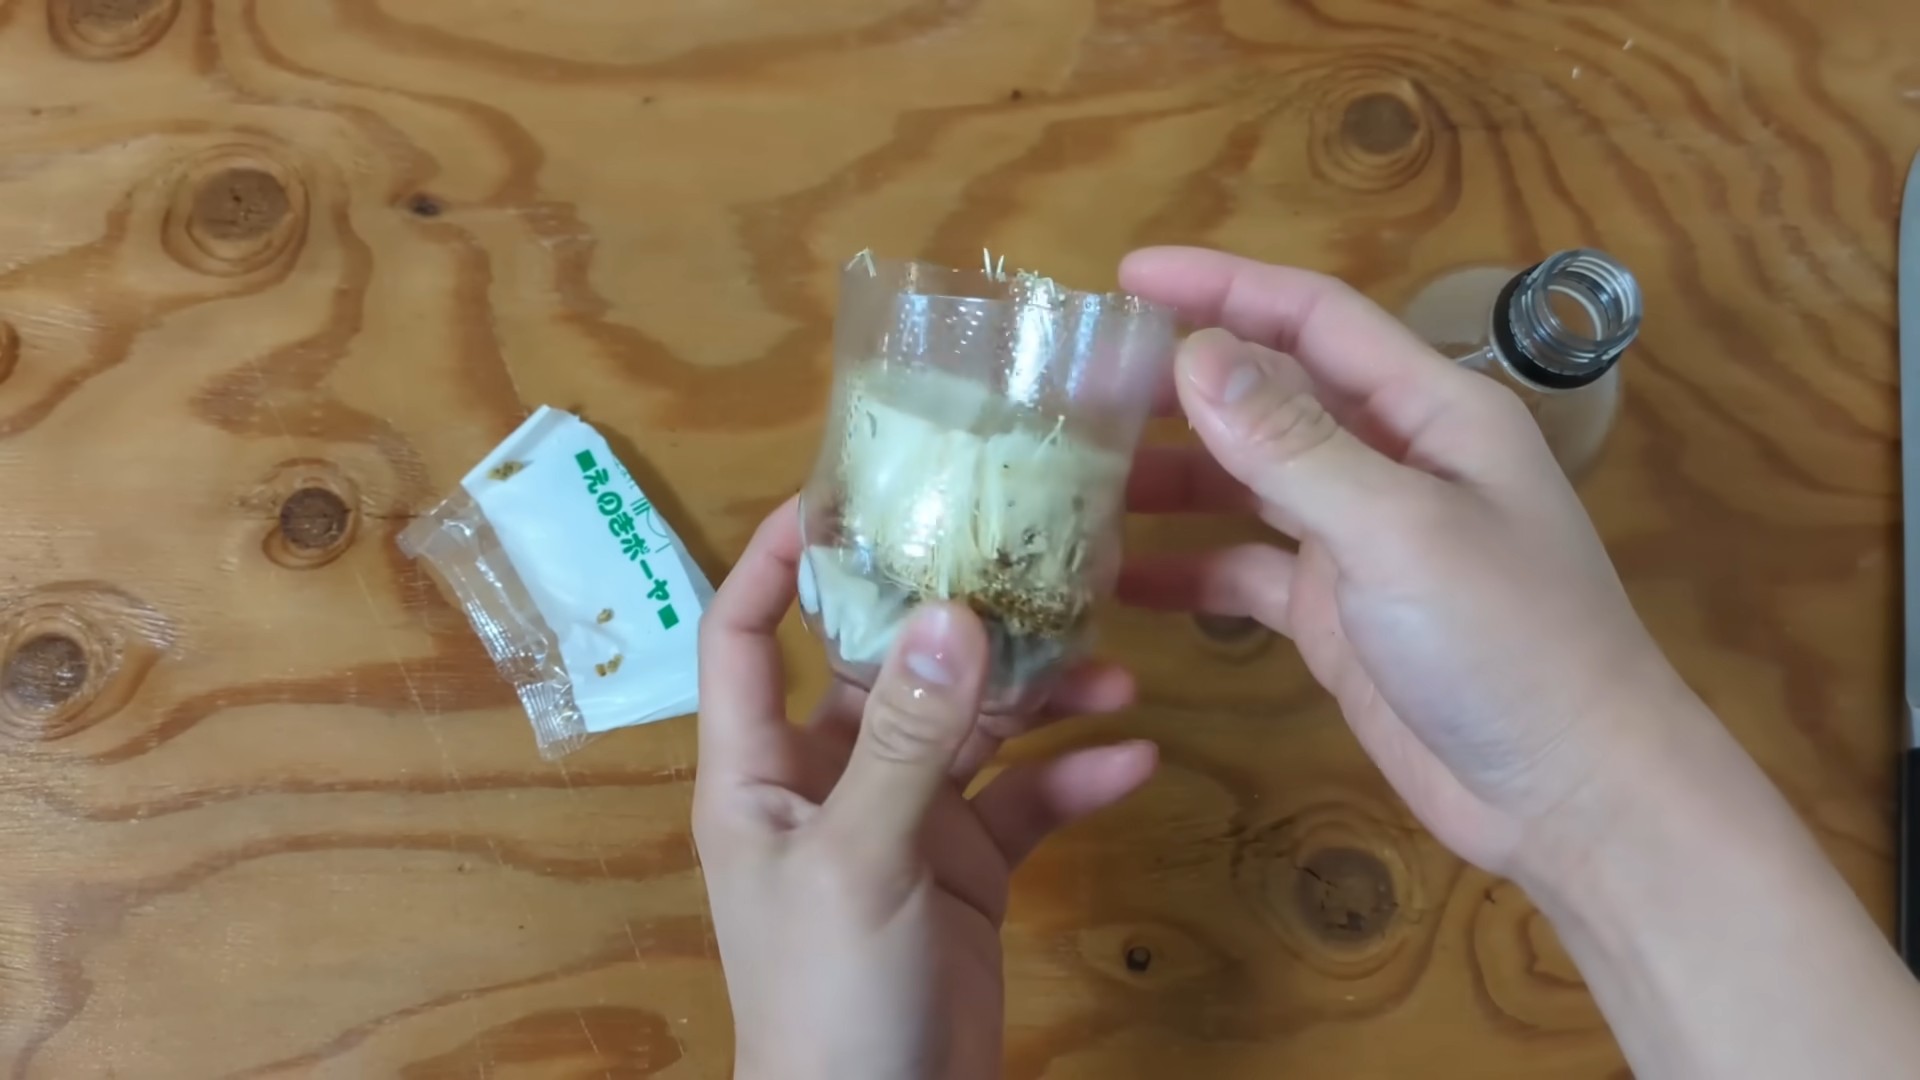
2. Prepare the Enoki Mushrooms: Carefully remove the Enoki mushrooms from their packaging. Gently separate the stems from the base. We’ll be using the base to inoculate the substrate.
3. Inoculate the Substrate: In a sterile environment (using gloves and a mask), carefully break up the base of the Enoki mushrooms and sprinkle them evenly over the surface of the sterilized substrate in each jar or bag.
4. Seal the Jars/Bags: If you opened the jars or bags to inoculate, reseal them with micropore tape or according to the manufacturer’s instructions.
Incubation
This is where the magic happens! The Enoki mushrooms will start to colonize the substrate.
1. Find a Dark, Cool Place: Place the inoculated jars or bags in a dark, cool place with a temperature between 65-75°F (18-24°C). A closet or basement works well.
2. Monitor Colonization: Check the jars or bags regularly for signs of colonization. You should start to see white, fuzzy mycelium (the vegetative part of the mushroom) spreading throughout the substrate. This usually takes about 2-3 weeks.
3. Be Patient: Don’t disturb the jars or bags during this time. Let the mycelium do its thing.
Fruiting
Time to get those beautiful Enoki mushrooms growing!
1. Cold Shock (Optional but Recommended): To encourage fruiting, you can give the substrate a cold shock. Place the jars or bags in the refrigerator for 24-48 hours. This simulates the change in temperature that triggers fruiting in nature.
2. Introduce Light and Humidity: After the cold shock (or if you skip it), move the jars or bags to a location with indirect light and high humidity. A humidity tent or a plastic container with a lid works well. You can mist the inside of the container regularly to maintain humidity.
3. Maintain Temperature: Keep the temperature between 50-60°F (10-15°C). This is crucial for Enoki mushroom fruiting.
4. Ventilation: Provide some ventilation to prevent the buildup of carbon dioxide. You can crack the lid of the container or tent slightly.
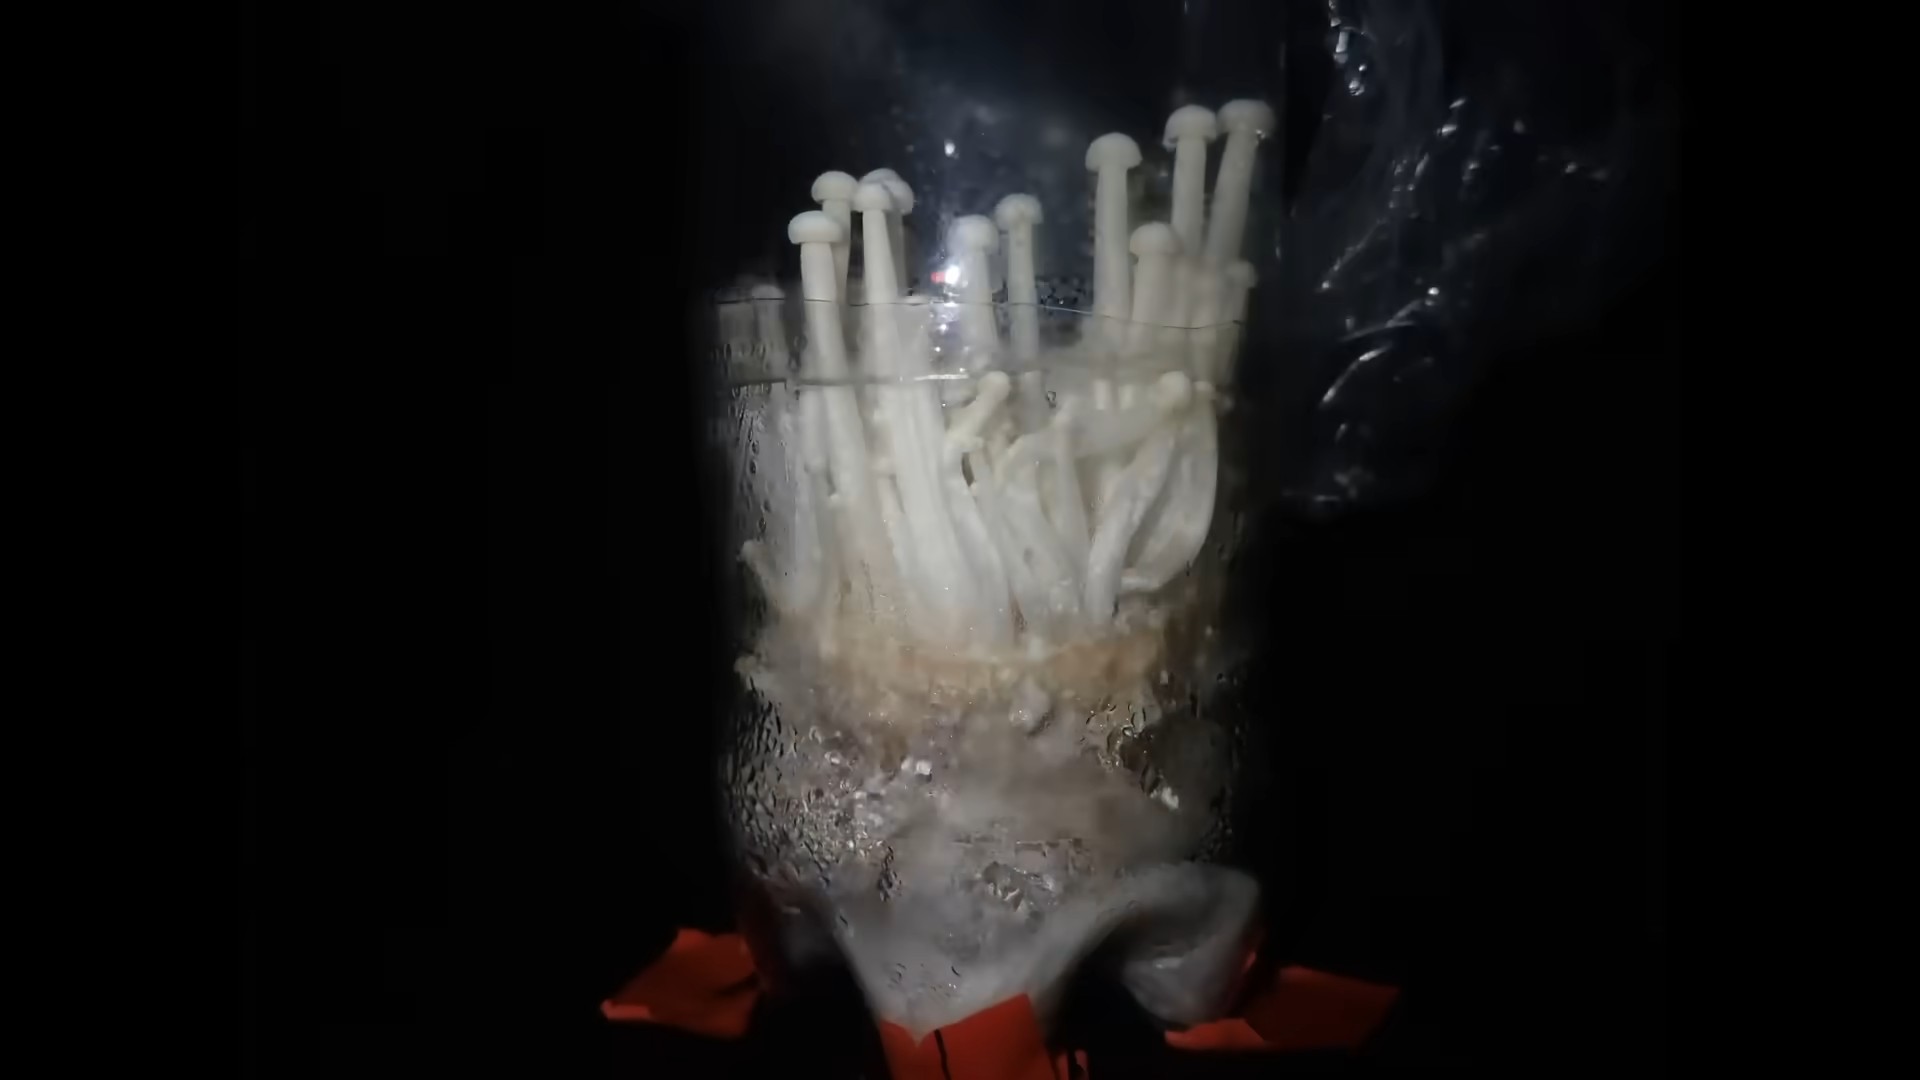
5. Watch Them Grow: Over the next few weeks, you should see tiny mushroom pins forming. These will gradually elongate into the long, slender stems characteristic of Enoki mushrooms.
Harvesting
The moment you’ve been waiting for!
1. Harvest When Ready: Harvest the Enoki mushrooms when they reach the desired length, usually around 4-6 inches.
2. Cut at the Base: Use a clean knife or scissors to cut the mushrooms at the base of the cluster.
3. Enjoy Your Harvest: Your homegrown Enoki mushrooms are now ready to be enjoyed! They’re delicious in soups, stir-fries, and salads.
Second Flush (Optional)
You can often get a second flush of mushrooms from the same substrate.
1. Soak the Substrate: After harvesting the first flush, soak the substrate in cold water for 24 hours.
2. Drain and Repeat: Drain the water and repeat the fruiting process. You may get a smaller yield on the second flush, but it’s still worth a try!
Troubleshooting
Sometimes things don’t go exactly as planned. Here are a few common issues and how to address them:
* Contamination: If you see any green, black, or other colored mold growing in your jars or bags, it’s likely contamination. Discard the contaminated substrate immediately to prevent it from spreading.
* Slow Colonization: If colonization is slow, make sure the temperature is within the optimal range and that the substrate is not too wet or too dry.
* No Fruiting: If you’re not seeing any fruiting, try giving the substrate a cold shock and make sure the temperature is cool enough. Also, ensure there’s enough humidity and ventilation.
* Small Mushrooms: If the mushrooms are small, it could be due to lack of nutrients or inadequate humidity. Try adding more bran to the substrate in future batches and make sure to maintain high humidity during fruiting.
Tips for Success
* Sterility is Key: Emphasize cleanliness throughout the entire process to minimize the risk of contamination.
* Temperature Control: Maintaining the correct temperature is crucial for both colonization and fruiting.
* Patience is a Virtue: Mushroom growing takes time, so
Conclusion
So, there you have it! Regrowing Enoki mushrooms at home isn’t just a fun experiment; it’s a gateway to fresh, delicious, and readily available fungi right in your kitchen. Forget those expensive grocery store runs for a handful of these delicate, flavorful mushrooms. With a little patience and minimal effort, you can cultivate your own supply and enjoy the unique taste and texture of homegrown Enoki whenever you desire.
This DIY trick is a must-try for several compelling reasons. First and foremost, it’s incredibly sustainable. By repurposing the base of store-bought Enoki mushrooms, you’re reducing food waste and contributing to a more eco-friendly lifestyle. Secondly, it’s cost-effective. Once you’ve purchased your initial batch of mushrooms, the subsequent harvests are essentially free, saving you money in the long run. Thirdly, it’s a fascinating educational experience. Watching the mushrooms regrow and develop is a rewarding process that connects you to the natural world and deepens your understanding of fungal biology. Finally, and perhaps most importantly, it allows you to enjoy the unparalleled freshness and flavor of homegrown Enoki, which surpasses anything you can find in a supermarket.
But the fun doesn’t stop there! Feel free to experiment with different growing mediums. While the water method is a great starting point, you can also try using a mixture of sawdust and coffee grounds for a more nutrient-rich environment. This may result in a more robust and flavorful harvest. Another variation involves adjusting the lighting conditions. While Enoki mushrooms generally prefer darkness, a small amount of indirect light can sometimes encourage growth. Just be careful not to expose them to direct sunlight, which can be harmful. You can also experiment with different containers. While a simple plastic container works well, you might try using a glass jar or even a repurposed mushroom growing kit for a more aesthetically pleasing setup.
Don’t be afraid to get creative and adapt the process to your own preferences and resources. The beauty of this DIY project is its simplicity and adaptability. The key is to maintain a clean environment, provide adequate moisture, and be patient. Remember, mushroom growing is a natural process, and it may take some time to see results.
We wholeheartedly encourage you to try this DIY trick and experience the joy of regrowing Enoki mushrooms at home. It’s a simple, rewarding, and sustainable way to add fresh, flavorful fungi to your diet. And once you’ve successfully harvested your own batch of Enoki, we’d love to hear about your experience! Share your tips, tricks, and photos with us in the comments below. Let’s build a community of home mushroom growers and inspire others to embrace the magic of DIY cultivation. Happy growing!
Frequently Asked Questions (FAQ)
What exactly are Enoki mushrooms, and why should I bother regrowing them?
Enoki mushrooms, also known as Enokitake, are long, thin, white mushrooms with small caps. They have a mild, slightly sweet flavor and a crisp texture, making them a popular addition to soups, salads, stir-fries, and other dishes. Regrowing them is worthwhile because it’s a sustainable, cost-effective, and educational way to enjoy fresh, homegrown mushrooms. You reduce food waste, save money, and learn about fungal biology all while enjoying delicious Enoki.
How long does it take to regrow Enoki mushrooms?
The time it takes to regrow Enoki mushrooms can vary depending on several factors, including temperature, humidity, and the health of the original mushroom base. Generally, you can expect to see new growth within 1-2 weeks. It may take 2-4 weeks to reach a harvestable size. Be patient and monitor the mushrooms regularly, adjusting the growing conditions as needed.
What kind of container should I use for regrowing Enoki mushrooms?
A clean, food-grade plastic container or glass jar is ideal. The container should be large enough to accommodate the mushroom base and enough water to keep it submerged. A container with a lid is also beneficial, as it helps to maintain humidity and prevent contamination. Make sure the container is thoroughly cleaned before use to minimize the risk of mold or bacteria growth.
What kind of water should I use?
Filtered or distilled water is recommended. Tap water may contain chlorine or other chemicals that can inhibit mushroom growth. If you only have access to tap water, let it sit out for 24 hours to allow the chlorine to evaporate before using it.
How often should I change the water?
Change the water every 2-3 days to prevent the buildup of bacteria and maintain a clean growing environment. This is crucial for healthy mushroom growth.
What if I see mold growing on the mushroom base?
Mold is a common problem when growing mushrooms at home. If you see mold, carefully remove the affected area with a clean knife or scissors. Make sure to clean the container thoroughly and replace the water. If the mold persists, it may be necessary to discard the mushroom base and start over with a fresh one.
Do Enoki mushrooms need light to grow?
Enoki mushrooms generally prefer darkness. However, a small amount of indirect light can sometimes encourage growth. Avoid exposing them to direct sunlight, which can be harmful. A dark cupboard or basement is an ideal location for regrowing Enoki mushrooms.
What is the ideal temperature for regrowing Enoki mushrooms?
Enoki mushrooms prefer cool temperatures, ideally between 50-70°F (10-21°C). Avoid placing them in areas that are too warm or too cold, as this can inhibit growth.
Can I use the same mushroom base multiple times?
While it’s possible to get multiple harvests from the same mushroom base, the subsequent harvests may be smaller and less vigorous. After 2-3 harvests, it’s generally best to start with a fresh mushroom base for optimal results.
How do I know when the Enoki mushrooms are ready to harvest?
The Enoki mushrooms are ready to harvest when they have reached your desired length and thickness. Generally, they are harvested when they are about 4-6 inches long. Simply cut them off at the base with a clean knife or scissors.
Can I eat the regrown Enoki mushrooms raw?
While Enoki mushrooms are often eaten raw in salads and other dishes, it’s generally recommended to cook them before consuming them, especially if they are homegrown. Cooking helps to kill any potential bacteria or contaminants and makes the mushrooms more digestible.
What are some ways to use regrown Enoki mushrooms in cooking?
Regrown Enoki mushrooms can be used in a variety of dishes, including soups, salads, stir-fries, and noodle dishes. They can also be added to omelets, frittatas, and other egg dishes. Their mild flavor and crisp texture make them a versatile ingredient that can complement a wide range of flavors.
Is it safe to regrow Enoki mushrooms at home?
Yes, it is generally safe to regrow Enoki mushrooms at home, as long as you follow proper hygiene practices and use clean materials. However, it’s important to be aware of the potential risks of mold and bacteria contamination. If you are unsure about the safety of your regrown mushrooms, it’s best to err on the side of caution and discard them.
What if my Enoki mushrooms don’t grow?
There are several reasons why your Enoki mushrooms may not be growing. The most common reasons include:
* **Contamination:** Mold or bacteria can inhibit mushroom growth.
* **Insufficient moisture:** The mushroom base needs to be kept consistently moist.
* **Incorrect temperature:** Enoki mushrooms prefer cool temperatures.
* **Poor water quality:** Tap water may contain chemicals that inhibit growth.
* **Old mushroom base:** The mushroom base may be too old or damaged to regrow.
Review the steps and ensure you are following them correctly. If problems persist, try starting with a fresh mushroom base and paying close attention to hygiene and growing conditions.


Leave a Comment