
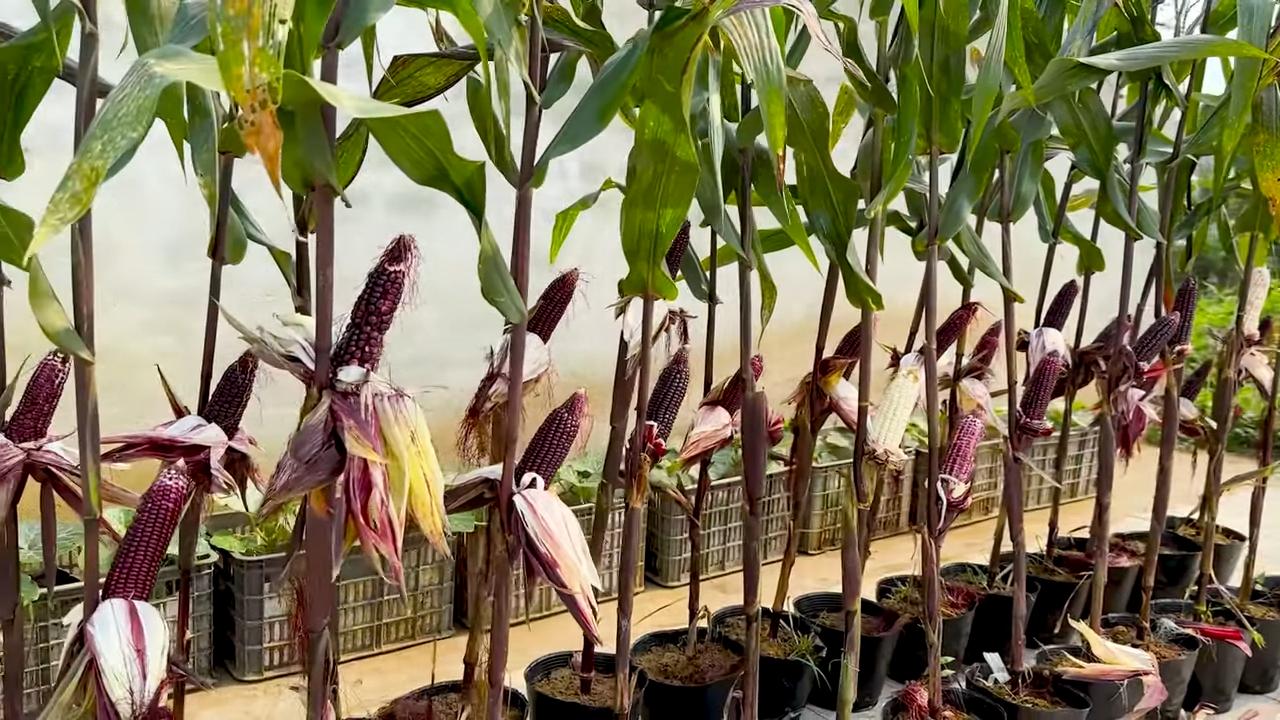
Rooftop Corn Growing Easy: Imagine stepping onto your rooftop and harvesting fresh, juicy corn – right in the heart of the city! Sounds like a dream, doesn’t it? Well, it doesn’t have to be! This DIY guide will unlock the secrets to successfully growing corn on your rooftop, transforming your urban space into a mini-farm.
Corn, a staple in diets around the world, has a rich history dating back thousands of years to ancient Mesoamerica. It’s been a symbol of abundance and sustenance for countless cultures. Now, you can connect with that history and bring a touch of rural charm to your urban life.
Why should you try rooftop corn growing easy? Because fresh, homegrown corn tastes infinitely better than anything you can buy at the store! Plus, it’s a fantastic way to utilize unused space, reduce your carbon footprint, and enjoy a rewarding hobby. Many people think growing corn requires acres of farmland, but with a few simple tricks and the right setup, you can enjoy a bountiful harvest right above your head. I’m here to show you how to make it happen, step-by-step, with easy-to-follow instructions and helpful tips. Let’s get started!
Dachgarten-Maisanbau: Dein einfacher DIY-Leitfaden
Hey Leute! Habt ihr jemals davon geträumt, euren eigenen Mais auf dem Dach anzubauen? Klingt verrückt, oder? Aber glaubt mir, es ist einfacher als ihr denkt! Ich zeige euch, wie ihr mit ein paar einfachen Schritten und ein bisschen Geduld euren eigenen kleinen Maisacker hoch über den Dächern der Stadt erschaffen könnt. Lasst uns loslegen!
Was du brauchst: Die Materialliste
Bevor wir anfangen, müssen wir sicherstellen, dass wir alles haben, was wir brauchen. Hier ist eine Liste der wichtigsten Materialien und Werkzeuge:
* Große Pflanzgefäße oder Behälter: Wichtig ist, dass sie groß genug sind (mindestens 45 Liter Fassungsvermögen pro Pflanze) und Abflusslöcher haben. Mais braucht Platz für seine Wurzeln!
* Hochwertige Blumenerde: Eine gute Mischung aus Gartenerde, Kompost und Perlit sorgt für die richtige Drainage und Nährstoffe.
* Maiskörner: Wähle eine Sorte, die für den Anbau in Behältern geeignet ist. Zwergmaissorten sind oft eine gute Wahl.
* Dünger: Ein Langzeitdünger oder ein wasserlöslicher Dünger speziell für Gemüse.
* Gießkanne oder Schlauch: Um deine Pflanzen regelmäßig zu gießen.
* Pflanzschaufel: Zum Einpflanzen der Maiskörner.
* Stützpfähle (optional): Bei starkem Wind können Stützpfähle helfen, die Pflanzen zu stabilisieren.
* Mulch (optional): Mulch hilft, die Feuchtigkeit im Boden zu halten und Unkraut zu unterdrücken.
* Geduld und Liebe: Das Wichtigste überhaupt!
Die Vorbereitung: Der Schlüssel zum Erfolg
Bevor wir mit dem Pflanzen beginnen, müssen wir ein paar Vorbereitungen treffen. Das ist wie beim Kochen – die richtige Vorbereitung ist die halbe Miete!
1. Wähle den richtigen Standort: Mais braucht viel Sonne! Stelle sicher, dass dein Dachgarten mindestens 6-8 Stunden direktes Sonnenlicht pro Tag bekommt.
2. Bereite die Pflanzgefäße vor: Reinige die Pflanzgefäße gründlich und stelle sicher, dass die Abflusslöcher frei sind. Lege eventuell eine Schicht Kies oder Tonscherben auf den Boden des Gefäßes, um die Drainage zu verbessern.
3. Fülle die Pflanzgefäße mit Erde: Fülle die Pflanzgefäße mit der vorbereiteten Blumenerde. Lasse etwa 5-7 cm Platz bis zum Rand des Gefäßes.
4. Wässere die Erde: Befeuchte die Erde gründlich, bevor du die Maiskörner pflanzt.
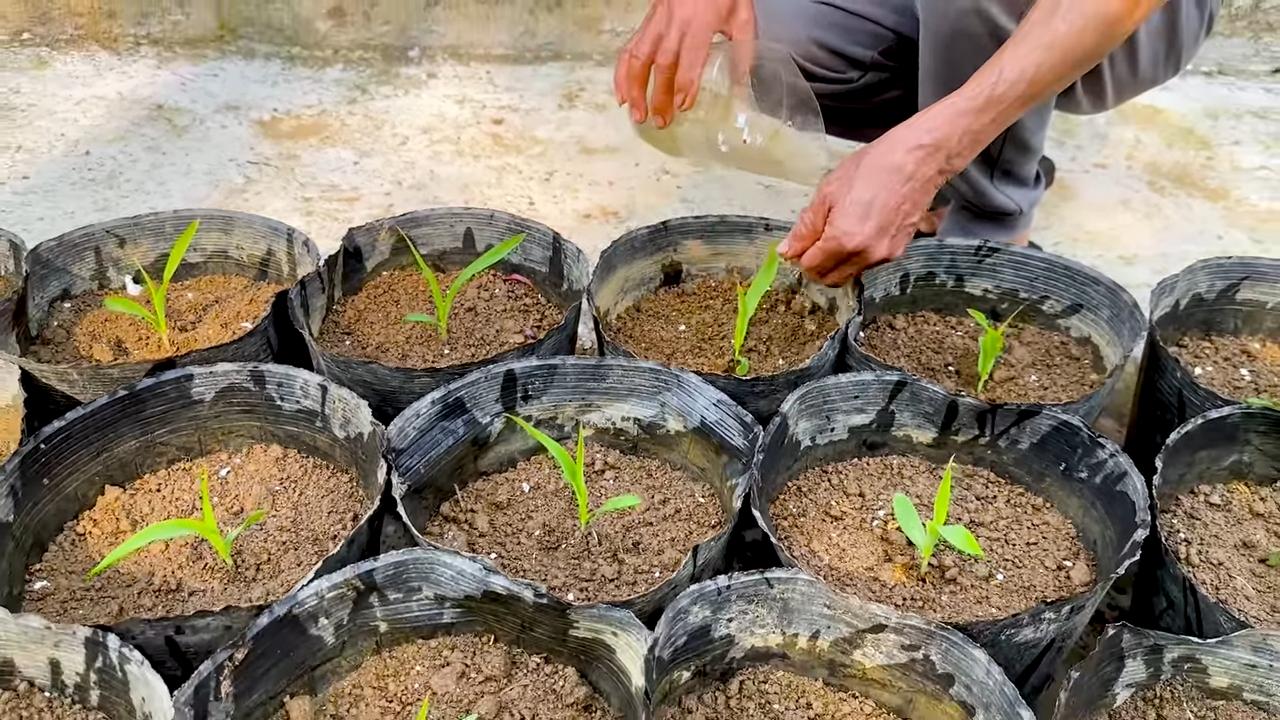
Die Aussaat: Der Beginn des Maislebens
Jetzt kommt der spannende Teil: das Pflanzen der Maiskörner!
1. Pflanze die Maiskörner: Mache mit dem Finger oder einer Pflanzschaufel kleine Löcher in die Erde (etwa 2-3 cm tief). Pflanze 2-3 Maiskörner pro Loch.
2. Bedecke die Maiskörner: Bedecke die Maiskörner mit Erde und drücke sie leicht an.
3. Gieße die Erde: Gieße die Erde vorsichtig, damit die Maiskörner nicht weggeschwemmt werden.
4. Halte die Erde feucht: Die Erde sollte immer leicht feucht sein, aber nicht nass.
Die Pflege: Damit dein Mais prächtig gedeiht
Nach der Aussaat beginnt die eigentliche Arbeit: die Pflege deiner kleinen Maispflanzen.
1. Gießen: Gieße deine Maispflanzen regelmäßig, besonders an heißen Tagen. Achte darauf, dass die Erde nicht austrocknet.
2. Düngen: Dünge deine Maispflanzen regelmäßig mit einem Langzeitdünger oder einem wasserlöslichen Dünger. Befolge die Anweisungen auf der Verpackung.
3. Unkraut jäten: Entferne regelmäßig Unkraut, das in den Pflanzgefäßen wächst.
4. Stützen: Wenn deine Maispflanzen hoch wachsen und der Wind stark ist, solltest du sie mit Stützpfählen stabilisieren.
5. Beobachten: Beobachte deine Pflanzen regelmäßig auf Schädlinge und Krankheiten. Bei Bedarf kannst du biologische Schädlingsbekämpfungsmittel einsetzen.
Die Ernte: Der Lohn deiner Mühe
Nach etwa 60-100 Tagen (je nach Sorte) ist es endlich soweit: die Ernte!
1. Erkenne die Reife: Die Maiskolben sind reif, wenn die Seidenfäden braun und trocken sind und die Kolben sich fest anfühlen.
2. Ernte die Maiskolben: Ziehe die Maiskolben vorsichtig von der Pflanze ab.
3. Genieße deine Ernte: Koche, grille oder backe deine frischen Maiskolben und genieße den Geschmack deiner eigenen Ernte!
Zusätzliche Tipps und Tricks für den Dachgarten-Maisanbau
Hier sind noch ein paar zusätzliche Tipps, die dir helfen können, deinen Maisanbau auf dem Dach noch erfolgreicher zu gestalten:
* Wähle die richtige Sorte: Informiere dich vor dem Kauf über die verschiedenen Maissorten und wähle eine Sorte, die für den Anbau in Behältern geeignet ist und in deinem Klima gut gedeiht.
* Pflanze in Gruppen: Mais wird besser bestäubt, wenn er in Gruppen gepflanzt wird. Pflanze mindestens 4-6 Pflanzen zusammen.
* Sorge für gute Belüftung: Stelle sicher, dass deine Maispflanzen ausreichend belüftet sind, um Krankheiten vorzubeugen.
* Verwende Mulch: Mulch hilft, die Feuchtigkeit im Boden zu halten und Unkraut zu unterdrücken. Du kannst Stroh, Holzhackschnitzel oder andere organische Materialien als Mulch verwenden.
* Recycle dein Gießwasser: Sammle Regenwasser oder verwende das Wasser, das du zum Kochen von Gemüse verwendet hast, um deine Maispflanzen zu gießen.
* Hab Spaß!: Der Anbau von Mais auf dem Dach sollte Spaß machen! Experimentiere mit verschiedenen Sorten und Techniken und lerne aus deinen Fehlern.
Häufige Probleme und Lösungen
Auch beim Maisanbau auf dem Dach können Probleme auftreten. Hier sind einige der häufigsten Probleme und wie du sie lösen kannst:
* Schlechte Bestäubung: Wenn die Maiskolben nicht richtig gefüllt sind, kann das an einer schlechten Bestäubung liegen. Du kannst die Bestäubung verbessern, indem du die Pflanzen von Hand bestäubst. Schüttle die Pflanzen vorsichtig, um den Pollen zu verteilen.
* Schädlinge: Mais kann von verschiedenen Schädlingen befallen werden, wie z.B. Maiszünsler, Blattläuse oder Schnecken. Verwende biologische Schädlingsbekämpfungsmittel, um die Schädlinge zu bekämpfen.
* Krankheiten: Mais kann auch von verschiedenen Krankheiten befallen werden, wie z.B. Maisbeulenbrand oder Rost. Sorge für gute Belüftung und vermeide es, die Blätter zu gießen, um Krankheiten vorzubeugen.
* Nährstoffmangel: Wenn deine Maispflanzen gelb werden oder schlecht wachsen, kann das an einem Nährstoffmangel liegen. Dünge deine Pflanzen regelmäßig mit einem ausgewogenen Dünger.
Fazit: Dein eigener Maisacker über den Dächern
So, das war’s! Mit diesen einfachen Schritten und ein bisschen Geduld kannst du deinen eigenen kleinen Maisacker auf dem Dach anlegen. Es ist eine tolle Möglichkeit, frisches Gemüse anzubauen, die Umwelt zu schonen und deinen Dachgarten zu verschönern. Also, worauf wartest du noch? Leg los und pflanze deinen eigenen Mais! Ich bin sicher, du wirst es nicht bereuen! Viel Spaß beim Gärtnern!
Conclusion
So, there you have it! Transforming your rooftop into a thriving cornfield might sound like a whimsical dream, but with a little planning and effort, it’s entirely achievable. This DIY rooftop corn growing method isn’t just about fresh, homegrown corn; it’s about embracing sustainable practices, maximizing urban spaces, and connecting with nature in a truly unique way. Forget those bland, mass-produced ears from the grocery store – imagine sinking your teeth into sweet, juicy corn that you nurtured from seed to table, all while enjoying the panoramic views from your very own rooftop oasis.
But why is this DIY trick a must-try? Beyond the obvious benefit of delicious, organic corn, rooftop gardening offers a multitude of advantages. It reduces your carbon footprint by minimizing transportation needs, promotes biodiversity in urban environments, and provides a therapeutic escape from the concrete jungle. Plus, let’s be honest, there’s a certain undeniable coolness factor to growing corn on your roof! It’s a conversation starter, a source of pride, and a testament to your resourcefulness.
Don’t be afraid to experiment with variations to suit your specific needs and preferences. Consider companion planting to enhance growth and deter pests. Marigolds, beans, and squash are excellent companions for corn. You could also explore different corn varieties. While sweet corn is a popular choice, dent corn (used for cornmeal) or flint corn (used for hominy) might be better suited for your climate or culinary interests. Think about adding a small, self-watering irrigation system to simplify watering, especially during hot summer months. You can also try different container sizes and materials to see what works best for your rooftop conditions. Remember to always prioritize safety and structural integrity when adding weight to your roof.
This DIY rooftop corn growing project is more than just a recipe; it’s an invitation to innovate, connect with nature, and enjoy the fruits (or rather, the vegetables) of your labor.
We encourage you to take the plunge and give this DIY trick a try. Start small, learn as you go, and don’t be discouraged by initial setbacks. Gardening is a journey, and every mistake is a learning opportunity. Most importantly, share your experiences with us! We’d love to hear about your successes, challenges, and creative adaptations. Post photos of your rooftop cornfields, share your tips and tricks, and inspire others to join the urban gardening movement. Let’s transform our rooftops into vibrant, productive spaces, one corn stalk at a time.
Ready to Grow Your Own Rooftop Corn?
Don’t wait any longer! Gather your supplies, prepare your containers, and get ready to embark on this exciting adventure. The taste of homegrown corn, the satisfaction of sustainable living, and the sheer joy of transforming your rooftop into a green paradise await you. Happy growing!
Frequently Asked Questions (FAQ)
Q1: Is it really safe to grow corn on my rooftop? I’m worried about the weight.
A1: Safety is paramount! Before embarking on any rooftop gardening project, it’s crucial to assess the structural integrity of your roof. Consult with a qualified structural engineer or building professional to determine the weight-bearing capacity of your roof. They can advise you on the maximum weight per square foot that your roof can safely support.
When planning your rooftop corn garden, distribute the weight evenly across the roof surface. Use lightweight containers made from materials like plastic or fabric. Avoid using heavy clay pots or filling containers with dense soil. Consider using a soilless growing medium, such as coco coir or perlite, which is lighter than traditional soil. Also, factor in the weight of the mature corn plants, which can be substantial, especially after rainfall. Regularly inspect your roof for any signs of stress or damage. If you have any concerns, consult with a professional immediately.
Q2: What kind of soil should I use for rooftop corn growing?
A2: While you can use regular garden soil, it’s generally not recommended for rooftop containers. Garden soil tends to be heavy and compact, which can restrict root growth and drainage. A better option is to use a lightweight potting mix specifically formulated for container gardening. These mixes typically contain a blend of peat moss, perlite, vermiculite, and compost.
Alternatively, you can create your own soilless growing medium using a combination of coco coir, perlite, and vermicompost (worm castings). Coco coir is a sustainable alternative to peat moss and provides excellent water retention and drainage. Perlite improves aeration and drainage, while vermicompost adds essential nutrients and beneficial microbes to the soil.
Regardless of the growing medium you choose, make sure it’s well-draining and rich in organic matter. Corn is a heavy feeder, so you’ll need to supplement the soil with fertilizer throughout the growing season.
Q3: How much sunlight does rooftop corn need?
A3: Corn requires at least 6-8 hours of direct sunlight per day to thrive. Choose a location on your rooftop that receives ample sunlight throughout the day. If your rooftop is partially shaded, try to position your corn plants in the sunniest spot. You can also use reflective materials, such as white paint or aluminum foil, to bounce sunlight onto your plants.
If you live in a particularly sunny and hot climate, you may need to provide some afternoon shade to prevent your corn plants from overheating. You can use shade cloth or strategically position your containers to take advantage of natural shade from nearby structures.
Q4: How often should I water my rooftop corn?
A4: Watering frequency depends on several factors, including the weather, the type of soil you’re using, and the size of your containers. In general, you should water your corn plants whenever the top inch of soil feels dry to the touch. During hot, dry weather, you may need to water daily or even twice a day.
When watering, water deeply and thoroughly, ensuring that the water reaches the roots. Avoid watering the foliage, as this can promote fungal diseases. Consider using a soaker hose or drip irrigation system to deliver water directly to the roots.
Q5: What kind of fertilizer should I use for rooftop corn?
A5: Corn is a heavy feeder and requires a steady supply of nutrients to produce healthy stalks and plump ears. Use a balanced fertilizer with an NPK ratio of around 10-10-10 or 14-14-14. You can use either a slow-release granular fertilizer or a liquid fertilizer.
If using a granular fertilizer, apply it at planting time and then again every 4-6 weeks throughout the growing season. If using a liquid fertilizer, apply it every 2-3 weeks. Follow the instructions on the fertilizer label carefully.
In addition to chemical fertilizers, you can also supplement your corn plants with organic fertilizers, such as compost tea, fish emulsion, or seaweed extract. These organic fertilizers provide essential micronutrients and beneficial microbes to the soil.
Q6: How do I prevent pests and diseases on my rooftop corn?
A6: Rooftop gardens are generally less susceptible to pests and diseases than ground-level gardens, but it’s still important to take preventative measures. Inspect your corn plants regularly for signs of pests or diseases.
Common corn pests include corn earworms, aphids, and spider mites. You can control these pests with insecticidal soap, neem oil, or Bacillus thuringiensis (Bt). Diseases that can affect corn include corn smut, rust, and leaf blight. Prevent these diseases by providing good air circulation, avoiding overhead watering, and using disease-resistant corn varieties.
Companion planting can also help to deter pests and diseases. Marigolds, for example, repel nematodes and other soil pests. Basil repels aphids and other insects.
Q7: How do I know when my rooftop corn is ready to harvest?
A7: Corn is typically ready to harvest about 20-25 days after the silks emerge. The silks should be dry and brown, and the kernels should be plump and milky. To test for ripeness, peel back a portion of the husk and puncture a kernel with your fingernail. If the liquid that comes out is milky, the corn is ready to harvest. If the liquid is clear, the corn needs more time to ripen.
To harvest, grasp the ear firmly and twist it downward. The ear should snap off easily from the stalk. Enjoy your freshly harvested rooftop corn!


Leave a Comment