
Rooftop okra gardening might sound like a far-fetched dream, especially if you’re living in a bustling city, but trust me, it’s totally achievable! Imagine plucking fresh, vibrant okra right from your own urban oasis, ready to be transformed into a delicious gumbo or a crispy fried treat. Forget those bland, store-bought veggies – we’re talking about homegrown goodness bursting with flavor!
Okra, also known as “lady’s fingers,” has a rich history, tracing back to ancient Ethiopia and Egypt. It’s been a staple in cuisines across the globe for centuries, prized for its unique texture and nutritional benefits. But beyond its culinary appeal, growing your own okra connects you to a tradition of self-sufficiency and sustainable living.
Why should you consider this DIY project? Well, for starters, rooftop okra gardening is incredibly rewarding. It’s a fantastic way to maximize limited space, bringing a touch of nature to your urban environment. Plus, you’ll have complete control over what goes into your food, avoiding harmful pesticides and chemicals. More importantly, growing your own food is empowering! I’m going to show you some simple tricks and hacks that will help you cultivate a thriving okra patch right on your rooftop, even if you’re a complete beginner. Let’s get started and turn your rooftop into a productive and beautiful garden!
Rooftop Okra Gardening: A Beginner’s Guide to Growing Your Own!
Hey there, fellow gardening enthusiasts! Ever thought about turning your rooftop into a vibrant, edible oasis? Well, I’m here to tell you it’s totally doable, and growing okra on your rooftop is a fantastic place to start. Okra is a heat-loving veggie that thrives in sunny spots, making rooftops ideal. Plus, fresh, homegrown okra tastes amazing! Let’s dive into how you can make this happen.
Choosing the Right Location and Container
Before we get our hands dirty, let’s talk about location and containers. These are crucial for a successful rooftop okra garden.
* Sunlight is Key: Okra needs at least 6-8 hours of direct sunlight per day. Observe your rooftop throughout the day to identify the sunniest spot.
* Weight Considerations: Rooftops have weight limits. Check with a structural engineer or building management to ensure your rooftop can handle the weight of your containers, soil, and plants, especially when the soil is wet.
* Accessibility: Choose a location that’s easy to access for watering, weeding, and harvesting. You don’t want to be lugging heavy watering cans across the entire roof!
* Wind Protection: Rooftops can be windy. Consider using windbreaks like trellises or screens to protect your okra plants from strong gusts.
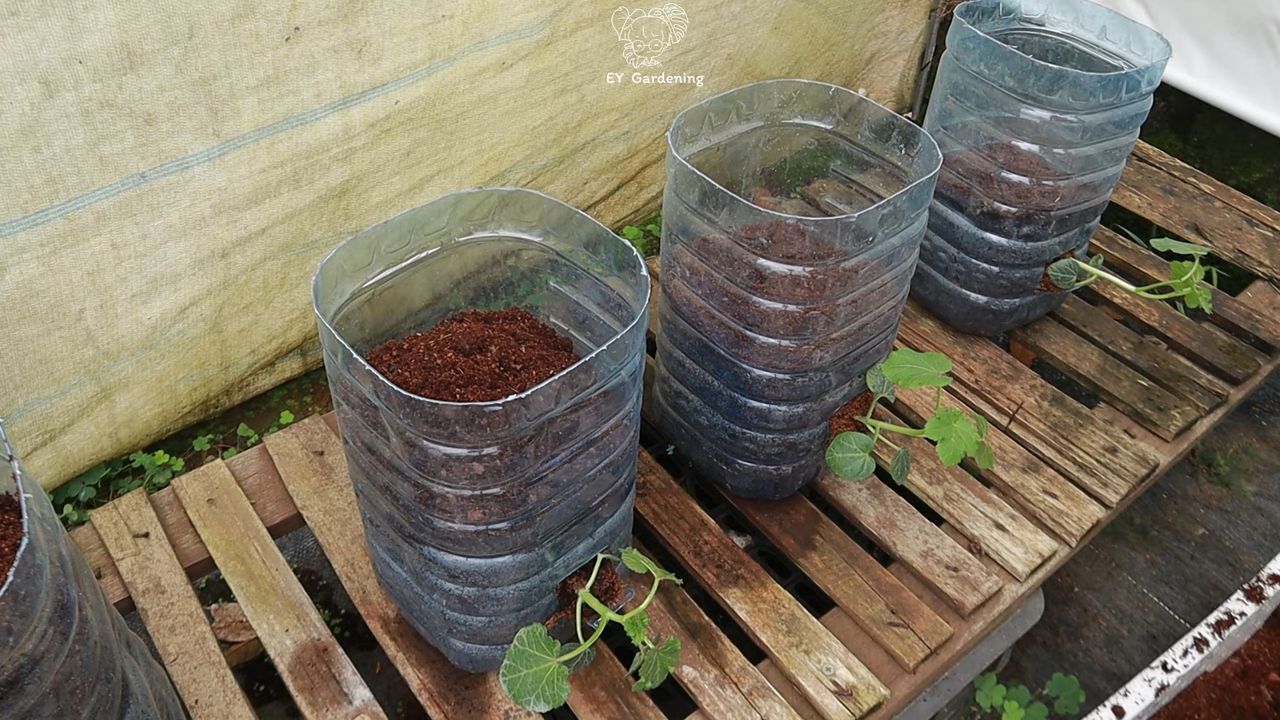
* Container Size Matters: Okra plants need plenty of room for their roots to grow. I recommend using containers that are at least 12-18 inches in diameter and 12 inches deep. Larger is always better!
* Drainage is Essential: Make sure your containers have drainage holes to prevent waterlogging. Waterlogged roots are a recipe for disaster.
* Container Material: You can use plastic, terracotta, or even fabric grow bags. Just make sure the material is durable and weather-resistant. I personally love using fabric grow bags because they allow for excellent drainage and aeration.
Preparing the Soil
Okra needs well-draining, fertile soil to thrive. Here’s how I prepare my soil mix:
* Start with a Good Base: Use a high-quality potting mix as your base. Avoid using garden soil, as it can be too heavy and compact for containers.
* Add Compost: Mix in plenty of compost to provide nutrients and improve drainage. Compost is like a superfood for your plants!
* Incorporate Perlite or Vermiculite: These materials help improve drainage and aeration. I usually add about 20% perlite or vermiculite to my soil mix.
* Consider Adding Slow-Release Fertilizer: This will provide your okra plants with a steady supply of nutrients throughout the growing season. Follow the instructions on the fertilizer package.
* Test the pH: Okra prefers a slightly acidic soil pH of around 6.0-6.8. You can test your soil pH using a soil testing kit. If the pH is too high, you can lower it by adding sulfur.
Planting Your Okra
Now for the fun part – planting your okra!
1. Start Seeds Indoors (Optional): You can start okra seeds indoors 4-6 weeks before the last expected frost. This will give you a head start on the growing season. Sow the seeds about ½ inch deep in seed-starting trays or small pots. Keep the soil moist and warm (around 70-80°F).
2. Direct Sow Seeds: If you live in a warm climate with a long growing season, you can direct sow okra seeds directly into your containers. Wait until the soil has warmed up to at least 65°F.
3. Soak the Seeds: Before planting, soak the okra seeds in warm water for 12-24 hours. This will help soften the seed coat and improve germination.
4. Planting Depth: Plant the seeds about ½ inch deep.
5. Spacing: If you’re planting multiple okra plants in the same container, space them at least 12-18 inches apart.
6. Water Gently: Water the soil gently after planting to avoid disturbing the seeds.
7. Provide Support: As your okra plants grow, they may need support. You can use stakes or trellises to keep them upright.
Caring for Your Okra Plants
Once your okra plants are established, it’s important to provide them with proper care.
* Watering: Okra needs consistent watering, especially during hot, dry weather. Water deeply whenever the top inch of soil feels dry to the touch. Avoid overwatering, as this can lead to root rot.
* Fertilizing: Feed your okra plants every 2-3 weeks with a balanced fertilizer. You can use a liquid fertilizer or a slow-release fertilizer.
* Weeding: Keep your containers free of weeds. Weeds compete with your okra plants for nutrients and water.
* Mulching: Apply a layer of mulch around your okra plants to help retain moisture, suppress weeds, and regulate soil temperature. I like to use straw or wood chips as mulch.
* Pest Control: Okra can be susceptible to pests like aphids, flea beetles, and stink bugs. Inspect your plants regularly for signs of pests. You can control pests by handpicking them off the plants, using insecticidal soap, or introducing beneficial insects like ladybugs.
* Pruning: Prune off any yellowing or dead leaves to improve air circulation and prevent disease.
Harvesting Your Okra
Harvesting okra at the right time is crucial for getting tender, delicious pods.
* Harvest Time: Okra pods are typically ready to harvest 50-65 days after planting.
* Pod Size: Harvest the pods when they are 2-4 inches long. If you wait too long, the pods will become tough and fibrous.
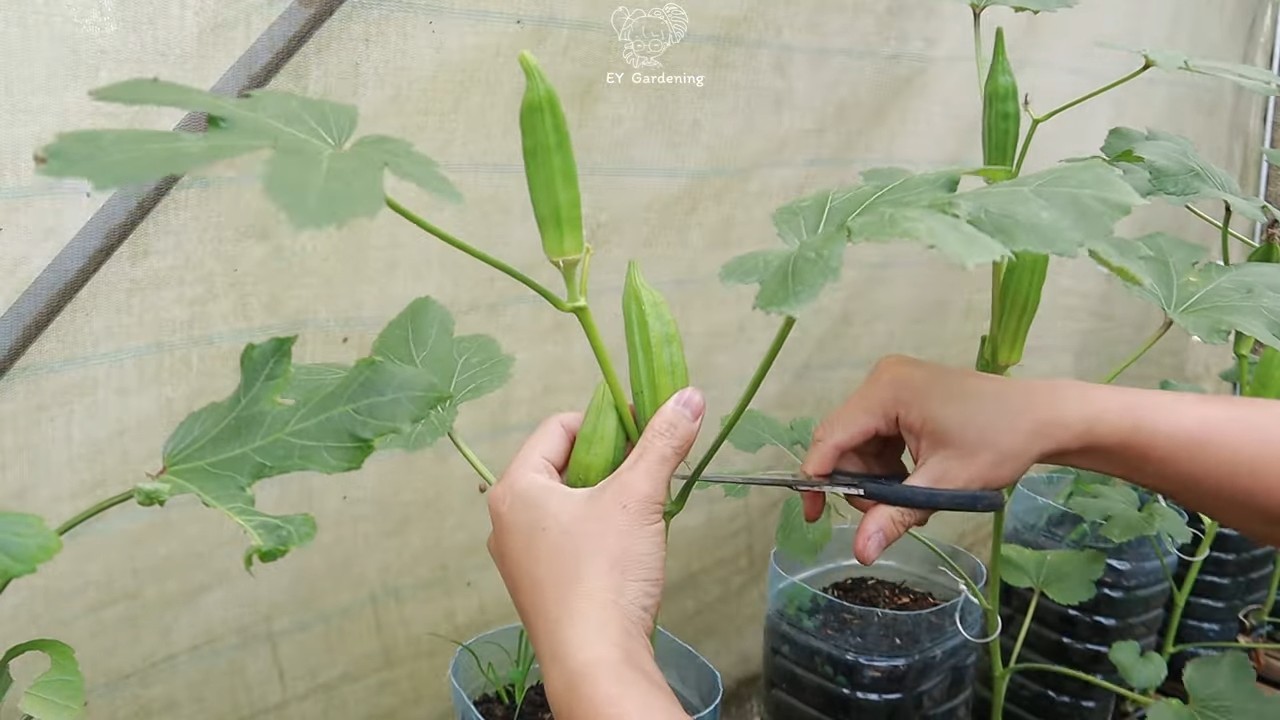
* Harvesting Technique: Use a sharp knife or pruning shears to cut the pods from the plant. Be careful not to damage the plant.
* Harvest Frequently: Harvest okra pods every 1-2 days to encourage continued production. The more you harvest, the more the plant will produce!
* Wear Gloves: Okra plants have tiny spines that can irritate the skin. Wear gloves when harvesting to protect your hands.
Dealing with Common Problems
Even with the best care, you may encounter some problems while growing okra. Here are a few common issues and how to address them:
* Yellowing Leaves: Yellowing leaves can be caused by a variety of factors, including nutrient deficiencies, overwatering, and pests. Check the soil pH, fertilize your plants, and inspect them for pests.
* Blossom End Rot: Blossom end rot is a condition that causes the ends of the okra pods to rot. It’s usually caused by a calcium deficiency. To prevent blossom end rot, make sure your soil is well-drained and add calcium to the soil.
* Stunted Growth: Stunted growth can be caused by a variety of factors, including poor soil, lack of sunlight, and pests. Make sure your okra plants are getting enough sunlight, water, and nutrients.
* Pest Infestations: As mentioned earlier, okra can be susceptible to pests. Regularly inspect your plants for signs of pests and take action to control them.
Choosing Okra Varieties for Rooftop Gardening
Not all okra varieties are created equal, especially when it comes to container gardening. Here are a few of my favorite varieties that do well in containers:
* ‘Clemson Spineless’: This is a classic okra variety that produces dark green, spineless pods. It’s a reliable and productive choice.
* ‘Burgundy’: This variety produces beautiful red pods that add a pop of color to your garden. The pods are tender and flavorful.
* ‘Dwarf Green Long Pod’: As the name suggests, this is a compact variety that’s perfect for containers. It produces long, green pods.
* ‘Emerald’: This variety produces smooth, dark green pods that are known for their excellent flavor.
Extending the Growing Season
If you live in a climate with a short growing season, you can extend the season by using a few simple techniques:
* Start Seeds Indoors: As mentioned earlier, starting seeds indoors will give you a head start on the growing season.
* Use Row Covers: Row covers can protect your okra plants from frost and cold temperatures.
* Plant in Dark-Colored Containers: Dark-colored containers will absorb more heat from the sun, which can help warm the soil and extend the growing season.
* Move Containers Indoors: If you have a sudden cold snap, you can move your containers indoors to protect your okra plants.
Enjoying Your Harvest
Now that you’ve successfully grown okra on your rooftop, it’s time to enjoy the fruits (or rather, vegetables) of your labor! Okra can be used in a variety of dishes, from soups and
Conclusion
So, there you have it! Transforming your rooftop into a thriving okra patch is not only achievable, but it’s also incredibly rewarding. We’ve walked you through the essential steps, from selecting the right containers and soil to nurturing your plants and harvesting your bounty. But why should you embark on this rooftop okra adventure?
Firstly, growing your own okra offers unparalleled freshness and flavor. Forget the store-bought varieties that have traveled miles and lost their vibrancy. With rooftop okra gardening, you’ll have access to plump, tender pods just moments after they’re picked, bursting with that distinctive, slightly grassy taste that makes okra so unique. Imagine the culinary possibilities: crispy fried okra, hearty gumbo, flavorful stews, or even pickled okra for a tangy treat. The possibilities are endless!
Secondly, rooftop okra gardening is a fantastic way to connect with nature, even in the heart of the city. Tending to your plants provides a sense of calm and accomplishment, allowing you to escape the stresses of daily life and immerse yourself in the simple pleasures of nurturing something from seed to harvest. Plus, you’ll be contributing to a greener environment by reducing your carbon footprint and supporting local biodiversity.
Thirdly, and perhaps most importantly, rooftop okra gardening is a sustainable and cost-effective way to supplement your diet. Okra is a highly nutritious vegetable, packed with vitamins, minerals, and fiber. By growing your own, you’ll not only save money on groceries but also ensure that you’re consuming fresh, healthy produce free from harmful pesticides and chemicals.
But don’t just take our word for it! We encourage you to give rooftop okra gardening a try. Experiment with different varieties of okra to find your favorites. Consider adding companion plants like basil, marigolds, or peppers to enhance the flavor and health of your okra plants. Get creative with your container designs and create a rooftop garden that reflects your personal style.
And remember, gardening is a journey, not a destination. There will be challenges along the way, but don’t be discouraged. Learn from your mistakes, adapt to your environment, and most importantly, have fun!
We’re confident that you’ll be amazed by the results. So, grab your seeds, gather your supplies, and get ready to transform your rooftop into an okra oasis. And once you’ve harvested your first crop, be sure to share your experiences with us. We’d love to hear your stories, see your photos, and learn from your successes. Happy gardening!
Frequently Asked Questions (FAQ)
What are the best okra varieties for rooftop gardening?
Choosing the right okra variety is crucial for success in a rooftop garden. Compact varieties that don’t grow too tall are generally the best choice. Some excellent options include:
* **’Dwarf Green Long Pod’:** As the name suggests, this variety stays relatively small, making it ideal for containers. It produces long, slender pods with a mild flavor.
* **’Clemson Spineless’:** This is a popular and reliable variety that produces high yields of spineless pods. It’s relatively compact and well-suited for container gardening.
* **’Burgundy’:** This variety is not only productive but also adds a touch of beauty to your rooftop garden with its striking red pods. It’s a good choice for those who want both flavor and visual appeal.
* **’Baby Bubba’:** This is a very compact variety, perfect for smaller containers. It produces small, tender pods that are great for pickling or stir-frying.
When selecting your okra variety, consider your local climate and growing conditions. Some varieties are more heat-tolerant than others, while others may be better suited for cooler climates.
How much sunlight does okra need?
Okra thrives in full sun, requiring at least 6-8 hours of direct sunlight per day. Without sufficient sunlight, your okra plants will become leggy, produce fewer flowers, and ultimately yield fewer pods.
If your rooftop doesn’t receive enough direct sunlight, you may need to supplement with artificial lighting. Grow lights can provide the necessary light intensity to support healthy okra growth.
What type of soil is best for rooftop okra gardening?
Okra prefers well-draining, fertile soil with a slightly acidic to neutral pH (6.0-7.0). A good potting mix specifically designed for vegetables is an excellent choice for rooftop okra gardening.
Avoid using garden soil in containers, as it tends to compact and doesn’t drain well. You can also amend your potting mix with compost or other organic matter to improve its fertility and drainage.
How often should I water my okra plants?
Okra plants need consistent moisture, especially during hot weather. Water deeply whenever the top inch of soil feels dry to the touch. Avoid overwatering, as this can lead to root rot.
The frequency of watering will depend on several factors, including the weather, the size of your containers, and the type of soil you’re using. Check the soil moisture regularly and adjust your watering schedule accordingly.
How do I fertilize my okra plants?
Okra plants are heavy feeders and benefit from regular fertilization. Use a balanced fertilizer with equal amounts of nitrogen, phosphorus, and potassium. You can also supplement with organic fertilizers like compost tea or fish emulsion.
Fertilize your okra plants every 2-3 weeks during the growing season. Follow the instructions on the fertilizer label carefully to avoid over-fertilizing.
How do I deal with pests and diseases?
Okra plants can be susceptible to various pests and diseases, including aphids, spider mites, and fungal infections. Regularly inspect your plants for signs of infestation or disease.
If you notice any problems, take action immediately. You can use organic pest control methods like insecticidal soap or neem oil to control pests. For fungal diseases, ensure good air circulation and avoid overwatering.
When is the best time to harvest okra?
Okra pods are best harvested when they are young and tender, typically 2-4 inches long. Overripe pods become tough and fibrous. Harvest your okra pods regularly, every 1-2 days, to encourage continued production.
Use a sharp knife or scissors to cut the pods from the plant. Wear gloves when harvesting okra, as the pods can be prickly.
Can I grow okra in a small container?
While okra plants can grow quite large, you can successfully grow them in containers as small as 5 gallons, especially if you choose a dwarf variety. However, larger containers (10 gallons or more) are generally recommended for optimal growth and yield.
Make sure your containers have drainage holes to prevent waterlogging.
What are some companion plants for okra?
Companion planting can benefit okra by attracting beneficial insects, repelling pests, and improving soil health. Some good companion plants for okra include:
* **Basil:** Repels aphids and other pests.
* **Marigolds:** Repel nematodes and other soil pests.
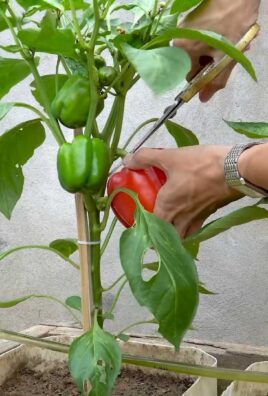
* **Peppers:** Attract beneficial insects.
* **Lettuce:** Provides ground cover and helps retain moisture.
* **Radishes:** Help break up the soil and improve drainage.
How can I prevent my okra plants from getting too tall?
While some okra varieties naturally grow tall, you can manage their height by pruning them. Pinch off the top of the plant when it reaches the desired height to encourage branching and bushier growth.
You can also choose dwarf varieties that are naturally more compact.

Leave a Comment