
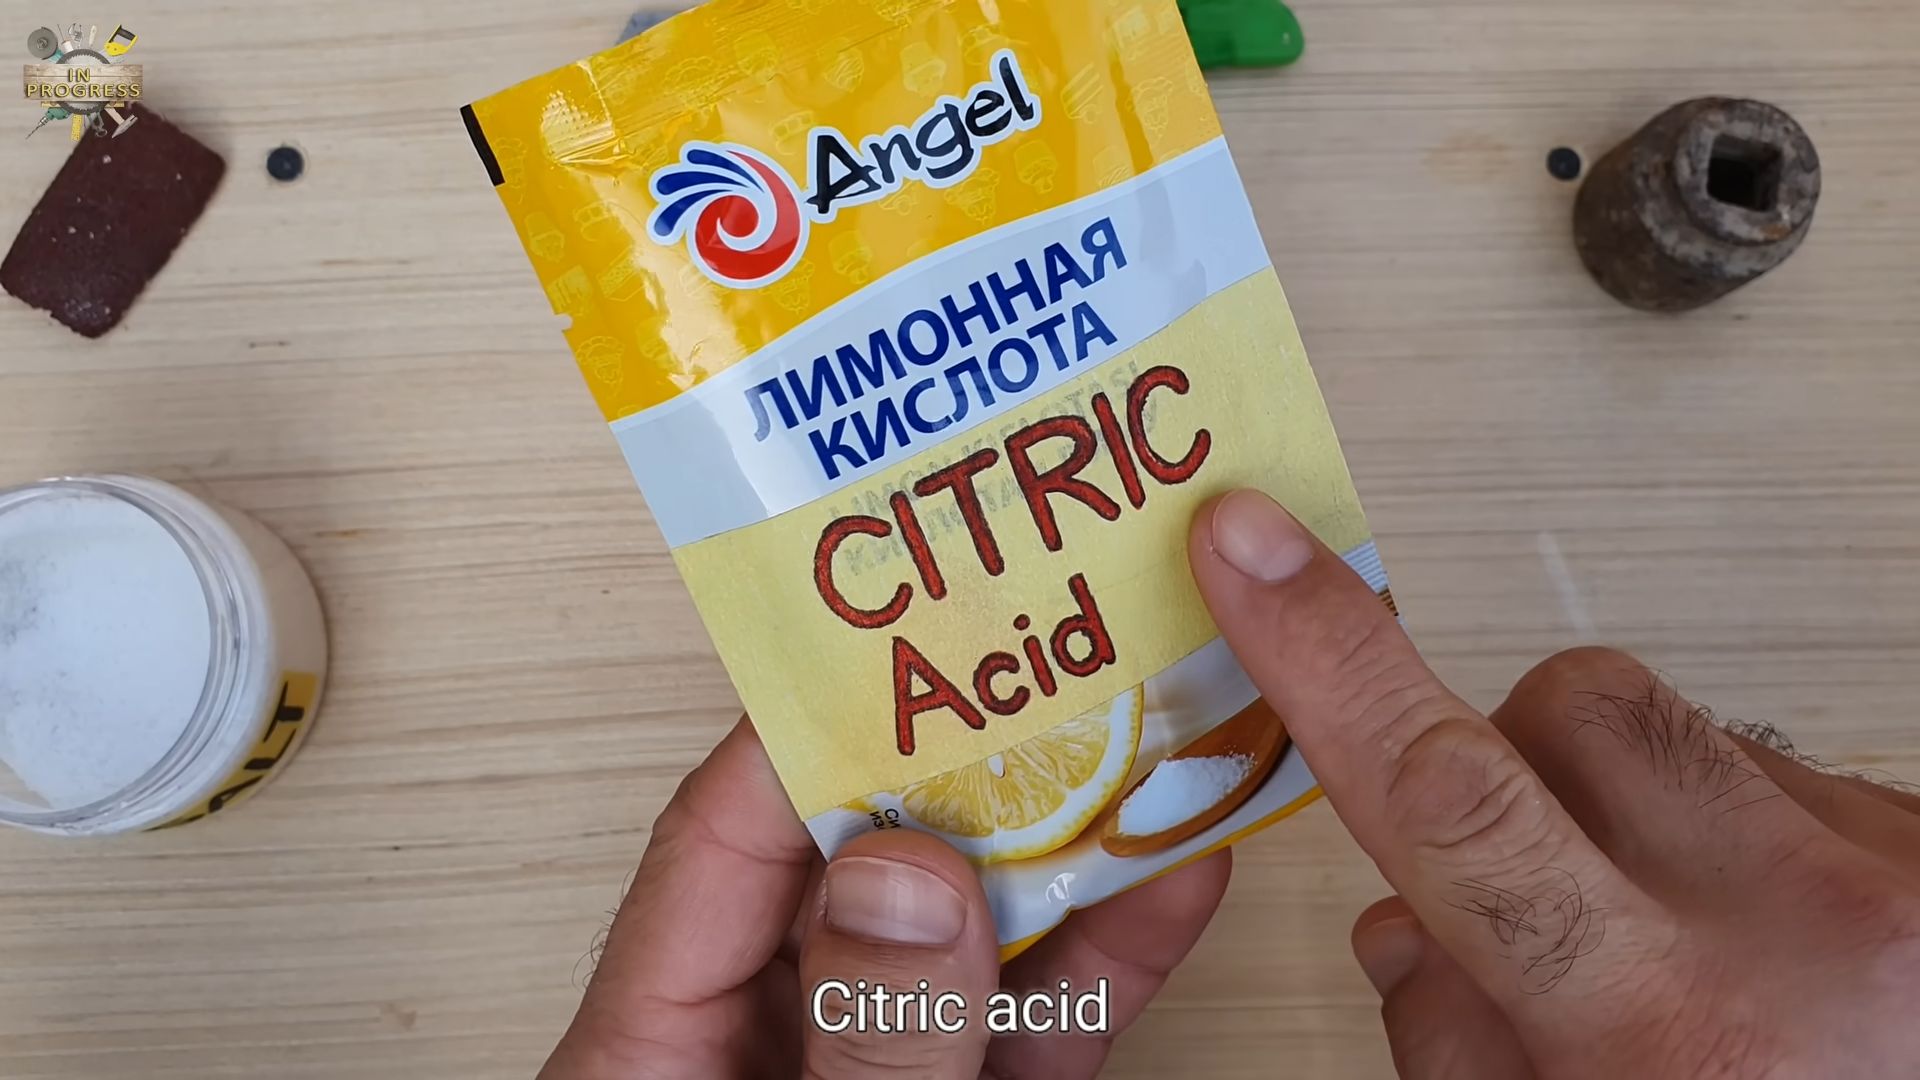
Salt and hydrogen peroxide mixture: Sounds like a science experiment, right? Well, in a way, it is! But trust me, this isn’t your average baking soda volcano. We’re diving into the world of home gardening, and I’m about to share a simple, yet incredibly effective, DIY trick that can seriously boost your plant’s health.
For centuries, gardeners have been experimenting with natural remedies to combat common plant problems. While the exact origins of using salt and hydrogen peroxide in this way are a bit murky, the individual components have long been recognized for their beneficial properties. Salt, in small doses, can act as a natural disinfectant and nutrient booster, while hydrogen peroxide is known for its oxygenating and antifungal capabilities.
Why do you need this DIY trick? Because let’s face it, gardening can be tough! From pesky fungal infections to nutrient deficiencies, our beloved plants often face an uphill battle. Instead of reaching for harsh chemicals, this salt and hydrogen peroxide mixture offers a gentle, eco-friendly solution. I’m going to show you exactly how to whip up this powerful concoction and use it to keep your garden thriving. Get ready to unlock a simple secret weapon for healthier, happier plants!
DIY Teeth Whitening with Salt and Hydrogen Peroxide
Hey everyone! Are you tired of expensive teeth whitening treatments that leave your wallet feeling a little too light? I know I was! That’s why I decided to explore a DIY method using ingredients I already had in my pantry: salt and hydrogen peroxide. Now, before we dive in, let me preface this by saying that I’m not a dentist, and this isn’t a substitute for professional dental care. Always consult with your dentist before trying any at-home teeth whitening remedies, especially if you have sensitive teeth or any existing dental issues.
This method is a gentle abrasive and oxidizing agent that can help remove surface stains. It’s not going to give you that Hollywood-white smile overnight, but with consistent, careful use, you can definitely see a noticeable difference.
Here’s what you’ll need:
* 3% Hydrogen Peroxide (the kind you find in the first aid aisle)
* Fine Sea Salt (table salt can be too abrasive)
* Baking Soda (optional, for extra whitening power)
* A Small Bowl or Dish
* A Soft-Bristled Toothbrush
* Water
* A Mirror (for obvious reasons!)
Mixing the Whitening Paste
This is where the magic happens! Getting the right consistency is key to an effective and safe whitening experience.
1. Gather Your Ingredients: Make sure you have everything laid out and ready to go. This will make the process smoother and prevent you from scrambling around with peroxide-covered hands.
2. Start with the Salt: In your small bowl, add about 1 teaspoon of fine sea salt. Remember, fine salt is crucial to avoid scratching your enamel. I learned that the hard way once!
3. Add the Hydrogen Peroxide: Slowly pour in the 3% hydrogen peroxide, a little at a time, while mixing with a spoon or your toothbrush. You’re aiming for a paste-like consistency, similar to toothpaste. I usually use about 2-3 teaspoons of hydrogen peroxide.
4. Optional Baking Soda Boost: If you want a little extra whitening power, you can add a pinch (about 1/4 teaspoon) of baking soda. Baking soda is a mild abrasive that can help remove surface stains. Be careful not to add too much, as it can be harsh on your enamel.
5. Mix Thoroughly: Make sure all the ingredients are well combined into a smooth paste. There shouldn’t be any clumps of salt or baking soda.
Brushing with the Whitening Paste
Now comes the actual whitening process. Remember to be gentle and patient!
1. Wet Your Toothbrush: Lightly wet your soft-bristled toothbrush with water. This will help the paste adhere to the bristles.
2. Apply the Paste: Dip your toothbrush into the salt and hydrogen peroxide paste, coating the bristles evenly. Don’t overload the brush; a small amount goes a long way.
3. Brush Gently: Using a gentle, circular motion, brush your teeth for about 2 minutes. Focus on areas with the most staining, but be sure to cover all surfaces of your teeth. Avoid brushing too hard, as this can damage your enamel and gums. I like to break my mouth into quadrants and spend about 30 seconds on each.
4. Pay Attention to Your Gums: Be extra careful around your gum line. The hydrogen peroxide can irritate your gums if you’re not gentle.
5. Rinse Thoroughly: After brushing, rinse your mouth thoroughly with water for at least 30 seconds. Make sure to remove all traces of the salt and hydrogen peroxide paste. I usually rinse a couple of times just to be sure.
Post-Whitening Care
Taking care of your teeth after whitening is just as important as the whitening process itself.
1. Wait Before Eating or Drinking: Avoid eating or drinking anything (except water) for at least 30 minutes after whitening. This will give your enamel time to re-mineralize.
2. Use a Fluoride Rinse: After rinsing with water, use a fluoride mouthwash to help strengthen your enamel. Fluoride helps protect your teeth from cavities and sensitivity.
3. Avoid Staining Foods and Drinks: For the next few hours, try to avoid foods and drinks that are known to stain teeth, such as coffee, tea, red wine, and berries.
4. Hydrate: Drink plenty of water to help keep your mouth clean and hydrated.
Important Considerations and Precautions
This DIY method is generally safe when used correctly, but it’s crucial to be aware of the potential risks and take necessary precautions.
* Frequency: Don’t use this method too often. I recommend using it no more than once or twice a week. Overuse can lead to enamel erosion and tooth sensitivity.
* Sensitivity: If you experience any tooth sensitivity, stop using the paste immediately. You may need to reduce the frequency of use or discontinue it altogether.
* Gum Irritation: If you notice any gum irritation, such as redness or swelling, stop using the paste and consult with your dentist.
* Swallowing: Avoid swallowing the paste. Hydrogen peroxide can be harmful if ingested in large quantities.
* Allergies: If you have any known allergies to salt or hydrogen peroxide, do not use this method.
* Dental Work: If you have any dental work, such as fillings, crowns, or veneers, consult with your dentist before using this method. The paste may not be suitable for all types of dental work.
* Children: This method is not recommended for children.
Troubleshooting
Sometimes, things don’t go exactly as planned. Here are some common issues you might encounter and how to address them:
* Paste is Too Runny: If your paste is too runny, add a little more salt or baking soda to thicken it up.
* Paste is Too Thick: If your paste is too thick, add a little more hydrogen peroxide to thin it out.
* Tooth Sensitivity: If you experience tooth sensitivity, try using a toothpaste designed for sensitive teeth. You can also reduce the frequency of use or discontinue the method altogether.
* Gum Irritation: If you experience gum irritation, try using a softer toothbrush and being more gentle when brushing. You can also reduce the frequency of use or discontinue the method altogether.
* No Results: If you don’t see any noticeable results after a few weeks, you may need to try a different whitening method. This DIY method is not a substitute for professional teeth whitening treatments.
Why This Works (The Science Behind It)
Okay, let’s get a little nerdy for a second and talk about why this combination actually works.
* Hydrogen Peroxide: This is the star of the show! Hydrogen peroxide is a mild oxidizing agent. When it comes into contact with stains on your teeth, it breaks them down into smaller, less visible molecules. Think of it like bleach for your teeth, but much, much gentler.
* Salt: Salt acts as a mild abrasive. It helps to scrub away surface stains and debris from your teeth. The fine texture of sea salt is important because it minimizes the risk of scratching your enamel.
* Baking Soda (Optional): Baking soda is another mild abrasive that can help remove surface stains. It also has a slightly alkaline pH, which can help neutralize acids in your mouth and prevent tooth decay.
The combination of these ingredients creates a synergistic effect, where they work together to whiten your teeth more effectively than they would on their own. The hydrogen peroxide breaks down the stains, while the salt and baking soda help to scrub them away.
My Personal Experience
I’ve been using this DIY teeth whitening method for a few months now, and I’ve definitely noticed a difference. My teeth are noticeably brighter, and I feel more confident about my smile. I started by using it twice a week, but I’ve since reduced it to once a week to avoid any sensitivity.
I’ve also experimented with adding a pinch of baking soda, but I found that it made my teeth a little too sensitive, so I stopped using it. Everyone’s teeth are different, so it’s important to find what works best for you.
I also make sure to use a soft-bristled toothbrush and brush very gently. I’ve learned that being patient and consistent is key to seeing results.
Final Thoughts
DIY teeth whitening with salt and hydrogen peroxide can be a safe and effective way to brighten your smile at home. However, it’s important to use this method carefully and responsibly. Always consult with your dentist before trying any at-home teeth whitening remedies, and be sure to follow the precautions outlined in this article.
Remember, this is not a substitute for professional dental care. Regular checkups and cleanings are essential for maintaining good oral health.
I hope this article has been helpful! Good luck with your teeth whitening journe
Hey everyone! Are you tired of expensive teeth whitening treatments that leave your wallet feeling a little too light? I know I was! That’s why I decided to explore a DIY method using ingredients I already had in my pantry: salt and hydrogen peroxide. Now, before we dive in, let me preface this by saying that I’m not a dentist, and this isn’t a substitute for professional dental care. Always consult with your dentist before trying any at-home teeth whitening remedies, especially if you have sensitive teeth or any existing dental issues.
This method is a gentle abrasive and oxidizing agent that can help remove surface stains. It’s not going to give you that Hollywood-white smile overnight, but with consistent, careful use, you can definitely see a noticeable difference.
Here’s what you’ll need:
* 3% Hydrogen Peroxide (the kind you find in the first aid aisle)
* Fine Sea Salt (table salt can be too abrasive)
* Baking Soda (optional, for extra whitening power)
* A Small Bowl or Dish
* A Soft-Bristled Toothbrush
* Water
* A Mirror (for obvious reasons!)
Mixing the Whitening Paste
This is where the magic happens! Getting the right consistency is key to an effective and safe whitening experience.
1. Gather Your Ingredients: Make sure you have everything laid out and ready to go. This will make the process smoother and prevent you from scrambling around with peroxide-covered hands.
2. Start with the Salt: In your small bowl, add about 1 teaspoon of fine sea salt. Remember, fine salt is crucial to avoid scratching your enamel. I learned that the hard way once!
3. Add the Hydrogen Peroxide: Slowly pour in the 3% hydrogen peroxide, a little at a time, while mixing with a spoon or your toothbrush. You’re aiming for a paste-like consistency, similar to toothpaste. I usually use about 2-3 teaspoons of hydrogen peroxide.
4. Optional Baking Soda Boost: If you want a little extra whitening power, you can add a pinch (about 1/4 teaspoon) of baking soda. Baking soda is a mild abrasive that can help remove surface stains. Be careful not to add too much, as it can be harsh on your enamel.
5. Mix Thoroughly: Make sure all the ingredients are well combined into a smooth paste. There shouldn’t be any clumps of salt or baking soda.
Brushing with the Whitening Paste
Now comes the actual whitening process. Remember to be gentle and patient!
1. Wet Your Toothbrush: Lightly wet your soft-bristled toothbrush with water. This will help the paste adhere to the bristles.
2. Apply the Paste: Dip your toothbrush into the salt and hydrogen peroxide paste, coating the bristles evenly. Don’t overload the brush; a small amount goes a long way.
3. Brush Gently: Using a gentle, circular motion, brush your teeth for about 2 minutes. Focus on areas with the most staining, but be sure to cover all surfaces of your teeth. Avoid brushing too hard, as this can damage your enamel and gums. I like to break my mouth into quadrants and spend about 30 seconds on each.
4. Pay Attention to Your Gums: Be extra careful around your gum line. The hydrogen peroxide can irritate your gums if you’re not gentle.
5. Rinse Thoroughly: After brushing, rinse your mouth thoroughly with water for at least 30 seconds. Make sure to remove all traces of the salt and hydrogen peroxide paste. I usually rinse a couple of times just to be sure.
Post-Whitening Care
Taking care of your teeth after whitening is just as important as the whitening process itself.
1. Wait Before Eating or Drinking: Avoid eating or drinking anything (except water) for at least 30 minutes after whitening. This will give your enamel time to re-mineralize.
2. Use a Fluoride Rinse: After rinsing with water, use a fluoride mouthwash to help strengthen your enamel. Fluoride helps protect your teeth from cavities and sensitivity.
3. Avoid Staining Foods and Drinks: For the next few hours, try to avoid foods and drinks that are known to stain teeth, such as coffee, tea, red wine, and berries.
4. Hydrate: Drink plenty of water to help keep your mouth clean and hydrated.
Important Considerations and Precautions
This DIY method is generally safe when used correctly, but it’s crucial to be aware of the potential risks and take necessary precautions.
* Frequency: Don’t use this method too often. I recommend using it no more than once or twice a week. Overuse can lead to enamel erosion and tooth sensitivity.
* Sensitivity: If you experience any tooth sensitivity, stop using the paste immediately. You may need to reduce the frequency of use or discontinue it altogether.
* Gum Irritation: If you notice any gum irritation, such as redness or swelling, stop using the paste and consult with your dentist.
* Swallowing: Avoid swallowing the paste. Hydrogen peroxide can be harmful if ingested in large quantities.
* Allergies: If you have any known allergies to salt or hydrogen peroxide, do not use this method.
* Dental Work: If you have any dental work, such as fillings, crowns, or veneers, consult with your dentist before using this method. The paste may not be suitable for all types of dental work.
* Children: This method is not recommended for children.
Troubleshooting
Sometimes, things don’t go exactly as planned. Here are some common issues you might encounter and how to address them:
* Paste is Too Runny: If your paste is too runny, add a little more salt or baking soda to thicken it up.
* Paste is Too Thick: If your paste is too thick, add a little more hydrogen peroxide to thin it out.
* Tooth Sensitivity: If you experience tooth sensitivity, try using a toothpaste designed for sensitive teeth. You can also reduce the frequency of use or discontinue the method altogether.
* Gum Irritation: If you experience gum irritation, try using a softer toothbrush and being more gentle when brushing. You can also reduce the frequency of use or discontinue the method altogether.
* No Results: If you don’t see any noticeable results after a few weeks, you may need to try a different whitening method. This DIY method is not a substitute for professional teeth whitening treatments.
Why This Works (The Science Behind It)
Okay, let’s get a little nerdy for a second and talk about why this combination actually works.
* Hydrogen Peroxide: This is the star of the show! Hydrogen peroxide is a mild oxidizing agent. When it comes into contact with stains on your teeth, it breaks them down into smaller, less visible molecules. Think of it like bleach for your teeth, but much, much gentler.
* Salt: Salt acts as a mild abrasive. It helps to scrub away surface stains and debris from your teeth. The fine texture of sea salt is important because it minimizes the risk of scratching your enamel.
* Baking Soda (Optional): Baking soda is another mild abrasive that can help remove surface stains. It also has a slightly alkaline pH, which can help neutralize acids in your mouth and prevent tooth decay.
The combination of these ingredients creates a synergistic effect, where they work together to whiten your teeth more effectively than they would on their own. The hydrogen peroxide breaks down the stains, while the salt and baking soda help to scrub them away.
My Personal Experience
I’ve been using this DIY teeth whitening method for a few months now, and I’ve definitely noticed a difference. My teeth are noticeably brighter, and I feel more confident about my smile. I started by using it twice a week, but I’ve since reduced it to once a week to avoid any sensitivity.
I’ve also experimented with adding a pinch of baking soda, but I found that it made my teeth a little too sensitive, so I stopped using it. Everyone’s teeth are different, so it’s important to find what works best for you.
I also make sure to use a soft-bristled toothbrush and brush very gently. I’ve learned that being patient and consistent is key to seeing results.
Final Thoughts
DIY teeth whitening with salt and hydrogen peroxide can be a safe and effective way to brighten your smile at home. However, it’s important to use this method carefully and responsibly. Always consult with your dentist before trying any at-home teeth whitening remedies, and be sure to follow the precautions outlined in this article.
Remember, this is not a substitute for professional dental care. Regular checkups and cleanings are essential for maintaining good oral health.
I hope this article has been helpful! Good luck with your teeth whitening journey!
Conclusion
So, there you have it! This simple yet surprisingly effective DIY trick using a salt and hydrogen peroxide mixture is a game-changer for anyone looking for a natural and affordable way to tackle various household cleaning challenges. Forget about harsh chemicals and expensive store-bought solutions. This powerful combination harnesses the abrasive power of salt and the oxidizing properties of hydrogen peroxide to deliver impressive results.
Why is this a must-try? Because it’s versatile, cost-effective, and environmentally friendly. You’re likely to already have these ingredients in your pantry and medicine cabinet, saving you a trip to the store and reducing your reliance on products filled with potentially harmful chemicals. From scrubbing stubborn stains in your kitchen and bathroom to brightening grout and even tackling minor rust spots, the applications are endless.
But the benefits don’t stop there. This DIY solution is also incredibly easy to customize to suit your specific needs. For a more potent cleaning action, consider using a higher concentration of hydrogen peroxide (always test on an inconspicuous area first!). If you’re dealing with a particularly tough stain, let the mixture sit for a longer period before scrubbing. You can even add a few drops of your favorite essential oil, like lemon or tea tree, for a fresh and clean scent.
Variations and Suggestions:
* For Grout Cleaning: Create a paste and apply it directly to the grout lines. Let it sit for 10-15 minutes before scrubbing with a stiff brush. Rinse thoroughly with water.
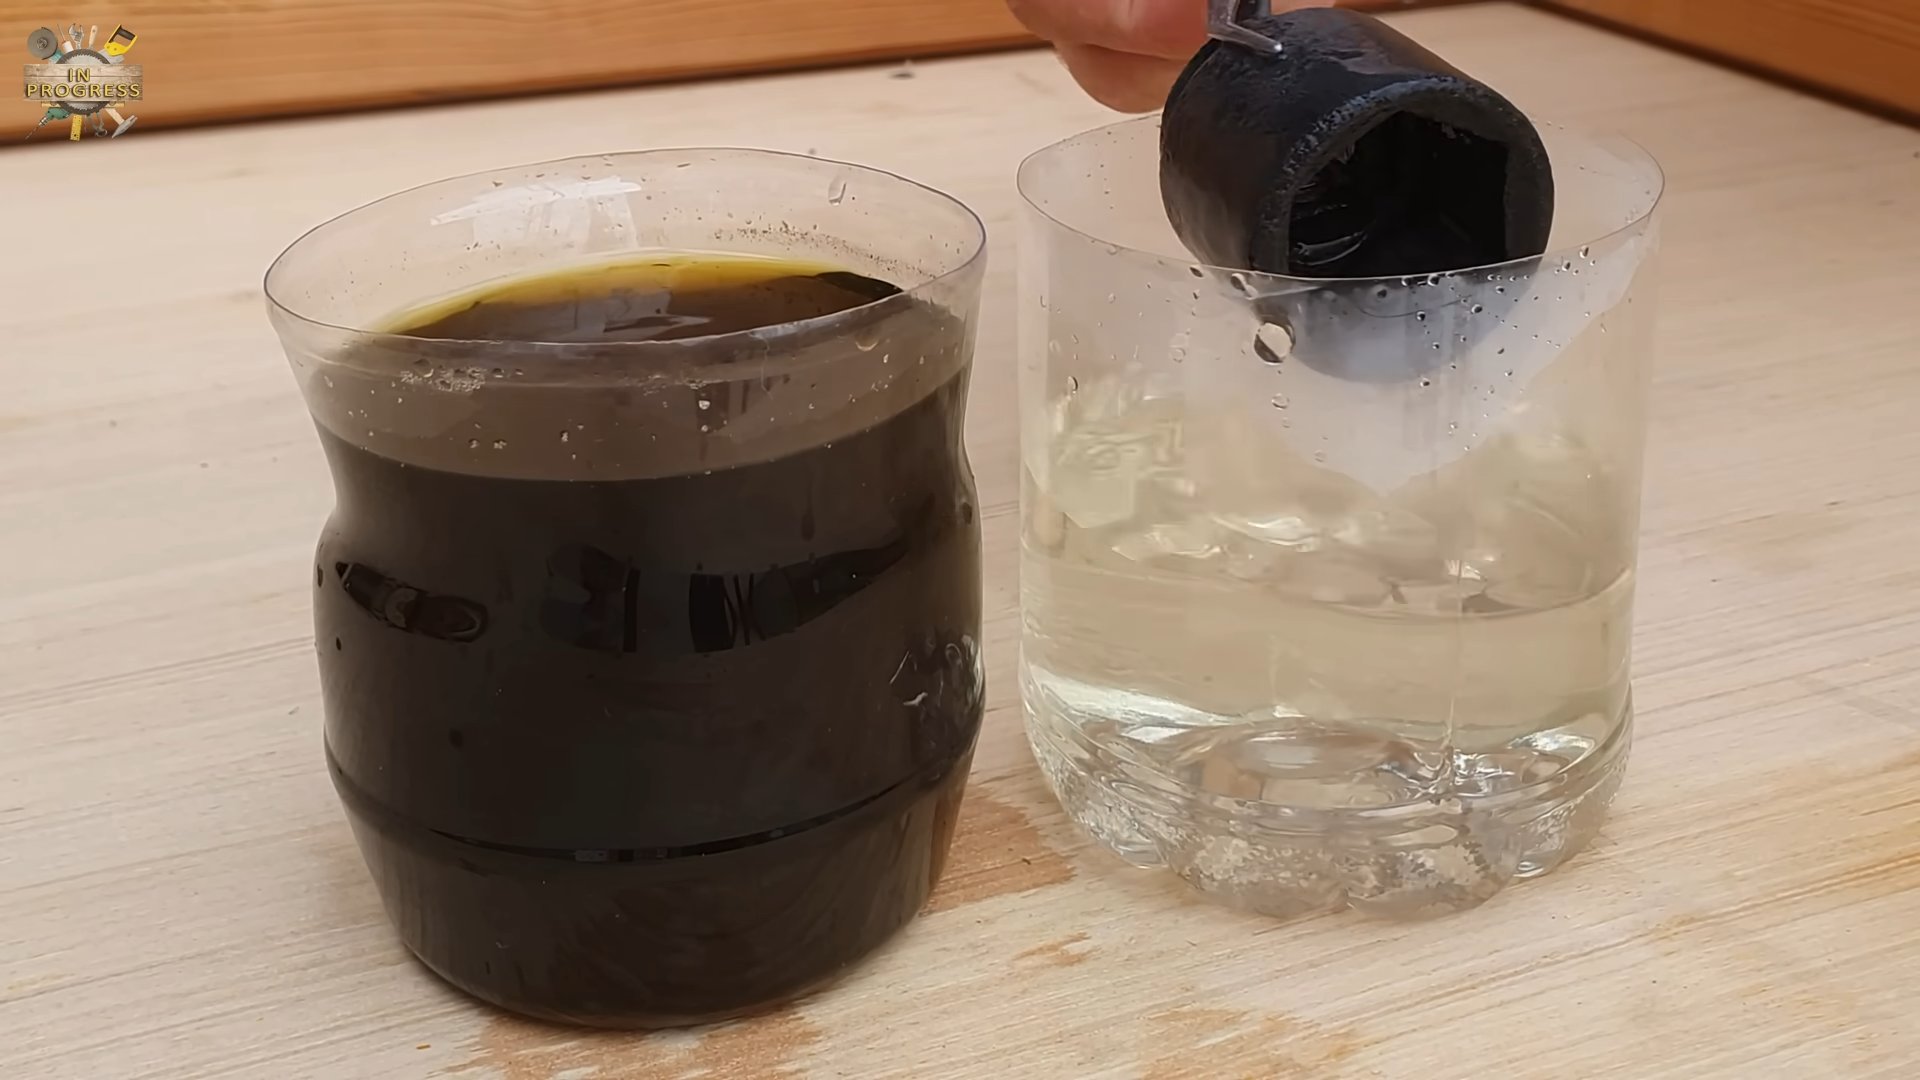
* For Rust Removal: Apply the mixture to the rusted area and let it sit for 30 minutes to an hour, depending on the severity of the rust. Scrub with a steel wool pad or brush. Rinse and dry.
* For Kitchen Surfaces: Use the mixture to clean countertops, sinks, and stovetops. Be sure to test on a small, hidden area first to ensure it doesn’t damage the surface.
* For Whitening Shoes: This mixture can work wonders on white canvas shoes. Apply the paste, let it dry in the sun, and then brush off the residue.
* For Cleaning Cutting Boards: Sanitize your wooden or plastic cutting boards by scrubbing them with the salt and hydrogen peroxide mixture. Rinse well.
We’re confident that once you try this DIY trick, you’ll be amazed by its effectiveness and versatility. It’s a simple, safe, and sustainable way to keep your home clean and fresh.
So, what are you waiting for? Gather your salt and hydrogen peroxide, and get ready to experience the cleaning power of this dynamic duo. We encourage you to experiment with different variations and find what works best for your specific needs.
Don’t forget to share your experiences with us! We’d love to hear about your successes, any modifications you made, and any other creative uses you discover for this amazing DIY cleaning solution. Share your photos and stories on social media using #SaltAndPeroxideClean or tag us in your posts. Let’s build a community of DIY enthusiasts who are passionate about natural and effective cleaning solutions. Embrace the power of this simple **salt and hydrogen peroxide mixture** and transform your cleaning routine today!
Frequently Asked Questions (FAQ)
Is this mixture safe to use on all surfaces?
While the salt and hydrogen peroxide mixture is generally safe for many surfaces, it’s always crucial to test it on an inconspicuous area first. This is especially important for delicate or sensitive materials like painted surfaces, certain types of stone, and fabrics. Hydrogen peroxide can have a bleaching effect, so it’s best to err on the side of caution. If you notice any discoloration or damage, discontinue use immediately. For surfaces you’re unsure about, consider diluting the mixture further or using a gentler cleaning method.
What concentration of hydrogen peroxide should I use?
So, there you have it! This simple yet surprisingly effective DIY trick using a salt and hydrogen peroxide mixture is a game-changer for anyone looking for a natural and affordable way to tackle various household cleaning challenges. Forget about harsh chemicals and expensive store-bought solutions. This powerful combination harnesses the abrasive power of salt and the oxidizing properties of hydrogen peroxide to deliver impressive results.
Why is this a must-try? Because it’s versatile, cost-effective, and environmentally friendly. You’re likely to already have these ingredients in your pantry and medicine cabinet, saving you a trip to the store and reducing your reliance on products filled with potentially harmful chemicals. From scrubbing stubborn stains in your kitchen and bathroom to brightening grout and even tackling minor rust spots, the applications are endless.
But the benefits don’t stop there. This DIY solution is also incredibly easy to customize to suit your specific needs. For a more potent cleaning action, consider using a higher concentration of hydrogen peroxide (always test on an inconspicuous area first!). If you’re dealing with a particularly tough stain, let the mixture sit for a longer period before scrubbing. You can even add a few drops of your favorite essential oil, like lemon or tea tree, for a fresh and clean scent.
Variations and Suggestions:
* For Grout Cleaning: Create a paste and apply it directly to the grout lines. Let it sit for 10-15 minutes before scrubbing with a stiff brush. Rinse thoroughly with water.
* For Rust Removal: Apply the mixture to the rusted area and let it sit for 30 minutes to an hour, depending on the severity of the rust. Scrub with a steel wool pad or brush. Rinse and dry.
* For Kitchen Surfaces: Use the mixture to clean countertops, sinks, and stovetops. Be sure to test on a small, hidden area first to ensure it doesn’t damage the surface.
* For Whitening Shoes: This mixture can work wonders on white canvas shoes. Apply the paste, let it dry in the sun, and then brush off the residue.
* For Cleaning Cutting Boards: Sanitize your wooden or plastic cutting boards by scrubbing them with the salt and hydrogen peroxide mixture. Rinse well.
We’re confident that once you try this DIY trick, you’ll be amazed by its effectiveness and versatility. It’s a simple, safe, and sustainable way to keep your home clean and fresh.
So, what are you waiting for? Gather your salt and hydrogen peroxide, and get ready to experience the cleaning power of this dynamic duo. We encourage you to experiment with different variations and find what works best for your specific needs.
Don’t forget to share your experiences with us! We’d love to hear about your successes, any modifications you made, and any other creative uses you discover for this amazing DIY cleaning solution. Share your photos and stories on social media using #SaltAndPeroxideClean or tag us in your posts. Let’s build a community of DIY enthusiasts who are passionate about natural and effective cleaning solutions. Embrace the power of this simple **salt and hydrogen peroxide mixture** and transform your cleaning routine today!
Frequently Asked Questions (FAQ)
Is this mixture safe to use on all surfaces?
While the salt and hydrogen peroxide mixture is generally safe for many surfaces, it’s always crucial to test it on an inconspicuous area first. This is especially important for delicate or sensitive materials like painted surfaces, certain types of stone, and fabrics. Hydrogen peroxide can have a bleaching effect, so it’s best to err on the side of caution. If you notice any discoloration or damage, discontinue use immediately. For surfaces you’re unsure about, consider diluting the mixture further or using a gentler cleaning method.
What concentration of hydrogen peroxide should I use?
The standard concentration of hydrogen peroxide found in most households is 3%. This is generally safe and effective for most cleaning tasks. However, for tougher stains or more demanding cleaning jobs, you can use a higher concentration, such as 6% or even 10%. However, exercise extreme caution when using higher concentrations, as they can be more irritating to the skin and eyes and may cause damage to certain surfaces. Always wear gloves and eye protection when working with higher concentrations of hydrogen peroxide. Remember to always test on a hidden area first, regardless of the concentration you use.
How long should I let the mixture sit on a stain before scrubbing?
The amount of time you let the salt and hydrogen peroxide mixture sit on a stain depends on the severity of the stain and the type of surface you’re cleaning. For light stains, 5-10 minutes may be sufficient. For more stubborn stains, you may need to let the mixture sit for 30 minutes to an hour, or even longer. Keep an eye on the area and check periodically to see if the stain is lifting. If the mixture starts to dry out, you can reapply it or lightly dampen the area with water.
Can I use this mixture to clean my teeth?
While hydrogen peroxide is sometimes used in teeth whitening products, it’s generally not recommended to use this DIY mixture for oral hygiene. The abrasive nature of salt can damage tooth enamel, and the concentration of hydrogen peroxide in household solutions may not be suitable for oral use. It’s always best to consult with your dentist for safe and effective teeth whitening options.
How should I store the leftover mixture?
It’s generally best to make the salt and hydrogen peroxide mixture fresh each time you need it. This ensures that the hydrogen peroxide retains its potency. However, if you have leftover mixture, you can store it in a dark, airtight container in a cool, dry place. Be sure to label the container clearly to avoid accidental ingestion. The mixture may lose some of its effectiveness over time, so it’s best to use it within a few days.
Is this mixture safe for pets and children?
While the ingredients themselves are relatively safe in diluted forms, it’s important to keep the salt and hydrogen peroxide mixture out of reach of children and pets. Ingesting large amounts of hydrogen peroxide can cause stomach upset and other health problems. If you’re using the mixture to clean surfaces that pets or children may come into contact with, be sure to rinse the area thoroughly with water after cleaning.
Can I add other ingredients to the mixture?
Yes, you can add other ingredients to the salt and hydrogen peroxide mixture to customize it for specific cleaning tasks. For example, you can add a few drops of essential oil for a pleasant scent. Lemon essential oil is a popular choice for its cleaning and deodorizing properties. You can also add a small amount of dish soap to help cut through grease and grime. However, avoid mixing the hydrogen peroxide with vinegar or bleach, as this can create harmful fumes.
What type of salt should I use?
You can use any type of salt for this DIY cleaning mixture, including table salt, sea salt, or kosher salt. The type of salt you use will not significantly affect the cleaning power of the mixture. However, finer salts may dissolve more easily in the hydrogen peroxide.
How does this mixture work to clean?
The salt acts as a mild abrasive, helping to scrub away dirt, grime, and stains. The hydrogen peroxide is a natural oxidizing agent, which means it can break down stains and kill bacteria. Together, these two ingredients create a powerful cleaning solution that is effective for a variety of household cleaning tasks. The **salt and hydrogen peroxide mixture** is a simple chemical reaction that creates a powerful cleaning agent.


Leave a Comment