
Sink clog removal – just the phrase sends shivers down the spine of any homeowner, right? I know I’ve been there, staring into a murky abyss of standing water, wondering if I’ll ever be able to wash my hands in peace again. But fear not, fellow DIY enthusiasts! This isn’t just another article about plunging and hoping for the best. We’re diving deep (pun intended!) into some seriously effective, and surprisingly simple, DIY sink clog removal tricks that will have your drains flowing freely in no time.
Believe it or not, dealing with clogged sinks is a tale as old as plumbing itself. Ancient civilizations, from the Romans with their elaborate aqueducts to the Minoans with their sophisticated drainage systems, all faced the challenge of keeping water flowing smoothly. While they might not have had baking soda and vinegar, they certainly understood the importance of a clear drain! Today, we have the benefit of both modern science and time-tested techniques to tackle this common household headache.
Why is mastering sink clog removal so crucial? Because a clogged sink isn’t just an inconvenience; it can lead to bigger problems. Think about it: standing water can harbor bacteria, create unpleasant odors, and even damage your pipes over time. Plus, who wants to call a plumber for something you can easily fix yourself? I’m here to empower you with the knowledge and confidence to conquer those clogs and reclaim your sink! So, grab your gloves, and let’s get started on these easy DIY sink clog removal tricks!
DIY Sink Clog Removal: My Tried-and-True Methods
Okay, so you’ve got a clogged sink. We’ve all been there! It’s annoying, messy, and can really throw a wrench in your day. But before you call a plumber and spend a fortune, let’s try some DIY methods. I’ve battled my fair share of sink clogs, and I’m going to share my go-to techniques that have saved me time and money. Let’s get that drain flowing again!
What You’ll Need
Before we dive in, let’s gather our supplies. Having everything ready will make the process much smoother. Here’s what I usually keep on hand:
* Boiling Water: A kettle or pot for boiling water.
* Baking Soda: The trusty household staple.
* White Vinegar: Another cleaning powerhouse.
* Plunger: A good old-fashioned plunger (make sure it’s a cup plunger for sinks, not a flange plunger for toilets).
* Pliers or a Wrench: For loosening pipes if needed.
* Bucket: To catch any water or debris.
* Screwdriver: Both flathead and Phillips head, just in case.
* Old Towels or Rags: For soaking up spills.
* Rubber Gloves: To protect your hands.
* Wire Coat Hanger (or Drain Snake): For reaching into the drain.
* Safety Glasses: To protect your eyes, especially when dealing with chemicals.
Method 1: The Boiling Water Blitz
This is always my first attempt because it’s the simplest and often surprisingly effective.
1. Clear the Sink: Remove any standing water from the sink. You can use a cup or small container to scoop it out.
2. Boil the Water: Bring a kettle or pot of water to a rolling boil.
3. Pour Carefully: Slowly and carefully pour the boiling water down the drain. Be cautious to avoid splashing, as boiling water can cause burns.
4. Wait and See: Give the water a few minutes to work its magic. Listen to see if you hear any gurgling or if the water starts to drain.
5. Repeat if Necessary: If the water drains slowly but doesn’t completely clear the clog, repeat the process one or two more times.
Why it Works: Boiling water can melt away grease and dissolve some types of soap buildup that are common culprits in sink clogs.
Method 2: Baking Soda and Vinegar Volcano
This is my go-to method when boiling water alone doesn’t cut it. It’s a natural and effective way to break down stubborn clogs.
1. Clear the Sink: Again, remove any standing water from the sink.
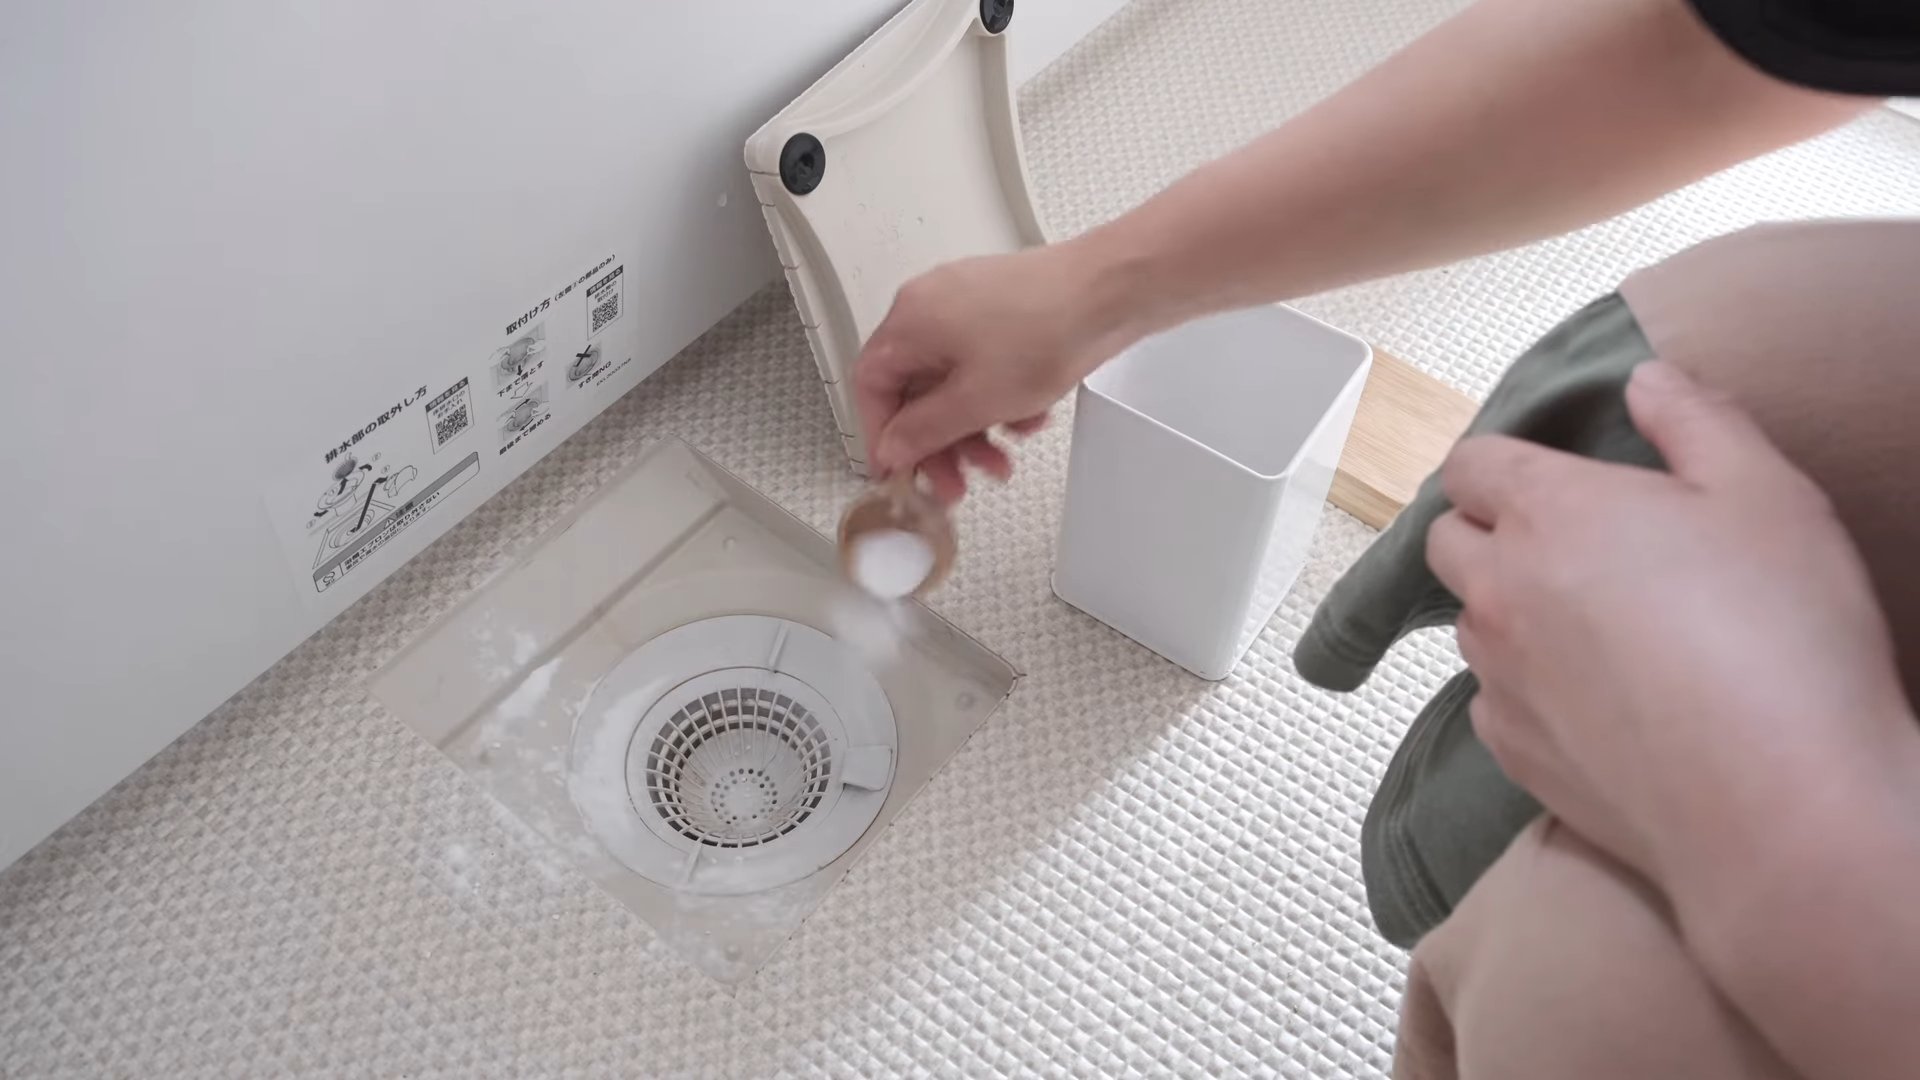
2. Pour in Baking Soda: Pour about one cup of baking soda down the drain. Try to get as much of it down the drain as possible.
3. Add Vinegar: Immediately follow the baking soda with one cup of white vinegar.
4. The Fizz: You’ll hear a fizzing sound as the baking soda and vinegar react. This is good! It means the mixture is working to break down the clog.
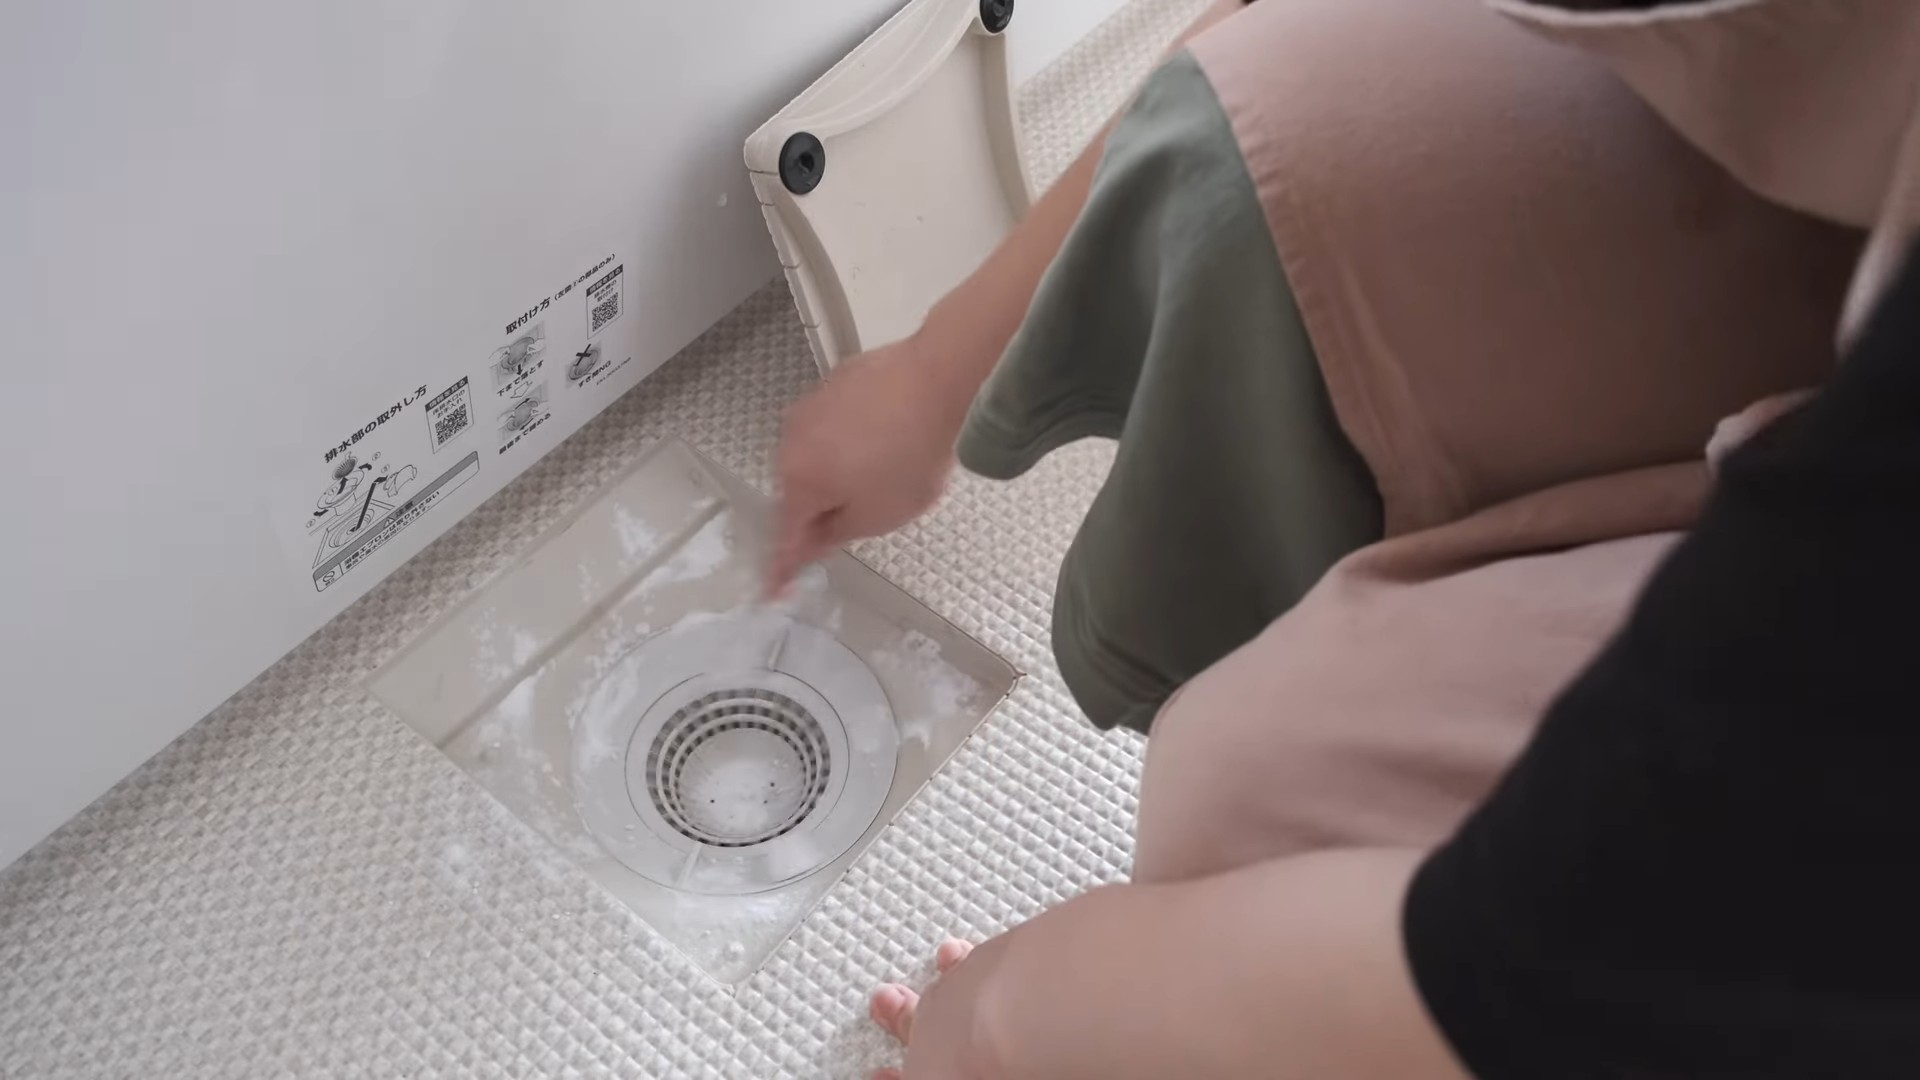
5. Cover the Drain: Cover the drain with a plug or a rag to contain the fizzing action and direct it down the drain.
6. Wait 30 Minutes: Let the mixture sit for at least 30 minutes, or even longer for tougher clogs. I sometimes let it sit overnight.
7. Flush with Boiling Water: After the waiting period, carefully pour a kettle of boiling water down the drain to flush away the loosened debris.
8. Assess and Repeat: Check if the drain is clear. If not, you can repeat the baking soda and vinegar treatment.
Why it Works: The chemical reaction between baking soda and vinegar creates carbon dioxide gas, which helps to loosen and break down the clog. The boiling water then helps to flush it away.
Method 3: The Plunger Power Play
Sometimes, a good old-fashioned plunger is all you need to dislodge a stubborn clog.
1. Remove Standing Water: Make sure there’s enough water in the sink to cover the cup of the plunger. If there isn’t enough, add some water.
2. Create a Seal: Place the cup of the plunger directly over the drain opening, ensuring a tight seal. You might need to add a little petroleum jelly around the rim of the plunger to improve the seal.
3. Plunge Vigorously: Push and pull the plunger up and down with a strong, steady motion. Maintain the seal as you plunge.
4. Repeat and Check: Continue plunging for several minutes. Then, remove the plunger and see if the water drains.
5. Repeat if Necessary: If the water still doesn’t drain, repeat the plunging process.
Why it Works: The plunging action creates pressure that can dislodge the clog and allow it to flow down the drain.
Method 4: The Wire Coat Hanger Rescue
This method is great for retrieving hair and other debris that might be lodged near the drain opening.
1. Straighten the Hanger: Take a wire coat hanger and straighten it out as much as possible.
2. Create a Hook: Bend one end of the hanger into a small hook.
3. Insert and Fish: Carefully insert the hooked end of the hanger into the drain opening. Gently probe around, trying to hook onto any hair, debris, or gunk.
4. Pull Out the Gunk: Once you’ve hooked something, slowly and carefully pull the hanger out of the drain. Be prepared for some grossness!
5. Clean the Hanger: Wipe off the hanger with a paper towel or rag.
6. Repeat as Needed: Repeat the process until you’re no longer pulling out any debris.
7. Flush with Water: After you’ve removed as much debris as possible, flush the drain with hot water to clear any remaining residue.
Why it Works: The wire coat hanger acts as a makeshift drain snake, allowing you to physically remove the clog from the drain.
Method 5: Tackling the P-Trap (Under the Sink)
If none of the above methods work, the clog might be located in the P-trap, the curved pipe under your sink. This requires a bit more effort, but it’s still something you can do yourself.
Safety First!
Before you start, turn off the water supply to the sink. You’ll usually find shut-off valves under the sink. Turn them clockwise to shut off the water. Also, wear your rubber gloves and safety glasses.
1. Prepare for Mess: Place a bucket under the P-trap to catch any water and debris that will spill out when you remove it.
2. Loosen the Slip Nuts: Locate the slip nuts that connect the P-trap to the drain pipes. Use pliers or a wrench to carefully loosen these nuts. Be careful not to overtighten or strip the nuts.
3. Remove the P-Trap: Once the slip nuts are loose, carefully remove the P-trap. Hold it over the bucket to catch any water and debris.
4. Inspect and Clean: Examine the P-trap for any clogs. You can use a wire coat hanger or a small brush to remove any debris.
5. Clean the Drain Pipes: Check the drain pipes that connect to the P-trap for any clogs as well.
6. Reassemble the P-Trap: Once everything is clean, reassemble the P-trap. Make sure the slip nuts are tightened securely, but not overtightened.
7. Turn on the Water: Slowly turn the water supply back on and check for leaks. If you see any leaks, tighten the slip nuts a little more.
Why it Works: The P-trap is designed to trap debris and prevent sewer gases from entering your home. Over time, this debris can build up and cause a clog. Removing and cleaning the P-trap allows you to physically remove the clog.
Method 6: The Drain Snake (Auger)
If the clog is further down the drainpipe, a drain snake (also called an auger) is your best bet. You can buy a drain snake at most hardware stores.
1. Insert the Snake: Carefully insert the end of the drain snake into the drain opening.
2. Feed the Snake: Feed the snake down the drainpipe, rotating the handle as you go. You’ll feel resistance when you encounter the clog.
3. Break Up the Clog: Continue rotating the handle to break up the clog. You might need to push and pull the snake back and forth to dislodge the debris.
4. Remove the Snake: Once you’ve broken up the clog, slowly and
Conclusion
So, there you have it! This simple, effective DIY sink clog removal method is a game-changer for anyone tired of battling slow drains and expensive plumber bills. We’ve walked you through the process, highlighting how easily accessible household ingredients can tackle even stubborn clogs. Forget harsh chemicals that damage your pipes and the environment; this approach is gentle, affordable, and, most importantly, it works!
Why is this a must-try? Because it empowers you to take control of your home maintenance. It saves you money, reduces your reliance on potentially harmful products, and gives you the satisfaction of fixing a problem yourself. Plus, it’s incredibly versatile.
Variations and Suggestions:
* For Grease Clogs: If you suspect grease is the primary culprit, pour a kettle of boiling water down the drain *after* the baking soda and vinegar mixture has fizzed. The boiling water helps to melt and flush away the grease. Be cautious when using boiling water, especially with PVC pipes. Test a small area first to ensure it can withstand the heat.
* For Hair Clogs: Hair is a common cause of sink clogs, especially in bathroom sinks. After the baking soda and vinegar treatment, try using a bent wire hanger or a drain snake to manually remove any remaining hair clumps.
* Preventative Maintenance: To prevent future clogs, flush your drain with hot water after each use, especially after washing greasy dishes. Consider using a drain strainer to catch hair and food particles before they enter the drain.
* Essential Oils Boost: For a fresher scent, add a few drops of your favorite essential oil (like lemon, tea tree, or eucalyptus) to the baking soda before pouring it down the drain. This won’t necessarily improve the clog removal process, but it will leave your sink smelling clean and revitalized.
* The Power of Plunger: After the baking soda and vinegar treatment, try using a plunger to create suction and dislodge any remaining debris. Make sure there’s enough water in the sink to cover the cup of the plunger.
We are confident that this DIY sink clog removal technique will become your go-to solution for maintaining clear and free-flowing drains. It’s a simple, effective, and environmentally friendly alternative to harsh chemical drain cleaners.
Now, it’s your turn! We encourage you to try this method and see the amazing results for yourself. Don’t let a clogged sink ruin your day. Take action, reclaim your drain, and experience the satisfaction of a job well done.
We’d love to hear about your experience! Share your results, variations, and any tips you discover in the comments below. Let’s build a community of DIY drain-clearing experts! Your feedback will help others discover the power of this simple yet effective solution. Let us know if this DIY sink clog removal method worked for you!
Frequently Asked Questions (FAQs)
Q: How often can I use this DIY sink clog removal method?
A: You can use this method as often as needed, typically once a month for preventative maintenance or whenever you notice your sink draining slowly. Because it uses natural ingredients, it’s much gentler on your pipes than chemical drain cleaners, which can corrode them over time. However, if you find yourself needing to use it more than once a week, it might indicate a more serious underlying plumbing issue that requires professional attention.
Q: Will this method work on all types of clogs?
A: This method is most effective on clogs caused by grease, hair, soap scum, and food particles. It works by creating a chemical reaction that helps to break down these organic materials. However, it might not be as effective on clogs caused by solid objects, such as toys or jewelry, that are physically blocking the drain. In those cases, you might need to use a drain snake or call a plumber.
Q: Is this method safe for all types of pipes?
A: This method is generally safe for most types of pipes, including PVC, copper, and metal pipes. However, it’s always a good idea to exercise caution, especially when using boiling water. If you have older or more fragile pipes, test a small area first to ensure they can withstand the heat. Avoid pouring boiling water directly onto PVC joints, as this could potentially weaken them.
Q: What if the clog is still there after trying this method?
A: If the clog persists after trying this method, there are a few things you can try. First, repeat the process. Sometimes, a stubborn clog requires multiple treatments. Second, try using a plunger to create suction and dislodge any remaining debris. Make sure there’s enough water in the sink to cover the cup of the plunger. Third, you can try using a drain snake to manually remove any remaining hair or debris. If none of these methods work, it’s best to call a professional plumber to diagnose and resolve the issue.
Q: Can I use more baking soda or vinegar to make the solution stronger?
A: While it might be tempting to use more baking soda or vinegar, it’s not necessarily more effective. The key is the chemical reaction between the two ingredients, and using excessive amounts won’t significantly improve the results. In fact, too much baking soda can sometimes solidify and worsen the clog. Stick to the recommended proportions for optimal results.
Q: What are some other ways to prevent sink clogs?
A: Preventing sink clogs is always easier than dealing with them. Here are a few tips:
* Use a drain strainer: This will catch hair, food particles, and other debris before they enter the drain.
* Flush your drain with hot water after each use: This will help to prevent grease and soap scum from building up.
* Avoid pouring grease down the drain: Dispose of grease in a separate container.
* Regularly clean your drain: Use this DIY method or a commercial drain cleaner (use sparingly) to keep your drain clear.
* Be mindful of what you put down the drain: Avoid flushing non-biodegradable items, such as cotton balls or feminine hygiene products.
Q: How does the baking soda and vinegar mixture actually work to remove clogs?
A: The magic lies in the chemical reaction! Baking soda (sodium bicarbonate) is a base, and vinegar (acetic acid) is an acid. When they combine, they create carbon dioxide gas and water. The fizzing action of the carbon dioxide helps to loosen and break down the clog, while the water helps to flush it away. It’s a simple yet effective way to tackle common sink clogs without resorting to harsh chemicals.
Q: Is there a specific type of vinegar that works best?
A: White vinegar is the most commonly recommended type for this DIY sink clog removal method because it’s readily available and inexpensive. However, apple cider vinegar can also be used as a substitute. The key ingredient is the acetic acid, which is present in both types of vinegar.
Q: Can I use this method for other drains in my house, like the shower or bathtub drain?
A: Yes, this method can be used for other drains in your house, such as the shower or bathtub drain. The process is the same: pour baking soda down the drain, followed by vinegar, let it fizz, and then flush with hot water. However, shower and bathtub drains often have more hair clogs, so you might need to use a drain snake to remove any remaining hair after the baking soda and vinegar treatment.


Leave a Comment