
Spinach Tower Garden DIY: Ready to ditch the grocery store spinach and grow your own fresh, vibrant greens right at home? I’m so excited to share this incredibly rewarding and space-saving project with you! For centuries, humans have cultivated gardens, finding not only sustenance but also a deep connection to nature. From the hanging gardens of Babylon to the meticulously planned gardens of Versailles, the desire to nurture and shape our environment is deeply ingrained in our history.
But let’s be honest, not everyone has acres of land to dedicate to a sprawling vegetable patch. That’s where this DIY spinach tower garden comes in! Imagine harvesting crisp, delicious spinach leaves just steps from your kitchen, all while maximizing your limited space. Whether you have a small balcony, a sunny patio, or just a tiny corner in your backyard, this project is perfect for you.
This isn’t just about growing spinach; it’s about embracing a sustainable lifestyle, reducing your carbon footprint, and enjoying the unparalleled flavor of homegrown produce. Plus, let’s face it, there’s something incredibly satisfying about creating something with your own two hands. So, grab your tools, and let’s embark on this exciting journey to build your very own spinach tower garden DIY! I promise, you won’t regret it!
Spinat-Turmgarten DIY: Dein eigener vertikaler Garten
Hallo Gartenfreunde! Habt ihr wenig Platz, aber trotzdem Lust auf frischen Spinat direkt aus dem Garten? Dann ist ein Spinat-Turmgarten genau das Richtige für euch! Ich zeige euch, wie ihr mit einfachen Mitteln einen solchen vertikalen Garten selber bauen könnt. Das ist nicht nur platzsparend, sondern auch ein echter Hingucker auf dem Balkon oder der Terrasse. Los geht’s!
Was du für deinen Spinat-Turmgarten brauchst:
* Rohr: Ein PVC-Rohr mit einem Durchmesser von ca. 15-20 cm und einer Länge von ca. 1,50-2,00 m. Das ist das Herzstück unseres Turms.
* Kleineres Rohr: Ein perforiertes PVC-Rohr mit einem Durchmesser von ca. 5-7 cm und der gleichen Länge wie das große Rohr. Dieses Rohr dient zur Bewässerung.
* Bohrmaschine mit Lochsäge: Für die Löcher, in die wir später die Spinatpflanzen setzen.
* Bohrmaschine mit Bohrer: Für die Löcher im Bewässerungsrohr.
* Pflanzerde: Am besten eine hochwertige Gemüseerde.
* Spinat-Setzlinge: Oder Spinatsamen, wenn du etwas mehr Geduld hast.
* Geotextil oder Unkrautvlies: Um zu verhindern, dass Erde aus den Löchern gespült wird.
* Kabelbinder oder Draht: Um das Geotextil zu befestigen.
* Endkappe für das große Rohr: Damit die Erde nicht unten herausfällt.
* Gießkanne oder Schlauch: Zum Bewässern.
* Handschuhe: Zum Schutz deiner Hände.
* Schutzbrille: Beim Bohren immer wichtig!
* Maßband oder Zollstock: Zum Abmessen der Löcher.
* Stift: Zum Markieren der Löcher.
* Optional: Kies oder Blähton für die Drainage am Boden des großen Rohrs.
Schritt-für-Schritt-Anleitung: So baust du deinen Spinat-Turmgarten
1. Vorbereitung des großen Rohrs
1. Reinigung: Zuerst reinige ich das große PVC-Rohr gründlich von innen und außen. Staub und Schmutz können die spätere Bepflanzung beeinträchtigen.
2. Markierung der Löcher: Jetzt kommt der spannende Teil: das Markieren der Löcher. Ich messe mit dem Maßband gleichmäßige Abstände entlang des Rohrs ab. Die Abstände sollten etwa 15-20 cm betragen, sowohl horizontal als auch vertikal. So haben die Spinatpflanzen später genug Platz zum Wachsen. Ich empfehle, die Löcher versetzt anzuordnen, damit sie sich nicht direkt übereinander befinden. Das sorgt für eine bessere Stabilität des Turms. Mit dem Stift markiere ich die Stellen, an denen ich bohren werde.
3. Bohren der Löcher: Mit der Bohrmaschine und der Lochsäge bohre ich nun die Löcher an den markierten Stellen. Die Größe der Löcher sollte etwa 5-7 cm im Durchmesser betragen. Achte darauf, dass die Löcher sauber und glatt sind, damit die Spinatpflanzen später gut eingesetzt werden können. Trage dabei unbedingt eine Schutzbrille!
2. Vorbereitung des Bewässerungsrohrs
1. Reinigung: Auch das kleinere, perforierte PVC-Rohr reinige ich gründlich.
2. Bohren zusätzlicher Löcher (optional): Wenn das Rohr nicht ausreichend perforiert ist, bohre ich mit einem kleinen Bohrer zusätzliche Löcher hinein. Diese Löcher sorgen dafür, dass das Wasser gleichmäßig im Turm verteilt wird. Achte darauf, dass die Löcher nicht zu groß sind, damit das Wasser nicht zu schnell abfließt.
3. Zusammenbau des Turms
1. Endkappe anbringen: Ich setze die Endkappe auf das untere Ende des großen PVC-Rohrs. So verhindern wir, dass die Erde später herausfällt.
2. Drainage (optional): Für eine bessere Drainage fülle ich eine Schicht Kies oder Blähton (ca. 10-15 cm hoch) in das untere Ende des großen Rohrs. Das verhindert Staunässe und sorgt für gesunde Wurzeln.
3. Geotextil vorbereiten: Ich schneide das Geotextil oder Unkrautvlies in Streifen, die etwas breiter sind als die Löcher im großen Rohr.
4. Geotextil befestigen: Ich lege die Geotextil-Streifen von innen über die Löcher und befestige sie mit Kabelbindern oder Draht. Das verhindert, dass die Erde beim Gießen aus den Löchern gespült wird. Achte darauf, dass die Kabelbinder oder der Draht nicht zu fest angezogen werden, damit die Pflanzen später noch Platz zum Wachsen haben.
5. Bewässerungsrohr einsetzen: Ich setze das kleinere, perforierte PVC-Rohr mittig in das große Rohr ein. Es sollte bis zum Boden reichen.
4. Befüllung mit Erde und Bepflanzung
1. Erde einfüllen: Nun fülle ich das große Rohr vorsichtig mit Pflanzerde. Achte darauf, dass die Erde locker und luftig ist. Ich fülle die Erde schichtweise ein und drücke sie leicht an.
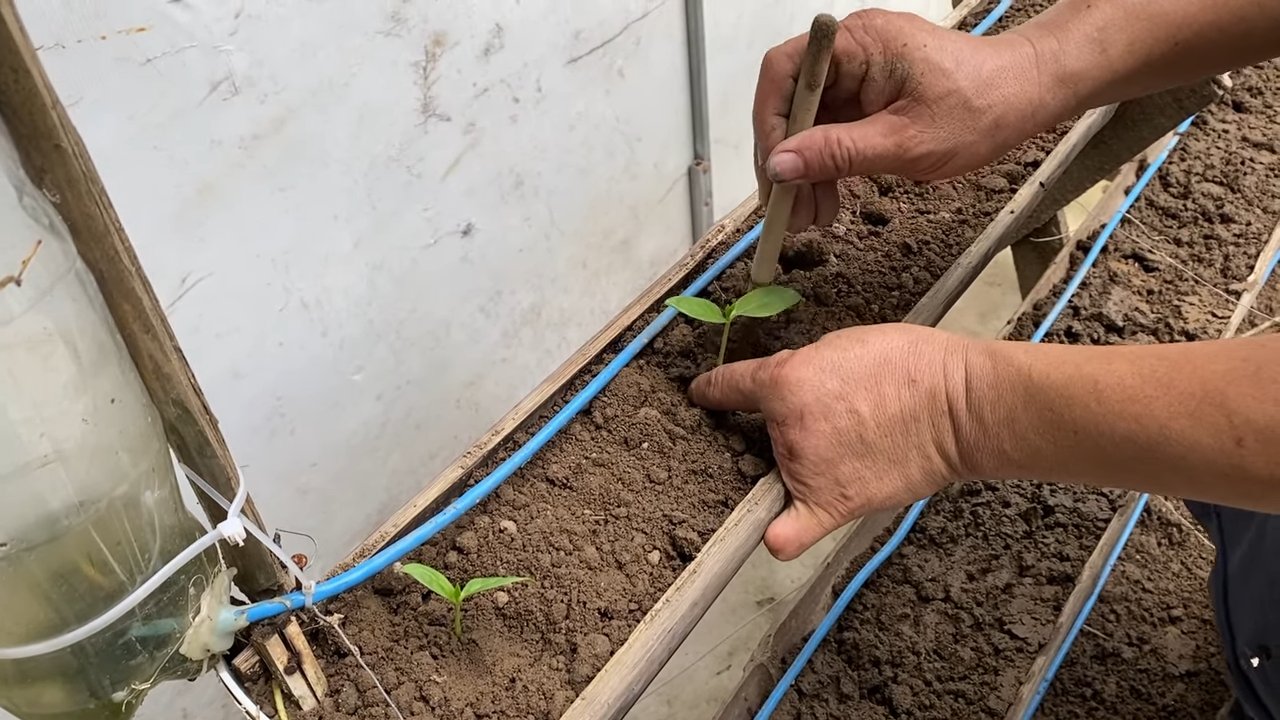
2. Spinat pflanzen: Jetzt kommt der schönste Teil: das Pflanzen des Spinats! Ich nehme die Spinat-Setzlinge vorsichtig aus ihren Töpfen und setze sie in die vorbereiteten Löcher. Die Wurzeln sollten gut mit Erde bedeckt sein. Wenn du Spinatsamen verwendest, säe sie direkt in die Löcher und bedecke sie leicht mit Erde.
3. Gießen: Nach dem Pflanzen gieße ich den Spinat-Turmgarten gründlich. Das Wasser sollte durch das Bewässerungsrohr fließen und die Erde gleichmäßig befeuchten.
5. Pflege deines Spinat-Turmgartens
1. Bewässerung: Der Spinat-Turmgarten sollte regelmäßig gegossen werden, besonders an heißen Tagen. Ich gieße am besten morgens oder abends, um Verdunstung zu vermeiden.
2. Düngung: Spinat ist ein Starkzehrer und benötigt ausreichend Nährstoffe. Ich dünge meinen Spinat-Turmgarten alle zwei Wochen mit einem organischen Flüssigdünger.
3. Standort: Der Spinat-Turmgarten sollte an einem sonnigen bis halbschattigen Standort stehen. Vermeide pralle Mittagssonne, da diese die Blätter verbrennen kann.
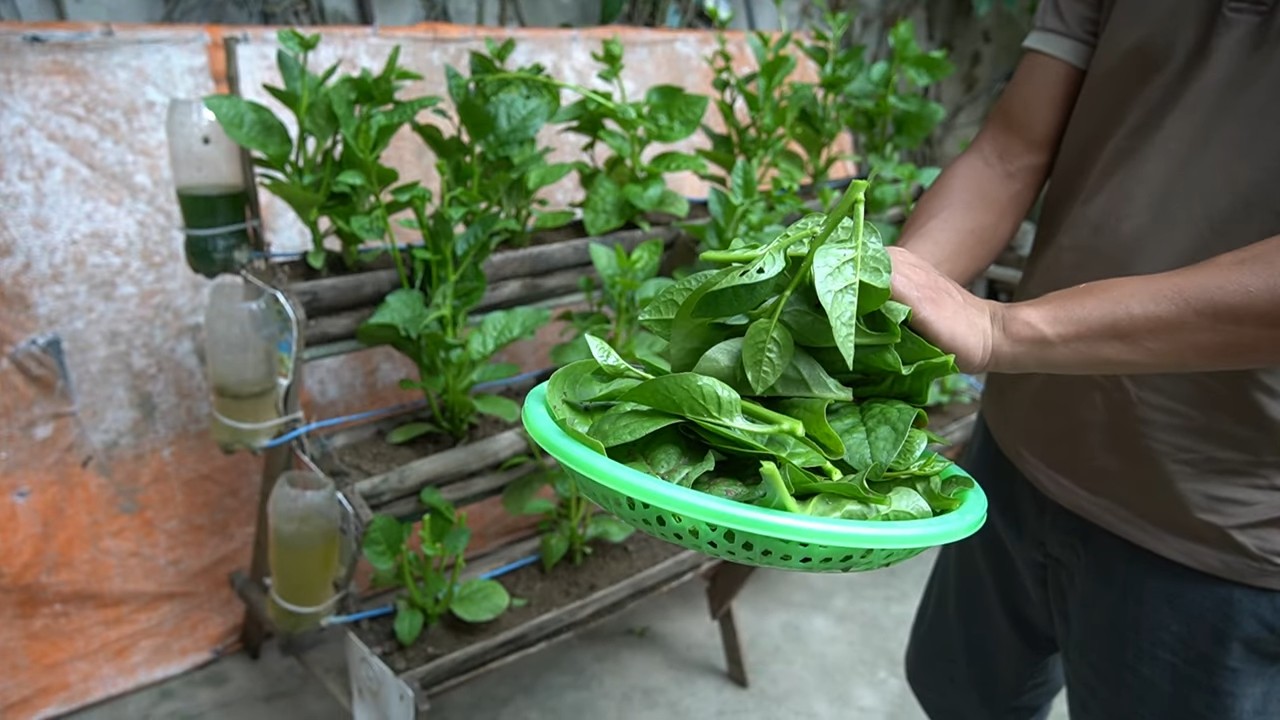
4. Ernte: Der Spinat kann geerntet werden, sobald die Blätter groß genug sind. Ich ernte die äußeren Blätter zuerst, damit die inneren Blätter weiterwachsen können.
Zusätzliche Tipps und Tricks
* Stabilität: Um die Stabilität des Turms zu erhöhen, kannst du ihn an einer Wand oder einem Zaun befestigen.
* Schnecken: Spinat ist bei Schnecken sehr beliebt. Schütze deinen Spinat-Turmgarten mit Schneckenkorn oder Schneckenzäunen.
* Andere Pflanzen: Du kannst den Spinat-Turmgarten auch mit anderen Kräutern oder Gemüsesorten bepflanzen, die ähnliche Ansprüche an Standort und Pflege haben, z.B. Salat oder Erdbeeren.
* Winterfest machen: Spinat ist relativ winterhart. In milden Wintern kannst du ihn draußen lassen. In kalten Wintern solltest du den Turm mit Vlies abdecken oder an einen geschützten Ort stellen.
Ich hoffe, diese Anleitung hilft dir dabei, deinen eigenen Spinat-Turmgarten zu bauen. Viel Spaß beim Gärtnern und guten Appetit!
Conclusion
So, there you have it! Building your own Spinach Tower Garden DIY isn’t just a fun weekend project; it’s a gateway to fresh, organic spinach right outside your door. We’ve walked you through the process, highlighting the simplicity and affordability of this method. But why is this DIY project a must-try?
Firstly, consider the convenience. Imagine stepping outside and harvesting crisp, vibrant spinach leaves whenever you need them. No more last-minute grocery store runs or settling for wilted, pre-packaged greens. You control the quality and freshness, ensuring you’re feeding yourself and your family the best possible produce.
Secondly, think about the cost savings. While there’s an initial investment in materials, the long-term benefits far outweigh the expense. You’ll significantly reduce your grocery bills, especially if you regularly consume spinach. Plus, you can propagate your own spinach plants from seeds or cuttings, further minimizing costs.
Thirdly, and perhaps most importantly, a Spinach Tower Garden DIY is an environmentally friendly choice. You’re reducing your carbon footprint by growing your own food locally. You’re also avoiding the pesticides and herbicides often used in commercial agriculture. It’s a sustainable way to enjoy healthy, delicious spinach.
But the beauty of this project lies in its adaptability. Feel free to experiment with different materials. Instead of PVC pipes, you could use repurposed plastic containers or even terracotta pots stacked creatively. Consider adding companion plants like basil or marigolds to deter pests and enhance the flavor of your spinach. You can also adjust the size of your tower to fit your available space, whether you have a sprawling backyard or a small balcony.
Don’t be afraid to get creative with your watering system. While we suggested a simple gravity-fed system, you could explore more advanced options like drip irrigation or even a recirculating hydroponic system for even greater efficiency.
We encourage you to take the plunge and build your own Spinach Tower Garden DIY. It’s a rewarding experience that will provide you with fresh, healthy spinach for months to come. And once you’ve built your tower, we want to hear about it! Share your photos, tips, and experiences in the comments below. Let’s create a community of spinach tower enthusiasts and inspire others to embrace this sustainable and delicious way of gardening. What worked for you? What challenges did you face? Your feedback will help others succeed and refine their own spinach tower projects. Happy gardening!
Frequently Asked Questions (FAQ)
What type of spinach grows best in a tower garden?
Many spinach varieties thrive in tower gardens. However, some are better suited than others. Consider varieties like ‘Baby’s Leaf Hybrid,’ which is known for its compact growth and tender leaves. ‘Space’ spinach is another excellent choice, as it’s heat-tolerant and slow to bolt (go to seed). ‘Tyee’ spinach is also a popular option, offering high yields and resistance to common diseases. Ultimately, the best variety depends on your local climate and personal preferences. Experiment with a few different types to see which performs best in your Spinach Tower Garden DIY.
How often should I water my spinach tower garden?
Watering frequency depends on several factors, including the weather, the type of growing medium you’re using, and the size of your tower. In general, you should water your spinach tower garden when the top inch of the soil feels dry to the touch. During hot, sunny weather, you may need to water daily, or even twice a day. In cooler, cloudier weather, you may only need to water every few days. The key is to monitor the moisture level of the soil and adjust your watering schedule accordingly. Ensure proper drainage to prevent waterlogging, which can lead to root rot.
What kind of fertilizer should I use for my spinach tower garden?
Spinach is a heavy feeder, meaning it requires a good supply of nutrients to thrive. Use a balanced, water-soluble fertilizer specifically formulated for leafy greens. Look for a fertilizer with an NPK ratio (nitrogen, phosphorus, potassium) of around 10-10-10 or 20-20-20. Follow the instructions on the fertilizer package carefully, as over-fertilizing can damage your plants. You can also supplement with organic fertilizers like compost tea or worm castings. Apply fertilizer every two to three weeks, or as needed, to keep your spinach plants healthy and productive.
How do I prevent pests and diseases in my spinach tower garden?
Prevention is key when it comes to pests and diseases. Start by using healthy, disease-free seedlings or seeds. Ensure good air circulation around your plants to prevent fungal diseases. Regularly inspect your plants for signs of pests, such as aphids, spider mites, or slugs. If you spot any pests, take action immediately. You can try spraying your plants with insecticidal soap or neem oil. You can also introduce beneficial insects like ladybugs to control pest populations. For fungal diseases, try spraying your plants with a copper-based fungicide. Rotate your crops regularly to prevent soilborne diseases from building up.
How much sunlight does my spinach tower garden need?
Spinach needs at least six hours of sunlight per day to thrive. However, it can tolerate some shade, especially during the hottest part of the day. If you live in a hot climate, consider placing your spinach tower garden in a location that receives morning sun and afternoon shade. If you don’t have enough natural sunlight, you can supplement with grow lights. Position the grow lights about 12 inches above your plants and keep them on for 12 to 14 hours per day.
Can I grow other plants in my spinach tower garden?
Yes, you can definitely grow other plants in your spinach tower garden! Companion planting can be beneficial for both your spinach and other plants. Good companions for spinach include basil, marigolds, and radishes. Basil helps to repel pests, while marigolds attract beneficial insects. Radishes help to break up the soil and improve drainage. Avoid planting spinach near fennel, as it can inhibit its growth. When choosing companion plants, consider their size and growth habits. You don’t want to overcrowd your spinach or block its sunlight.
How long does it take for spinach to grow in a tower garden?
Spinach is a relatively fast-growing crop. You can typically harvest your first spinach leaves about 30 to 45 days after planting. Baby spinach leaves can be harvested even sooner, after about 20 to 30 days. To harvest, simply snip off the outer leaves, leaving the inner leaves to continue growing. This will allow you to harvest spinach continuously for several weeks.
How do I harvest spinach from my tower garden?
Harvesting spinach from your tower garden is easy. Simply use a pair of scissors or garden shears to snip off the outer leaves, leaving the inner leaves to continue growing. Harvest the leaves when they are about 4 to 6 inches long. Avoid harvesting more than one-third of the plant at a time, as this can stress the plant and reduce its yield. Harvest in the morning, when the leaves are crisp and cool.
What do I do with my spinach tower garden in the winter?
If you live in a cold climate, you may need to protect your spinach tower garden from frost and freezing temperatures. You can cover your tower with a frost blanket or move it to a sheltered location, such as a garage or greenhouse. Spinach can tolerate light frosts, but prolonged exposure to freezing temperatures can damage the plants. You can also grow spinach indoors during the winter, using grow lights to provide the necessary light.


Leave a Comment