
Sweeter Cantaloupe Growing Tips are what every home gardener dreams of! Imagine biting into a perfectly ripe, incredibly sweet cantaloupe, bursting with flavor, all thanks to your own green thumb. Forget those bland, watery melons from the grocery store. I’m going to let you in on some secrets to cultivating cantaloupes so delicious, they’ll be the envy of the neighborhood.
Growing cantaloupe has a rich history, dating back thousands of years. Originating in Africa and Asia, these melons were prized for their sweetness and refreshing qualities. Over time, different varieties were developed, each with its unique flavor profile and growing requirements. But one thing has remained constant: the desire for a truly exceptional cantaloupe.
Let’s face it, achieving that perfect sweetness can be tricky. Factors like soil quality, sunlight, and watering practices all play a crucial role. That’s why I’ve compiled these essential sweeter cantaloupe growing tips and DIY hacks to help you maximize your harvest. Whether you’re a seasoned gardener or just starting out, these simple yet effective techniques will transform your cantaloupe crop from ordinary to extraordinary. Get ready to impress your friends and family with the sweetest, most flavorful cantaloupes they’ve ever tasted!
How to Grow the Sweetest Cantaloupe You’ve Ever Tasted!
Okay, let’s be honest, there’s nothing more disappointing than biting into a cantaloupe and finding it bland and tasteless. I’ve been there, and it’s a real letdown after all the effort of growing it! But don’t worry, I’m going to share all my secrets for growing cantaloupes that are bursting with sweetness and flavor. It’s all about the right conditions, a little TLC, and knowing when to harvest. So, grab your gardening gloves, and let’s get started!
Choosing the Right Cantaloupe Variety
First things first, the variety of cantaloupe you choose makes a HUGE difference. Some are naturally sweeter and more disease-resistant than others. Here are a few of my favorites:
* ‘Athena’: This is a reliable hybrid that’s known for its sweetness and disease resistance. It’s a good choice for beginners.
* ‘Hales Best Jumbo’: An heirloom variety with a classic cantaloupe flavor. It’s a bit more susceptible to disease, but the taste is worth it!
* ‘Ambrosia’: Another hybrid that’s super sweet and juicy. It matures relatively quickly, which is great if you have a shorter growing season.
* ‘Sugar Cube’: As the name suggests, this one is incredibly sweet! It’s a smaller cantaloupe, perfect for individual servings.
When you’re buying seeds or seedlings, read the descriptions carefully and choose varieties that are known for their sweetness and suitability to your climate.
Preparing the Soil: The Foundation for Sweetness
Cantaloupes are heavy feeders, meaning they need a lot of nutrients to produce those delicious fruits. Proper soil preparation is absolutely crucial.
* Sunlight: Cantaloupes need at least 6-8 hours of direct sunlight per day. Choose a location in your garden that gets plenty of sun.
* Soil Type: They prefer well-drained, sandy loam soil. If your soil is heavy clay, you’ll need to amend it with organic matter.
* Soil pH: The ideal soil pH for cantaloupes is between 6.0 and 6.8. You can test your soil pH with a simple soil testing kit.
Step-by-Step Planting Guide
Now for the fun part – getting those cantaloupes in the ground!
1. Amend the Soil: A few weeks before planting, amend your soil with plenty of compost, well-rotted manure, or other organic matter. This will improve drainage, add nutrients, and help retain moisture. I usually add about 4-6 inches of compost to my garden beds.
2. Create Mounds or Rows: Cantaloupes grow best on slightly raised mounds or rows. This helps with drainage and warms the soil faster. Create mounds that are about 12 inches high and 2-3 feet wide. If you’re planting in rows, space the rows about 4-6 feet apart.
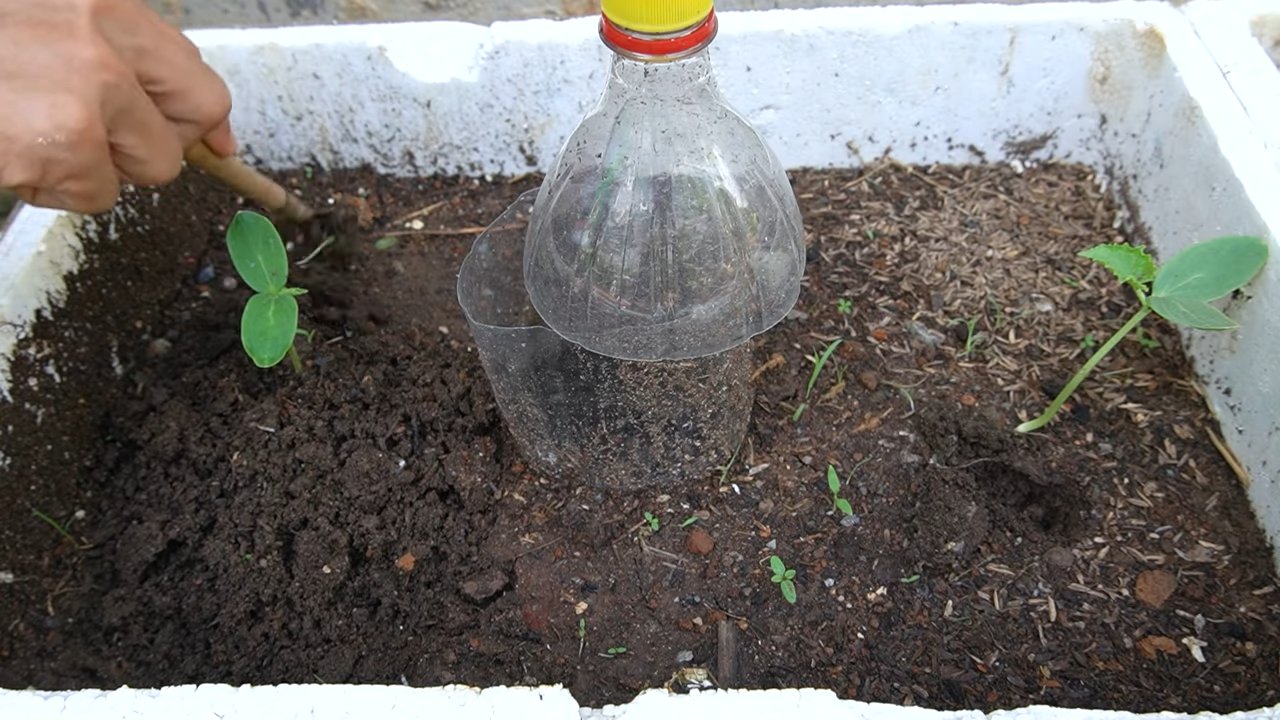
3. Planting Seeds or Seedlings: You can either start cantaloupe seeds indoors 3-4 weeks before the last expected frost or direct sow them in the garden after the danger of frost has passed.
* Starting Seeds Indoors: Sow seeds about 1 inch deep in small pots filled with seed-starting mix. Keep the soil moist and warm (around 70-80°F). Once the seedlings have a few true leaves, you can transplant them into the garden.
* Direct Sowing: Sow seeds about 1 inch deep and 18-24 inches apart on the mounds or rows. Water gently and keep the soil moist until the seeds germinate.
4. Watering: Water deeply and regularly, especially during hot, dry weather. Aim to keep the soil consistently moist, but not waterlogged. Drip irrigation or soaker hoses are ideal for watering cantaloupes, as they deliver water directly to the roots and avoid wetting the foliage, which can lead to disease.
5. Mulching: Apply a layer of mulch around the plants to help retain moisture, suppress weeds, and keep the soil cool. Straw, hay, or black plastic mulch are all good options. Black plastic mulch can also help warm the soil, which is beneficial in cooler climates.
Cantaloupe Care: Nurturing Sweetness
Once your cantaloupes are planted, it’s important to provide them with the care they need to thrive.
* Fertilizing: Cantaloupes need regular feeding to produce sweet, flavorful fruits.
* At Planting: Apply a balanced fertilizer (e.g., 10-10-10) at planting time. Follow the instructions on the fertilizer package.
* During Growth: Side-dress the plants with a nitrogen-rich fertilizer when the vines start to run. This will encourage vigorous growth.
* When Fruits Set: Switch to a fertilizer that’s higher in phosphorus and potassium when the fruits start to set. This will promote sweetness and fruit development. Bone meal and wood ash are good sources of phosphorus and potassium.
* Pruning: Pruning cantaloupe vines can improve air circulation and encourage the plant to focus its energy on producing fewer, but larger and sweeter, fruits.
* Remove Suckers: Remove any suckers (small shoots that grow from the base of the plant) to improve air circulation.
* Pinch Back Vines: Once the vines have reached a certain length (e.g., 6-8 feet), you can pinch back the tips to encourage branching and fruit production.
* Pollination: Cantaloupes need to be pollinated in order to produce fruit. Bees are the primary pollinators, so it’s important to attract them to your garden. Plant flowers that attract bees, such as lavender, sunflowers, and zinnias. If you’re not seeing many bees, you can hand-pollinate the flowers yourself.
* Hand-Pollination: Use a small paintbrush to transfer pollen from the male flowers (which have a long, thin stem) to the female flowers (which have a small fruit behind the flower). Do this in the morning, when the pollen is fresh.
* Pest and Disease Control: Cantaloupes can be susceptible to various pests and diseases.
* Common Pests: Aphids, squash bugs, cucumber beetles, and vine borers.
* Common Diseases: Powdery mildew, downy mildew, and fusarium wilt.
* Prevention: Practice good garden hygiene to prevent pests and diseases. Remove any diseased leaves or plants promptly. Use organic pest control methods, such as insecticidal soap or neem oil, to control pests. Choose disease-resistant varieties.
* Crop Rotation: Rotate your crops each year to prevent soilborne diseases from building up.
Watering Strategies for Maximum Sweetness
Watering is key to sweetness, but it’s a delicate balance.
* Consistent Moisture: Keep the soil consistently moist, especially during fruit development.
* Avoid Overwatering: Overwatering can dilute the sugars in the fruit and make it bland.
* Reduce Watering Before Harvest: About a week or two before harvest, reduce watering to concentrate the sugars in the fruit. This is a crucial step for maximizing sweetness!
Harvesting at the Peak of Sweetness
Knowing when to harvest your cantaloupes is essential for getting that perfect, sweet flavor.
* Days to Maturity: Check the seed packet or plant tag for the days to maturity. This will give you a general idea of when to expect your cantaloupes to be ready.
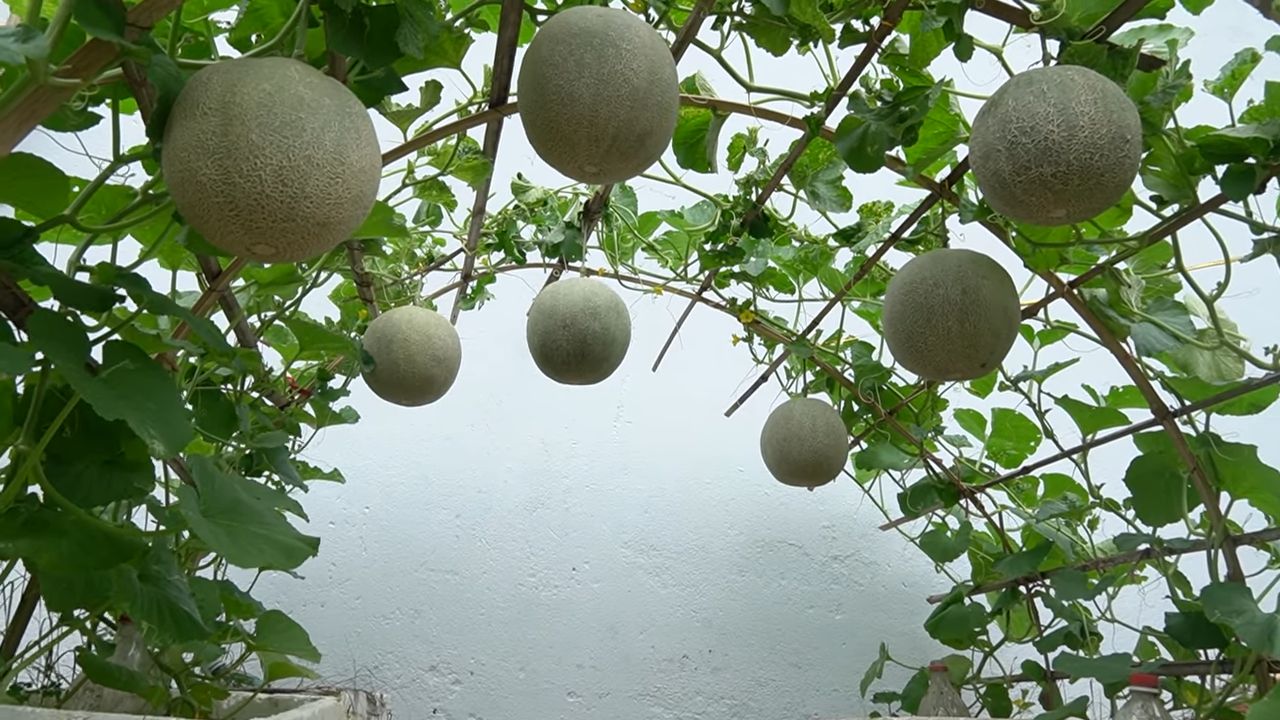
* Visual Cues: Look for these signs of ripeness:
* Color Change: The skin color should change from green to a tan or yellowish color.
* Netting: The netting on the skin should become more prominent and raised.
* Stem Separation: The stem should start to crack and separate easily from the fruit. This is called “slipping.”
* The Smell Test: A ripe cantaloupe will have a sweet, musky aroma, especially at the stem end.
* The Knock Test: A ripe cantaloupe will sound hollow when you knock on it.
* Harvesting: Gently twist the cantaloupe from the vine. If it’s ripe, it should come off easily. If it doesn’t, it’s not quite ready.
Post-Harvest Care: Enhancing Flavor
Even after you harvest your cantaloupes, there are a few things you can do to enhance their flavor.
* Curing: Allow the cantaloupes to cure for a few days at room temperature. This will allow the sugars to develop further and improve the flavor.
* Storage: Store ripe cantaloupes in the refrigerator for up to a week.
* Enjoy! Slice and enjoy your delicious, homegrown cantal
Conclusion
So, there you have it! Transforming a bland, disappointing cantaloupe into a juicy, intensely sweet treat is not only possible, but surprisingly simple. This DIY trick, focusing on strategic ripening and flavor enhancement, is a game-changer for anyone who’s ever been let down by a lackluster melon. We’ve all been there – the anticipation of that sweet, summery flavor, only to be met with a watery, almost tasteless disappointment. But with these techniques, you can say goodbye to cantaloupe letdowns forever.
The beauty of this method lies in its adaptability. While we’ve outlined specific steps, feel free to experiment and find what works best for you and your cantaloupe. For example, if you prefer a more subtle sweetness, you might reduce the ripening time in the paper bag. Or, if you’re feeling adventurous, try adding a sprig of fresh mint or a slice of ginger to the bag during the ripening process to infuse the cantaloupe with a hint of herbal or spicy complexity. Another variation involves using a honey-water solution instead of plain water for the stem dip. This can impart a subtle honeyed flavor that complements the cantaloupe’s natural sweetness.
This simple DIY trick is a must-try because it empowers you to take control of your cantaloupe experience. No longer are you at the mercy of the grocery store’s selection or the unpredictable nature of fruit ripening. You can actively influence the flavor profile and ensure that every slice is bursting with the sweet, refreshing taste you crave.
Beyond the immediate gratification of a sweeter cantaloupe, this method also encourages a deeper appreciation for the fruit itself. It’s a reminder that even seemingly ordinary ingredients can be elevated with a little knowledge and effort. It also promotes sustainability by reducing food waste. Instead of tossing out a less-than-perfect cantaloupe, you can transform it into something truly delicious.
We’re confident that once you try this method, you’ll be amazed by the results. Imagine serving slices of perfectly ripened, intensely sweet cantaloupe to your family and friends, knowing that you played a key role in enhancing its flavor. It’s a simple pleasure that can bring a lot of joy.
Don’t just take our word for it – give it a try! We’re eager to hear about your experiences. Did you find that the paper bag method worked wonders? Did you experiment with any variations? Share your tips, tricks, and photos in the comments below. Let’s create a community of cantaloupe enthusiasts who are dedicated to unlocking the full potential of this delicious fruit. Your feedback will not only help other readers but also contribute to refining and improving this DIY trick for everyone. So go ahead, grab a cantaloupe, and get ready to experience a whole new level of sweetness! We can’t wait to hear your success stories!
Frequently Asked Questions (FAQ)
Q: How do I know if my cantaloupe is ripe enough to start this process?
A: Determining ripeness is key to success. Look for a cantaloupe that has a fragrant aroma, especially at the blossom end (the opposite end from the stem). The rind should have a creamy, golden color underneath the netting. Also, the stem end should be slightly soft and give a little when pressed gently. Avoid cantaloupes with green rinds or those that are rock-hard. If the stem is still attached, it’s likely not fully ripe. A ripe cantaloupe will usually have a slight give when pressure is applied to the blossom end.
Q: What if my cantaloupe is already very ripe? Will this trick still work?
A: If your cantaloupe is already very ripe, this method might not be as effective, and it could even cause it to become overripe and mushy. The goal is to enhance the sweetness of a cantaloupe that is slightly underripe. If it’s already at its peak, focus on enjoying it immediately. You can still try the stem-dipping method, but monitor it closely to prevent over-ripening.
Q: Can I use a plastic bag instead of a paper bag?
A: No, we strongly recommend using a paper bag. Plastic bags trap moisture, which can lead to mold growth and spoilage. Paper bags allow the cantaloupe to breathe, creating a more controlled environment for ripening. The paper bag also helps to concentrate the ethylene gas that the cantaloupe naturally produces, which aids in the ripening process.
Q: How long should I leave the cantaloupe in the paper bag?
A: The ideal time frame is typically 1-3 days, but it depends on the initial ripeness of the cantaloupe and the temperature of your kitchen. Check it daily for ripeness. You’ll know it’s ready when the aroma becomes stronger and the blossom end yields slightly to pressure. Over-ripening can occur quickly, so keep a close eye on it.
Q: What kind of water should I use for the stem dip?
A: Plain, filtered water is best. Avoid using tap water if it has a strong chlorine smell. The purpose of the water is simply to hydrate the stem and prevent it from drawing moisture away from the fruit.
Q: Does the stem dip really make a difference?
A: Yes, it does! The stem acts as a wick, and when it dries out, it can draw moisture from the cantaloupe, resulting in a less juicy and less sweet fruit. Keeping the stem hydrated helps to maintain the cantaloupe’s moisture content and sweetness.
Q: Can I use this method on other types of melons?
A: While this method is specifically designed for cantaloupe, the principles of ripening and hydration can be applied to other melons like honeydew. However, the timing and results may vary. Experiment cautiously and adjust the ripening time accordingly.
Q: My cantaloupe developed mold while in the paper bag. What did I do wrong?
A: Mold growth indicates that there was too much moisture trapped inside the bag. This could be due to using a plastic bag instead of a paper bag, or the cantaloupe may have been too wet when placed in the bag. Ensure the cantaloupe is dry before placing it in the paper bag, and always use a paper bag for proper ventilation.
Q: How should I store the cantaloupe after it’s ripened using this method?
A: Once the cantaloupe is ripe, store it in the refrigerator to slow down the ripening process and prevent it from becoming overripe. A cut cantaloupe should be stored in an airtight container in the refrigerator and consumed within a few days.
Q: Can I freeze cantaloupe after using this method?
A: While you can freeze cantaloupe, the texture will change significantly. It will become softer and less firm after thawing. Frozen cantaloupe is best used in smoothies or other blended drinks where the texture is less important. To freeze, cut the cantaloupe into cubes and freeze them in a single layer on a baking sheet before transferring them to a freezer bag.
Q: What if I don’t have a paper bag? Are there any alternatives?
A: If you don’t have a paper bag, you can try wrapping the cantaloupe loosely in newspaper. The newspaper will provide some of the same benefits as a paper bag, allowing the cantaloupe to breathe while concentrating the ethylene gas. However, a paper bag is still the preferred method.
Q: Is there a specific type of cantaloupe that works best with this method?
A: This method works well with most commercially available cantaloupe varieties. However, some varieties are naturally sweeter than others. Look for cantaloupes that are labeled as “Athena” or “Hales Best,” as these are known for their sweetness.
Q: I tried this method, and my cantaloupe was still not as sweet as I hoped. What could I have done differently?
A: Several factors could contribute to this. First, ensure that you started with a cantaloupe that was at least slightly ripe. If it was completely unripe, this method may not be enough to transform it. Second, check the temperature of your kitchen. Warmer temperatures can speed up the ripening process, while cooler temperatures can slow it down. Finally, consider the variety of cantaloupe. Some varieties are simply less sweet than others. You can also try the honey-water stem dip variation for an extra boost of sweetness.


Leave a Comment